Tabla de contenido
Publicidad
Enlaces rápidos
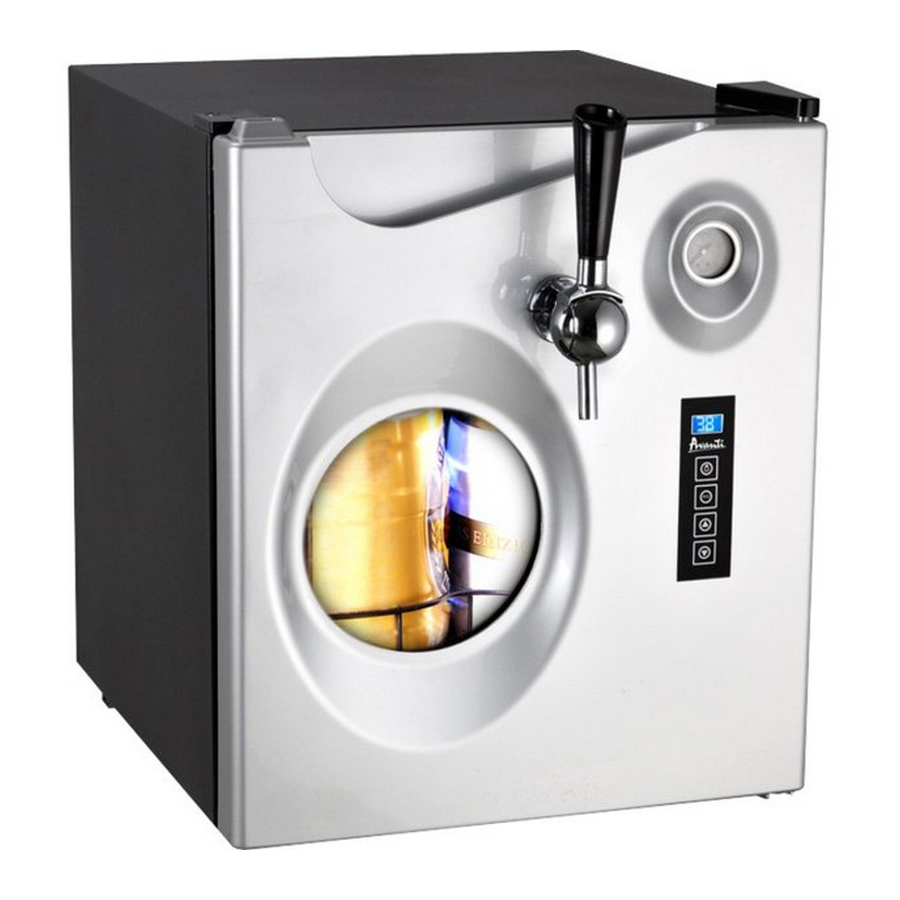
Party Pub
INSTRUCTION MANUAL
MANUAL DE INSTRUCCIONES
CB350S
Model Number / No. de Modelo:
BEER DISPENSER
DISPENSADOR DE CERVEZA
BEFORE USE, PLEASE READ AND FOLLOW ALL SAFETY RULES AND OPERATING
INSTRUCTIONS.
La sección en español empieza en la página 19
Avanti has a policy of continuous improvement on its products and reserves the right to change materials and specifications
without notice.
Avanti Products, A Division of the Mackle Co., Inc.
P.O. Box 520604 - Miami, Florida 33152
www.avantiproducts.com
Publicidad
Tabla de contenido

Manuales relacionados para Avanti CB350S

Resumen de contenidos para Avanti CB350S
- Página 1 INSTRUCTIONS. La sección en español empieza en la página 19 Avanti has a policy of continuous improvement on its products and reserves the right to change materials and specifications without notice. Avanti Products, A Division of the Mackle Co., Inc.
-
Página 2: Tabla De Contenido
Care and Maintenance Keg Removal and Cleaning the Unit 13 – 14 Storage Troubleshooting Guide Draught Beer Trouble Guide 15 – 16 Your Avanti Products Warranty Service for Your Appliance Instrucciones en Español 19 – 26 Registration Information and Registration Card... -
Página 3: Important Safety Instructions And Appliance Safety
IMPORTANT SAFETY INSTRUCTIONS To reduce the risk of fire, electrical shock, or injury when using your appliance, follow WARNING these basic precautions: • Read all instructions before using the appliance. • Never allow children to operate, play with, or crawl inside the appliance. •... -
Página 4: Important Safeguides
IMPORTANT SAFEGUIDES Before the appliance is used, it must be properly positioned and installed as described in this manual, so read the manual carefully. To reduce the risk of fire, electrical shock or injury when using the appliance, follow basic precaution, including the following: •... -
Página 5: Help Us Help You
Please write these numbers here: If you don't understand something or you need more assistance, please call: ____________________________________ Date of Purchase Avanti Customer Service 800-220-5570 ____________________________________ Model Number Keep proof of original purchase date (such as your sales slip) with this guide to establish the warranty period. -
Página 6: Parts And Features
PARTS & FEATURES Safety Latch Regulator with pressure gauge and cartridge holder assembly See –thru window Keg Piercing assembly Leveling Legs Keg support rail Upper Door Hinge Glass mug tray Pressure gauge window Cleansing cylinder (Not Shown) Tap with pull handle Keg Seal (Total 2) (Not Shown) Temperature Control Panel Replacement Hoses (Total 2) (Not Shown) -
Página 7: Installation Instructions
• Do not try to repair, adjust this appliance or replace its components by yourself. Should it not operate correctly, contact Avanti Products Customer Service. • This appliance is designed for household use only and not for an intensive professional use. -
Página 8: Electrical Connection
Improper use of the grounded plug can result in the risk of electrical shock. If the power cord is damaged, have it replaced by an authorized Avanti Products service center. This appliance should be properly grounded for your safety. The power cord of this appliance is equipped with a three-prong plug which mates with standard three prong wall outlets to minimize the possibility of electrical shock. -
Página 9: Installation Of Your Appliance
Installation of Your Appliance • Take the appliance out of its packaging (do not allow children to play with plastic parts, as this can cause a possible choking hazard). • Place your Party Pub on a steady and horizontal flat surface, leaving at least 5 inches / 10 cm on either side so as to allow correct ventilation of the appliance. - Página 10 IMPORTANT: Before piercing the plug on the top of the keg, you must always follow the instructions marked on the keg to eliminate the excess gas and ensure that the keg has rested long enough to avoid foam coming out through the tap faucet. a) Heineken keg: When using the Heineken type keg: Remove the spout that is supplied with the keg.
-
Página 11: Setting Up The Keg
CAUTION: allow the beer to rest before piercing the plug so as to avoid beer spray. Piercing pin: Prior to installing the piercing pin in the keg, place it under running water so that it is wet at the time of insertion. -
Página 12: Adjusting The Gas Pressure
• Connect the hose by inserting it into the hose outlet (to check that the hose is correctly connected, try to remove it by slightly pulling it. Resistance indicates that the hose is correctly connected. In order to disconnect the hose, push in the blue plastic collar on the hose outlet while pulling the hose). -
Página 13: Operating Your Appliance
OPERATING YOUR PARTY PUB Setting the Temperature You will need to set the temperature to best suit your taste. The temperature can be set from 38º to 43ºF (3° to 6°C), using the temperature selectors ( located below the temperature display. You can select temperature display setting from Fahrenheit to Celsius degree by pushing appear in blue color in the temperature display window. -
Página 14: Storage
• Unlock the dispensing head from the keg by pushing the catch and remove the piercing pin from the keg. b) To clean the beer lines • Fill the cleaning bottle supplied with your appliance half-way with lukewarm water. As required, you may add a bit of detergent. -
Página 15: Draught Beer Trouble Guide
DRAUGHT BEER TROUBLE GUIDE CLOUDY BEER When beer in glass appears hazy, and not clear. Causes Corrections • • Over chilling beverage cooler and/or Excessive low temperatures may cause hazy, beverage lines. cloudy beer, particularly when beer lies in cold coil for long periods of time. - Página 16 LOOSE FOAM Causes Corrections • • Large soap-like bubbles (sometimes This is generally a Flat Beer condition: the Causes called fish eyes). Foam settles quickly. and corrections for Flat Beer should be followed. WILD BEER Beer, when drawn, is all foam, or too much foam, and not enough liquid beer. Cause Corrections •...
-
Página 17: Your Avanti Products Warranty
In rental or commercial use, the warranty period is 90 days. All Avanti Appliances of 3.5 cubic feet capacity or less must be brought/sent to the appliance service shop for repair. -
Página 18: Service For Your Appliance
Avanti refrigerators. With the purchase of your Avanti unit, you can be confident that if you ever need additional information or assistance, the Avanti Products Customer Service team will be here for you. Just call us toll-free. -
Página 19: Instrucciones De Seguridad
INSTRUCCIONES DE SEGURIDAD ADVERTENCIA: Para reducir el riesgo de incendio, choque eléctrico, o daños cuando use electrodomésticos, siga estas precauciones: Lea todas las instrucciones antes de usar su Dispensador de Cerveza. Nunca limpie el Dispensador de Cerveza con líquidos inflamables. Los vapores pueden causar fuego o explosión. - Página 20 GUIAS DE SEGURIDAD Antes de usar el Dispensador de Cerveza, posiciónelo correctamente e instálelo como se describe mas adelante; por favor lea el manual cuidadosamente. Para reducir el riesgo de fuego, choque eléctrico o daños cuando use el Dispensador de Cerveza, siga precauciones básicas, incluyendo las siguientes: PELIGRO •...
-
Página 21: Antes De Operar El Dispensador, Lea Las Siguientes Instrucciones
• No intente reparar, ajustar la unidad o reemplazar los componentes Ud. mismo. Si la unidad no funciona correctamente, contacte al Servicio al Cliente de Avanti Products. • Esta unidad esta diseñada para ser usada dentro de la casa y no para uso intensivo profesional. -
Página 22: Instalacion
INSTALACION • Saque la unidad de la caja (no permita que los niños jueguen con las partes plásticas, esto puede ocasionar el peligro de asfixia o sofocación). • Coloque el Party Pub sobre una superficie plana y estable, dejando 5 pulgadas / 10 cm a cada lado para permitir la correcta ventilación. - Página 23 COLOCANDO EL CILINDRO DE GAS a. El cilindro de gas no está incluído pero está disponible como accesorio de nuestro departamento de partes. • Inserte el cilindro de 16 gramos en la parte larga (inferior) del adaptador. • Enrosque las dos partes del adaptador hasta que escuche “Pop”, este sonido indica que se ha perforado el sello del cilindro y que el gas fluirá...
-
Página 24: Almacenaje
b. Para limpiar la líneas de cerveza • Llene el recipiente plástico de limpieza incluído con esta unidad hasta la mitad con agua tibia. Si es necesario agregue un poco de detergente. Presione firmemente en el juego del dispensador dentro del barril. •... - Página 25 PROBLEMAS CON LA CERVEZA CERVEZA TURBIA Cuando la cerveza parece opaca y no transparente. CAUSAS CORRECCIONES 1. La cerveza está demasiado fría. Temperaturas excesivamente bajas pueden causar cerveza turbia, nublada, especialmente cuando la cerveza descansa sobre superficies frías por largos períodos de tiempo. Asegúrese que las líneas estén limpias y suba la temperatura un poquito.
- Página 26 ESPUMA SUELTA CAUSAS CORRECCIONES Burbujas grandes como de jabón (llamadas ojo Esta es una condición similar a la de cerveza de pez). La espuma se asienta muy rápido. sin cuerpo. Seguir las correcciones para cerveza sin cuerpo. CERVEZA CON DEMASIADA ESPUMA Cuando se sirve la cerveza, ésta tiene demasiada espuma y no suficiente líquido.
-
Página 27: Registration Information And Registration Card
Registration Information Thank you for purchasing this fine Avanti product. Please fill out this form and return it to the following address within 100 days from the date of purchase and receive these important benefits: Avanti Products, A Division of The Mackle Co., Inc. - Página 28 Ver 1 – 10-19-2010 PRINTED IN CHINA...