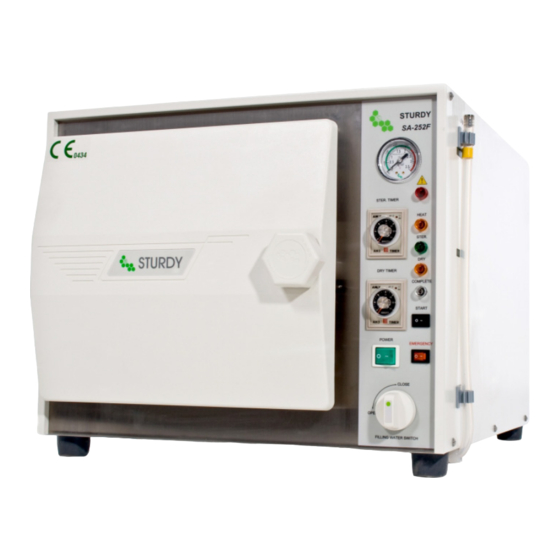
Resumen de contenidos para Quirumed SA252F
- Página 1 AUTOCLAVE CLASE S 24 LITROS AUTOCLAVE CLASS S 24 LITRES Manual de instrucciones SA252F...
-
Página 2: Capítulo 1. Ubicación De Los Controles
15. 1NTERRUPTOR DE LLENADO DE AGUA 16. ASA DE LA PUERTA 17.AUTO-CIERRE DE LA PUERTA 18. 1NTERRUPTOR DE CONTROL DE PRESION 19. FUSIBLE 15A 20. CABLE DE ALIMENTACION 21 . PUERTA DE LIMPIEZA DEL FILTRO DE AGUA 22. TAPA DEL DEPÓSITO DE AGUA www.quirumed.com... -
Página 3: Capítulo 2. Especificaciones
4. Ahora ya puede conectar el cable del autoclave y enchufarlo la la corriente de AC. RECUERDE: ENCHUFE DE ALIMENTACIÓN 230VAC 1 15A. ATENCIÓN: Antes de conectar el cable asegúrese de que el autoclave está apagado. 5. Compruebe que el indicador de potencia está encendido. Esto significa que su Figura 1 autoclave está listo. www.quirumed.com... - Página 4 Coloque la tapa encima de la caja de esterilización Abra las ventanas de ambos laterales antes de colocar la caja de esterilización dentro del autoclave. Compruebe el nivel de la bandeja del calentador cuando se ha puesto la cubierta. Cubierta de la resistencia. www.quirumed.com...
- Página 5 4. Apague el interruptor y vierta el agua dentro de la cámara. Luego, cierre la puerta y pulse otra vez el interruptor para ENCENDER. 5. Durante el proceso. controle continuamente la temperatura del aparato para evitar riesgo de sobre- calentamiento. www.quirumed.com...
- Página 6 Si desea un autoclave con ESTERILIZACIÓN lÍQUIDA DE SERIE disponemos de la referncia SA-252F-LI. CAPÍTULO 6. ANEXO-B INSTRUCCIONES PARA GUARDAR EL AUTOCLAVE EN SU EMBALAJE: 1. Vaciar el autoclave de agua. 2. Quitar el cable de alimentación y colocar todos los accesorios dentro de la cámara. Cerrar firme- www.quirumed.com...
-
Página 7: Importante
Perilla para el llenado de agua 5394-03N-TK 40 1-0 1 005-02 Mando para la puerta 409-02022-01 Junta 410-01001-01 Goma de silicona para auto cierre 908-01 004-01 Purgadores de vapor 916-01002-01 Control de temperatura para las bandas de calor 916-01003-01 Control de temperatura para el calentador www.quirumed.com... -
Página 8: Capítulo 7. Solución De Problemas
Retirar y limpiar válvula de emergencia y reemplazar la válvula de seguridad y el sifón de vapor. Comprobar el sistema de cables eléctricos, el fusible y los conectores. Comprobar el funcionamiento del manómetro durante un ciclo. Comprobar el fusible. Comprobar la junta de la puerta (sugerencia: cambiarla cada año). www.quirumed.com... -
Página 9: Garantía
GARANTÍA Quirumed le ofrece la garantía que establece la ley contra todo defecto de fabricación a partir de la fecha de compra. Deberá por tanto conservar la factura o documento de adquisición. En caso de utilizar repuestos no originales o modificar el producto se anulará inmediatamente. - Página 10 14. POWER ON / OFF SWITCH 15. FILLING / DRAINING WATER VALVE 16. DOOR HANDLE 17. DOOR AUTO-LOCK 18. TEMPERATURE CONTROL SWITCH REAR VIEW 19. NO FUSE BREAK 15A 20. POWER CORD 21. WATER FILTER CLEANING GATE 22. WATER TANK COVER www.quirumed.com...
- Página 11 3. Pouring the water (DISTILLED WATER ONLY) into the water reservoir, until the water level nears the “FULL “level signs at outside cover. Other way you can see water level below yellow sign of exhaust pipe at outside cover (See figure 1) CAUTION: PLEASE DON’T OVER THAN THIS FULL SIGN. Figure 1 www.quirumed.com...
- Página 12 By the way, don’t forget open both side windows before put steri- lization box into chamber. Fit the end of the heater cover into the grooves of the chamber partition fitting, and check that there is no play. Please see figure 3. www.quirumed.com...
- Página 13 TURN-ON the power switch again. 4. Please attend the high temperature on the top of the case. When she is working. 5. Ensure the heater element inside the chamber is covered with water prior to commencement of the sterilization cycle. www.quirumed.com...
- Página 14 # Sterilization instruments must be made by metal without plate, or autoclave plastic or rubber material. # Liquid sterilization is available, but it must adjust the venting system by our engineer. So, as for liquid sterilization must be noticed by your purchase order. www.quirumed.com...
-
Página 15: Important
1. Cause: Steam solenoid unclean. Solution: Replace clean the filter. 2. Cause: Steam solenoid unclean Solution: Clean the filter or replace the solenoid valve. * PRESSURE CAN‘T UP: 1. Cause: Steam solenoid unclean. Solution: Replace clean the filter. Solution: Replace main heater www.quirumed.com... - Página 16 - Use biological indicators to test the validity of sterilization. WARRANTY Quirumed offers the guarantee provided by law against all manufacturing defects from the date of purchase. You should therefore retain the invoice or purchase. When using non-original parts or modifies the product immediately void.
- Página 17 www.quirumed.com...
- Página 18 Distribuido por: Quirumed, S.L. - C.Moroder, 3 Pol. Ind. III Moncada 46113 - Valencia (Spain) Tel.: 96 338 38 33 - Fax: 96 338 38 34 - www.quirumed.com MADE IN TAIWAN APEX MEDICAL S.L. - Maximo Aguirre 18, Bis. 8th floor 48011 Bilbao. Vizcaya. SPAIN STURDY INDUSTRIAL CO., LTD.
