Tabla de contenido
Publicidad
Idiomas disponibles
Idiomas disponibles
Enlaces rápidos
HIFI-PLATTENSPIELER
MIT USB-ANSCHLUSS
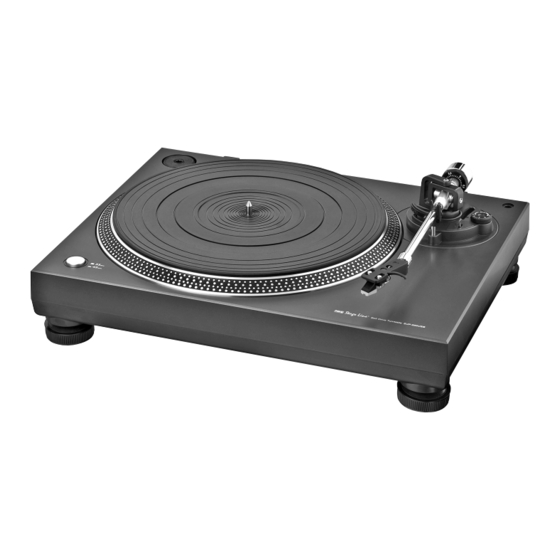
HI-FI TURNTABLE WITH USB PORT
PLATINE DISQUE HI-FI AVEC PORT USB
GIRADISCHI HIFI CON CONNESSIONE USB
DJP-200USB
Bestellnummer 21.1460
BEDIENUNGSANLEITUNG • INSTRUCTION MANUAL • MODE D'EMPLOI
ISTRUZIONI PER L'USO • MANUAL DE INSTRUCCIONES • INSTRUKCJA OBSŁUGI
VEILIGHEIDSVOORSCHRIFTEN • SIKKERHEDSOPLYSNINGER • SÄKERHETSFÖRESKRIFTER • TURVALLISUUDESTA
Publicidad
Tabla de contenido

Resumen de contenidos para IMG STAGELINE DJP-200USB
- Página 1 MIT USB-ANSCHLUSS HI-FI TURNTABLE WITH USB PORT PLATINE DISQUE HI-FI AVEC PORT USB GIRADISCHI HIFI CON CONNESSIONE USB DJP-200USB Bestellnummer 21.1460 BEDIENUNGSANLEITUNG • INSTRUCTION MANUAL • MODE D’EMPLOI ISTRUZIONI PER L’USO • MANUAL DE INSTRUCCIONES • INSTRUKCJA OBSŁUGI VEILIGHEIDSVOORSCHRIFTEN • SIKKERHEDSOPLYSNINGER • SÄKERHETSFÖRESKRIFTER • TURVALLISUUDESTA...
- Página 2 Bevor Sie einschalten … Before switching on … Wir wünschen Ihnen viel Spaß mit Ihrem neuen Gerät We wish you much pleasure with your new “img Stage von „img Stage Line“. Bitte lesen Sie diese Bedienungs- Line” unit. Please read these operating instructions care- anleitung vor dem Betrieb gründlich durch.
- Página 3 LINE OUT AUTO STOP 230V~ ON POWER OFF 50 Hz Belt Drive Turntable DJP-200USB Œ Ž Antriebsriemen (b) um die Antriebsachse (a) legen Tonarm ausbalancieren Wrapping the drive belt (b) around the axle (a) Balancing the tone arm Positionner la courroie dʼentraînement (b) autour de lʼaxe dʼentraînement (a) Contrebalancer le bras Sistemare la cinghia motrice (b) intorno allʼasse (a)
-
Página 4: Übersicht Der Bedienelemente Und Anschlüsse
Verriegelung (12) sichern. Zum Digitalisieren der Musik von Schallplat- 9 Gegengewicht zum Ausbalancieren des Ton- ten lässt sich der DJP-200USB über die USB- arms (13) 7) Am Gegengewicht befindet sich ein drehba- Schnittstelle an einen Computer anschließen. -
Página 5: Technische Daten
Zusätzlich wird eine Audio-Recording- 3) Das Tonabnehmersystem vom Träger ab - 9 Technische Daten Software be nötigt. Falls keine entsprechende schrauben und die Anschlussdrähte abzie- Tonabnehmersystem: ..magnetisch Software auf Ihrem Computer vorhanden ist, hen. (Moving Magnet) lassen sich verschiedene Programme als 4) Das neue Tonabnehmersystem am Träger Plattenteller: . -
Página 6: Operating Elements And Connections
3 Applications weight, set the ring to “0” (fig. 4), i. e. the “0” 10 Rotary knob for anti-skating adjustment The turntable DJP-200USB is suited both for pri- must be at the top. 11 Lever for lifting the tone arm... -
Página 7: Replacement Headshell
6 Operation 4) Screw the new phono cartridge system onto 9 Specifications the support and connect the wires as follows: Phono cartridge system . . magnetic 1) Remove the protective cap from the stylus. blue left channel, positive pole (moving magnet) 2) Switch on the turntable with the POWER white left channel, negative pole Turntable platter: . -
Página 8: Eléments Et Branchements
Pour digitaliser la musique de disques, on cʼest-à-dire que “0” doit être en haut. 10 Bouton rotatif pour le réglage anti-skating peut relier la DJP-200USB via lʼinterface USB à 8) Lʼéchelle donne la force dʼappui en grammes. 11 Levier pour le lève-bras un ordinateur. -
Página 9: Porte Cellule De Remplacement
6 Utilisation 4) Vissez la nouvelle cellule sur le support et 9 Caractéristiques techniques placez les fils comme mentionné ci-dessous : 1) Retirez le cache de protection de lʼaiguille. Celllule : ....magnétique bleu canal gauche, pôle plus (aimant mobile) -
Página 10: Elementi Di Comando E Collegamenti
3 Possibilità dʼimpiego Un cavo USB è in dotazione. 6) Posizionare il braccio sul suo supporto e fis- Il giradischi DJP-200USB è adatto per lʼuso nel 7 Cavo audio per il collegamento con lʼingresso sarlo con il relativo bloccaggio (12). -
Página 11: Testina E Puntina Di Ricambio
6 Funzionamento 3) Svitare la testina dal portatestina e sfilare i 9 Dati tecnici cavetti di collegamento. 1) Togliere la protezione dalla puntina. Testina: ....magnetica 4) Avvitare la nuova testina sul portatestina e (moving magnet) 2) Accendere il giradischi con lʼinterruttore... -
Página 12: Elementos De Funcionamiento Y Conexiones
Para digitalizar la música de los discos, el el “0” tiene que estar en la parte superior. DJP-200USB tiene una interfaz USB para conec- 8 Soporte para una carcasa portacélula de 8) La escala indica la presión en gramos sobre tar un ordenador. -
Página 13: Funcionamiento
6 Funcionamiento 4) Enrosque el nuevo sistema de cápsula 9 Especificaciones phono en el soporte y conecte los cables del 1) Extraiga la funda de protección de la aguja. Sistema de siguiente modo: cápsula phono ..Magnético (movi- 2) Conecte el giradiscos con el interruptor Azul Canal izquierdo, polo positivo... - Página 14 8) Wartości na skali oznaczają siłę nacisku Ponadto, DJP-200USB posiada port USB 8 Uchwyt na wymienną wkładkę wkładki na płytę. Znajdująca się w komplecie pozwalający na połączenie z komputerem. Do wkładka wymaga siły 2 g.
-
Página 15: Konserwacja Urządzenia
6 Obsługa 4) Nakręcić nową wkładkę na uchwyt i podłą- 9 Specyfikacja czyć przewody: 1) Zdjąć osłonę z wkładki. Wkładka gramofonowa: . . magnetyczna niebieski lewy kanał, dodatni biegun (ruchomy magnes) 2) Włączyć gramofon przełącznikiem POWER biały lewy kanał, ujemny biegun Talerz: . -
Página 16: Veiligheidsvoorschriften
Lees aandachtig de onderstaande veiligheids- voorschriften, alvorens het toestel in gebruik te ne men. Mocht u bijkomende informatie over de bediening van het toestel nodig hebben, lees dan de En gelse tekst van deze handleiding. Veiligheidsvoorschriften Transport Indien u de platenspeler wenst te verzenden, Het apparaat is in overeenstemming met alle Een beschadigd netsnoer mag alleen in een relevante EU-Richtlijnen en is daarom geken-... - Página 17 Ge akt på säkerhetsinformationen innan enhe- ten tas i bruk. Skulle ytterliggare information behövas kan den återfinnas i Manualen för andra språk. Säkerhetsföreskrifter Transport Om enheten används på annat sätt än som Om skivspelaren skall transporteras bör den Denna enhet uppfyller alla relevanta direktiv avses, om den inte kopplas in ordentligt, om packas ner i originalkartongen för att ge bästa inom EU och har därför fått...
- Página 18 ® MONACOR INTERNATIONAL GmbH & Co. KG • Zum Falsch 36 • 28307 Bremen • Germany © Copyright by MONACOR INTERNATIONAL. All rights reserved. A-1418.99.01.03.2013...


