Tabla de contenido
Publicidad
Idiomas disponibles
Idiomas disponibles
Enlaces rápidos
Publicidad
Capítulos
Tabla de contenido

Resumen de contenidos para Jupiter Bikes DISCOVER X5
-
Página 2: Tabla De Contenido
TABLE OF CONTENTS Structural Diagram ............2 Specifications ..............3 Unfolding The Bike Frame.........4 Unfolding the Handle Stem ........5 Installing The Handle ...........6 Installing The Seat Post ..........7 Unfolding the Pedals ............8 Battery and Charger Care ..........8 Removing The Battery ..........9 Turning On Your Bike..........10 The LCD Display ............ -
Página 3: Structural Diagram
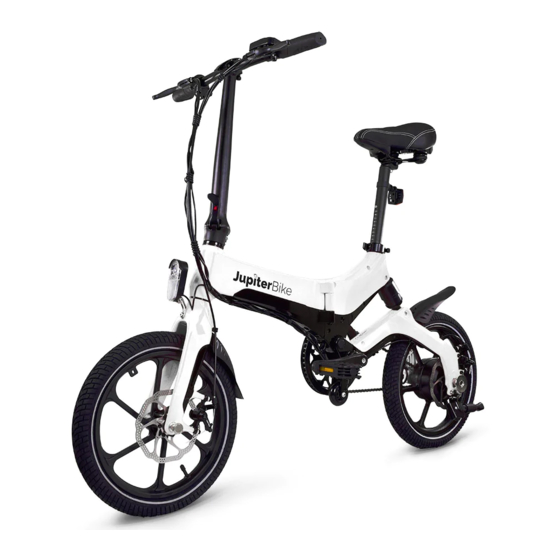
STRUCTURAL DIAGRAM HANDLE BIKE FRAME BRAKE LATCH SADDLE STEM LATCH LOCK SEAT POST STEM LATCH SEAT POST CLAMP BIKE FRAME SHOCK ABSORBER FRONT FORK DISC BRAKE MOTOR PEDAL CHAINWHEEL CHAINWHEEL PROTECTION WHEEL Max Range: 34 Miles Max Speed: 16 MPH Max Load: 265 lbs NOTE: Manual illustrations are for demonstration purposes only. -
Página 4: Specifications
SPECIFICATIONS MOTOR & BATTERY PACKING CONTENTS: Motor Wattage: 36V / 350w E-Bike x 1 Charging Time: About 3 hours Saddle & Seat Tube x 1 Waterproof Rating: IP54 User Manual x 1 Battery Capacity: 36V / 5.2Ah Charger x 1 Battery Type: Lithium Ion Battery Lock Keys x 2 Charging Current 2A max... -
Página 5: Unfolding The Bike Frame
UNFOLDING THE BIKE FRAME limit screw limit screw 1: Unfold the bike frame. 2: Press the latch lock to release mechanism. Adjust limit limit screw limit screw screw if necessary. limit screw limit screw limit screw limit screw 3: Proceed when you achieve the 4: Fasten the latch as pictured. -
Página 6: Unfolding The Handle Stem
UNFOLDING THE HANDLE STEM 1: Tilt stem upright to ensure it connects seamlessly with the base. 2: Fasten the stem latch upward to lock it in place. Jiggle the stem to see if the folder has firmly locked in place. 3: To fold the stem, press the latch lock then release the stem latch... -
Página 7: Installing The Handle
INSTALLING THE HANDLE(IF NEEDED) 1: Lift the quick-release lock 2: Set aside the nut and gasket but from the handlebar holder and leave screw in place. remove the lower screw. 3: Place the handle bar inside the 4: Adjust handlebar angle and holder, then close the holder position to your preference. -
Página 8: Installing The Seat Post
INSTALLING SEAT POST 1. Loosen the seat post clamp and insert saddle post. Adjust saddle to the preferred height then tighten clamp. 2: For safety precautions, make sure the seat post clamp is somewhere between the “Limit Screw” and the “Max Height Line”. 3: To secure the saddle, tighten the seat post clamp as pictured, then press the... -
Página 9: Unfolding The Pedals
UNFOLDING THE PEDALS 1: Lower pedal into place 2: Fold pedal back up by pressing inward & upward CHARGING THE BATTERY Be sure to charge the battery before your first ride! Option 1: Uncover silicon lid and Option 2: Remove battery insert charger to charge from and plug charger in directly. -
Página 10: Removing The Battery
REMOVING THE BATTERY 1: Unfold frame by pressing the latch lock and pulling the frame latch away from frame. 2: With bike folded, turn battery lock, then slide battery out from frame. 3: Reverse the procedure to re-install the battery. -
Página 11: Turning On Your Bike
TURNING ON YOUR BIKE 1: Once the bike is Congratulations! Don’t Forget! Practice charged, hold the You are ready for common sense & “M” button on the your first ride! safety measures when LCD to power up riding your bike. your bike. -
Página 12: Precautions When Riding
PRECAUTIONS WHEN RIDING • Wear the appropriate protection gear such as helmets, knee pads, and elbow pads on your rides to help prevent injury. • Inspect the bike, brakes, & battery before each ride to ensure all is in working order. •... -
Página 13: Warnings
SAFETY WARNINGS • For your safety, please read the user • When riding with others, always maintain manual carefully. Make sure the owner a safe distance to avoid the possibility of and operator understand and accept all a collision. the safety instructions. •... -
Página 14: Warranty
WARRANTY: JUPITER BIKE DISCOVERY – LIMITED 1 YEAR WARRANTY The Jupiter Bike Discovery and accessories are manufactured to high quality standards. The Jupiter Bike Discovery is warranted to the original purchaser for one full year from the original purchase date against defective materials or workmanship. This warranty applies to replacement parts only and specifically excludes the tire tread. - Página 16 TABLE DES MATIÈRES Schéma de la structure ..........2 Caractéristiques techniques ........3 Déplier le cadre du vélo ..........4 Déplier le guidon ............5 Installation du guidon ..........6 Installation de la selle ..........7 Déplier la pédale ............8 Entretien de la batterie et du chargeur ...8 Retrait de la batterie ............9 Mise en marche de votre vélo ......10 L’écran LCD ..............10...
-
Página 17: Schéma De La Structure
SCHÉMA DE LA STRUCTURE SCHÉMA DE LA STRUCTURE POIGNÉE CADRE DU VÉLO CADRE DU VÉLO FREIN LOQUET DE VERROUILLAGE LOQUET DE SELLE VERROUILL AGE DE LA TIGE DE POTENCE SELLE LOQUET DE FIXATION POTENCE AMORTIS SEUR FOURCHE AVANT FREINA GE À DISQUE ROUE À... - Página 18 CARACTÉRISTIQUES MOTEUR & BATTERIE CONTENU Puissance du moteur : 36V / 350w DE L’EMBALLAGE : Temps de charge : Environ 3 heures E-Bike x 1 Étanchéité à l’eau : IP54 Selle et tube de selle x 1 Capacité de la batterie: 36V / 5.2Ah Manuel de l’utilisateur x 1 Type de batterie : Lithium Ion Chargeur x 1...
-
Página 19: Déplier Le Cadre Du Vélo
DÉPLIER LE CADRE DU VÉLO limit screw limit screw 1: Dépliez le cadre du vélo. 2: Appuyez sur le loquet de verrouillage pour déverrouiller le limit screw limit screw mécanisme. Régler la vis de butée si nécessaire. limit screw limit screw limit screw limit screw 3: Procédez jusqu’à... - Página 20 DÉPLIER LA POTENCE 1. Inclinez la tige vers le haut pour qu’elle se raccorde parfaitement à la base. 2. Fixez le loquet de la potence vers le haut pour le verrouiller. Secouez la potence pour voir si le verrou est bien en place. 3.
-
Página 21: Installation De La Poignée
INSTALLATION DE LA POIGNÉE (SI NÉCESSAIRE) 1: Soulevez le verrou à 2. Mettre l’écrou et le joint de déverrouillage rapide du support côté, mais laisser la vis en du guidon et retirez la vis place. inférieure. 3. Placez le guidon à l’intérieur du 4. -
Página 22: Installation De La Selle
INSTALLATION DE LA TIGE DE SELLE 1. Desserrez le collier de serrage de la tige de selle et insérez la tige de selle. Régler la selle à la hauteur souhaitée puis serrer le collier de serrage. 2. Pour des raisons de sécurité, assurez-vous que le collier de serrage de la tige de selle se trouve... -
Página 23: Déplier Les Pédales
DÉPLIER LES PÉDALES 1: Abaissez la pédale en place 2: Repliez la pédale en appuyant- vers l’intérieur et vers le haut CHARGER LA BATTERIE N’oubliez pas de charger la batterie avant votre première sortie Option 1: Retirer le couvercle en Option 2: Retirez la batterie et silicone et insérer le chargeur branchez-la directement au... -
Página 24: Retirer La Batterie
RETIRER LA BATTERIE 1. Dépliez le cadre en appuyant sur le loquet de verrouillage et en tirant le loquet du cadre pour l’éloigner du cadre. 2. Une fois le vélo plié, tournez le verrou de la batterie, puis retirez la batterie du cadre. - Página 25 PARTIR À VÉLO PARTIR À VÉLO 1: Une fois le vélo Félicitations ! Vous N’oubliez pas ! Faites chargé, maintenez êtes prêt pour votre preuve de bon sens 1 Une fois le vélo chargé, Félicitations ! Vous N'oubliez pas N'oubliez pas ! Faites preuve enfoncer le bouton première sortie ! et appliquez des...
-
Página 26: Précautions À Prendre Lors De La Conduite
PRÉCAUTIONS À PRENDRE LORS DE LA CONDUITE • Portez l’équipement de protection approprié, comme un casque, des genouillères et des protège- coudes, afin de prévenir les blessures. • Inspectez le vélo, les freins et la batterie avant chaque sortie pour vous assurer que tout est en bon état de marche. -
Página 27: Avertissements
AVERTISSEMENTS DE SÉCURITÉ • Pour votre sécurité, veuillez lire attentivement • Lorsque vous roulez avec d’autres personnes, le manuel d’utilisation . Assurez-vous que le gardez toujours une distance de sécurité afin propriétaire et l’opérateur comprennent et d’éviter tout risque de collision. acceptent toutes les consignes de sécurité. -
Página 28: Garantie
GARANTIE: JUPITER BIKE DISCOVERY – GARANTIE LIMITÉE DE 1 AN La Jupiter Bike Discovery et ses accessoires sont fabriqués selon des normes de qualité élevées. Jupiter Bike Discovery est garanti à l’acheteur d’origine pour une année complète à compter de la date d’achat originale contre tout défaut de matériaux ou de fabrication. - Página 30 ÍNDICE Diagrama Estructural........... 2 Especificaciones ............. 3 Despliegue del Cuadro de la Bicicleta..... 4 Despliegue del Vástago del Manubrio ..... 5 Instalación el Manubrio ..........6 Instalación la Tija del Sillín........7 Despliegue del Pedal ..........8 Cuidado de la Batería y el Cargador....8 Extracción de la Batería.
-
Página 31: Diagrama Estructural
DIAGRAMA ESTRUCTURAL HANDLE BIKE FRAME BRAKE LATCH SADDLE STEM LATCH LOCK SEAT POST STEM LATCH SEAT POST CLAMP BIKE FRAME SHOCK ABSORBER FRONT FORK DISC BRAKE MOTOR PEDAL CHAINWHEEL CHAINWHEEL PROTECTION WHEEL Max Range: 34 Miles Max Speed: 16 MPH Max Load: 265 lbs NOTA: Las ilustraciones manuales son sólo para fines de demostración. -
Página 32: Especificaciones
ESPECIFICACIONES MOTOR y BATERÍA CONTENIDO Potencia del motor: 36V / 350w DEL PAQUETE: Tiempo de Carga: Alrededor de 3 horas Bicicleta Electrónica x 1 Impermeabilidad: IP54 Asiento y Tubo de Asiento x 1 Capacidad de Batería: 36V / 5.2Ah Manual de Usuario x1 Tipo de Batería: Ion Litio Cargador x 1 Corriente de Carga 2A máximo... -
Página 33: Despliegue Del Marco De La Bicicleta
DESPLIEGUE DEL MARCO DE LA BICICLETA limit screw limit screw 1: Despliegue el marco de la 2: Presione el seguro del pestillo bicicleta. para liberar el mecanismo. Ajuste limit screw limit screw el tornillo de límite si es necesario. tornillo de límite limit screw limit screw limit screw... -
Página 34: Despliegue Del Vástago Del Manubrio
DESPLIEGUE DEL VÁSTAGO DEL MANUBRIO 1: Incline el vástago hacia arriba para asegurarse de que se conecta sin problemas con la base. 2: Sujete el seguro del vástago hacia arriba para bloquearlo en su lugar. Mueva el vástago para ver si la carpeta se ha bloqueado firmemente en su lugar. -
Página 35: Instalación El Manubrio
INSTALACIÓN DEL MANUBRIO (SI ES NECESARIO) 1: Levante el cerrojo de liberación 2: Ponga a un lado la tuerca y la rápida del soporte del manubrio empaquetadera, pero deje el y retire el tornillo inferior. tornillo en su lugar. 3: Coloque el manubrio dentro del 4: Ajuste el ángulo y la posición soporte, luego cierre el soporte del manubrio según sus... -
Página 36: Instalación La Tija Del Sillín
INSTALACIÓN DE LA TIJA DEL SILLÍN 1. Afloje la abrazadera del poste del asiento e inserte el poste del sillín. Ajuste el sillín a la altura preferida y luego apriete la abrazadera. 2: Por precauciones de se- guridad, asegúrese de que la abrazadera del poste del asiento esté... -
Página 37: Despliegue Del Pedal
DESPLIEGUE DE PEDALES 1: Baje el pedal en su lugar 2: Pliegue el pedal hacia arriba presionando hacia adentro y hacia arriba CARGA DE LA BATERÍA ¡Asegúrese de cargar la batería antes de su primer viaje! Opción 1: Destape la tapa de Opción 2: Retire la batería y silicona e inserte el cargador para enchufe el cargador directamente. -
Página 38: Extracción De La Batería
EXTRACCIÓN DE LA BATERÍA 1: Despliegue el marco presionando el seguro del pestillo y separando el pestillo del marco. 2: Con la bicicleta plegada, gire el seguro de la batería, luego deslice la batería fuera del cuadro. 3: Invierta el procedimiento para volver a instalar la batería. -
Página 39: Prendiendo Su Bicicleta
PRENDIENDO SU BICICLETA 1: Una vez que la ¡Felicidades! ¡Está ¡No se olvide! bicicleta esté cargada, listo para su primer Practique el sentido mantenga presionado viaje! común y las medidas el botón “M” en la de seguridad al andar pantalla LCD para en bicicleta. -
Página 40: Precauciones Al Manejar
PRECAUCIONES AL MANEJAR • Use el equipo de protección adecuado, como cascos, rodilleras y coderas en sus paseos para ayudar a prevenir lesiones. • Inspeccione la bicicleta, los frenos y la batería antes de cada viaje para asegurarse de que todo funcione correctamente. -
Página 41: Precauciones De Seguridad
PRECAUCIONES DE SEGURIDAD • Para su seguridad, lea detenidamente el • Cuando maneje con otras personas, manual del usuario. Asegúrese de que mantenga siempre una distancia segura el propietario y el operador entiendan para evitar la posibilidad de una colisión. y acepten todas las instrucciones de •... -
Página 42: Garantía
GARANTÍA: JUPITER BIKE DISCOVERY – GARANTÍA LIMITADA DE 1 AÑO Jupiter Bike Discovery y sus accesorios están fabricados con altos estándares de calidad. Jupiter Bike Discovery está garantizado para el comprador original por un año completo a partir de la fecha de compra original contra materiales o mano de obra defectuosos.