Publicidad
Idiomas disponibles
Idiomas disponibles
Enlaces rápidos
VESA Mount Adapter Bracket
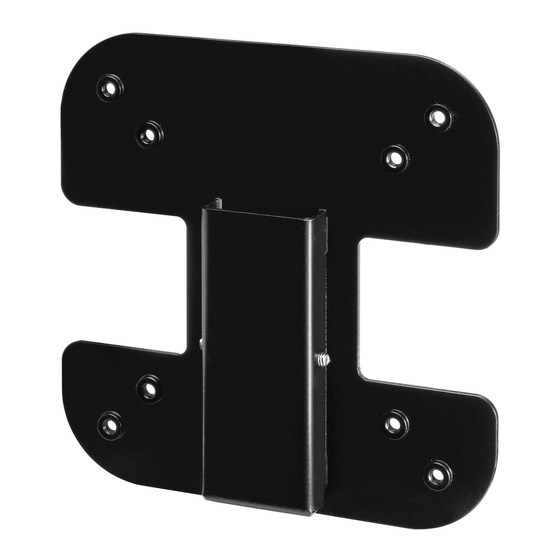
Mounting Bracket
Set Screw
VESA screws
Additional models may also be compatible. Check our online listings for the most recent
compatibility updates.
© 2015 HumanCentric Ventures LLC
for AOC™ Monitors
Model 101-1009
Fits AOC™ models i2367Fh/Fm, i2757Fh/Fm,
Parts included
Compatible with models
and i2267Fw/Fwh
www.humancentric.com
English
1
2
4
1
Publicidad

Resumen de contenidos para HumanCentric 101-1009
- Página 1 Parts included Mounting Bracket Set Screw VESA screws Compatible with models Fits AOC™ models i2367Fh/Fm, i2757Fh/Fm, and i2267Fw/Fwh Additional models may also be compatible. Check our online listings for the most recent compatibility updates. © 2015 HumanCentric Ventures LLC www.humancentric.com...
- Página 2 STEP 1 Remove monitor from base. Depress the button on the base and lift the monitor to remove it from the base.
- Página 3 STEP 2 Attach the bracket to the VESA mount Use the screws that came with your VESA mount to attach the bracket to the VESA mount. The pocket for holding the monitor pole should be open towards the top.
- Página 4 STEP 3 Insert the monitor pole into the bracket Insert the curved pole on the back of the monitor into the adapter bracket. Tilt the monitor away from the curved pole to allow more room for inserting the cables. STEP 4 Tighten the set screws Tighten the set screws to secure the monitor in place.
- Página 5 Enthaltene Teile Halterungsbügel Feststellschrauben VESA Schrauben Kompatibel mit folgenden Modellen Passend für AOC™ Modelle i2367Fh/Fm, i2757Fh/Fm und i2267Fw/Fwh Zusätzliche Modelle können ebenfalls kompatibel sein. Sehen Sie sich unsere Online-Au istung für die neuesten Kompatibilitätsupdates an. © 2015 HumanCentric Ventures LLC www.humancentric.com...
- Página 6 SCHRITT 1 Entfernen Sie den Monitor vom Sockel. Drücken Sie den Knopf an der Basis und heben Sie den Bildschirm hoch um ihn vom Sockel zu entfernen.
- Página 7 Befestigen Sie den Halterungsbügel an der SCHRITT 2 VESA Halterung Verwenden Sie die mitgelieferten Schrauben um Ihre VESA Halterung mit dem Halterungsbügel zu verbinden. Das Steckfach für die Bildschirmstange muss nach oben hin offen sein.
- Página 8 SCHRITT 3 Schieben Sie den Monitorständer in den Bügel Schieben Sie die gebogene Stange auf der Rückseite des Monitors in die Adapterhalterung. Neigen Sie den Monitor weg vom gebogenen Ständer, um mehr Platz zum Einführen der Leitungen zu ermöglichen. SCHRITT 4 Ziehen Sie die Feststellschrauben an Ziehen Sie die Feststellschrauben gut an um den...
- Página 9 Compatibilité avec les modèles S'adapte aux modèles AOC™ i236Fh/Fm, i2757Fh/Fm et i2267Fw/Fwh D'autres modèles peuvent aussi être compatibles. Véri ez sur nos listes en ligne les dernières mises à jour en termes de compatibilité. © 2015 HumanCentric Ventures LLC www.humancentric.com...
- Página 10 ÉTAPE 1 Retirez l'écran du pied Appuyez sur le bouton situé sur le pied et soulevez l'écran pour le retirer du pied.
- Página 11 ÉTAPE 2 Fixez le support à la monture VESA Utilisez les vis livrées avec votre monture VESA pour xer le support à la monture VESA. La pochette contenant l'axe de l'écran doit être ouverte vers le haut.
- Página 12 ÉTAPE 3 Insérez l'axe de l'écran dans le support Insérez l'axe incurvé à l'arrière de l'écran dans le support. Inclinez l'écran en l'écartant de l'axe incurvé a n de laisser davantage d'espace pour l'insertion des câbles. ÉTAPE 4 Serrez les vis de pression Serrez les vis de pression pour verrouiller la xation de l'écran.
-
Página 13: Modelli Compatibili
Vite di ssaggio Viti VESA Modelli compatibili Compatibile con modelli AOC™ i2367Fh/Fm, i2757Fh/Fm e i2267Fw/Fwh Anche altri modelli potrebbero risultare compatibili. Consulta il nostro elenco su internet per gli ultimi aggiornamenti sulla compatibilità di nuovi modelli. © 2015 HumanCentric Ventures LLC www.humancentric.com... - Página 14 FASE 1 Staccare il monitor dalla base Premere il pulsante presente sulla base e sollevare il monitor per staccarlo dalla base.
- Página 15 FASE 2 Fissare la staffa al supporto VESA Usare le viti fornite con il supporto VESA per ssare la staffa al supporto VESA. L'alloggiamento per l'asta del monitor deve avere il lato aperto rivolto verso l'alto.
- Página 16 FASE 3 Inserire l'asta del monitor nella staffa Inserire l'asta ricurva sul retro del monitor nella staffa di adattamento. Inclinare il monitor in direzione opposta all'asta ricurva per avere più spazio per inserire i cavi. FASE 4 Stringere le viti di ssaggio Stringere le viti di ssaggio per bloccare il monitor in posizione.
-
Página 17: Adaptador De Montaje De Soporte Vesa Para Monitores Aoc
Set de tornillos Tornillos VESA Compatibilidad con modelos Compatible con modelos AOC™ i2367Fh/Fm, i2757Fh/Fm, y i2267Fw/Fwh Otros modelos también pueden ser compatibles. Comprueba nuestras listas online para conocer las actualizaciones más recientes en cuanto a compatibilidad. © 2015 HumanCentric Ventures LLC www.humancentric.com... - Página 18 PASO 1 Quitar el monitor de la base Pulsa el botón de la base y desliza el monitor para separarlo de la misma.
- Página 19 PASO 2 Fijar el soporte al soporte VESA Usa los tornillos que viene con tu soporte VESA para jar la pieza al soporte VESA. El bolsillo para sostener el palo del monitor debe ser abierto hacia arriba.
- Página 20 PASO 3 Inserta la percha del monitor en el soporte Inserta el gancho curvado en la parte posterior del monitor en el soporte adaptador. Inclina el monitor desde el gancho curvado para permitir más espacio para insertar los cables. PASO 4 Apretar el conjunto de tornillos Aprieta el set de tornillos para asegurar el...
