Tabla de contenido
Publicidad
Idiomas disponibles
Idiomas disponibles
Enlaces rápidos
Instruction
manual
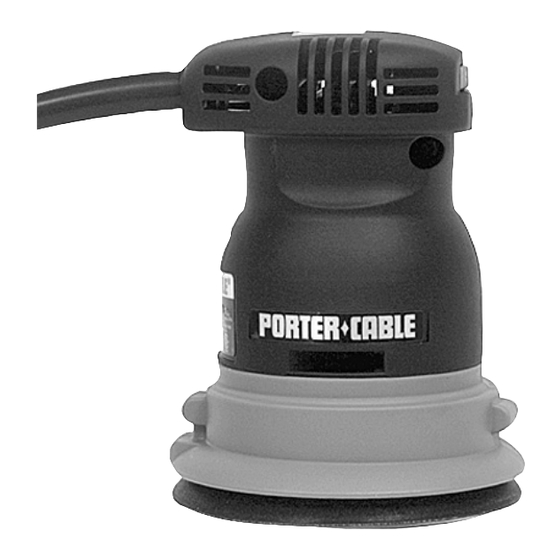
MODELS 333
and 334
To learn more about Porter-Cable
visit our website at:
http://www.porter-cable.com
Copyright © 2005 Porter-Cable
ESPAÑOL: PÁGINA 17
FRANÇAISE : PAGE 33
Double Insulated
Random Orbit Sanders
MODEL
MODEL
333VS
Please make certain that the person who is
to use this equipment carefully reads and
understands these instructions before
starting operations.
The Model and Serial No. plate is located on the main
housing of the tool. Record these numbers in the
spaces below and retain for future reference.
Model No. ______________________________________
Type ___________________________________________
Serial No. _______________________________________
332
IMPORTANT
Part No. A14117 - 09-26-05 Rev. A
Publicidad
Tabla de contenido

Manuales relacionados para Porter Cable 332


Resumen de contenidos para Porter Cable 332
- Página 1 ESPAÑOL: PÁGINA 17 FRANÇAISE : PAGE 33 Instruction Double Insulated manual Random Orbit Sanders MODEL MODELS 333 and 334 MODEL 333VS IMPORTANT Please make certain that the person who is To learn more about Porter-Cable to use this equipment carefully reads and visit our website at: understands these instructions before http://www.porter-cable.com...
-
Página 2: Tabla De Contenido
TABLE OF CONTENTS IMPORTANT SAFETY INSTRUCTIONS ......2 SAFETY GUIDELINES ........3 GENERAL SAFETY RULES . -
Página 3: Safety Guidelines
SAFETY GUIDELINES - DEFINITIONS It is important for you to read and understand this manual. The information it contains relates to protecting YOUR SAFETY and PREVENTING PROBLEMS. The symbols below are used to help you recognize this information. indicates an imminently hazardous situation which, if not avoided, will result in death or serious injury. -
Página 4: General Safety Rules
GENERAL SAFETY RULES Read all instructions. Failure to follow all instructions listed below may result in electric shock, fire and/or serious injury. The term "power tool" in all of the warnings listed below refers to your mains-operated (corded) power tool or battery-operated (cordless) power tool. - Página 5 GENERAL SAFETY RULES continued d) Remove any adjusting key or wrench before turning the power tool on. A wrench or a key left attached to a rotating part of the power tool may result in personal injury. e) Do not overreach. Keep proper footing and balance at all times. This enables better control of the power tool in unexpected situations.
-
Página 6: Additional Specific Safety Rules
ADDITIONAL SPECIFIC SAFETY RULES Hold power tools by insulated gripping surfaces when performing an operation where the cutting tool may contact hidden wiring or its own cord. Contact with a "live" wire will make exposed metal parts of the tool "live" and shock the operator. Use proper safety equipment. - Página 7 SYMBOL DEFINITION ......volts ......amperes ......hertz ......watts ......kilowatts ......farads µF ......microfarads ......litres ......grams ......kilograms ......bars ......pascals ......hours ......minutes ......seconds ......no-load speed …/min or …min - ..
-
Página 8: Additional Rules For Paint Removal
ADDITIONAL SAFETY RULES FOR PAINT REMOVAL Extreme care should be taken when removing paint. The peelings, residue, and vapors of paint may contain lead, which is poisonous. Exposure to even low levels of lead can cause irreversible brain and nervous system damage. Young and unborn children are particularly vulnerable. -
Página 9: Extension Cord Selection
230V 50 Ft. 100 Ft. 200 Ft. 300 Ft. 400 Ft. 500 Ft. 600 Ft. 800 Ft. 1000 Ft. 8-10 10-12 12-14 14-16 16-18 18-20 SAVE THESE INSTRUCTIONS! CARTON CONTENTS * Sander * Sanding disc * Filter (except 332 model) -
Página 10: Functional Description
The Porter-Cable Random Orbit Sanders provide rapid stock removal with 80 to 100 grit paper and swirl-free finishing with 120-150 grit paper. Model 332 is equipped to accept 5" diameter STIKIT™ adhesive paper backed abrasives. Model 333 is equipped to accept 5" hook & loop backed abrasives with five dust extraction holes. - Página 11 Fig. 3 Fig. 2 Models 333 and 333VS: DISCONNECT TOOL FROM POWER SOURCE. Place machine on workbench with pad up (see Fig. 3). Clean dust from pad face. Position Hook & Loop Abrasive Disc onto sander pad, aligning the dust extraction holes in paper with holes in pad.
-
Página 12: Operation
W e a r s a f e t y glasses while using DUST CONTAINER compressed air. Never sander with dust container or dust collector assembly removed. Dust could be blown into eyes. The dust collector may be FLANGE replaced with Accessory Hose so that tool can be used with a remote vacuum system. -
Página 13: Pad Brake
PAD BRAKE These sanders are equipped with a pad brake that prevents over-speeding of the pad. If the tool is lifted off the work surface while the motor is running, the brake will limit pad rotation to no more than 400 RPM. The pad brake uses a belt to provide the braking action. - Página 14 BELT REPLACEMENT CAUTION: DISCONNECT TOOL FROM POWER SOURCE. Remove back-up pad (see CHANGING BACK-UP PAD). Remove the old belt and clean the belt mounting area. Position the new belt around pulley (A) Fig. 10, and start it onto the shoulder of the pad support (B). Rotate the pad support as you “walk”...
-
Página 15: Service
SERVICE REPLACEMENT PARTS Use only identical replacement parts. For a parts list or to order parts, visit our website at servicenet.porter-cable.com. You can also order parts from your nearest factory-owned branch, or by calling our Customer Care Center at 1-800-223-7278 to receive personalized support from highly-trained technicians. -
Página 16: Warranty
WARRANTY To register your tool for warranty service visit our website at www.porter- cable.com. PORTER-CABLE LIMITED ONE YEAR WARRANTY Porter-Cable warrants its Professional Power Tools for a period of one year from the date of original purchase. We will repair or replace at our option, any part or parts of the product and accessories covered under this warranty which, after examination, proves to be defective in workmanship or material during the warranty period. -
Página 17: Lijadora De Orbita Excéntrica
ENGLISH: PAGE 1 FRANÇAISE : PAGE 33 Lijadora de Orbita Excéntrica Manual de Instrucciones Aislamiento Doble MODELO MODELOS 333 y 334 MODELO 333VS IMPORTANTE Asegúrese de que la persona que va a usar Para obtener más información esta herramienta lea cuidadosamente y sobre Porter-Cable, comprenda estas instrucciones antes de visite nuestro sitio web en:... -
Página 18: Instrucciones De Seguridad Importantes
INSTRUCCIONES DE SEGURIDAD IMPORTANTES Lea y entienda todas advertencias y las instrucciones operadoras antes de utilizar cualquier instrumento o el equipo. Cuando se usa instrumentos o equipo, las precauciones básicas de la seguridad siempre se deben seguir para reducir el riesgo de la herida personal. -
Página 19: Normas Generales De Seguridad
NORMAS GENERALES DE SEGURIDAD Lea todas las instrucciones. Si no se siguen todas las instrucciones que aparecen a continuación, el resultado podría ser sacudidas eléctricas, incendio y/o lesiones graves. La expresión "herramienta mecánica" en todas las advertencias que aparecen a continuación se refiere a su herramienta mecánica alimentada por la red eléctrica (herramienta alámbrica) o su herramienta mecánica alimentada por baterías (herramienta inalámbrica). - Página 20 NORMAS GENERALES DE SEGURIDAD (continuación) d)Quite todas las llaves de ajuste o de tuerca antes de encender la herramienta mecánica. Una llave de tuerca o de ajuste que se deje colocada en una pieza giratoria de la herramienta mecánica podría causar lesiones corporales.
-
Página 21: Normas Específicas De Seguridad Y Símbolos
NORMAS ESPECÍFICAS DE SEGURIDAD Y SÍMBOLOS Detenga la herramienta por las superficies aisladas para hacer una operación donde el cuchillo de la herramienta pueda tocar un alambre escondido o su propio cable. El contacto con un alambre cargado «vivo» también cargará a las partes metálicas y le dará un choque al usuario. Utilice equipo de seguridad adecuado. - Página 22 SÍMBOLO DEFINICIÓN ......voltio ......amperios ......hertzio ......vatio (watts) ......kilovatio (kilowatts) ......faradios µF ......microfaradios ......litros ......grama ......kilograma ......bars ......Pascal ......horas ......minutos ......segundos ......velocidad sin carga …/min or …min - ..
-
Página 23: La Seguridad Adicional Gobierna Para La Eliminacion De Pintura
La SEGURIDAD ADICIONAL GOBIERNA PARA la ELIMINACION de PINTURA Se debe usar extrema precaución al quitar la pintura. El descascarillado, el residuo, y los vapores de pintura pueden contener plomo que es venenoso. Hasta un nivel bajo puede afectar el cerebro y el sistema nervioso. Afecta aún más a los niños chicos y a los prenatales. -
Página 24: Selección De Cables De Servicio
50 pies 100 pies 200 pies 300 pies 400 pies 500 pies 600 pies 800 pies 1000 pies 8-10 10-12 12-14 14-16 16-18 18-20 GUARDE ESTAS INSTRUCCIONES! CONTENIDO DE CARTON * Lijadora * Disco de Sanding * Filtra (menos 332 modelo) -
Página 25: Descripción Funcional
80 a 100 granos. El uso de papel de 120 a 150 granos resulta en un acabado sin remolinos. El Modelo 332 acepta el papel abrasivo con respaldo adhesivo STIKIT™ con un diámetro de 5" (12.7 cm). El Modelo 333 acepta los discos abrasivos con respaldo de anillo y gancho de 5"... -
Página 26: Para Instalar Y Remover Los Discos Abrasivos
PARA INSTALAR Y REMOVER LOS DISCOS ABRASIVOS Modelos 332 y 334: PRECAUCION: DESCONECTE LA LIJADORA DE LA FUENTE DE ELECTRICIDAD. Ponga la máquina sobre un banco con el cojín hacia arriba (vea Fig. 2). Limpie el polvo del cojín. Quite el disco abrasivo nuevo del rollo y colóquelo sobre el cojín. -
Página 27: Captador De Polvo
Apriete firmemente el disco al cojín. PRECAUCION: Si el disco no está bien pegado al cojín puede salirse y causar una herida personal. Para quitar el disco, despegue el disco del cojín. CAPTADOR DE POLVO PITON Fig. 4 CAPTADOR DE POLVO RECIPIENTE (Modelos 333, 333VS y 334) DE POLVO... -
Página 28: El Freno Para El Cojin
Fig. 7 Fig. 8 EL FRENO PARA EL COJIN Estas lijadoras tienen un freno para el cojín el cual previene la velocidad excesiva del cojín. Si Ud. levanta la herramienta de la pieza en elaboración mientras que el motor esté en marcha, el freno limita la rotación del cojín a 400 RPM o menos. -
Página 29: Mantenimiento
MANTENIMIENTO TORNILLOS FIJADORES DEL COJIN Fig. 9 PARA CAMBIAR EL COJIN 1. PRECAUCION: DESCONECTE LA LIJADORA DE LA FUENTE DE ELECTRICIDAD. Agarre el cojín con una mano y desatornille los tres tornillos con un desarmador Phillip (de cruz), Fig. 9 (desatornille en sentido contrario a las manecillas del reloj). -
Página 30: Mantenga Las Herramientas Limpias
MANTENGA LAS HERRAMIENTAS LIMPIAS Periódicamente sople todos los conductos de ventilación con aire seco a presión. Todas las partes de plástico deben ser limpiadas con una tela suave y húmeda. NUNCA use solventes para limpiar las partes de plástico. Es posible que puedan disolver o de otra manera dañar el material. -
Página 31: Piezas De Repuesto
SERVICIO PIEZAS DE REPUESTO Utilice sólo piezas de repuesto idénticas. Para obtener una lista de piezas o para solicitar piezas, visite nuestro sitio web en servicenet.porter-cable.com. También puede solicitar piezas en nuestro centro más cercano, o llamando a nuestro Centro de atención al cliente al 1-800-223-7278 para obtener asistencia personalizada a través de nuestros técnicos capacitados. -
Página 32: Garantia
GARANTIA Para registrar la herramienta para obtener el mantenimiento cubierto por la garantía, visite nuestro sitio web en www.porter-cable.com PÓLIZA DE GARANTÍA LIMITADA DE 1 AÑO DE PORTER-CABLE La Compañía de Porter-Cable garantiza sus herramientas mecánicas profesionales por un período de 1 año a partir de la fecha de compra. -
Página 33: Español
ENGLISH: PAGE 1 ESPAÑOL: PÁGINA 13 Ponceuses à orbite aléatoire Manuel et double isolation d’utilisation MODÈLE MODÈLES 333 et 334 MODÈLE 333VS IMPORTANT Pour de plus amples renseignements Veuillez vous assurer que la personne qui concernant Porter-Cable, consultez utilise cet outil lit attentivement et notre Website à... -
Página 34: Mesures De Sécurité - Définitions
INSTRUCTIONS DE SÛRETÉ IMPORTANTES Lire et comprendre toutes instructions d'avertissements et opération avant d'utiliser n'importe quel outil ou n'importe quel équipement. En utilisant les outils ou l'équipement, les précautions de sûreté fondamentales toujours devraient être suivies pour réduire le risque de blessure personnelle. L'opération déplacée, l'entretien ou la modification d'outils ou d'équipement ont pour résultat la blessure sérieux et les dommages de propriété. -
Página 35: Règles Générales Sur La Sécurité
RÈGLES GÉNÉRALES SUR LA SÉCURITÉ Veuillez lire toutes les instructions. Le fait de ne pas respecter toutes les instructions indiquées ci-dessous pourrait entraîner des chocs électriques, des incendies et/ou des blessures graves. Le terme " outil électrique " qui apparaît dans tous les avertissements ci- dessous fait référence aussi bien à... -
Página 36: Règles Générales Sur La Sécurité (Suite)
RÈGLES GÉNÉRALES SUR LA SÉCURITÉ (suite) c) Évitez la mise en marche accidentelle de l'outil. Veillez à ce que l'interrupteur soit dans la position de fermeture avant de brancher l'outil. C'est une invite aux accidents de porter un outil électrique avec le doigt sur l'interrupteur ou de brancher un outil électrique dont l'interrupteur est dans la position de marche. - Página 37 CONSIGNES DE SÉCURITÉ ET SYMBOLES SPÉCIFIQUES Tenez l’outil par les surfaces isolées de préhension en effectuant une opération au cours de laquelle l’outil de coupe peut venir en contact avec les fils dissimulés ou son propre cordon. Le contact avec un fil sous tension rendra également les pièces métalliques exposées de l’outil sous tension et causera des secousses à...
- Página 38 SYMBOLE DÉFINITION ......volts ......ampères ......hertz ......watts ......kilowatt ......farads µF ......microfarads ......litres ......grammes ......kilogramme ......barres ......pascals ......heures ......minutes ......secondes ......vitesse sans charge …/min or …min - ..
- Página 39 RÈGLES DE SÉCURITÉ SUPPLÉMENTAIRES POUR L’ÉLIMINATION DE LA PEINTURE On doit procéder extrêmement soigneusement en éliminant la peinture. Les éclats, les résidus et les vapeurs de peinture peuvent contenir du plomb qui est toxique. L’exposition fût-ce à de bas niveaux de plomb peut causer des lésions irréversibles au cerveau et au système nerveux ;...
-
Página 40: Contenus De Boite
100 pi. 200 pi. 300 pi. 400 pi. 500 pi. 600 pi. 800 pi. 1000 pi. 8-10 10-12 12-14 14-16 16-18 18-20 CONSERVEZ CES INSTRUCTIONS! CONTENUS DE BOITE * La Ponceuse * Le disque de Sanding * Filtre (sauf 332 modèle) -
Página 41: Description Fonctionnelle
à l’aide de papier à grain 80 à 100, et une finition sans marques de tourbillonnement à l’aide de papier à grain 120 à 150. Le modèle 332 est équipé de manière à accepter les abrasifs à dos en papier adhésif STIKIT de 5 po de diamètre. - Página 42 POSE/DÉPOSE DU DISQUE ABRASIF Modèles 332 et 334 : DÉBRANCHEZ L’OUTIL DE LA PRISE DE COURANT. MISE EN GARDE Placez l’outil sur l’établi avec le patin dirigé vers le haut (voir Fig. 2). Enlevez la poussière sur la face du patin.
-
Página 43: Frein De Patin
COLLECTEUR DE POUSSIÈRE BUSE Fig. 4 RÉCUPÉRATEUR À RÉCIPIENT À POUSSIÈRE (Modèles POUSSIÈRE 333, 333VS et 334) DÉBRANCHEZ MISE EN GARDE LA PONCEUSE DE LA PRISE DE COURANT. Positionnez le collecteur de poussière sur la buse de la ponceuse comme illustré à la BRIDE Fig. -
Página 44: Guide De Depannage
Fig. 7 Fig. 8 Le frein de patin a recours à une courroie pour assurer le freinage. Il pourra être nécessaire de remplacer cette courroie. Si le frein ne réussit pas à limiter la rotation du patin, confiez la ponceuse à un centre de service Porter-Cable ou remplacez la courroie vous-même comme expliqué... -
Página 45: Remplacement De La Courroie
RÉPARATION (ENTRETIEN) VIS DE RETENUE DU PATIN Fig. 9 REMPLACEMENT DU COUSSINET D’APPUI DÉBRANCHEZ LA PONCEUSE DE LA PRISE DE MISE EN GARDE COURANT. Saisissez le patin à la main et utilisez un tournevis à empreinte cruciforme pour retirer trois vis de retenue du patin, Fig. 9 (tournez les vis en sens anti-horaire pour enlever). - Página 46 NETTOYER VOS OUTILS Nettoyer régulièrement les passages d’air avec de l’air comprimé à sec. Toutes les pièces en plastiques doivent être nettoyées avec un chiffon doux légèrement humide. Ne nettoyer JAMAIS les pièces en plastique avec des dissolvants. Ils pourraient dissoudre ou autrement endommager ces pièces. Mettez ANSI Z87.1 toujours des lunettes de sécurité...
- Página 47 ACCESSOIRES Une ligne complète des accessoires est fournie des centres commerciaux • • d'usine de par votre de Porter-Cable Delta fournisseur, de Porter-Cable Delta, et des stations service autorisées par Porter-Cable. Veuillez visiter notre site Web www.porter-cable.com pour un catalogue ou pour le nom de votre fournisseur plus proche.
- Página 48 The following are trademarks of PORTER-CABLE • DELTA (Las siguientes son marcas registradas de PORTER-CABLE • DELTA S.A.) (Les marques suivantes sont des marques de fabriquant de la PORTER-CABLE • DELTA): Auto-Set ® , BAMMER ® , B.O.S.S. ® , Builder’s Saw ®...