Tabla de contenido
Publicidad
Idiomas disponibles
Idiomas disponibles
Enlaces rápidos
Publicidad
Tabla de contenido

Manuales relacionados para IOGear Dock Pro 60

Resumen de contenidos para IOGear Dock Pro 60
- Página 1 Dock Pro 60 USB-C 4K Station with Game+ Mode Guide de démarrage rapide Dock Pro 60 USB-C 4K Station avec mode jeu + Guía de inicio rápido Dock Pro 60 USB-C 4K Estación con modo de juego + GUC3C4HP PART NO. Q1600 www.iogear.com...
-
Página 2: Package Contents
Package Contents 1x GUC3C4HP 1x USB-C™ cable 1x Quick Start Guide 1x Warranty Card System Requirements • Windows 10 (32/64 bit)* ® • Mac OS X 10.12 and above* ® • Android 8 and above (USB-C)* ™ • IOS 12.1+ (IPad Pro 2018)** ®... -
Página 3: Product Overview
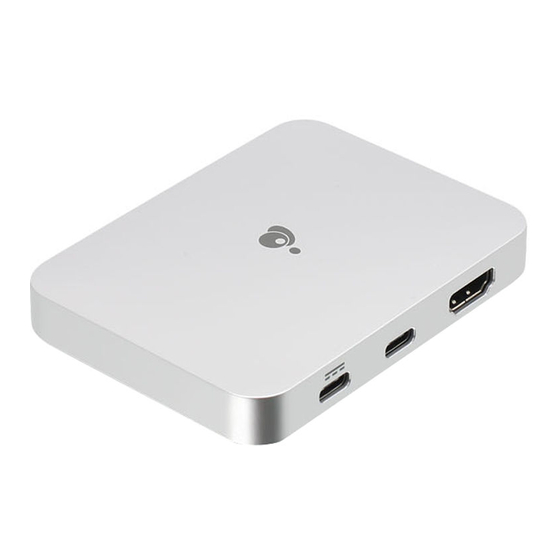
Product Overview A. USB-C port (Power Delivery Pass-Through)* B. USB-C port for the host C. HDMI™ port (up to 4K)** D. USB-A 3.1 Gen 1 port for Keyboard, mouse or peripherals*** E. USB-A 2.0 port for Keyboard, mouse or peripherals**** Front Back *Supports USB-C PD charging at 5V, 9V, 15V, 20V output. -
Página 4: Hardware Installation
Hardware Installation Please follow steps below to ensure the optimal performance: Android/Windows/Mac Installation STEP 1 Turn on host computer/Smartphone. Connect power supply to Power Delivery Pass-Through port. STEP 2 Connect external devices to appropriate ports as needed. (refer to product overview for ports call out) STEP 3 Connect external HDMI display to HDMI port. - Página 5 Nintendo Switch Installation ® STEP 1 Connect Nitendo Switch USB-C power adapter directly to the NS(Nintendo Switch) to initiate charging.* STEP 2 Connect other USB peripherals to their respective ports.** STEP 3 Connect HDMI display to GUC3C4HP. STEP 4 Disconnect NS power adapter from NS. Connect NS power adapter to Power Delivery Pass-Through port on GUC3C4HP.
- Página 6 Limited Warranty Warranty Information This product carries a 1 Year Limited Warranty. For the terms and conditions of this warranty, please go to https://www.iogear.com/support/warranty Register online at https://www.iogear.com/register Important Product Information Product Model _____________ Serial Number _____________...
- Página 7 Contact WE’RE HERE TO HELP YOU! NEED ASSISTANCE SETTING UP THIS PRODUCT? Make sure you: 1. Visit www.iogear.com for more product information 2. Visit www.iogear.com/support for live help and product support IOGEAR iogear.custhelp.com support@iogear.com www.iogear.com...
-
Página 8: Compliance Information
Compliance Information Federal Communication Commission Interference Statement This equipment has been tested and found to comply with the limits for a Class B digital service, pursuant to Part 15 of the FCC rules. These limits are designed to provide reasonable protection against harmful interference in a residential installation. -
Página 9: Contenu De L'eMballage
Contenu de l'emballage 1x GUC3C4HP 1x Câble USB-C 1x Guide de démarrage rapide 1x Carte de garantie Configuration système requise • Windows 10 (32/64 bit)* ® OS X 10.12 et supérieur* • Mac ® • Android 8 et supérieur (USB-C)* ™... -
Página 10: L'aPerçu Du Produit
L’aperçu du produit A. Port USB-C (transmission de puissance)* B. Port USB-C pour l'hôte C. Port HDMI (jusqu'à 4K)** D. Port USB-A 3.1 Gen 1 pour clavier, souris ou périphériques*** E. Port USB-A 2.0 pour clavier, souris ou périphériques**** Vue avant Vue arrière *Prend en charge la charge USB-C PD en sortie 5V, 9V, 15V, 20V. -
Página 11: Installation Du Matériel
Installation du matériel Veuillez suivre les étapes ci-dessous afin d'assurer une performance optimale Installation Android / Windows / Mac ÉTAPE 1 Allumez l'ordinateur hôte/Smartphone. Connectez l’alimentation au port de transfert d’alimentation. ÉTAPE 2 Connectez les périphériques externes aux ports appropriés en fonction des besoins. (reportez-vous à... - Página 12 Installation de Nintendo Switch ® ÉTAPE 1 Connectez l’adaptateur secteur USB-C du commutateur Nintendo directement à NS (Nintendo Switch) pour lancer le chargement.* ÉTAPE 2 Connectez d’autres périphériques USB à leurs ports respectifs.** ÉTAPE 3 Connectez l’affichage HDMI au GUC3C4HP. ÉTAPE 4 Déconnectez l'adaptateur d'alimentation NS du NS et le bloc d'alimentation vers le port d'intercommunication d'alimentation.
-
Página 13: Garantie Limitée
Contact NOUS SOMMES LÀ POUR VOUS AIDER! BESOIN D'AIDE POUR LA CONFIGURATION DE CE PRODUIT? Assurez-vous de: 1. Visiter www.iogear.com pour plus d'information sur le produit 2. Visiter www.iogear.com/support pour obtenir de l'aide et un soutien technique en ligne IOGEAR https://iogear.custhelp.com... -
Página 14: Information De Conformité
Information de conformité Déclaration sur les interférences de la Commission fédérale des communications (FCC) Cet appareil a été testé et déclaré conforme aux limites pour appareils numériques de Classe B, conformément à la partie 15 des règles de la FCC. Ces limites sont conçues pour fournir une protection raisonnable contre les interférences nuisibles dans une installation résidentielle. -
Página 15: Contenido Del Paquete
Contenido del paquete 1x GUC3C4HP 1x Cable USB-C 1x Guía de configuración rapide 1x Tarjeta de Garantía Requerimientos del Sistema • Windows 10 (32/64 bit)* ® • Mac OS X 10.12 y superior* ® • Android 8 y superior (USB-C)* ™... -
Página 16: Descripción Del Producto
Descripción del producto A. Puerto USB-C (Transferencia de suministro de energía)* B. Puerto USB-C C. Puerto HDMI (hasta 4K)** D. Puerto USB-A 3.1 Gen 1 para teclado, mouse o periféricos*** E. Puerto USB-A 2.0 para teclado, mouse o periféricos**** Vista frontal Vista posterior *Compatible con USB-C PD que se carga a 5V, 9V, 15V, 20V de salida. -
Página 17: Instalación Del Hardware
Instalación del hardware Por favor, cumpla los siguientes pasos para garantizar un desempeño óptimo. ® Instalación de Android / Windows / Mac PASO 1 Encienda la computadora host / teléfono inteligente. Conecte la fuente de alimentación al puerto de paso de suministro de energía. PASO 2 Conecte los dispositivos externos a los puertos apropiados según sea necesario. - Página 18 Instalación del Nintendo Switch ® PASO 1 Conecte el adaptador de corriente USB-C de Nintendo Switch directamente a NS (Nintendo Switch) para iniciar la carga.* PASO 2 Conecte otros periféricos USB a sus respectivos puertos.** PASO 3 Conecte la pantalla HDMI a GUC3C4HP. PASO 4 Desconecte el adaptador de corriente NS de NS.
-
Página 19: Garantía Limitada
Número de serie___________________ Contacto ¡ESTAMOS AQUÍ PARA AYUDARLE! ¿NECESITA AYUDA CON ESTE PRODUCTO? Asegúrese de: 1. Visitar www.iogear.com para más información sobre nuestros productos 2. Visitar www.iogear.com/support para ayuda en directo y soporte técnico sobre el producto IOGEAR https://iogear.custhelp.com support@iogear.com www.iogear.com... -
Página 20: Información De Conformidad
Información de Conformidad Información sobre interferencias de la Comisión federal de comunicaciones (FCC) Este equipo fue sometido a pruebas, y se determinó que cumple con los límites para los servicios digitales de Clase B, según se especifica en la sección 15 de las normas de la FCC.