Tabla de contenido
Publicidad
Idiomas disponibles
Idiomas disponibles
Enlaces rápidos
Publicidad
Capítulos
Tabla de contenido
Solución de problemas

Manuales relacionados para Medion AKOYA E6220


Resumen de contenidos para Medion AKOYA E6220
- Página 2 Ordenador portátil abierto - Ecrã 13 - Ligação monitor externo VGA Botão liga/desliga 14 - Porta LAN (RJ-45) Open notebook - Teclado 15 - Conector HDMI Offenes Notebook Indicações de funcionamento 16 - Porta eSATA / USB Teclas touchpad 17 - Conector do microfone* Touchpad 18 -...
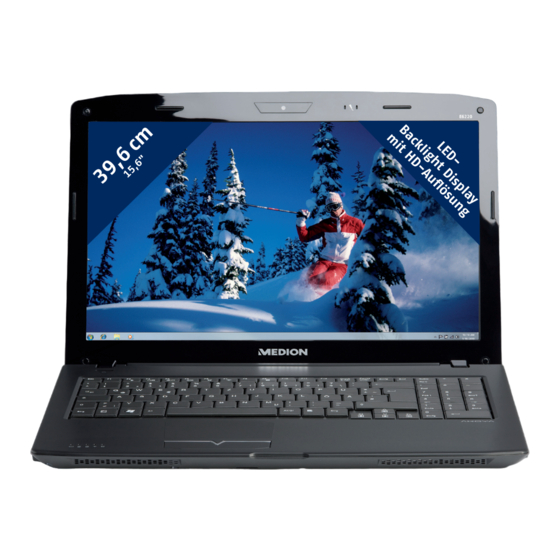
- Página 3 39,6 cm / 15,6" High Definition Design Notebook MEDION AKOYA ® ® E6220 (MD 98510) Deutsch Display Ein-/Ausschalter Tastatur Betriebs- und Statusanzeigen Touchpad Tasten Touchpad Handablage Webcam Mikrofon 10 - Stereo Lautsprecher 11 - Netzadapteranschluss 12 - USB-Anschluss 13 -...
- Página 4 39,6 cm / 15,6" High Definition Design Notebook MEDION AKOYA ® ® E6220 (MD 98510) Español Pantalla Interruptor encendido/apagado Teclado Indicativos de estado y de funcionamiento Teclas touchpad Touchpad Reposa manos Cámara web Micrófono 10 - Altavoces 11 - Conexión red 12 - Conexión USB...
- Página 5 39,6 cm / 15,6" High Definition Design Notebook MEDION ® AKOYA ® E6220 (MD 98510) Français Deutsch English 1. Akku einlegen 1. Insert the battery 1. Insérer la batterie 2. Netzadapter anschließen 2. Connecting the mains adapter 2. Brancher l'adaptateur secteur 3.
- Página 6 39,6 cm / 15,6" High Definition Design Notebook MEDION ® AKOYA ® E6220 (MD 98510) Polski Español Português Na powierzchni znajduje siê folia ochronna, zabezpieczaj¹ca urz¹dzenie przed porysowaniem podczas produkcji i transportu. Po prawid³owym ustawieniu urz¹dzenia, ale przed jego uŸyciem, naleŸy œciœgn¹æ...
-
Página 7: Indicaciones Para Estas Instrucciones
Indicaciones para estas instrucciones Mantenga estas instrucciones a mano junto a su ordenador personal. Guarde bien el manual de instrucciones para poder dárselo al nuevo dueño del ordenador en el caso de una futura venta. Hemos reunido estas instrucciones de manera que Ud. pueda ver en cualquier momento la tabla de contenidos con las informaciones que necesita. -
Página 8: Nuestros Destinatarios
Copyright © 2010 Reservados todos los derechos. Este manual está protegido por la ley de propiedad intelectual. ® El Copyright pertenece a la empresa Medion Marcas comerciales: ® ® ®... -
Página 9: Tabla De Contenido
Contenido Seguridad de Funcionamiento ............1 Recomendaciones de Seguridad ..............3 Alimentador de Energía ............... 7 Câbles ....................8 Vistas & Puesta en Marcha ............11 Volumen de envío ..................13 Aspecto Físico ................... 14 ... - Página 10 Lector de tarjetas Multimedia ..............59 La cámara web ..................60 La Conexión Bus Universal en Serie ............62 Conexión eSATA / USB ................63 Asegurar el ordenador portátil ..............64 Software ....................65 ...
-
Página 11: Seguridad De Funcionamiento
Capítulo 1 Seguridad de Funcionamiento Tema Página Seguridad de Datos ..............4 Lugar de Instalación ..............4 Ambiente Previsto ..............5 Ergonomía ................6 Conexión ................. 7 Información de conformidad R&TTE ........9 Indicaciones para el Touchpad ..........9 Funcionamiento del Acumulador ......... 10... - Página 12 Contenido...
-
Página 13: Recomendaciones De Seguridad
Recomendaciones de Seguridad Lea este capítulo con atención hasta el final y siga todas las recomendaciones indicadas. Así podrá garantizar un buen funcionamiento de su ordenador personal así como una larga duración de éste. Mantenga alejados a los niños de jugar con aparatos eléctricos. Los niños no siempre son conscientes de todos los peligros. -
Página 14: Seguridad De Datos
Apague el ordenador inmediatamente, no lo encienda, desenchúfelo o diríjase al Servicio de Atención al Cliente cuando... ... el adaptador de red o el cable de red a él conectado o el enchufe estén dañados. Cambie el cable o el adaptador de red por otro recambio original. -
Página 15: Ambiente Previsto
Ambiente Previsto El ordenador puede utilizarse en una temperatura ambiente de entre 5° C y 35° C y con una humedad relativa del aire entre 20% - 80% (no condensada). Cuando está apagado, el ordenador puede almacenarse en temperaturas entre 0°... -
Página 16: Ergonomía
Ergonomía Tenga cuidado La pantalla debe estar puesta de tal modo que se eviten los reflejos, los deslumbramientos y los fuertes contrastes entre claros y oscuros. (¡y que la vista por la ventana sea igual de atractiva. Si permanece sentado en una posición fija durante largos periodos de tiempo puede resultar incómodo. -
Página 17: Alimentador De Energía
Conexión Respete las siguientes recomendaciones para una correcta conexión de su ordenador: Alimentador de Energía No abra la carcasa de las conexiones de red. Si se abre, existe el peligro de muerte por descarga eléctrica. No contiene ninguna pieza de mantenimiento. -
Página 18: Câbles
Câbles Ponga los cables de manera que nadie los pise ni tropiece. No coloque objetos en el cable de modo que pueda dañarse. No deje que actúen cerca del aparato fuerzas grandes, por ejemplo por el lateral. Esto podría dar lugar a daños en el aparato. ... -
Página 19: Información De Conformidad R&Tte
Información de conformidad R&TTE Con este PC han sido verificadas las siguientes directivas R&TTE (1999/5/EC): Lan sin cables Debido al rendimiento de la solución LAN inalámbrica incorporada (>100mW), el uso en Francia sólo está permitido en el interior de edificios. En todos los demás países de la UE, no existen de momento limitaciones. -
Página 20: Funcionamiento Del Acumulador
Funcionamiento del Acumulador El acumulador guarda energía eléctrica en su interior y la utiliza cuando sea necesario. Para alargar la vida y la buena condición del acumulador, así como para garantizar un funcionamiento seguro, han de seguirse las siguientes recomendaciones: ... -
Página 21: Vistas & Puesta En Marcha
Capítulo 2 Vistas & Puesta en Marcha Tema Página Volumen de envío ..............13 Aspecto Físico ............... 14 Ordenador portátil abierto ..........14 Parte Delantera ..............15 Parte Izquierda ............... 15 Parte Derecha ..............16 Indicativos de Funcionamiento y Estado ......17 Puesta en Marcha .............. - Página 22 Recomendaciones de Seguridad...
-
Página 23: Volumen De Envío
Volumen de envío Compruebe que el envío esté completo y avísenos hasta 14 días después de realizada la compra, en el caso de que no esté completo. Indíquenos sin falta el número de serie. Junto al PC que ha adquirido, se encuentran los siguientes componentes: ... -
Página 24: Aspecto Físico
Aspecto Físico Ordenador Portátil Abierto (Illustración similar) Aspecto Físico... -
Página 25: Parte Delantera
- Pantalla ................. ( p. 34) - Interruptor encendido/apagado ..........( p. 27) - Teclado .................. ( p. 39) - Indicativos de estado y de funcionamiento ......( p. 17) - Teclas Touchpad ..............( p. 40) - Touchpad ................( p. 40) - Reposa manos - Cámara web ................ -
Página 26: Parte Derecha
Parte Derecha (Illustración similar) - Puerto de USB ..............( p. 62) - Conexión micrófono* ............. ( p. 53) - Salida de audio * / Salida digital de audio (S/P-DIF, óptico) ........ ( p. 52) - Lector de tarjetas multimedia ..........( p. 59) - Lector óptico ................. -
Página 27: Indicativos De Funcionamiento Y Estado
Indicativos de Funcionamiento El sistema se muestra bajo el cuidado de la corriente LEDs y de las condiciones de funcionamiento del sistema. Los indicativos de funcionamiento del sistema aparecen siempre que se produce una actividad en el ordenador: ... -
Página 28: Puesta En Marcha
Puesta en Marcha Para utilizar su ordenador de forma segura y para garantizar una vida larga, debe haber leído el capítulo “Seguridad y Mantenimiento” al inicio de este manual. El ordenador viene instalado de antemano de forma que no tiene que instalar ningún conductor y puede comenzar de inmediato. - Página 29 Conecte el adaptador de red (incluido en el suministro) al ordenador portátil (11) (). Conecte el cable de red por un lado al adaptador () y por el otro a un enchufe (). Coloque el interruptor del adaptador de red en la posición I para que el ordenador sea alimentado por la corriente y se recargue la batería ().
- Página 30 Abra la pantalla y establezcala a continuación en la posición deseada (). La pantalla no debe ser abierta más de los 120°. Trate de abrirla con cuidado. Recomendación La primera vez que utilice el ordenador, asegúrese de que la batería esté...
- Página 31 A continuación, se cargará el sistema operativo del disco duro. El proceso de carga dura un poco más la primera vez. Tras haber introducido todos los datos necesarios, el sistema está preparado. El sistema operativo está completamente cargado cuando se visualiza una pantalla de bienvenida. Recomendación La primera instalación puede durar hasta 30 minutos.
-
Página 32: Descripción Breve De La Superficie Windows
Recomendación Windows puede actualizar y configurar datos los primeros días tras la instalación (por ejemplo, con nuevas actualizaciones) lo que puede causar el retraso de las descargas y del inicio del ordenador. No preconecte el ordenador. ® * Descripción breve de la superficie Windows ... - Página 33 Iconos en el „escritorio“ Los Iconos son enlaces a los programas que se utilizan para el inicio de los programas a los que se refieren. Haciendo doble clic (presionar dos veces seguidas el botón izquierdo del ratón) en el símbolo se iniciará la aplicación. El escritorio comprende aproximadamente la pantalla completa y es la superficie de archivo de estas entradas o de otros enlaces a los cuales puede acceder de manera rápida.
- Página 34 Puesta en Marcha...
-
Página 35: Componentes Principales
Capítulo 3 Componentes principales Tema Página Alimentación de energía ............27 Display ................. 34 Introducción de datos ............37 Disco duro ................42 La unidad óptica ..............44 La tarjeta de sonido .............. 49 Funcionamiento en una red ..........54 Lector de tarjetas Multimedia .......... - Página 36 Puesta en Marcha...
-
Página 37: Alimentación De Energía
Alimentación de Energía Conector/Desconector Con el interruptor encendido/apagado se enciende/apaga el ordenador. El anuncio del estatus le informa sobre el estado de funcionamiento. El ordenador se apaga independientemente del sistema cuando el botón está accionado de forma continuada más de 4 segundos. ¡Cuidado! No apague el ordenador mientras esté... -
Página 38: Funcionamiento De La Red
Funcionamiento de la Red Su ordenador viene con un adaptador de red universal para corriente alternativa que se adecua automáticamente dependiendo de la fuente de corriente ofrecida. Se apoyan los siguientes valores: AC 100-240V~/ 50-60 Hz. Observe las Recomendaciones de Seguridad para la alimentación de energía de la página 7. -
Página 39: Funcionamiento Del Acumulador
Funcionamiento del Acumulador Recomendación Cargue y descargue completamente la nueva batería dos o tres veces seguidas para que llegue a su máxima capacidad de rendimiento! Los acumuladores de la batería acumulan energía eléctrica en sus celdas para transmitirla posteriormente cuando sea necesario. La vida útil y el rendimiento de la batería dependen de su correcto manejo. -
Página 40: Retirada Del Acumulador
Retirada del Acumulador Para extraer el bloque de la batería, deslice el pestillo de seguridad ()hasta la posición de desbloqueo o “unlock”, mantenga pulsado el botón de expulsión () y retire el paquete de batería del compartimento (). ¡Atención! No separe el acumulador mientras la luz está encendida porque corre el riesgo de perder los datos. -
Página 41: Recarga Del Acumulador
Recarga del Acumulador El acumulador se recarga con la pieza de red. Si ésta está enchufada, el acumulador se carga automáticamente, independientemente de que el ordenador esté o no encendido. Con el ordenador desconectado, serán necesarias varias horas para recargar el acumulador. Si el ordenador está encendido, serán obviamente necesarias más horas. -
Página 42: Revisión De La Carga Del Acumulador
Revisión de la carga del Acumulador Para revisar el actual estado de carga del acumulador, mueva el curso al símbolo de “Power” en el teclado. Cuando funciona la batería, se muestra un símbolo de una pila. Encontrará más información al respecto si hace doble clic sobre el símbolo. Recomendación Si ignora el signo de aviso cuando el nivel de energía del acumulador es bajo, se cambia el ordenador al modo Suspender. -
Página 43: Administración De Energía (Power Management)
Administración de Energía (Power Management) Su ordenador ofrece funciones de ahorro de energía automático y manual que puede utilizar para maximizar la duración del uso del acumulador y para reducir los costes totales de utilización. Los modos de ahorro de energía se denominan “modo Suspender”... -
Página 44: Display
Display Abrir y Cerrar la Pantalla La exposición será bloqueada gracias a un dispositivo especial de bloqueo de exposición de modo que no es necesario un bloqueo adicional. Para abrir, abra la pantalla con ayuda de los dedos pulgar e índica hasta colocarla en la posición deseada. -
Página 45: Apariencia Y Personalización
Apariencia y personalización Este programa le ofrece la posibilidad de ajustar la representación en su pantalla. Esto incluye, por ejemplo, la imagen de fondo, el protector de pantalla, el escritorio activo (Web) así como otras opciones adicionales de su pantalla y de su tarjeta gráfica. El programa puede ser inicializado siguiendo los pasos siguientes: ... -
Página 46: Conexión De Un Monitor Externo
Conexión de un monitor externo El ordenador dispone de una conexión VGA (13) para un monitor externo. 1. Coloque el ordenador correctamente. 2. Conecte el cable de señal del monitor externo al conector VGA del ordenador (13). De manera alternativa, puede utilizar la conexión digital HDMI (High Definiton Multimedia Interface) (15) para la transferencia de imágenes y sonido. -
Página 47: Duplicar Estas Pantallas
Una vez cargado el sistema operativo, se pondrá en funcionamiento la pantalla exterior. Aparece entonces la siguiente ventana y se ponen a su disposición diversas posibilidades de representación: 1. Haga clic con el botón derecho del ratón sobre la pantalla. 2. -
Página 48: Extender Estas Pantallas
Extender estas pantallas En este modo, se muestra un escritorio vacío en el segundo monitor (externo). La ventana de la primera pantalla puede desplazada e invertida. La resolución de pantalla y la calidad del color del único dispositivo de indicación pueden ser ajustadas individualmente en Inicio Panel de control ... -
Página 49: Introducción De Datos
Introducción de Datos El Teclado Ciertas teclas le proporcionan las mismas opciones por medio del teclado de Windows en sus ventanas. Algunas funciones son ordenadas con ayuda del teclado típico Fn del ordenador. Combinación de Teclas Específicas del Ordenador Combinación Descripción Fn + F2 Función de ahorro de energía... -
Página 50: Ratón Táctil
Cámara web Fn + F9 Enciende o apaga la cámara web. Fn + Aumenta el volumen. Fn + Reduce el volumen. Fn + Aumenta la claridad de la pantalla. Fn + Reduce la claridad de la pantalla. Ratón táctil El indicativo del ratón se dirige en la dirección que le indique su dedo con el movimiento en el teclado. -
Página 51: Uso Del Teclado Con Dos Dedos
Uso del teclado con dos dedos El teclado soporta la función de uso con dos dedos en algunas aplicaciones que permiten una orden determinada de ciertos comandos. Las siguientes órdenes pueden realizarse con el teclado: Imagen Orden Función Alejar o acercar el zoom a un ampliar / reducir objeto Girar un objeto en el sentido... -
Página 52: El Disco Duro
El disco duro El disco duro es su medio principal de memoria, donde se encuentra la mayor capacidad de almacenamiento y donde el acceso a los datos es más rápido. Junto al PC ha adquirido una versión OEM del sistema operativo Microsoft ®... -
Página 53: Directorios Importantes
Directorios importantes A continuación especificamos los directorios más importantes y describimos el contenido. ¡Atención! No elimine ni modifique estos directorios ni tampoco sus contenidos, ya que de lo contrario se podrían perder datos o se pone en peligro el funcionamiento correcto del sistema. En el directorio raíz de la unidad C: se encuentran importantes archivos imprescindibles para el inicio de Windows. -
Página 54: La Unidad Óptica
La unidad óptica Introducir un CD/DVD Al contrario que el CD-ROMs en un PC, el ordenador portátil utiliza un elemento para detener la adherencia del CD. Cuando introduzca un CD, tenga cuidado de que sea presionado en el lugar adecuado. Recomendación No pegue plásticos protectores sobre los CDs ni otro tipo de pegatinas. - Página 55 1. Presione el botón de apertura del lector de CD (21) para abrir la bandeja. 2. Extraiga la bandeja completamente y con cuidado. 3. Saque el CD de su funda preferiblemente sin tocar la parte donde están los datos. 4. Ponga el disco en el lector con la etiqueta hacia arriba y apriételo con cuidado hacia abajo para que quede plano en la bandeja y pueda ser bien leído.
-
Página 56: Recuperación De Emergencia De Un Disco Bloqueado
Recuperación de Emergencia de un Disco Bloqueado Si la bandeja no se abriera de forma automática, se puede abrir manualmente suponiendo que su aparato tiene un sistema de apertura de emergencia (22). 1. Finalice Windows y apague el ordenador. 2. Introduzca un objeto punzante (p.ej. un clip) en la apertura de emergencia hasta que encuentre resistencia. -
Página 57: Reproducción De Información Regional En Dvd
Reproducción de Información Regional en DVD La reproducción de títulos de películas en DVD contiene la decodificación de video MPEG2, de datos de audio AC3 digital y la decodificación de contenido protegido CSS. CSS (a veces conocido también como Copy Guard) es la designación de un programa de seguridad de datos que ha sido utilizado por la industria cinematográfica como medida frente a las copias ilegales. -
Página 58: Temas Relacionados Con La Regrabadora De Cds
Temas relacionados con la regrabadora de CDs Esta sección se refiere únicamente a los aparatos que han sido entregados con un CD-RW, un combinado o un lector de DVD-RW. En primer lugar obtendrá información sobre los llamados CDs vírgenes. Estos medios, necesarios para que una regrabadora de CD pueda grabar un CD se denominan CD-Recordable (CD-R, grabable) o CD-Rewritable (CD-RW, regrabable). -
Página 59: Insertar Un Módulo Del Subwafle O Un Disco Duro Adicional
Insertar un módulo del subwafle o un disco duro adicional Tiene la posibilidad de cambiar el disco óptico por un disco duro adicional o un módulo de subwafle. Recomendación Puede comprar el disco duro adicional o el modulo de subwafle en nuestra tienda en línea www.micronshop.com. -
Página 60: Sustitución De Un Disco Duro O Módulo De Subwafle Adicional
Sustitución de un disco duro o módulo de subwafle adicional Siga los pasos indicados a continuación: 1. Apague el ordenador bajándolo correctamente y girándolo. 2. Retire la batería como se describe en la página 30. 3. Mantenga pulsado el bloqueo de la unidad extraíble (). - Página 61 6. Inserte la batería como se describe en la página 29. 7. Ponga en marcha el ordenador. 8. El segundo disco duro será reconocido por el sistema operativo e integrado por éste siempre que éste ya esté formateado o contenga datos.
-
Página 62: La Tarjeta De Sonido
La Tarjeta De Sonido Su ordenador tiene un tarjeta de sonido estéreo incorporada con 16 Bit y efectos de sonido espacial (3D). La tarjeta de sonido es compatible con los estándares industriales Sound Blaster y Microsoft Sound System Version 2.0. Esto garantiza el cuidado óptimo de todos los programas y juegos actuales. -
Página 63: Externo Conexiones Audio
Externo Conexiones Audio Su ordenador contiene altavoz para poder reproducir el sonido sin dispositivos adicionales. La conexión a un dispositivo HiFi aumenta considerablemente la calidad del sonido. La utilización de las conexiones externas le ofrece la buena posibilidad de conectar el portátil con aparatos externos. ¡Atención! El uso de cascos de audición con un nivel alto de volumen de sonido puede dañar el sistema auditivo. - Página 64 Para grabar utilizando un micrófono externo. Conexión de micrófono Salida de audio / Para salida de sonido con un descodificador Salida digital de audio externo de sonido ambiental mediante un cable (S/P-DIF óptico) óptico (en tiendas especializadas). (18) Para la reproducción de sonido mediante un equipo estéreo externo como altavoces (activo) o auriculares.
-
Página 65: Funcionamiento En Una Red
Funcionamiento en una red ¿Qué es una Red? Se habla de una red cuando hay varios PCs conectados entre sí. De esta forma los usuarios pueden transmitir información y datos de PC a PC y compartir sus recursos (impresora, módem y unidades). Estos son algunos ejemplos de la práctica: ... -
Página 66: Lan Sin Cables (Red De Radio)
LAN sin cables (red de radio) La LAN sin cables es un equipamiento opcional. Esta función le permite pasar por la radio una conexión de red a una estación receptora apropiada. Antes de la activación, le aconsejamos que lea las condiciones necesarias de la página siguiente. -
Página 67: Condiciones
Condiciones Como Punto de Acceso se puede utilizar un llamado Punto de Acceso LAN. Un Punto de Acceso es un aparato de transmisión de radio que se comunica con su ordenador y que acceder a la red conectada. Los Puntos de Acceso LAN se encuentran con frecuencia en oficinas grandes, aeropuertos, estaciones de tren, universidades o cibercafés. -
Página 68: Solución De Problemas En La Red
Solución de problemas en la red ¿Por qué no se visualizan los usos compartidos en el entorno de red? El entorno de red sufre un leve retardo. Verifique el uso compartido buscando los correspondientes nombres de PC. ¿Por qué aparece un mensaje de error cuando hago clic en Entorno de red? El nombre de PC sólo puede aparecer una vez en la red y no debe denominarse de la misma forma que el grupo de trabajo. -
Página 69: Lector De Tarjetas Multimedia
Lector de tarjetas Multimedia Las tarjetas de memoria son medios que se utilizan por ejemplo en el campo de la fotografía digital y que poco a poco van sustituyendo al disquete como medio de almacenamiento de datos. La forma y la capacidad de una tarjeta de memoria pueden variar según el fabricante. -
Página 70: La Cámara Web
La cámara web La cámara web incorporada permite el uso de diversos servicios, como el Messenger de Windows. Ejemplo de utilización con Messenger de Windows 1. Inicie el Messenger de Windows y cree una cuenta de usuario, en el caso en el que no lo haya hecho ya. - Página 71 Un asistente le ayuda a establecer los ajustes óptimos para el altavoz, micrófono y cámara web. Siga las indicaciones que irán apareciendo en la pantalla. 3. Haga clic en Conectar para transmitir imágenes por su cámara web. 4. Si la persona de contacto tuviera conectada una cámara web, haga clic en el símbolo de la cámara que se encuentra bajo la fotografía de la persona de contacto para recibir la imagen emitida en directo.
-
Página 72: La Conexión Bus Universal En Serie
La Conexión Bus Universal en Serie La conexión bus universal en serie (USB 1.0 o 2.0) (12) es el estándar más moderno para la conexión de aparatos de input, escáneres y demás periféricos. Con el USB se pueden conectar hasta 127 aparatos con un único cable. En el futuro, la conexión de multitud de periféricos al ordenador se va a simplificar considerablemente. -
Página 73: Conexión Esata / Usb
Conexión eSATA / USB eSATA significa „external Serial ATA“ y es una conexión a un disco duro externo. Al contrario de los estándares USB usuales, la velocidad de transmisión en una conexión e-SATA es superior que en discos duros USB externos. En estas conexiones, se trata de un „Combo-Slot“... -
Página 74: Asegurar El Ordenador Portátil
Asegurar el ordenador portátil Su ordenador portátil dispone de nuevas soluciones de software y hardware contra un acceso no autorizado. Contraseña de arraque Puede proteger su ordenador a través de una contraseña del uso no autorizado. Al encender el ordenador, aparece la solicitud de contraseña en la pantalla. La contraseña se incluye en BIOS. -
Página 75: Windows 7 - Novedades
Software Esta sección trata de los programas. Para ello, diferenciamos entre el sistema operativo, los programas (los programas de las aplicaciones), la activación de Windows y el BIOS. ® Aprender a utilizar Windows Con Windows® 7, Microsoft saca al mercado el nuevo sistema operativo y la continuación de Vista®. -
Página 76: Escritorio Mejorado
En la lista de archivos recientes de Internet Explorer se muestran los sitios web que haya visitado recientemente y con mayor frecuencia. En algunos programas, puede acceder así con mayor rapidez a órdenes que en el pasado sólo estaban accesibles en el mismo programa, como la orden de escribir un mensaje de correo electrónico. -
Página 77: Ayuda Y Soporte Técnico
doméstico se realiza rápidamente, puede especificar exactamente lo que será visible de cada PC en el grupo. Posteriormente, la utilización conjunta de archivos en los diferentes PC domésticos, y en otros muchos aparatos distintos, será tan sencilla como si se tratara de archivos en un único disco duro. Así puede guardar fotografías digitales en el ordenador en su lugar de trabajo y acceder a ellas con un ordenador portátil en otro lugar. -
Página 78: Tareas Iniciales
® Windows 7 – Tareas iniciales Aprenda todo lo que necesita saber para configurar el ordenador portátil. El objetivo de esta herramienta es llevar a cabo las regulaciones de la primera utilizacion de usuarios con experiencia así como de los usuarios por primera vez, tanto en la primer utilización como en mejoras posteriores para el uso óptimo de Windows®... -
Página 79: Windows ® 7 - Control De Cuentas De Usuario
Las Tareas iniciales para comprendre mejor su PC y poder utilizarlo de manera óptima. También le sirve como fuente adicional de información para reconocer y solucionar posibles problemas. Contiene los siguientes enlaces: Conectarse para obtener información acerca de las noveda… ... -
Página 80: Windows ® 7 - Panel De Control
® Windows 7 – Panel de control Con ayuda del panel de control, puede modificar la configuración de Windows. Esta configuración controla casi toda la representación y las funciones de Windows, y le permite configurar Windows según sus necesidades. Cuando abra por primera vez el Panel de control se mostrarán algunos de los elementos más frecuentemente utilizados del panel de control agrupados por categorías. -
Página 81: Instalación De Software
Instalación de software Recomendación Si su sistema operativo está configurado de forma que sólo se admite la instalación de software y controladores si están rotulados (autorizados por Microsoft), aparecerá un cuadro. El software que se suministra con el PC ya está completamente instalado. ¡Atención! Al instalar programas o controladores puede ocurrir que se sobrescriban archivos importantes. - Página 82 Windows Media Center Windows Media Center es la plataforma para su Home-Entertainment individual en Windows® 7. Con Windows Media Center, puede ver la televisión, grabar programas de televisión, reproducir DVD y música, ver fotos y mucho más… por control remoto (no incluido en el paquete de entrega) o haciendo simplemente clic con el ratón.
- Página 83 Menú principal Menú secundario Tareas Configuraciones Ajuste aquí los requisitos y necesidades en Windows Media Center. Establezca aquí, por ejemplo, las configuraciones de seguridad infantil. Apagado Aquí no sólo se apaga el Windows Media Center sino que puede apagar todo el sistema operativo. Asegúrese de que todas las demás aplicaciones ya hayan sido cerradas antes de desconectar el sistema.
- Página 84 Menú principal Menú secundario Música Biblioteca de música En la biblioteca de música, se encuentran todos los cortes de música guardados en su ordenador. Aquí puede reproducir un álbum completo, un intérprete o una canción determinada. Reproducir todo Aquí inicia la reproducción de todos los archivos que se encuentren en la biblioteca de música.
-
Página 85: Así Podrá Instalar Su Software
Así podrá instalar su software Siga las instrucciones que su proveedor de software ha adjuntado al paquete de software. A continuación, describiremos una instalación “típica”. Cuando inserte el CD se iniciará automáticamente el menú de instalación. Recomendación Si no funciona el inicio automático, es posible que esté desactivada la función de ejecución automática denominada “Autorun“. -
Página 86: Activación De Windows
Activación de Windows Para protegerse contra la piratería de software, Microsoft utiliza la activación del producto. La versión de Windows® 7 que hay instalada en su PC, al igual que la que se suministra con el PC, no la tiene que activar, ya que la hemos activado nosotros para su PC. -
Página 87: Programa De Instalación Bios
Programa de Instalación BIOS El programa de instalación BIOS (configuración de hardware básica de su sistema) contiene numerosas posibilidades de instalación para el uso de su ordenador. Por ejemplo, puede modificar el funcionamiento de los interfaces, las instrucciones de seguridad o el suministro de energía. El ordenador viene instalado de fábrica para garantizar un funcionamiento óptimo. -
Página 88: Bullguard Internet Security
BullGuard Internet Security El Paquete BullGuard Internet Security es una recopilación de las tecnologías más modernas de seguridad de ordenador que se encuentran disponibles en el mercado y le ofrece la más alta protección en todo momento. BullGuard ya está preinstalado de modo que no es necesario instalarlo de nuevo. - Página 89 * Recomendación Los componentes Antispyware, Spamfilter (Filtro de correo no deseado), Backup (Copia de Seguridad) y Soporte se activan con el registro gratuito en BullGuard y se desactivan cuando hayan transcurrido 90 días. Para poder volver a utilizar este módulo, adquiera por medio del enlace dado a continuación un abono BullGuard.
-
Página 90: Consejos Y Trucos
Consejos y trucos Ayuda Control del teclado Windows Para obtener más recomendaciones sobre el teclado, refiérase a la página 39. Puede cambiar la ventana activa con ALT + TAB. Con la tecla TAB salta al siguiente campo de texto o de introducción, con las teclas SHIFT + TAB, al anterior. -
Página 91: Adaptaciones E Informaciones Del Sistema
Adaptaciones e informaciones del sistema Función de Autoinicio del puerto óptico Cuando inserte un disco, éste será implementado de acuerdo con su contenido (música, video, etc.). Si no fuera éste el caso, puede deberse a varios motivos: El disco no cuenta con la función de autoinicio, la función está desactivada o la función está... - Página 92 Consejos y trucos...
-
Página 93: Asistencia Propria
Capítulo 4 Asistencia Propria Tema Página Protección de datos y del sistema ........85 Restaurar sistema .............. 86 Restaurar el estado en la entrega ........89 Preguntas frecuentes ............91 Servicio ................92 Re-/adaptación y reparación ..........98 Reciclado y eliminación de desechos ......100... - Página 94 Consejos y trucos...
-
Página 95: Protección De Datos Y Del Sistema
Protección de datos y del sistema Los programas descritos están integrados en Windows. Para información más detallada consulte las palabras clave en negrita en la ayuda de Windows. Consulte también las notas de la página 4. Protección de datos Haga copias de seguridad con frecuencia en medios externos, tales como CD-R o CD-RW. -
Página 96: Restaurar Sistema
Restaurar sistema Windows® 7 dispone de una función adicional (Restaurar sistema) , con la que es posible guardar los llamados puntos de recuperación. El sistema registra la configuración actual como una grabación momentánea y la utiliza en el caso de que sea necesario. - Página 97 ® Windows Update Windows Update es la actualización en línea de Windows. Utilice Windows Update para descargar de Internet información como actualizaciones de seguridad, actualizaciones importantes, los archivos de ayuda actuales, controladores y otros productos de Internet. El sitio web renueva regularment su contenido para que siempre encuentre las últimas actualizaciones y correcciones de manera que pueda proteger el ordenador y garantizar así...
-
Página 98: Actualización De Información De Windows Para La Seguridad De Los Datos
Actualización de información de Windows para la seguridad de los datos Para poder preparar un listado adecuado con actualizacioens, Windows Update necesita del ordenador. Estas informaciones se guardan en las siguientes carpetas: Número de la versión del sistema operativo ... -
Página 99: Restaurar El Estado En La Entrega
Restaurar el estado en la entrega Si su sistema no funciona pese a haber seguido las indicaciones descritas para la resolución de problemas, puede volver a establecerlo al nivel de fábrica. Limitación de la restauración Las modificaciones de la configuración realizadas con posterioridad (configuración de acceso telefónico a redes/escritorio/Internet) y las instalaciones de software no se restauran. -
Página 100: Recuperación De Los Datos De La Copia De Seguridad
Recuperación de los datos de la copia de seguridad 1. Retire todos los aparatos de soporte de datos que puedan estar conectados (tarjetas de memoria, lápiz USB, etc.). 2. Encienda el PC All-In-On. 3. Pulse al ver el mensaje „ Press F11 to run recovery “ o „ Press F12 to run recovery “... -
Página 101: Preguntas Frecuentes
Preguntas frecuentes ¿Cuándo debo activar Windows? Puede encontrar informaciones sobre este tema a partir de la página 76. El programa está preactivado de fábrica. El software está preinstalado de fábrica. Es necesaria una activación si ..más componentes (tarjeta gráfica, CPU, etc.) son creados.. -
Página 102: Servicio
Servicio Primeros auxilios en caso de problemas con el Hardware Las disfunciones pueden deberse a veces a hechos banales pero también a defectos de los componentes. Nos gustaría poner en sus manos a continuación una guía para resolver problemas. Si las medidas aquí indicadas no tienen éxito, le ayudaremos encantados. -
Página 103: Servicio
Fallos y Causas La pantalla está oscura: Este error puede tener diversas causas: 1. La luz indicadora de funcionamiento (Interruptor ON/OFF) no se ilumina y el ordenador está en estado de permutar. Solución: Accione el interruptor ON/OFF. 2. La indicación de standby parpadea. El ordenador está en modo standby. -
Página 104: Necesita Más Ayuda
Esto se debe a que, por ejemplo, se han producido posibles problemas de compatibilidad con otros componentes aún no probados (programas, dispositivos). En la siguiente dirección de Internet encontrará actualizaciones de controladores: http://www.medion.com Servicio... -
Página 105: Transporte
Transporte Siga las siguientes recomendaciones si quiere transportar su ordenador: Apague el ordenador. Para evitar daños, ponga las cabezas del disco duro en lugar seguro. Después de haberlo transportado, espere a que el aparato recupere la temperatura ambiente. Con altas temperaturas o con fluctuaciones de humedad puede ocurrir que la condensación lleve a la formación de humedad y que se produzca un cortocircuito. -
Página 106: Mantenimiento
Mantenimiento ¡Atención! La carcasa del ordenador no contiene ninguna pieza de mantenimiento ni de limpieza. Puede prolongar la vida de su ordenador siguiendo las siguientes recomendaciones: Desenchúfelo siempre antes de limpiarlo y separe el acumulador. Limpie el ordenador con un paño seco. ... -
Página 107: Cuidado De La Pantalla
Cuidado de la Pantalla Cierre el ordenador una vez que haya acabado de trabajar con él. Evite los arañazos a la pantalla, porque es muy fácil dañarla. Limpie la pantalla con un paño suave y seco. Tenga cuidado de que no caiga ninguna gota de agua en la pantalla. El agua puede causar alteraciones estables en los colores. -
Página 108: Re-/Adaptación Y Reparación
Re-/Adaptación y Reparación Deje la re-/adaptación en manos del personal especialmente cualificado. Si Ud. no dispone de los conocimientos necesarios, pídale ayuda al correspondiente Servicio-Técnico. Diríjase a nuestro Servicio Técnico si tiene algún problema técnico con su ordenador. ... -
Página 109: Recomendaciones Sobre Las Radiaciones Láser
Recomendaciones sobre las radiaciones láser En el ordenador se pueden utilizar tipos de láser entre las clases 1 y 3b. En caso de carcasa no abiertas, se utilizará la clase 1. Al abrir la carcasa del ordenador, recibirá radiaciones hasta la clase 3b. En caso de extensión o apertura, hay que tener en cuenta lo siguiente: ... -
Página 110: Reciclado Y Eliminación De Desechos
Reciclado y eliminación de desechos Aparato No tire bajo ningún concepto el aparato al final de su vida útil a la basura doméstica normal. Infórmese sobre las posibilidades de las que dispone para eliminarlo de forma respetuosa con el medio ambiente. Pilas ¡No tire las pilas usadas a la basura doméstica! Deben ser depositadas en un punto de recogida para pilas usadas. -
Página 111: Indicaciones De Seguridad De Baterias
Indicaciones de seguridad de baterias Las pilas pueden contener sustancias inflamables. El manejo inadecuado puede descargar las pilas, sobrecalentarlas, inflamarlas o incluso hacerlas explotar, lo que podría ocasionar daños al aparato o perjudicar su salud. Por favor, siga atentamente las siguientes indicaciones: ... - Página 112 Reciclado y eliminación de desechos...
-
Página 113: Apéndice
Capítulo 5 Apéndice Tema Página Recomendaciones sobre la conformidad ......105 Índice ................. 108... - Página 114 Reciclado y eliminación de desechos...
-
Página 115: Recomendaciones Sobre La Conformidad
En el pasado había muy variadas maneras para definir el error de pixel permitido. Sin embargo, éstos eran generalmente muy complicados y muy diferentes entre los distintos fabricantes. MEDION se ocupa de todos los productos con pantalla TFT con el desarrollo de la garantía de las necesidades... - Página 116 Estructura del Pixel: lineas azul verde rojo Tipos de fallos de Pixel: Tipo 1: pixel luminoso largo tiempo (punto blanco, claro) pero no dirigido. El pixel blanco es el resultado de la luz de tres sub-pixel. Tipo 2: pixel no luminoso (punto negro, oscuro) pero dirigido ...
- Página 117 Ejemplo: Una pantalla SXGA de ca. 43 cm (17”) está compuesta de 1280 puntos de imagen (pixels) horizontales y 1024 verticales, que suman un total de 1.31Mio. Pixel. En relación con un millón de Pixels, esto supone un factor de cerca de 1,31.
-
Página 118: Índice
Índice Copiar textos u otras A imágenes ......80 Activación de Windows ....76 Función de Autoinicio .... 81 Activación del producto en el PC 76 Contrato de Licencia ....21 Administración de energía ..33 Copiar archivos ......80 Alimentación de corriente Cuidado de la pantalla .... - Página 119 Funcionamiento del I acumulador ......10 Indicaciones de seguridad de Recomendaciones de Seguridad baterias ........ 101 Alimentación de Corriente ..7 Indicaciones para el teclado ..9 Câbles ........8 Instalación de nuevo software ... 71 Conexión ........7 Instalación de software ....75 Lugar de instalación ....
- Página 120 Lector óptico ......16 U Pantalla ........15 Unidad de disco ......44 Puerto de USB ....15, 16 Unidad óptica......44 Teclado ........15 Teclas Touchpad ....15 V Touchpad ......15 Vistas VGA ........15 Cámara web ......15 Volumen de envío .....
- Página 121 Notes on This Manual Keep these instructions with your computer at all times. The proper set up, use and care can help extend the life of your computer. In the event that you transfer ownership of this computer, please provide these instructions to the new owner. This manual is divided into sections to help you find the information you require.
- Página 122 This document contains legally protected information. All rights reserved. Copying in mechanical, electronic and any other form without the written approval of the manufacturer is prohibited. © ® Copyright 2010 MEDION ® ® All rights reserved. Microsoft , MS-DOS , and Windows are registered trademarks of Microsoft Corporation in the U.S.
- Página 123 Table of Contents: Safety and Maintenance ................. 1 Safety Instructions ................... 3 Data Security ....................4 Set-Up Location ................... 4 Ambient Temperature ................. 5 Working in Comfort ..................6 Connecting ....................7 Power supply ..................
- Página 124 Duplicate the Desktop ................. 38 Extend the Desktop ................38 Only display the Desktop on 1 ............. 38 Only display the Desktop on 2 ............. 38 Data Entry ..................... 39 The Keyboard .................... 39 ...
- Página 125 ® Windows 7 - Help and Support ............67 ® Windows 7 – Getting Started .............. 68 ® Windows 7 - User Account Control ............. 69 ® Windows 7 – Control Panel ..............70 Windows Media Center ................71 ...
-
Página 127: Safety And Maintenance
Chapter 1 Safety and Maintenance Subject Page Safety Instructions ............. 3 Data Security ..............4 Set-up Location ..............4 Ambient Temperature ............5 Working in Comfort ............6 Connecting ................ 7 Information about the regulatory compliance according to R&TTE ............9 Touch Pad ................ - Página 128 English...
-
Página 129: Safety Instructions
Safety Instructions Please follow the instructions in this section for the safe operation of your notebook: Do not allow small children to play unattended with electrical equipment. Children are incapable of judging potential risks properly. Keep the packing materials, such as plastic sheet away from children. The danger of suffocation could arise in the case of misuse. -
Página 130: Data Security
Switch off your Notebook immediately or do not switch it on at all and contact customer service … … if the power cord or the connectors attached to it are burnt or damaged. Replace the defective power cord with an original power cord. Under no circumstances may a defective power cord be repaired. -
Página 131: Ambient Temperature
Ambient Temperature The notebook is most reliably operated at an ambient temperature between +41° (5° C) and +95° F (35° C) and at a relative humidity between 20% and 70% (without condensation). When powered off, the notebook can be stored at temperatures between 32°... -
Página 132: Working In Comfort
Working in Comfort Sitting in one position for long periods can be uncomfortable. To minimize the potential for physical discomfort or injury, it’s important that you maintain proper posture. Back – While sitting at your work surface, make sure your back is supported by the chair’s backrest in an erect position or angled slightly backwards. -
Página 133: Connecting
Connecting Pay attention to the following information, in order to connect your notebook correctly: Power supply Do not open the power adapter housing. When the housing is open there is a danger of severe electric shock. It contains no user-serviceable parts. ... -
Página 134: Cabling
Cabling Arrange cables so no one can walk on or trip over them. Do not place objects on any of the cables. Do not allow any large forces to be exerted on the plug-in connections, from the side, for example. This will otherwise lead to damage to and in your device. -
Página 135: Information About The Regulatory Compliance According To R&Tte
The company declares herewith that these devices are in agreement with the fundamental requirements and the other relevant terms of the 1999/5/EG Guideline. Complete declarations of conformity are available under www.medion.com/conformity. Touchpad Light pressure with the tip of your finger is all that is required to operate the touch pad. -
Página 136: Battery Operation
Battery Operation To extend the life and power of your battery and guarantee secure operation, the instructions below should be followed: Never expose the battery to direct sunlight or heat for long periods. Do not dispose of the battery by fire. ... -
Página 137: Views & Handling
Chapter 2 Views & Handling Subject Page Included with your notebook ..........13 Views .................. 14 Open notebook ............. 14 Front view ..............15 Left side ................. 15 Right side ..............16 Power and status indicators ........... 17 Getting started ..............18 How to start .............. - Página 138 English...
-
Página 139: Included With Your Notebook
Included with Your Notebook Please check that the contents are complete and notify us within 14 days of purchase if any of the following components are missing: Notebook Battery Power adapter with connection cable (Model: FSP065-ASC) OEM version of operating system ... -
Página 140: Views
Views Open Notebook (Diagram the same) English... -
Página 141: Front View
- TFT Display ................( p. 34) - Power ON/OFF ..............( p. 27) - Keyboard ................( p. 39) - Device Indicators ..............( p. 17) - Touchpad Buttons ..............( p. 41) - Touchpad ................( p. 41) - Palm Rest - Webcam ................ -
Página 142: Right Side
Right Side (Diagram the same) - USB Port ................( p. 62) - Microphone* ................ ( p. 53) - Audio Out* / Digital Audio Out (S/P-DIF, optical) ........( p. 53) - Multimedia Card Reader ............( p. 60) - Optical Drive ................ ( p. 45) - Disc Eject Button .............. -
Página 143: Device Indicators
Device Indicators LED's indicate the power and operating system states of the Notebook. The meaning of each LED is: Battery LED This LED lights when the battery is charging. Capital Lock This LED lights when CAPS-Lock has been activated. This sets the keyboard to capital letters. -
Página 144: Getting Started
Getting Started Before you get started using your notebook, first take a few moments to read the important section on Safety. This notebook comes with software fully pre-installed. You do not have to install any of the discs supplied. How to start: Step 1 ... - Página 145 Connect the supplied power adapter () to the notebook at the notebook power socket (11). Connect the power adapter () via a power cable to a free AC power outlet (). Set the switch on the power adapter to the I setting, in order to supply the notebook with electricity and to charge the battery ().
- Página 146 Open the display to the required position with your thumb and index fingers (). To avoid damage to the TFT Display, never open it more than 120º. Do not forcibly open it. Note Please ensure that the battery is inserted and the power adapter connected when operating the Notebook for the first time.
- Página 147 The operating system is loaded from the hard disk. During the initial set-up, the loading process takes slightly longer than normal to register the operating system and the individual components completely. Your operating system is finished loading when a welcome screen is shown on your display. Note The initial installation may take up to 30 minutes to complete.
-
Página 148: Short Description Of The Windows Desktop
Note Windows might update and configure data (e.g. by means of new updates) in the first days after the initial installation. This could lead to delays during shutting down and starting up the notebook computer. Do not switch off the laptop/notebook prematurely for this reason. This could have a negative effect on the installation. - Página 149 Desktop Icons Desktop icons link to their respective programs. To start a program, double-click its desktop icon. The desktop encompasses nearly the entire screen and acts as the shelf space for such entries or for other links, to which you would like rapid access. ...
- Página 150 English...
-
Página 151: Main Components
Chapter 3 Main Components Subject Page Power Supply ..............27 Display ................34 Data Entry ................39 Hard Drive ................43 Optical Drive ............... 45 Sound Card ................. 49 Network ................56 The Multi Card Reader ............60 Webcam ................61 Universal Serial Bus (USB) Port .......... - Página 152 English...
-
Página 153: Power Supply
Power Supply On/Off Button Power on or off your notebook by pressing the on/off button briefly. The operational indicator will inform you about the operational status of the notebook. The notebook will always be switched off, if the main switch is pressed for more than 4 seconds. -
Página 154: Power Adapter
Power Adapter Your notebook is supplied with a universal AC power adapter, which automatically adjusts to the available power source. The following levels are supported: AC 100-240V~/ 50-60 Hz. Please follow the power supply safety instructions found on page 5. The power adapter is connected via a power cord to an AC outlet. -
Página 155: Battery Operation
Battery Operation Note Please charge and discharge the new battery completely two to three times in succession, so that it will achieve its full performance! Batteries store electrical energy in their cells and then deliver it when needed. The useful life and performance of your battery depend on careful handling. The battery should be completely discharged before a charging process and completely charged again, in order to optimize its useful life and its performance. -
Página 156: Removing The Battery
Removing the Battery Push the Safety Lock () to the ‘Unlock’ position, push and hold the eject button ( in order to remove the battery pack, then slide the battery out of the compartment (). Warning! Do not remove the battery while the notebook is running on battery power, this will very likely cause data loss. -
Página 157: Charging The Battery
Charging the Battery The battery is charged via the power adapter. If the power adapter is connected, it charges the battery automatically, whether the notebook is turned on or not. When the notebook is switched off, full charging takes a few hours. If the notebook is switched on, the charging process takes a significantly longer time. -
Página 158: Checking The Battery Level
Checking the Battery Level In order to check the current level of the battery, move the cursor over the power symbol in the taskbar. The symbol of a battery is displayed during battery operation. You will receive additional information about settings if you double click on this symbol. -
Página 159: Power Management
Power Management Your notebook offers automatic and modifiable power saving functions that you can use to maximize battery life and reduce overall operating costs. The power saving modes are known as sleep mode and hibernate mode. Sleep Mode When in sleep mode, the contents of the RAM of your notebook are preserved while practically all other components of your notebook are shut down, reducing your power consumption to a minimum. -
Página 160: Display
Display Opening and Closing the Display The display is locked by means of a special construction of the display hinge so that an additional lock is not necessary. 1. To open, lift the display with your thumb and index finger and position it as desired. -
Página 161: Appearance And Personalization
Appearance and Personalization This program offers you the possibility of adjusting the presentation on your display. This includes the background image, the screensaver, Active Desktop (web) and additional settings of your display and your graphics card, for example. The program can be started in the following way: ... -
Página 162: Connecting An External Monitor
Connecting an External Monitor The notebook has an has a VGA port (13) for connecting an external monitor. 1. Shut down your notebook. 2. Connect the video signal cable of the external monitor to the VGA port of the notebook (13). Alternatively, you will be able to use the digital HDMI (High Definition Multimedia Interface) connection (15) for the transmission of image and sound signals, provided that your output device (a monitor or LCD TV) has a... - Página 163 The external screen will be determined after the operating system has been loaded. Several possibilities will be available to you. You will call them up as follows: 1. A right click on the display. 2. Select the Screen Resolution option in the selection window. 3.
-
Página 164: Duplicate The Desktop
Duplicate the Desktop This Mode duplicates the display of the notebook on an external monitor. Information The same screen resolution must have been set on both devices in the case of this mode. Extend the Desktop An empty Desktop will be shown on the second (external) monitor in this mode. Windows from the first screen can be pushed to the second screen and vice versa. -
Página 165: Data Entry
Data Entry The Keyboard By dual assignment of certain keys you have the same range of functions available to you as with a normal Windows® keyboard. Some functions are input using the Fn key, which is normal on notebook computers. Notebook-Specific Key Combinations Combination Description... - Página 166 Combination Description WLAN Fn + F7 Enables or disables the wireless LAN function. Webcam Fn + F9 Enables or disables the webcam. Fn + Increases the volume. Fn + Decreases the volume. Fn + Enhances screen brightness. Fn + ...
-
Página 167: Touch Pad
Touch Pad The touchpad is positioned in front of the keyboard. The mouse pointer (cursor) follows the direction pre-determined on the touchpad by the movement of your finger in the normal mode. Caution! Do not use a ball-point pen or other object on the touch pad, as this could damage or cause a malfunction of your touch pad. -
Página 168: Two-Finger Gesture
Two-Finger Gesture Your touchpad supports a two-finger gesture which can be applied to customised functions. The gestures and their functions are described as follows: Illustration Gesture Function Zoom out object / Expand / Narrow Zoom in object Rotation Counter clock-wise rotate object Flick from the left to the right/ Flick from the right to Forward / Backward... -
Página 169: The Hard Drive
The Hard Drive The hard drive is the main storage medium combining large storage capacity and rapid data access. The hard drive contains the operating system of the computer, other application programs and backup files. These programs and files are pre-installed on your notebook, so you may note that some of the space on your hard drive is already taken. -
Página 170: Important Directories
Important Directories In the following we have listed the most important directories and described their content. Attention! Do not delete or modify these directories or their contents since data could be lost or the functionality of the system could be at risk. The master directory of drive C: includes important files required to start Windows®. -
Página 171: The Optical Drive
The Optical Drive Loading a Disc Unlike optical drives of desktop PC’s optical drives of notebooks retain discs with the help of a locking mechanism. When inserting the disc, you should take care to push the disc right onto the locking mechanism so that it can lock in position. - Página 172 1. Press the eject button (21) at the optical drive to open the tray. 2. Remove the disc from its case without touching the unprinted side if possible. 3. Place the disc on the tray so that it lays flat with the label facing upward and gently push the tray in to close it.
-
Página 173: Emergency Ejection Of A Blocked Disc
Emergency Ejection of a Blocked Disc If the tray fails to open automatically, the tray can be opened manually provided there is an opening for emergency ejection (22). Restart your notebook and if the tray is still locked proceed as follows: 1. -
Página 174: Subjects Concerning The Cd/Dvd-Rewriter
Subjects Concerning the CD/DVD-Rewriter This Section only relates to devices that have been supplied with a CD-RW, a combination drive or a DVD-RW drive. First of all, you receive information on the so-called blank discs. Recordable/Rewriteable Discs Normal Discs are pressed from a digital, glass master and then sealed. In the case of blank disc, the information is burnt onto the disc with the laser of the Rewriter. -
Página 175: Subwoofer Module / Install An Additional Hard Drive
Subwoofer module / install an additional hard drive You have the possibility of replacing the optical drive by an additional hard drive or a sub-woofer module. Note You can order an additional hard drive and the subwoofer module through our online shop: www.medionshop.de. Safety Instructions ... -
Página 176: Replacement With An Additional Hard Drive Or A Subwoofer Module
Replacement with an additional hard drive or a subwoofer module Proceed as follows: 1. Switch the notebook off by shutting it down correctly and turn it over. 2. Remove the battery as described on page 30. 3. Press and hold the lock of the replaceable drive (). - Página 177 8. The second hard drive will be recognized and be integrated by the operating system, provided that it is already formatted or contains data. Configure the hard drive under Disk Management if you are using a brand-new one. Note The notebook does not support a hardware RAID function (interconnected association of individual hard drives).
-
Página 178: The Sound Card
The Sound Card Your notebook has an integrated stereo sound card (on-board) with 16-bit and 3D spatial sound effects (3D). The sound card is compatible with the industry standard Sound Blaster and Microsoft Sound System Version 2.0. This guarantees optimal support for all popular programs and games. -
Página 179: External Audio Ports
External Audio Ports Your notebook has a loudspeaker, so you can always playback sounds without additional equipment. The use of the external connections gives you a good opportunity to connect your notebook to external devices. Caution! The use of earphones with a high volume can lead to lasting damage to your hearing. - Página 180 For recording via an external microphone. Microphone In (17) For sound reproduction with an external surround Audio Out / decoder via an optical cable (available separately at Digital a specialist shop). Audio Out For sound reproduction via external stereo (S/P-DIF optical) equipment such as loudspeakers (active) or (18) headphones.
-
Página 181: Setting The Recording Level
Setting the Recording Level To set the desired recording level, go to System control Sound Recording and select the source. The button Digital Mic is intended for the integrated microphone. If you want to use an external microphone or another recording source (Line In), select the relevant option. -
Página 182: The Network
The Network What is a network? A network means connecting your notebook to one or several other computers. Users can transfer data between computers and share resources such as printers, modems and hard disk drives. Here are some practical examples: ... -
Página 183: Wireless Lan
Wireless LAN Wireless LAN is an optional feature. This function allows you to create a wireless network link with an access point or directly with another wireless-enabled PC. Using the key combination Fn+F7 you can enable or disable the wireless LAN function. -
Página 184: Conditions
Conditions An access point is a wireless transmitter that communicates with your notebook and controls access to the network connection (e.g., a home network or a broadband connection such as DSL). Wireless access points are often found in offices, airports, universities or Internet cafés. They offer access to networks or to the Internet. -
Página 185: Troubleshooting Within The Network
Troubleshooting within the Network Why does an error message appear when I click on the network environment? The computer name must be unique on the network and may not be the same as the task group. It appears that the network boards are unable to communicate. What might be the problem? Maybe one of the used network boards works with a different speed (e. -
Página 186: The Multimedia Card Reader
The Multimedia Card Reader Memory cards are media that are being used for a variety of purposes, especially in digital photography. They are increasingly replacing the floppy disk. The form and capacity of a memory card can vary according to the manufacturer. Your notebook supports the following formats: ... -
Página 187: Webcam
Webcam Various services like calling online can be used with the built in webcam. Actual example using Windows Messenger 1. Start Windows Messenger and create a user account if you do not already have one. This service is free of charge. You only pay the cost of your Internet connection. -
Página 188: Universal Serial Bus (Usb) Port
Universal Serial Bus (USB) Port USB ports provide an easy way to connect many peripheral devices to your notebook (12). You can use any USB device with any USB port. Your notebook has 3 USB 2.0 connection sockets (USB 1.1 compatible). Some USB devices require that you reinstall software drivers when you connect the device to a different USB port than the one originally used. -
Página 189: Esata / Usb Port
eSATA / USB Port eSATA stands for "external Serial ATA" and is used for connecting external hard disks. Unlike common USB standards, the transmission speed of an eSATA connection is higher than that of external USB hard disks. This connection is a "combo slot", to which both USB and S-ATA devices can be connected. -
Página 190: Securing The Notebook
Securing the Notebook Unauthorized access to software and hardware solutions will be made available to you with your new Notebook. Startup Password You can protect your notebook against unauthorized use with a switching on password. Then, an invitation to enter the password will appear on the screen when the notebook is switched on. -
Página 191: Software
Software This section concerns itself with software. We make a distinction between the operating system, the software (application program), Windows activation, BIOS and the security package BullGuard, which is delivered with the device. Getting to Know Windows® 7 With Windows® 7, is launching the new operating system and successor to Vista®. Windows®... - Página 192 Improved Desktop Windows® 7 simplifies working with the windows on the Desktop. This provides you with more intuitive possibilities for opening and closing, as well as for changing the size and for rearranging. Windows® 7 makes the performance of everyday tasks even simpler. For example, the Snaps function makes it easier than ever to compare two open windows.
-
Página 193: Help And Support
Homegroup With homegroups, a new function of Windows® 7, the linking of home computers is really simple. A home network group is created automatically, for example, when you link the first notebook under Windows® 7 with the home network. The addition of additional PCs with Windows®... -
Página 194: Getting Started
® Windows 7 – Getting Started Learn everything you need to know about the features of the notebook. It is the aim of this feature to enable both beginners and experienced users to make additional setting for the optimal use of Windows®7 after first bringing the Notebook into operation. -
Página 195: User Account Control
Getting Started has been subdivided into many small groups of subjects, so that the user will have the possibility of adjusting the content optimally to his or her knowledge. There are some of the links in the following: Go online to find out what’s new in Windows®7 ... -
Página 196: Control Panel
® Windows 7 – Control Panel You can change Windows settings using the control panel. The settings control almost everything relating to Windows displays and functionalities, and they enable you to organise Windows according to your requirements. When you first open the Control Panel, a few of the most frequently used elements of the Control Panel are displayed by category. -
Página 197: Windows Media Center
Windows Media Center The Windows Media Center is the platform for your individual home entertainment in Windows®7. You will be able to record television, TV broadcasts, DVDs and music, look at photos and much more by a remote (not included in the scope of the delivery) or by a click of the mouse, with the Windows Media Center. - Página 198 Main menu Sub-menu Tasks Settings Adapt the Windows Media Center to your requirements and needs here. For example, make the settings for the protection of children here. Stand by You will not only close the Windows Media Center but you will be able to put the whole operating system in stand-by through this sub-menu.
-
Página 199: Software
Main menu Sub-menu Music Music library All the music titles stored in your notebook will be located in the music library. You will be able to start the selected playback of an album, an artist or a selected title here. Play back everything You will start the playback of all the files stored in your music library by means of this sub-menu. -
Página 200: Installation Of Software
Installation of Software Note If your operating system is configured so that the installation procedure accepts only signed drivers (default) and software an information screen will appear. The software included in delivery is already pre-installed in the factory. Attention! You may find that during the installation procedure important files may be changed or even cancelled. -
Página 201: Software Uninstallation
An example for the manual installation without the autorun function: 1. Click on Start 2. Click on All Programs. 3. Open the Accessories program point. 4. Select the item Run. 5. Now enter the letter of the CD-ROM drive followed by a colon and the program name setup: 6. -
Página 202: Windows Activation
Windows Activation Microsoft is committed to the protection of intellectual property rights and the reduction of software piracy. Therefore Windows® 7 contains software-based product activation technology. Your copy of Windows® 7 has already been activated for your notebook. Product activation is needed if some components of your notebook have been replaced or you use a non-authorized BIOS. -
Página 203: The Bios Set-Up-Program
The BIOS Set-up-Program In BIOS setup (Basic Configuration) there are a number of configurable parameter settings available for your notebook. For example, you can change the operating mode of the interfaces, security features or power management. Warning! The notebook is factory pre-set to guarantee optimum operation. Only modify the parameters if necessary and if you are familiar with the configuration options. -
Página 204: Bullguard Internet Security
BullGuard Internet Security The BullGuard Internet Security Package is a combination of the currently most up- to-date PC security technologies on the market and thus offers you 24-hour optimum protection. BullGuard is already installed, so that additional installation will not be necessary. If you nevertheless have to carry out an installation (e.g. - Página 205 The BullGuard Internet Security Package will be updated with the most up-to-date virus information for 90 days after the free registration. The registration window will only appear after your notebook has been restarted. You will need to register by entering your email address. Note Keep your password in a secure place.
- Página 206 English...
-
Página 207: First Aid
Chapter 4 First Aid Subject Page Data and System Security ............ 83 System Restore ..............84 FAQ ..................89 Customer Service ............... 90 Upgrades and Repairs ............95 Recycling and Disposal ............96... - Página 208 English...
-
Página 209: Data And System Security
Data and System Security The programs described below are part of your Windows operating system. You can find additional information on these programs in the Windows Help file. Please also read the notes on page 4. Data Security Back up data regularly on external media such as a CD-R or CD-RW. Windows offers Backup Status and Configuration. -
Página 210: System Restore
System Restore Windows® 7 provides a useful function (System Restore) enabling the storage of the so-called Recovery points. The system remembers the current configuration as a snapshot and returns to this, if necessary. The advantage is that an unsuccessful installation can be cancelled. Recovery points are created automatically by the system, but they can also be set manually. -
Página 211: Windows® Update
Windows® Update Windows Update is the online updating of Windows. Use Windows Update to download elements such as security updates, important updates, the newest help files, drivers and Internet products from the Internet. The website is regularly augmented by new content, so that you can download the newest updates and error corrections at any time, to protect the notebook and guarantee its functioning. -
Página 212: Windows Update Information For Data Security
Windows Update Information for Data Security Windows Update needs certain information about the respective notebook, so that a suitable list with updates can be provided for you. This information will include the following: Version number of the operating system ... -
Página 213: System Restore
System Restore If your system is not functioning properly, you should use the Application Support Disc to restore your system. Limits of the Recovery Changes made to the original configuration (RAS, Desktop or Internet settings) and installed Software will be ignored by this Recovery and will not be reloaded. -
Página 214: Carrying Out A Restore
Carrying out a Restore 1. Remove any mass storage devices you may be using (memory cards, USB sticks, etc.). 2. Switch on the notebook. 3. Press the corresponding key when you see the message "Press F11 to run recovery" or "Press F12 to run recovery". After a few seconds, the message "Windows is loading files"... -
Página 215: Faq - Frequently Asked Questions
FAQ – Frequently Asked Questions When do I have to activate Windows? Your software has been preactivated in the factory. An activation will only be required, if ..several components are replaced by others..you install a new motherboard.. -
Página 216: Customer Service
Customer Service Localize the Cause Errors can have simple causes, but sometimes they are caused by faulty equipment. We would like to give you some tips to help solve common problems. Should these instructions not lead to success, please feel free to contact us. Check Cables and Connections Visibly check all cables and connections. -
Página 217: Errors And Possible Causes
Errors and Possible Causes The screen is black: This error can have different causes: 1. The operational display (On /Off switch) does not shine and the notebook is busy with 'file swapping'. Solution: Press the On /Off switch. 2. The sleep LED is flashing. The notebook is in the sleep mode. Solution: Press the On /Off switch. -
Página 218: Additional Support
Additional Support If the suggestions in the above section have not solved your problem, please contact customer care and we will attempt to help you solve the problem. Before you call, however, please have the following information available: How is your computer configured? ... -
Página 219: Transporting The Notebook
Transporting the Notebook Please use the following guidelines when transporting the notebook: Switch off the notebook. This will prevent damage to the hard disk. When the notebook is turned off, the hard disk heads are moved into a safe area. ... -
Página 220: Maintenance
Maintenance Warning! There are no user-serviceable or user-cleanable parts inside the notebook housing. Never open the notebook housing. Following these measures can extend the lifetime of your notebook: Before cleaning, always remove the power adapter plug and all connecting cables. -
Página 221: Upgrades And Repairs
Upgrades and Repairs Only a qualified Service Engineer should perform upgrades and repairs to your notebook. If you do not have the necessary qualifications, go to an appropriate Service Engineer. Please contact the Service Centre if you are experiencing technical problems with your notebook. -
Página 222: Recycling And Disposal
Recycling and Disposal Device At the end of its life, the appliance must not be disposed of in household rubbish. Enquire about the options for environmentally-friendly disposal Batteries Do not dispose of used batteries in the household rubbish! They must be deposited at a collection point for used batteries. -
Página 223: Batteries And Proper Treatment
Batteries and Proper Treatment Batteries may contain combustible materials. By misuse, this may cause battery leakage, heat, explosion or ignition, bringing about injury or damage to the device. Please observe strictly the following matters: Warning! There is a lithium battery on the motherboard. Lithium batteries are hazardous waste and need to be disposed of properly. - Página 224 English...
-
Página 225: Appendix
Chapter 5 Appendix Subject Page Information about conformity ........... 101 Index ................. 104... - Página 226 English...
-
Página 227: Information About Conformity
Information about conformity The device fulfils electromagnetic compatibility and electricity safety requirements. Your device complies with the basic requirements and the relevant guidelines of the 2004/108/EU EMV Guidelines [electromagnetic compatibility] and the 2006/95/EU Guideline for low voltage devices. This device fulfils the basis requirements and the relevant regulation of the Ecodesign Guideline 2009/125/EG (Commission Regulation 1275/2008). - Página 228 Pixel structure Rows Blue Green Types of Pixel Failures: Type 1: A constantly lit pixel (a bright, white spot), even though it is not addressed. A white pixel is caused when all three sub-pixel are lit. Type 2: A pixel that does not light up (dark, black spot), although it is addressed ...
-
Página 229: Fcc Compliance Statement
FCC Compliance Statement This equipment has been tested and found to comply with the limits for a Class B digital device, pursuant to Part 15 of FCC Rules. These limits are designed to provide reasonable protection against harmful interference in a residential installation. -
Página 230: Index
Index Data Entry ........39 A Data security ......... 83 Additional hard drive ..... 49 Data Security ........4 All programs ......... 22 Directories ........44 Ambient Temperature ..... 5 Disc-Drive ........45 Appearance and Personalization ... 35 Discharging the battery ....31 Autorun ........ - Página 231 Keyboard ........39 Removing the Battery ....30 Repairs .......... 95 L Running the Bios Setup ....77 Laser radiation ....... 95 S License agreement ......21 Safety and maintenance ....1 M Safety instructions ......3 Care of the display ....94 Main Components Data Security .......
- Página 232 Webcam ........15 U Universal Serial Bus ....... 62 W Upgrades and Repairs ....95 Webcam........61 Using a safety lock ......64 Windows activation ....... 76 Windows Media Center ....71 V ® Windows Views User account control ....69 Audio Out .........
- Página 233 Hinweise zu dieser Bedienungsanleitung Halten Sie diese Bedienungsanleitung stets griffbereit in der Nähe Ihres Notebooks. Bewah- ren Sie die Bedienungsanleitung und die Verpackung gut auf, um sie bei einer Veräuße- rung des Notebooks dem neuen Besitzer weiter geben zu können. Wir haben dieses Dokument so gegliedert, dass Sie jederzeit über das Inhaltsverzeichnis die benötigten Informationen nachlesen können.
- Página 234 Vervielfältigung in mechanischer, elektronischer und jeder anderen Form ohne die schriftli- che Genehmigung des Herstellers ist verboten. Copyright © 2010 Alle Rechte vorbehalten. Dieses Handbuch ist urheberrechtlich geschützt. ® Das Copyright liegt bei der Firma MEDION Warenzeichen: ® ® ® MS-DOS und Windows sind eingetragene Warenzeichen der Fa.
- Página 235 Inhalt Betriebssicherheit ...................... 1 Betriebssicherheit ....................3 Datensicherung ....................4 Aufstellungsort ....................4 Umgebungsbedingungen ................5 Ergonomie ...................... 5 Komfortables Arbeiten ................. 6 Anschließen ....................7 Stromversorgung ..................7 Verkabelung ....................8 ...
- Página 236 Bildschirmauflösung ..................34 Darstellung und Anpassung ................35 Anschluss eines externen Monitors ..............36 Desktop duplizieren ................... 38 Desktop erweitern ..................38 Desktop nur auf 1 anzeigen ............... 38 Desktop nur auf 2 anzeigen ............... 38 ...
- Página 237 ® Windows 7 - Hilfe und Support ..............68 ® Windows 7 - Erste Schritte ................. 69 ® Windows 7 - Benutzerkontensteuerung ............ 70 ® Windows 7 - Systemsteuerung ..............71 Windows Media Center ................. 72 ...
- Página 239 Kapitel 1 Betriebssicherheit Thema Seite Betriebssicherheit .............. 3 Datensicherung ..............4 Aufstellungsort ..............4 Umgebungsbedingungen ..........5 Ergonomie ................5 Anschließen ..............7 Konformitätsinformation nach R&TTE ........ 9 Hinweise zum Touchpad ..........9 Akkubetrieb ..............10...
- Página 240 Betriebssicherheit...
-
Página 241: Betriebssicherheit
Betriebssicherheit Bitte lesen Sie dieses Kapitel aufmerksam durch und befolgen Sie alle aufgeführten Hinwei- se. So gewährleisten Sie einen zuverlässigen Betrieb und eine lange Lebenserwartung Ihres Notebooks. Lassen Sie Kinder nicht unbeaufsichtigt an elektrischen Geräten spielen. Kinder können mögliche Gefahren nicht immer richtig erkennen. ... -
Página 242: Betriebssicherheit
Schalten Sie das Notebook sofort aus bzw. erst gar nicht ein, ziehen Sie den Netzstecker und wenden Sie sich an den Kundendienst wenn... ... der Netzadapter oder die daran angebrachten Netzkabel- oder Stecker ange- schmort oder beschädigt sind. Lassen Sie das defekte Netzkabel/Netzadapter gegen Originalteile austauschen. -
Página 243: Umgebungsbedingungen
Umgebungsbedingungen Das Notebook kann bei einer Umgebungstemperatur von 5° C bis 30° C und bei einer relativen Luftfeuchtigkeit von 20% - 80% (nicht kondensierend) betrieben werden. Im ausgeschalteten Zustand kann das Notebook bei 0° C bis 60° C gelagert wer- den. -
Página 244: Komfortables Arbeiten
Komfortables Arbeiten Langes Sitzen ohne Veränderung der Haltung kann unbequem sein. Um die Risiken physi- scher Beschwerden oder Schäden zu minimieren, ist es wichtig, die richtige Haltung ein- zunehmen. Rücken – Beim Sitzen am Arbeitsplatz muss der Rücken durch die aufrechte oder leicht nach hinten geneigte Rückenlehne des Arbeitsstuhls abgestützt werden. -
Página 245: Anschließen
Anschließen Beachten Sie nachfolgende Hinweise, um Ihr Notebook ordnungsgemäß anzuschließen: Stromversorgung Öffnen Sie nicht das Gehäuse des Netzadapters. Bei geöffnetem Gehäuse besteht Lebensgefahr durch elektrischen Schlag. Es enthält keine zu wartenden Teile. Die Steckdose muss sich in der Nähe des Notebooks befinden und leicht zugänglich sein. -
Página 246: Verkabelung
Verkabelung Verlegen Sie die Kabel so, dass niemand darauf treten oder darüber stolpern kann. Stellen Sie keine Gegenstände auf die Kabel, da diese sonst beschädigt werden könnten. Lassen Sie keine großen Kräfte, z.B. von der Seite, auf Steckverbindungen einwir- ken. -
Página 247: Konformitätsinformation Nach R&Tte
Ländern informieren Sie sich vor Ort über die jeweils gültigen gesetzlichen Vor- schriften. Hiermit erklärt die MEDION AG, dass sich dieses Gerät in Übereinstimmung mit den grund- legenden Anforderungen und den übrigen einschlägigen Bestimmungen der Richtlinie 1999/5/EG befindet. Vollständige Konformitätserklärungen sind erhältlich unter www.medion.com/conformity. -
Página 248: Akkubetrieb
Akkubetrieb Um die Lebensdauer und Leistungsfähigkeit Ihres Akkus zu verlängern sowie einen siche- ren Betrieb zu gewährleisten, sollten Sie nachfolgende Hinweise beachten: Setzen Sie den Akku nie längerer, direkter Sonneneinstrahlung oder Hitze aus. Werfen Sie den Akku nicht ins Feuer. ... - Página 249 Kapitel 2 Ansichten & Erste Inbetriebnahme Thema Seite Lieferumfang ..............13 Ansichten ................. 14 Geöffnetes Notebook ..........14 Vorderseite ..............15 Linke Seite ..............15 Rechte Seite ............... 16 Betriebs- und Statusanzeigen ........17 Erste Inbetriebnahme ............18 So starten Sie .............. 18 Kurzbeschreibung der Windows®-Oberfläche ....
- Página 250 Lieferumfang...
-
Página 251: Lieferumfang
Lieferumfang Bitte überprüfen Sie die Vollständigkeit der Lieferung und benachrichtigen Sie uns bitte innerhalb von 14 Tagen nach dem Kauf, falls die Lieferung nicht komplett ist. Mit dem von Ihnen erworbenen Produkt haben Sie erhalten: Notebook Lithium-Ionen Akku ... -
Página 252: Ansichten
Ansichten Geöffnetes Notebook (Abbildung ähnlich) Ansichten... -
Página 253: Vorderseite
- Display .................. ( S. 34) - Ein- / Ausschalter ..............( S. 27) - Tastatur ................. ( S. 39) - Betriebs- und Statusanzeigen ..........( S. 17) - Touchpad Tasten ..............( S. 41) - Touchpad ................( S. 41) - Handablage - Webcam ................ -
Página 254: Rechte Seite
Rechte Seite (Abbildung ähnlich) - USB Anschluss ............... ( S. 63) - Mikrofonanschluss* ............( S. 53-55) - Audioausgang* / Digital Audioausgang (S/P-DIF, optisch) ......( S. 53-55) - Multi-Kartenleser ..............( S. 60) - Optisches Laufwerk ............... ( S. 45) - Auswurftaste optisches Laufwerk ........... -
Página 255: Betriebs- Und Statusanzeigen
Betriebs- und Statusanzeigen Das System zeigt über LEDs Stromversorgungs- und Betriebszustände an. Die Betriebsan- zeigen leuchten jeweils bei der entsprechenden Aktivität des Notebooks auf: Betriebsanzeige Diese Anzeige leuchtet blau, wenn das System eingeschaltet ist. ... -
Página 256: Erste Inbetriebnahme
Erste Inbetriebnahme Um Ihr Notebook sicher zu betreiben und eine hohe Lebenserwartung zu gewährleisten sollten Sie das Kapitel „Betriebssicherheit“ am Anfang dieses Handbuches gelesen haben. Das Notebook ist bereits vollständig vorinstalliert, so dass Sie keine Treiber mehr laden müssen und Sie sofort starten können. So starten Sie: Schritt 1 ... - Página 257 Schließen Sie den mitgelieferten Netzadapter an das Notebook (11) an (). Verbinden Sie dann das Netzkabel mit dem Adapter () und schließen es anschließend an einer Steckdose an (). Stellen Sie den Schalter am Netzadapter auf die Stellung I, um das Notebook mit Strom zu versorgen und den Akku aufzuladen ().
- Página 258 Klappen Sie das Display mit Daumen und Zeigefinger bis zur gewünschten Position auf (). Das Display sollte nicht um mehr als 120° aufgeklappt werden. Versuchen Sie niemals, es mit Gewalt zu öffnen. Hinweis Bitte stellen Sie bei der ersten Inbetriebnahme Ihres Notebooks sicher, dass der Akku eingesetzt und das Netzteil angeschlossen ist.
- Página 259 Das Betriebssystem wird von der Festplatte geladen. Der Ladevorgang dauert bei der Erst- einrichtung etwas länger. Erst nachdem alle erforderlichen Daten eingegeben worden sind, ist das Betriebssystem eingerichtet. Das Betriebssystem ist vollständig geladen, wenn ein Begrüßungsbildschirm angezeigt wird. Hinweis Die Erstinstallation kann bis zu 30 Minuten in Anspruch nehmen. Nehmen Sie während der Erstinstallation das Notebook nicht vom Strom und schalten Sie es nicht aus.
-
Página 260: Kurzbeschreibung Der Windows -Oberfläche
Hinweis Windows kann in den ersten Tagen nach der Erstinstallation Daten aktuali- sieren und konfigurieren (z. B. durch neue Updates), was zu Verzögerungen des Herunterfahrens und Startens des Notebooks führen kann. Schalten Sie daher das Notebook nicht vorzeitig aus. Dies könnte sich negativ auf die In- stallation auswirken. - Página 261 „Icons“ auf dem „Desktop“ Icons sind Programmverknüpfungen, die zum Starten der betreffenden Programme be- nutzt werden. Mit einem Doppelklick (zwei Mal die linke Maustaste kurz hintereinander drücken) auf dem Symbol wird die Anwendung gestartet. Der Desktop umfasst annähernd den gesamten Bildschirm und ist die Ablagefläche für solche Einträge oder für andere Verknüpfungen, auf die Sie schnell zugreifen möchten.
- Página 262 Erste Inbetriebnahme...
-
Página 263: Hauptkomponenten
Kapitel 3 Hauptkomponenten Thema Seite Stromversorgung ............. 27 Display ................34 Dateneingabe ..............39 Das Touchpad ..............41 Die Festplatte ..............43 Das optische Laufwerk ............ 45 Die Soundkarte ............... 52 Netzwerkbetrieb ............... 56 Der Multi Kartenleser ............60 Webcam ................61 Der Universal Serial Bus-Anschluss ........ - Página 264 Stromversorgung...
-
Página 265: Stromversorgung
Stromversorgung Ein-/Ausschalter Halten Sie den Ein-/Ausschalter kurz gedrückt, um das Notebook ein- bzw. auszuschalten. Die Betriebsanzeige informiert Sie über den Betriebszustand. Unabhängig vom Betriebssys- tem wird das Notebook ausgeschaltet, wenn der Schalter länger als 4 Sekunden un- unterbrochen betätigt wird. Achtung! Schalten Sie Ihr Notebook nicht aus, während auf die Festplatte oder das optische Laufwerk zugegriffen wird. -
Página 266: Netzbetrieb
Netzbetrieb Ihr Notebook wird mit einem Universal-Netzadapter für Wechselstrom ausgeliefert, wel- cher sich automatisch auf die angebotene Stromquelle einstellt. Unterstützt werden die folgenden Werte: AC 100-240V~/ 50-60 Hz. Beachten Sie die Sicherheitshinweise zur Stromversorgung auf den Seiten 7ff. Der Adapter wird über ein Netzkabel an eine Wechselstromsteckdose angeschlossen. Das Gleichstromkabel des Netzadapters wird an der linken Seite des Notebooks angeschlossen (11). -
Página 267: Akkubetrieb
Akkubetrieb Hinweis Bitte laden und entladen Sie den neuen Akku zwei- bis dreimal hintereinan- der vollständig, damit dieser seine volle Leistungsfähigkeit erreicht! Akkus speichern elektrische Energie in ihren Zellen und geben sie dann bei Bedarf wieder Die Lebensdauer und Leistungsfähigkeit Ihres Akkus ist abhängig von einer sorgfältigen Handhabung. -
Página 268: Entnehmen Des Akkus
Entnehmen des Akkus Um den Akkupack zu entfernen, schieben Sie den Akkuriegel () auf die Position „unlock“, schieben und halten Sie die Auswurftaste () und entnehmen Sie den Akkupack aus dem Fach (). Achtung! Entfernen Sie den Akku nicht, während das Gerät eingeschaltet ist, da an- dernfalls Daten verloren gehen können. -
Página 269: Aufladen Des Akkus
Aufladen des Akkus Der Akku wird über den Netzadapter aufgeladen. Wenn der Netzadapter angeschlossen und eingeschaltet ist, lädt sich der Akku automatisch auf, unabhängig davon, ob das No- tebook eingeschaltet ist oder nicht. Eine vollständige Aufladung benötigt bei abgeschalte- tem Notebook einige Stunden. Wenn das Notebook eingeschaltet ist, dauert der Ladevor- gang deutlich länger. - Página 270 Überprüfen der Akkuladung Zur Überprüfung des aktuellen Ladezustands des Akkus bewegen Sie den Cursor über das Power-Symbol in der Taskleiste. Im Batteriebetrieb wird das Symbol einer Batterie angezeigt. Weitere Informationen zu Einstellungen erhalten Sie, wenn Sie einen Doppelklick auf das Symbol machen.
-
Página 271: Energieverwaltung (Power Management)
Energieverwaltung (Power Management) Ihr Notebook bietet automatische und modifizierbare Stromspar- und Energiefunktionen, die Sie zur Maximierung der Akkunutzungsdauer und Reduzierung der gesamten Betriebs- kosten verwenden können. Man unterscheidet zwischen dem Energie Sparen Modus und dem Ruhezustand (Hibernate). Energie Sparen Bei dieser Einstellung bleibt der Inhalt des Arbeitsspeichers Ihres Notebooks erhalten, wäh- rend praktisch alle anderen Komponenten Ihres Notebooks abgeschaltet werden oder ihren Stromverbrauch auf ein Minimum reduzieren. -
Página 272: Display
Display Öffnen und Schließen des Displays Das Display wird durch die spezielle Konstruktion der Displayscharniere verschlossen, sodass eine zusätzliche Verriegelung nicht erforderlich ist. 1. Zum Öffnen klappen Sie das Display mit Daumen und Zeigefinger bis zur ge- wünschten Position auf. Achtung! Klappen Sie das Display nicht um mehr als 120°... -
Página 273: Display
Darstellung und Anpassung Dieses Programm bietet Ihnen die Möglichkeit, die Darstellung auf Ihrem Bildschirm anzu- passen. Dazu gehört z.B. das Hintergrundbild, der Bildschirmschoner, der Active Desktop (Web) sowie weiterführende Einstellungen Ihres Bildschirms und Ihrer Grafikkarte. Das Programm kann folgendermaßen gestartet werden: ... -
Página 274: Anschluss Eines Externen Monitors
Anschluss eines externen Monitors Das Notebook verfügt über eine VGA-Anschlussbuchse (13) für einen externen Monitor. 1. Fahren Sie Ihr Notebook ordnungsgemäß herunter. 2. Schließen Sie das Signalkabel des externen Monitors an die VGA-Buchse des Note- books (13) an. Alternativ können Sie den digitalen HDMI-Anschluss (High Definiton Multimedia Interface) (15) zur Übertragung von Bild- und Tonsignalen benutzen. - Página 275 Nachdem das Betriebssystem geladen wurde, wird der externe Bildschirm ermittelt. Es stehen Ihnen mehrere Möglichkeiten zur Verfügung. Diese rufen Sie wie folgt auf: 1. Rechtsklick auf dem Display. 2. Wählen Sie im Auswahlfenster die Option Bildschirmauflösung aus. 3. Unter „Mehrere Anzeigen“ wählen Sie unter den nachfolgenden Optionen: ...
-
Página 276: Desktop Duplizieren
Desktop duplizieren Dieser Modus dupliziert die Anzeige des Notebooks auf den externen Monitor. Hinweis Bei diesem Modus muss bei beiden Geräten die gleiche Bildschirmauflösung eingestellt sein. Desktop erweitern In diesem Modus wird auf dem zweiten (externen) Monitor ein leerer Desktop angezeigt. Fenster aus dem ersten Bildschirm können auf den zweiten verschoben werden und um- gekehrt. -
Página 277: Dateneingabe
Dateneingabe Die Tastatur Durch Doppelbelegung einiger Tasten steht Ihnen der gleiche Funktionsumfang wie bei einer herkömmlichen Windows-Tastatur zur Verfügung. Einige Funktionen werden mit Hilfe der für Notebooks typischen Fn-Taste eingegeben: Notebookspezifische Tastenkombinationen Kombination Beschreibung Fn + F2 Energiesparen. Standardmäßig ist diese Tastenkombination auf Herunterfahren eingestellt. - Página 278 Webcam Fn + F9 Schaltet die Webcam ein oder aus. Lauter Fn + Erhöht die Lautstärke der Tonwiedergabe. Leiser Fn + Verringert die Lautstärke der Tonwiedergabe. Fn + Heller Erhöht die Bildschirmhelligkeit. Fn + Dunkler Verringert die Bildschirmhelligkeit. Dateneingabe...
-
Página 279: Das Touchpad
Das Touchpad Im normalen Modus folgt der Mauszeiger (Cursor) der Richtung, die auf dem Touchpad durch Bewegung Ihres Fingers in die entsprechende Richtung vorgegeben wird. Achtung! Benutzen Sie keine Kugelschreiber oder anderen Gegenstände, da dies zu einem Defekt Ihres Touchpads führen könnte. Unter dem Touchpad befindet sich die linke und rechte Maustaste, die wie bei einer ge- wöhnlichen Maus genutzt werden können. -
Página 280: Zweifingerbedienung Des Touchpads
Zweifingerbedienung des Touchpads Ihr Touchpad unterstützt eine Zweifingerbedienung die bei einigen Anwendungen die Ausführung bestimmter Befehle ermöglicht. Folgende Befehle können Sie mit Ihrem Touchpad ausführen: Abbildung Befehl Funktion aus einem Objekt herauszoomen / vergrößern / verkleinern in ein Objekt hereinzoomen drehen Objekt gegen den Uhrzeigersinn drehen von links nach rechts streifen /... -
Página 281: Die Festplatte
Die Festplatte Die Festplatte ist Ihr Hauptspeichermedium, das hohe Speicherkapazität und schnellen Datenzugriff vereint. Mit Ihrem Notebook haben Sie eine OEM-Version des Betriebssys- ® tems Microsoft Windows erworben, die alle Leistungsmerkmale des Notebooks voll unter- stützt. Wir haben die Festplatte Ihres Notebooks bereits so konfiguriert, dass Sie in der Regel optimal damit arbeiten können, ohne selbst installieren zu müssen. -
Página 282: Wichtige Verzeichnisse
Wichtige Verzeichnisse Nachfolgend haben wir die wichtigsten Verzeichnisse aufgeführt und den Inhalt beschrie- ben. Achtung! Löschen oder verändern Sie diese Verzeichnisse oder die sich darin befin- denden Inhalte nicht, da ansonsten Daten verloren gehen können oder die Systemfunktionalität gefährdet ist. Im Stammverzeichnis des Laufwerks C: befinden sich wichtige, für den Start von Windows®... -
Página 283: Das Optische Laufwerk
Das optische Laufwerk Einlegen einer Disc Anders als bei optischen Laufwerken in einem Desktop-PC verwendet das Notebook eine Halterung zum Arretieren der Disc. Beim Einlegen der Disc ist darauf zu achten, dass sie genau auf die Halterung gedrückt wird und dort einrastet. Hinweis Bekleben Sie die Disc nicht mit Schutzfolien oder anderen Aufklebern. - Página 284 1. Drücken Sie bei eingeschaltetem Gerät die Auswurftaste (21) am optischen Laufwerk, um die Lade zu öffnen. 2. Ziehen Sie die Lade vorsichtig vollstän- dig heraus. 3. Nehmen Sie die Disc aus ihrer Hülle, möglichst ohne die unbedruckte Seite anzufassen. 4.
-
Página 285: Notentnahme Einer Blockierten Disc
Notentnahme einer blockierten Disc Sollte sich die Schublade nicht mehr automatisch öffnen, kann sie manuell geöffnet wer- den, sofern Ihr Gerät eine Notentnahmeöffnung (22) hat. 1. Beenden Sie Windows und schalten Sie das Notebook aus. 2. Führen Sie einen langen spitzen Gegenstand (z.B. aufgebogene Büroklammer) so- weit in die Notentnahmeöffnung ein, bis Sie einen Widerstand spüren. -
Página 286: Regionale Wiedergabeinformationen Bei Dvd
Regionale Wiedergabeinformationen bei DVD Die Wiedergabe von DVD-Filmtiteln beinhaltet Dekodierung von MPEG2-Video, digitaler AC3 Audiodaten und Entschlüsseln von CSS-geschützten Inhalten. CSS (manchmal auch Copy Guard genannt) ist die Bezeichnung eines Datenschutzprogrammes, das von der Filmindustrie als Maßnahme gegen illegale Kopien aufgenommen wurde. Unter den vielen Reglementierungen für CSS-Lizenznehmer sind die wichtigsten die Wie- dergabeeinschränkungen bei landesspezifischen Inhalten. -
Página 287: Subwoofer-Modul / Zusätzliche Festplatte Einbauen
Subwoofer-Modul / zusätzliche Festplatte einbauen Sie haben die Möglichkeit, das optische Laufwerk gegen eine zusätzliche Festplatte oder ein Subwoofer-Modul auszutauschen. Hinweis Die zusätzliche Festplatte sowie das Subwoofer-Modul können Sie über un- seren online Shop www.medionshop.de bestellen. Sicherheitshinweise Schalten Sie Ihr Notebook aus, bevor Sie einen Austausch des optischen Laufwerks vornehmen. -
Página 288: Austauschen Einer Zusätzlichen Festplatte Bzw. Eines Subwoofer-Moduls
Austauschen einer zusätzlichen Festplatte bzw. eines Subwoofer- Moduls Gehen Sie wie folgt vor: 1. Schalten Sie das Notebook aus indem Sie es ordnungsgemäß herunterfahren und drehen Sie es um. 2. Entnehmen Sie den Akku wie auf S. 30 beschrieben. 3. Drücken und halten Sie die Verriegelung des Wechsellaufwerks (). - Página 289 6. Setzen Sie den Akku ein wie auf S. 29 beschrieben. 7. Starten Sie Ihr Notebook. 8. Die zweite Festplatte wird von dem Betriebssystem erkannt und eingebunden, so- fern diese bereits formatiert ist oder Daten enthält. Sollten Sie eine fabrikneue Fest- platte verwenden, konfigurieren Sie diese unter Computerverwaltung ...
-
Página 290: Die Soundkarte
Die Soundkarte Ihr Notebook besitzt eine integrierte Stereosoundkarte mit 16 Bit und räumlichen Klangef- fekten (3D). Die Soundkarte ist kompatibel zu den Industriestandards Sound Blaster und Microsoft Sound System Version 2.0. Dies gewährleistet eine optimale Unterstützung für alle gängigen Programme und Spiele. Wenn Sie die Grundlautstärke ändern wollen, kli- cken Sie auf das Lautsprechersymbol in Ihrer Taskleiste. -
Página 291: Externe Audioverbindungen
Externe Audioverbindungen Ihr Notebook verfügt über eingebaute Stereo-Lautsprecher, so dass Sie stets ohne zusätzli- che Geräte Klänge wiedergeben können. Die Benutzung der externen Anschlüsse gibt Ihnen eine gute Möglichkeit, Ihr Notebook mit externen Geräten zu verbinden. Vorsicht! Zu große Lautstärke bei der Verwendung von Ohrhörern oder Kopfhörern erzeugt übermäßigen Schalldruck und kann zum Verlust des Hörsinns füh- ren. - Página 292 Zur Aufnahme über ein externes Mikrofon. Mikrofonanschluss (17) Zur Soundausgabe mit einem externen Raumklang- Audio Ausgang / decoder über ein optisches Kabel (separat im Fach- Digitaler handel erhältlich). Audioausgang (S/P-DIF optisch) Zur Soundwiedergabe über externe Stereogeräte (18) wie Lautsprecher (aktiv) oder Kopfhörer. Die Soundkarte...
-
Página 293: Aufnahmepegel Einstellen
Aufnahmepegel einstellen Um den jeweiligen Aufnahmepegel einzustellen, gehen Sie über Systemsteuerung Sound Aufnahme und wählen die entsprechende Quelle aus. Die Schaltfläche Digital Mic ist für das eingebaute Mikrofon gedacht. Sollten Sie ein externes Mikrofon benutzen, wählen Sie die entsprechende Option aus. ®... -
Página 294: Netzwerkbetrieb
Netzwerkbetrieb Was ist ein Netzwerk? Man spricht von einem Netzwerk, wenn mehrere Computer direkt miteinander verbunden sind. So können die Anwender Informationen und Daten untereinander übertragen und sich Ihre Ressourcen (Drucker und Laufwerke) teilen. Hier einige Beispiele aus der Praxis: ... -
Página 295: Netzwerkbetrieb
Wireless LAN (Funk-Netzwerk) Wireless LAN ist eine optionale Ausstattung. Diese Funktion ermöglicht es Ihnen, über Funk eine Netzwerkverbindung zu einer entsprechenden Gegenstelle aufzubauen. Bitte lesen Sie vor der Aktivierung die erforderlichen Voraussetzungen. Die Wireless LAN- Funktion wird über die Tastenkombination Fn + F7 aktiviert bzw. deakti- viert. - Página 296 Voraussetzungen Als Gegenstelle kann man einen sog. LAN Access Point benutzen. Ein Access Point ist ein Funkübertragungsgerät, das mit Ihrem Notebook kommuniziert und den Zugriff auf das angeschlossene Netzwerk steuert. LAN Access Points sind häufig in Großraumbüros, Flughäfen, Bahnhöfen, Universitäten oder Internet-Cafés zu finden.
-
Página 297: Problembeseitigung Im Netzwerk
Problembeseitigung im Netzwerk Warum werden in der Netzwerkumgebung die Freigaben nicht angezeigt? Die Netzwerkumgebung ist zeitverzögert. Überprüfen Sie die Freigabe, indem Sie nach dem betreffenden Computernamen suchen. Warum bekomme ich eine Fehlermeldung wenn ich auf die Netzwerkum- gebung klicke? Der Computername muss im Netzwerk einmalig sein und darf nicht wie die Arbeitsgruppe heißen. -
Página 298: Der Multi Kartenleser
Der Multi Kartenleser Speicherkarten sind Medien, die z.B. im Bereich der digitalen Fotografie eingesetzt werden und nach und nach das Medium Diskette ersetzen. Die Form und Kapazität einer Speicher- karte kann je nach Hersteller variieren. Ihr Notebook unterstützt folgende Formate: ... -
Página 299: Die Webcam
Die Webcam Die eingebaute Webcam ermöglicht die Nutzung diverser Dienste wie z.B. den Windows Messenger. Anwendungsbeispiel mit dem Windows Messenger 1. Starten Sie den Windows Messenger und erstellen Sie ein Benutzerkonto, sofern noch nicht geschehen. Dieser Dienst ist kostenlos. Es fallen lediglich die Kosten für die Internetverbindung an. - Página 300 Ein Assistent hilft Ihnen, die optimalen Einstellungen für Ihre Lautsprecher, Ihr Mikrofon und Ihre Webcam vorzunehmen. Folgen Sie den Anweisungen auf dem Bild- schirm. 3. Klicken Sie auf Fertigstellen, um Ihr Bild mit der Webcam zu übertragen. 4. Sollte Ihr Gesprächspartner ebenfalls eine Webcam angeschlossen haben, klicken Sie auf das Kamerasymbol unter dem Anzeigebild Ihres Gesprächspartners, um das Live-Bild zu empfangen.
-
Página 301: Der Universal Serial Bus-Anschluss
Der Universal Serial Bus-Anschluss Der Universal Serial Bus (USB 1.1 und USB 2.0) (12) ist ein Standard für den Anschluss von Eingabegeräten, Scannern und weiteren Peripherien. An den USB lassen sich bis zu 127 Geräte über ein einziges Kabel anschließen. Ihr Notebook verfügt über 3 USB 2.0 Anschlussbuchsen (USB 1.1 kompatibel). -
Página 302: Esata-/Usb-Anschluss
eSATA-/USB-Anschluss eSATA steht für „external Serial ATA“ und ist ein Anschluss für externe Festplatten. Im Gegensatz zu den gängigen USB-Standards ist die Übertragungsgeschwindigkeit bei ei- nem eSATA-Anschluss höher als bei externen USB-Festplatten. Bei diesem Anschluss handelt es sich um einen „Combo-Slot“, an dem sowohl USB- als auch S-ATA-Geräte angeschlossen werden können. -
Página 303: Notebook Sichern
Notebook sichern Gegen unbefugten Zugriff stellt Ihnen Ihr neues Notebook Software- und Hardwarelösun- gen zur Verfügung. Einschaltkennwort Sie können Ihr Notebook mit einem Einschaltkennwort gegen unbefugte Benutzung schützen. Beim Einschalten des Notebooks erscheint dann eine Aufforderung zur Eingabe des Kennwortes auf dem Bildschirm. Das Kennwort wird im BIOS eingerichtet. Achtung! Bewahren Sie Ihr Kennwort an einem sicheren Ort auf. -
Página 304: Software
Software Dieser Abschnitt befasst sich mit dem Thema Software. Dabei unterscheiden wir zwischen dem Betriebssystem, der Software (den Anwendungsprogrammen), der Windows- Aktivierung, dem BIOS sowie dem mitgelieferten Sicherheitspaket BullGuard. ® Windows 7 kennen lernen Mit Windows® 7 stellt Microsoft das neue Betriebssystem und den Nachfolger von Vista® auf den Markt. - Página 305 In der Sprungliste für Internet Explorer werden die häufig und zuletzt besuchten Websites angezeigt. Bei einigen Programmen können Sie hiermit sogar schnell auf Befehle zugrei- fen, die in der Vergangenheit nur aus dem Programm selbst aufgerufen werden konnten, wie den Befehl zum Verfassen einer neuen E-Mail-Nachricht. Verbesserter Desktop Windows®...
-
Página 306: Hilfe Und Support
Heimnetzgruppe Mit Heimnetzgruppen, einer neuen Funktion von Windows® 7, wird das Verbinden von Heimcomputern zu einem Kinderspiel. Eine Heimnetzgruppe wird automatisch eingerich- tet, wenn Sie den ersten PC unter Windows® 7 mit dem Heimnetzwerk verbinden. Das Hinzufügen weiterer PCs mit Windows® 7 zur Heimnetzgruppe ist schnell erledigt. Sie können exakt angeben, was auf jedem PC für alle anderen PCs in der Heimnetzgruppe freigegeben werden soll. -
Página 307: Erste Schritte
® Windows 7 - Erste Schritte Erfahren Sie alles, was Sie zum Einrichten des Notebooks wissen müssen. Ziel dieses Features ist es, Anfängern sowie auch erfahrenen Anwendern, nach der Erstin- betriebnahme, noch zusätzliche Einstellungen zur optimalen Nutzung von Windows® 7 vorzunehmen. -
Página 308: Benutzerkontensteuerung
Erste Schritte ist in viele kleine Themenbereiche aufgeteilt, so dass der Anwender die Möglichkeit hat, den Inhalt optimal auf seine Kenntnisse abzustimmen. Nachfolgend eini- ge Links: Neues in Windows® 7 online abrufen Windows anpassen Dateien und Einstellungen von anderem Computer übertragen ... -
Página 309: Systemsteuerung
® Windows 7 - Systemsteuerung Mithilfe der Systemsteuerung können Sie Einstellungen für Windows ändern. Diese Einstel- lungen steuern fast alles zur Darstellung und Funktionsweise von Windows, und sie er- möglichen Ihnen das Einrichten von Windows entsprechend Ihren Anforderungen. Beim ersten Öffnen der Systemsteuerung werden einige der am häufigsten verwendeten Elemente der Systemsteuerung nach Kategorien gruppiert angezeigt. -
Página 310: Windows Media Center
Windows Media Center Windows Media Center ist die Plattform für Ihr individuelles Home-Entertainment in Win- dows® 7. Mit Windows Media Center können Sie fernsehen, TV-Sendungen aufzeichnen, DVDs und Musik abspielen, Fotos betrachten und vieles mehr - per Fernbedienung (nicht im Lieferumfang enthalten) oder Mausklick. Hinweis Die Unterstützung der Funktionen hängt von der Hardwareausstattung des Notebooks ab. - Página 311 Hauptmenü Untermenü Aufgaben Einstellungen Passen Sie hier das Windows Media Center Ihren Anforderungen und Bedürfnissen an. Nehmen Sie hier zum Beispiel die Jugend- schutzeinstellungen vor. Herunterfahren Hierüber beenden Sie nicht nur Windows Media Center sondern können das gesamte Betriebssystem herunterfahren. Achten Sie darauf, dass alle andere Anwendungen bereits geschlossen wur- den, bevor Sie das System herunter fahren.
- Página 312 Hauptmenü Untermenü Musik Musikbibliothek In der Musikbibliothek befinden sich alle auf Ihrem Notebook ab- gelegten Musiktitel. Hier können Sie die gezielte Wiedergabe eines Albums, eines Interpreten oder eines bestimmten Titels starten. Alles wiedergeben Hierüber starten Sie die Wiedergabe aller Dateien, die sich in der Musikbibliothek befinden.
-
Página 313: Softwareinstallation
Softwareinstallation Hinweis Sollte Ihr Betriebssystem so eingestellt sein, dass die Installation von Soft- ware und Treibern nur angenommen wird, wenn diese signiert (von Micro- soft freigegeben) sind, erscheint ein solcher oder ähnlicher Dialog: Klicken Sie zur Installation der Treiber auf „Diese Treibersoftware trotzdem installieren“. -
Página 314: So Installieren Sie Ihre Software
So installieren Sie Ihre Software: Befolgen Sie die Anweisungen, die der Softwarelieferant dem Softwarepaket beigelegt hat. Nachfolgend beschreiben wir eine „typische“ Installation. Wenn Sie eine Disc einlegen, wird automatisch das Installationsmenü gestartet. Hinweis Sollte der automatische Start nicht funktionieren, ist wahrscheinlich die sog. „Autorun“-Funktion deaktiviert. -
Página 315: Deinstallation Einer Software
Deinstallation einer Software Um installierte Software von Ihrem Notebook zu entfernen, befolgen Sie bitte folgende Schritte: 1. Klicken Sie auf Start 2. Klicken Sie auf Systemsteuerung. 3. Wählen Sie anschließend die Option Programme. 4. Wählen Sie das betreffende Programm aus, starten Sie die Deinstallation und folgen Sie den Anweisungen auf Ihrem Bildschirm. -
Página 316: Produktaktivierung Bei Ihrem Notebook
Produktaktivierung bei Ihrem Notebook In einigen wenigen Fällen kann es trotzdem passieren, dass man aufgefordert wird, Win- dows® 7 zu aktivieren. Falls die Aktivierung via Internet mit einer Fehlermeldung quittiert wird, sollten bitte folgende Schritte durchgeführt werden. 1. Bitte wählen Sie telefonische Aktivierung aus und klicken Sie auf weiter. 2. -
Página 317: Bios Setup-Programm
BIOS Setup-Programm Im BIOS Setup (Hardware Basis-Konfiguration Ihres Systems) haben Sie vielfältige Einstel- lungsmöglichkeiten zum Betrieb Ihres Notebooks. Beispielsweise können Sie die Betriebs- weise der Schnittstellen, die Sicherheitsmerkmale oder die Verwaltung der Stromversor- gung ändern. Das Notebook ist bereits ab Werk so eingestellt, dass ein optimaler Betrieb gewährleistet ist. -
Página 318: Bullguard Internet Security
BullGuard Internet Security Das Bullguard Internet Security Paket ist eine Zusammenstellung der zurzeit modernsten PC-Sicherheitstechnologien, die sich auf dem Markt befinden und bietet Ihnen somit den optimalen Schutz rund um die Uhr. BullGuard ist bereits vorinstalliert, sodass eine Installation nicht erforderlich ist. Sollten Sie dennoch eine Installation durchführen müssen (z. - Página 319 Das BullGuard Internet Security Paket wird 90 Tage nach der kostenlosen Registrierung mit den neuesten Vireninformationen aktualisiert. Das Registrierungsfenster erscheint erst nach dem Neustart Ihres Notebooks. Sie registrie- ren sich durch Angabe Ihrer E-Mail Adresse und eines Passwortes. Nach Ablauf der 90 Tage läuft die Antiviren-Software weiter, wird aber nicht mehr aktuali- siert, sodass Ihr Notebook gegen neue Viren ungeschützt ist.
-
Página 320: Tipps Und Tricks
Tipps und Tricks Bedienhilfen Windows - Tastatursteuerung Hinweise zu der Tastatur finden Sie ab Seite 39. Mit ALT + TAB wechseln Sie das aktive Fenster. Mit der TAB-Taste springen Sie zum nächsten Text-/Eingabefeld, mit SHIFT + TAB zum vorherigen ... -
Página 321: Systemeinstellungen Und -Informationen
Systemeinstellungen und -informationen Autostart-Funktion des optischen Laufwerks Wenn Sie eine Disc einlegen, wird diese gemäß dem Inhalt (Musik, Video etc.) ausgeführt. Ist dies nicht der Fall, kann das mehrere Ursachen haben: Die Disc hat keine Autostart-Funktion, die Funktion ist deaktiviert oder die Funktion ist für diesen Typ deaktiviert. - Página 322 Tipps und Tricks...
-
Página 323: Selbsthilfe
Kapitel 4 Selbsthilfe Thema Seite Daten- und Systemsicherheit .......... 87 Systemwiederherstellung ..........88 Auslieferungszustand wiederherstellen ......91 FAQ – Häufig gestellte Fragen ......... 93 Kundendienst ..............94 Auf-/Umrüstung und Reparatur ........99 Recycling und Entsorgung ..........100... - Página 324 Daten- und Systemsicherheit...
-
Página 325: Daten- Und Systemsicherheit
Daten- und Systemsicherheit Die beschriebenen Programme sind in Windows integriert. Detaillierte Informationen fin- den Sie unter Angabe der fett gedruckten Stichwörter in der Windows-Hilfe im Startmenü. Lesen Sie bitte auch die Hinweise auf Seite 4. Datensicherung Machen Sie regelmäßig Sicherungen auf externe Medien, wie CD-R oder CD-RW. Windows bietet Ihnen dazu das Programm „Sicherungsstatus und -konfiguration“. -
Página 326: Systemwiederherstellung
Systemwiederherstellung Windows® 7 liefert eine nützliche Funktion (Systemwiederherstellung), die es ermöglicht, so genannte Wiederherstellungspunkte zu speichern. Das System merkt sich die aktuelle Konfiguration als Momentaufnahme und kehrt bei Bedarf zu dieser zurück. Dies hat den Vorteil, dass eine missglückte Installation wieder rückgängig gemacht werden kann. -
Página 327: Systemwiederherstellung
Windows Update Windows Update ist die Onlineerweiterung von Windows. Verwenden Sie Windows Up- date, um Elemente wie Sicherheitsupdates, wichtige Updates, die neuesten Hilfedateien, Treiber und Internetprodukte über das Internet zu laden. Die Website wird regelmäßig durch neuen Inhalt ergänzt, damit Sie jederzeit die neuesten Updates und Fehlerkorrekturen downloaden können, um das Notebook zu schützen und dessen Funktionsfähigkeit zu gewährleisten. -
Página 328: Windows Update-Informationen Zur Datensicherheit
Windows Update-Informationen zur Datensicherheit Damit eine geeignete Liste mit Updates für Sie bereitgestellt werden kann, benötigt Win- dows Update bestimmte Informationen zum jeweiligen PC. Diese Informationen umfassen Folgendes: Versionsnummer des Betriebssystems Versionsnummer von Internet Explorer Versionsnummern weiterer Softwareprogramme ... -
Página 329: Auslieferungszustand Wiederherstellen
Auslieferungszustand wiederherstellen Sollte Ihr System trotz der voran beschriebenen Fehlerbehebung nicht mehr richtig funktionieren, können Sie den Auslieferungszustand wiederherstellen. Beschränkung der Wiederherstellung Nachträglich vorgenommene Konfigurationsänderungen (DFÜ-/Desktop-/Internet- Einstellung) und Softwareinstallationen werden nicht wiederhergestellt. Nachträgliche Treiberaktualisierungen und Hardwareergänzungen werden nicht berücksichtigt. -
Página 330: Rücksicherung Durchführen
Rücksicherung durchführen 1. Entfernen Sie alle eventuell eingesetzten Massenspeichergeräte (Speicherkarten, USB-Stick etc.). 2. Schalten Sie das Notebook ein. 3. Drücken Sie bei der Meldung „Press F11 to run recovery“ oder „Press F12 to run recovery“ die entsprechende Taste. Nach einigen Sekunden erscheint die Meldung „Windows is loading files“. Warten Sie ab, bis die Daten geladen sind. -
Página 331: Faq - Häufig Gestellte Fragen
FAQ - Häufig gestellte Fragen Muss ich die beiliegenden Discs noch installieren? Nein. Grundsätzlich sind alle Programme bereits vorinstalliert. Die Discs sind lediglich als Sicherheitskopie gedacht. Wo finde ich die notwendigen Treiber für mein Notebook? Die Treiber befinden sich auf der zweiten Partition der Festplatte in den Ordnern Driver (Treiber) und Tools. -
Página 332: Kundendienst
Kundendienst Erste Hilfe bei Hardwareproblemen Fehlfunktionen können manchmal banale Ursachen haben, aber manchmal auch von defekten Komponenten ausgehen. Wir möchten Ihnen hiermit einen Leitfaden an die Hand geben, um das Problem zu lösen. Wenn die hier aufgeführten Maßnahmen keinen Erfolg bringen, helfen wir Ihnen gern weiter. -
Página 333: Kundendienst
Fehler und mögliche Ursachen Der Bildschirm ist schwarz. Dieser Fehler kann unterschiedliche Ursachen haben: 1. Die Betriebsanzeige (Ein-/Ausschalter) leuchtet nicht und das Notebook befindet sich im Ruhezustand. Lösung: Betätigen Sie den Ein-/Ausschalter. 2. Die Energie Sparen Anzeige blinkt. Das Notebook befindet sich im Energie Spa- ren Modus. -
Página 334: Benötigen Sie Weitere Unterstützung
Wenn Sie trotz der Vorschläge im vorangegangenen Abschnitt immer noch Probleme haben, nehmen Sie bitte Kontakt mit Ihrer Hotline auf oder wenden Sie sich an www.medion.de/service. Wir werden Ihnen weiterhelfen. Bevor Sie sich jedoch an Ihr Technologie Center wenden, bereiten Sie bitte folgende Daten vor: ... -
Página 335: Transport
Transport Beachten Sie folgende Hinweise, wenn Sie das Notebook transportieren wollen: Schalten Sie das Notebook aus. Um Beschädigungen zu vermeiden, werden die Köpfe der Festplatte dabei automatisch in einem sicheren Bereich bewegt. Entfer- nen Sie eingelegte DVDs/CDs. Warten Sie nach einem Transport des Notebooks solange mit der Inbetriebnahme, bis das Gerät die Umgebungstemperatur angenommen hat. -
Página 336: Wartung
Wartung Achtung! Es befinden sich keine zu wartenden oder zu reinigenden Teile innerhalb des Notebook-Gehäuses. Die Lebensdauer des Notebooks können Sie durch folgende Maßnahmen verlängern: Ziehen Sie vor dem Reinigen immer den Netzstecker, alle Verbindungskabel und entfernen Sie den Akku. ... -
Página 337: Auf-/Umrüstung Und Reparatur
Auf-/Umrüstung und Reparatur Überlassen Sie die Auf- oder Umrüstung Ihres Notebooks ausschließlich qualifi- ziertem Fachpersonal. Sollten Sie nicht über die notwendige Qualifikation verfü- gen, beauftragen Sie einen entsprechenden Service-Techniker. Bitte wenden Sie sich an Ihren Kundendienst, wenn Sie technische Probleme mit Ihrem Notebook haben. -
Página 338: Recycling Und Entsorgung
Recycling und Entsorgung Gerät Werfen Sie das Gerät am Ende seiner Lebenszeit keinesfalls in den normalen Hausmüll. Erkundigen Sie sich nach Möglichkeiten einer umweltgerechten Entsorgung. Batterien Verbrauchte Batterien gehören nicht in den Hausmüll! Sie müssen bei einer Sammelstelle für Altbatterien abgegeben werden. Verpackung Ihr Gerät befindet sich zum Schutz vor Transportschäden in einer Verpackung. -
Página 339: Umgang Mit Batterien
Umgang mit Batterien Batterien können brennbare Stoffe enthalten. Bei unsachgemäßer Behandlung können Batterien auslaufen, sich stark erhitzen, entzünden oder gar explodieren, was Schäden für Ihr Gerät und ihre Gesundheit zur Folge haben könnte. Bitte befolgen Sie unbedingt folgende Hinweise: Halten Sie Kinder von Batterien fern. - Página 340 Recycling und Entsorgung...
-
Página 341: Anhang
Kapitel 5 Anhang Thema Seite Hinweise zur Konformität ..........105 Index ................107... - Página 342 Recycling und Entsorgung...
-
Página 343: Hinweise Zur Konformität
In der Vergangenheit gab es immer wieder verschiedenste Ansätze die Anzahl der erlaub- ten Pixelfehler zu definieren. Diese waren aber zumeist sehr kompliziert und von Hersteller zu Hersteller völlig unterschiedlich. MEDION folgt daher für alle TFT-Display-Produkte bei der Garantieabwicklung den strengen und transparenten Anforderungen der Norm ISO 13406-2, Klasse II;... - Página 344 Pixelaufbau Pixelfehler-Typen: Typ 1: dauerhaft leuchtende Pixel (heller, weißer Punkt), obwohl nicht angesteuert. Ein weißer Pixel entsteht durch das Leuchten aller drei Subpixel. Typ 2: nicht leuchtende Pixel (dunkler, schwarzer Punkt), obwohl angesteuert Typ 3: abnormale oder defekte Subpixel der Farben Rot, Grün oder Blau (z.B. dauerhaft leuchtend mit halber Helligkeit, nicht leuchtend einer Farbe, blinkend oder fla- ckernd, aber nicht vom Typ 1 oder 2) Ergänzung: Cluster vom Typ3 ( = Ausfall von zwei oder mehr Sub-Pixeln in einem Block...
-
Página 345: Index
Index Touchpad ........17 A WLAN ..........17 Akkubetrieb ........10, 29 Arbeitshaltung Akku aufladen ......... 31 Allgemein ......... 6 Akku einsetzen ........ 29 Arme ..........6 Akku entladen ......... 31 Beine ..........6 Akku entnehmen ......30 Handgelenke ........6 Akkuleistung ........ - Página 346 CD-ROM-Reinigungsdiscs ....98 K Kensington-Sicherheitsschloss .... 65 D Keyboard ........... 39 Dateien kopieren ........ 82 Kundendienst........94 Daten- und Systemsicherheit ....87 Datensicherung ......4, 87 L Defragmentierung ......87, 94 Laserstrahlung ........99 Deinstallation der Software ....77 Lieferumfang ........13 Digitaler Audioausgang ......
- Página 347 SD ............60 Autostart-Funktion ......83 Secure Digital ........60 Kopieren von Text oder Bildern ..82 Selbsthilfe ........... 85 Tastatursteuerung ......82 Daten- und Systemsicherheit ..87 Tipps und Tricks ......... 82 Wartung ......... 98 Touchpad .......... 41 Sicherheit Transport ...........
- Página 348 Index...