Publicidad
Enlaces rápidos
ITM. / ART. 1600248
Model / Modèle / Modelo: SC-NEP3-C8
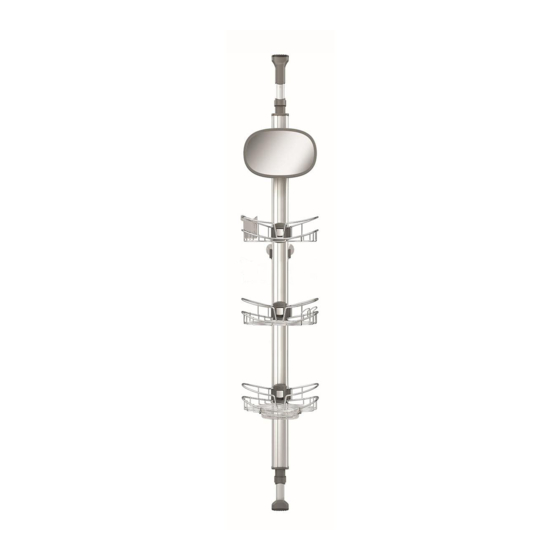
Shower caddy - Neptune
INSTRUCTION MANUAL
IMPORTANT, KEEP FOR
FUTURE REFERENCE:
PLEASE READ CAREFULLY.
Support de rangement de douche - Neptune
MANUEL D'INSTRUCTIONS
IMPORTANT : À LIRE
ATTENTIVEMENT ET À
CONSERVER.
Estante de ducha - Neptune
MANUAL DE INSTRUCCIONES
IMPORTANTE, GUARDAR
PARA FUTURA REFERENCIA:
POR FAVOR, LEER
DETENIDAMENTE.
Made in China
Residential use only
Indoor use only
TM
MC
MR
Fabriqué en Chine
Usage résidentiel seulement
Usage intérieur seulement
Rev. 08.07.2020
Hecho en China
Uso residencial solamente
Uso interiores solamente
Publicidad

Resumen de contenidos para Artika Neptune SC-NEP3-C8
- Página 1 ITM. / ART. 1600248 Model / Modèle / Modelo: SC-NEP3-C8 Shower caddy - Neptune INSTRUCTION MANUAL IMPORTANT, KEEP FOR FUTURE REFERENCE: PLEASE READ CAREFULLY. Support de rangement de douche - Neptune MANUEL D’INSTRUCTIONS IMPORTANT : À LIRE ATTENTIVEMENT ET À CONSERVER.
- Página 2 INSTRUCTION MANUAL / MANUEL D’INSTRUCTIONS / MANUAL DE INSTRUCCIONES INCLUDED INCLUS INCLUIDO Item Description Quantity Pièce Description Quantité Pieza Descripción Cantidad Support pole Tige de support × 1 Barra de soporte Adjustable shelf with hooks 1 Panier ajustable avec crochets 1 ×...
- Página 3 INCLUDED INCLUS INCLUIDO Item Description Quantity Pièce Description Quantité Pieza Descripción Cantidad Mirror Miroir × 1 Espejo Succion cup Ventouse × 2 Ventosa Adhesive film Pellicule adhésive × 2 Película adhesiva IMPORTANT IMPORTANT IMPORTANTE The installer and/or user must Avant l’installation de ce produit, El instalador o usuario deben read, understand and follow these l’utilisateur et/ou l’installateur doit...
- Página 4 INSTRUCTION MANUAL / MANUEL D’INSTRUCTIONS / MANUAL DE INSTRUCCIONES SECURING SÉCURISATION ASEGURAR 1. Place the two (2) suction cups on 1. Placer les deux (2) ventouses sur 1. Coloque las dos (2) ventosas en the safety clip. le support de sécurité. el clip de seguridad.
- Página 5 SUPPORT POLE INSTALLATION DE LA TIGE INSTALACIÓN DE LA BARRA INSTALLATION DE SUPPORT DE SOPORTE 1. Place the pole at the desired 1. Placer la tige de support à 1. Coloque la varilla de soporte location (shower or bath) and l'endroit de votre choix (douche en el lugar deseado (ducha o attach the suction cups/3M stickers...
- Página 6 INSTRUCTION MANUAL / MANUEL D’INSTRUCTIONS / MANUAL DE INSTRUCCIONES 2. Hold the pole with one hand (1). 2. Maintenir le support d'une 2. Sostenga el poste con una mano main (1). (1). Extend the inner rod with the other hand (2). Make sure to apply Déployer la tige intérieure avec Empuje la varilla interna hacia enough force to hide the minimum...
- Página 7 MIRROR INSTALLATION INSTALLATION DU MIROIR INSTALACIÓN DE ESPEJO 1. Insert the mirror on the plastic 1. Inserte el espejo en el clip de 1.Insérer le miroir sur l'attache en clip. (fig. 4). Install the plastic clip plástico (Fig. 4). Fije el clip de plastique (fig.
- Página 8 INSTRUCTION MANUAL / MANUEL D’INSTRUCTIONS / MANUAL DE INSTRUCCIONES ACCESSORIES INSTALLATION DES INSTALACIÓN DE INSTALLATION ACCESSOIRES ACCESORIOS 1. To install the adjustable shelves, 1. Pour installer les paniers et 1. Para instalar los estantes and the mirror, slightly rotate the le miroir, tourner légèrement ajustables y el espejo, rote accessory to the left and push the...
- Página 9 Q-CUP AND SOAP Q-CUP ET LE INSTALACIÓN DE Q-CUP HOLDER INSTALLATION PORTE-SAVON Y JABONERA Install the Q-Cup onto the Installer la Q-Cup sur le coin rond Instale la Q-Cup en la esquina rounded corner of the basket. Clip du panier. Poussez-la en place sur redondeada del estante.
-
Página 10: Los Accesorios
INSTRUCTION MANUAL / MANUEL D’INSTRUCTIONS / MANUAL DE INSTRUCCIONES MODIFY THE LOCATION MODIFIER LA POSITION CAMBIAR LA POSICIÓN DE OF THE ACCESSORIES. DES ACCESSOIRES LOS ACCESORIOS 1. Pull the latch. 1. Lever la languette de 1. Tire de la lengüeta de bloqueo. verrouillage. -
Página 11: Garantía
à la o de la pieza a entera discreción de Artika discrétion d’Artika conformément au présent como aquí se indica, y no puede exceder el This warranty is valid only on products document, et ne peut pas excéder le prix... - Página 12 INSTRUCTION MANUAL / MANUEL D’INSTRUCTIONS / MANUAL DE INSTRUCCIONES Artika For Living Inc. 1-866-661-9606 1756, 50 ave, Lachine support@artika.com Quebec, Canada H8T 2V5 www.artika.com Customer Service Service à la clientèle Atención al cliente Monday to Friday du lundi au vendredi Lunes a viernes 9 a.m.
