Tabla de contenido
Publicidad
Idiomas disponibles
Idiomas disponibles
Enlaces rápidos
USB MIDI Controller and Stereo Audio Interface
Quick Start Owner's Manual
BOX CONTENTS
•
PHOTON X 25 USB AUDIO/MIDI CONTROLLER
•
USB CABLE
•
QUICK START OWNER'S MANUAL
•
IMPORTANT SAFETY INSTRUCTIONS
Manual de inicio rápido para el usuario
CONTENIDO DE LA CAJA
•
CONTROLADOR USB DE AUDIO/MIDI PHOTON
X25
•
CABLE USB
•
MANUAL DE INICIO RÁPIDO DEL USUARIO
Manuel d'utilisation du propriétaire
CONTENU DE LA BOÎTE
•
CONTRÔLEUR MIDI/AUDIO USB PHOTON X 25
•
CABLE USB
•
GUIDE D'UTILISATION SIMPLIFIÉ
•
CONSIGNES DE SÉCURITÉ IMPORTANTES
Schnellbedienungsanleitung
INHALT DER VERPACKUNG
•
PHOTON X 25 USB AUDIO/MIDI CONTROLLER
•
USB-KABLE
•
SCHNELLBEDIENUNGSANLEITUNG
•
WICHTIGE SICHERHEITSHINWEISE
Manuale rapido di utilizzazione
CONTENUTO DELLA CONFEZIONE
•
PHOTON X 25 USB AUDIO/MIDI CONTROLLER
•
CAVO USB
•
MANUALE RAPIDO DI UTILIZZAZIONE
•
IMPORTANTI ISTRUZIONI DI SICUREZZA
Publicidad
Tabla de contenido

Manuales relacionados para Alesis PHOTON X25


Resumen de contenidos para Alesis PHOTON X25
- Página 1 USB MIDI Controller and Stereo Audio Interface Quick Start Owner’s Manual BOX CONTENTS • PHOTON X 25 USB AUDIO/MIDI CONTROLLER • USB CABLE • QUICK START OWNER’S MANUAL • IMPORTANT SAFETY INSTRUCTIONS Manual de inicio rápido para el usuario CONTENIDO DE LA CAJA •...
- Página 2 This page intentionally left blank.
-
Página 3: Product Registration
Please go to http://www.alesis.com to register your new Photon X 25. Registration helps you by ensuring that we can keep you up to date on any last- minute product issues. If you want, Alesis can also send you information on other products that might interest you. -
Página 4: Connection Diagram
Minimum Computer Requirements The Photon X 25 requires either Windows XP or Mac OS X, along with an available USB 1.1 or higher connection. Earlier operating systems are not supported. Any MIDI application in which MIDI inputs can be configured should be compatible with the Photon X 25. - Página 5 This page intentionally left blank.
-
Página 6: Rear-Panel Connections
Rear-Panel Connections External Adapter Jack – Plug in the AC adapter if you don’t want to power the Photon X 25 through either the USB connection or four “C”-size batteries. (Use a 6VDC, negative tip, 1000mA device.) Power Source Selector –... - Página 7 MIDI OUT Connector – Use a five-pin MIDI cable to connect the MIDI OUT of the Photon X 25 to the INPUT of an external MIDI device. The operation of the MIDI OUT port changes depending on whether or not a USB cable is connected to the Photon.
-
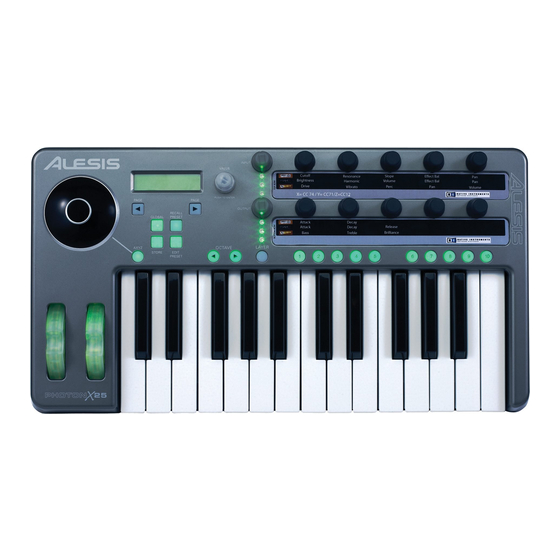
Página 8: Top Panel Controls
Top Panel Controls Keyboard – A full-size, 25-note, velocity-sensitive keyboard. Octave Up/Down Buttons – Transpose the keyboard in octaves using these buttons. Press them both at the same time to reset the keyboard range. Pitch Wheel – Control pitch bend with this backlit wheel. Modulation Wheel –... - Página 9 MIDI and Audio software applications as either a “Photon” controller or a “USB Audio Device.” No need to worry: the Photon will work regardless of its designation. The Photon is not compatible with earlier versions of Windows or Mac OS. Check http://www.Alesis.com for driver updates and up-to-date information on operating system compatibility.
- Página 10 Operation: 1. Using the Keyboard with your MIDI software Start off simply. Once you’re plugged in and powered up, go to your sound module or software application and set the incoming MIDI channel. If you’re using software, you will probably need to configure it to use the Photon or “USB”...
- Página 11 3. Audio Recording and Playback To record, connect the OUTPUT from an audio device to the AUDIO IN jacks of the Photon X 25. Use balanced (TRS) Maximizing Your Gain Staging or unbalanced (TS) ¼” cables. In your audio software, enable For the best recorded sound, input from the Photon X 25.
- Página 12 4. Editing and Storing Configurations GLOBAL BUTTON (Editing the Global settings) Global settings are in effect at all times, in all presets. Press the GLOBAL button to access these settings. Then use the PAGE buttons to cycle through the options. Any changes you make are stored immediately. When you are finished, press RECALL PRESET to exit this mode and return to normal operation.
- Página 13 RECALL SETUPS BUTTON (Loading presets) Presets are snapshots of the Photon X 25’s settings for its three layers of knobs and buttons, its pitch and mod wheels, With the Recall Setup button and its AXYZ dome. 20 different preset locations are illuminated, move any controller to see its midi available.
- Página 14 Assigning Knobs Use the LAYER button to choose the layer you want to edit. Press EDIT PRESET then wiggle a knob to select that knob for editing. ● Press the PAGE RIGHT button. ● Turn VALUE/ENTER to change the MIDI continuous control (CC) number associated to the knob.
- Página 15 Assigning the AXYZ dome Press the EDIT PRESET button and turn the VALUE/ENTER knob until you see X Ctrl, Y Ctrl, or Z Ctrl. For each of these settings, you can press PAGE RIGHT button and assign a different MIDI CC number to each of the three axis (left/right, near/far, and up/down).
- Página 16 Default *** * Cubase LE requires you to load the “Photon 25 Cubase Remote.xml” file before you can use your Photon 25 / Photon X25. Consult the Cubase LE manual (located on the Cubase CD) for more on this. ** FM7 requires you to load “Photon25.f7c” or “PhotonX25.f7c” before you can use your Photon 25 / Photon X25 with FM7.
- Página 17 Reference: List of Common MIDI Controller Values Use this table for reference as you configure the Photon. Controller Description Range of Values Modulation Wheel 0 through 127 Breath Controller 0 through 127 Foot Controller 0 through 127 Portamento Time 0 through 127 Master Volume 0 through 127 Balance...
- Página 18 Troubleshooting: Symptom Cause Solution The display does not No power. If you are using USB power, check that the light up. USB power switch on the back of the Photon is OUT. If you are using batteries or an AC adapter, check to see that the batteries are not drained or that the adapter is plugged in to a live power outlet and that the power switch is...
- Página 19 Sound source not Try using an instrument that has a virtual active or volume set keyboard built in. Will the instrument sound to 0. when you use that virtual keyboard? If not, the problem may be with the software synthesizer, not the Photon connection.
- Página 20 AXYZ dome not AXYZ activation Press the button next to the AXYZ dome to operational. button not pressed activate its use. AXYZ dome’s Press EDIT PRESET to assign AXYZ MIDI control controller values. assignments not made. AUDIO: USB connection not Verify that the USB cable is plugged in and the Computer does not made.
- Página 21 Specifications Keyboard: 25-note, full-size, full-travel, velocity-sensitive keys. MIDI Controllers: AXYZ three-way controller. Octave Up/Down buttons. Ten programmable buttons. Ten endless (360º) knobs, with three independent layers. Full- size Pitch and Modulation wheels with variable lighting. Master control section: Global, Recall Preset, Edit Preset, MIDI Send, and Page Forward/Back buttons.
-
Página 22: Photon X 25 - Manual De Inicio Rápido Del Usuario
RÁPIDO DEL USUARIO (ESPAÑOL) Introducción ¡Felicitaciones por su compra del Controlador MIDI Alesis Photon X 25 y la interfaz de audio estéreo de 24 bits! El Photon X 25 combina la portabilidad con un sinnúmero de funciones de vanguardia: MIDI •... -
Página 23: Requisitos Mínimos De Computadora
Requisitos mínimos de computadora Photon X 25 requiere Windows XP o Mac OS X y una conexión USB 1.1 o superior. No se soportan los sistemas operativos más antiguos. Cualquier aplicación MIDI en que las entradas MIDI puedan configurarse debe ser compatible con el Photon X 25. -
Página 24: Conexiones Del Panel Trasero
Conexiones del panel trasero Conector del adaptador extern – Enchufe el adaptador de CA si no desea alimentar el Photon X 25 a través de la conexión USB o con cuatro pilas de tamaño “C”. (Use un aparato de 6 VCC, con punta negativa, de 1000mA). Selector de fuente de alimentación –... - Página 25 Conector MIDI OUT – Use un cable MIDI de cinco pines para conectar la salida MIDI OUT del Photon X 25 a la entrada (INPUT) de un dispositivo MIDI externo. El funcionamiento del puerto MIDI OUT cambia dependiendo de que haya o no un cable USB conectado al Photon.
-
Página 26: Controles Del Panel Superior
Controles del panel superior Teclado – Un teclado de tamaño completo, 25 notas y sensible a la velocidad. Botones de subir/bajar octavas – Transponga el teclado en octavas usando estos botones. Presione ambos botones al mismo tiempo para reinicializar el rango del teclado. -
Página 27: Conexión Plug-And-Play A Una Computadora
“dispositivo de Audio USB”. No debe preocuparse: El Photon funcionará sin importar su designación. El Photon no es compatible con las versiones anteriores de Windows o de Mac Visite http://www.Alesis.com para buscar actualizaciones y la última información acerca de la compatibilidad de los sistemas operativos. -
Página 28: Usando Las Perillas Con Las Plantillas Del Controlador Suministradas
Funcionamiento: 1. Usando el teclado con su software MIDI Comience por lo sencillo. Después de que el equipo esté enchufado y encendido, vaya a su módulo de sonido o aplicación de software y seleccione el canal MIDI de entrada. Si está usando software, es posible que necesite configurarlo para usar el Photon o el dispositivo USB. -
Página 29: Grabación Y Reproducción De Audio
3. Grabación y reproducción de audio Para grabar, conecte la salida OUTPUT de un dispositivo de audio a los conectores de entrada de audio AUDIO IN del Cómo maximizar las etapas de ganancia Photon X 25. Use cables de ¼” balanceados (TRS) o no Para obtener el mejor sonido balanceados (TS). -
Página 30: Cómo Editar Y Almacenar Configuraciones
5. Cómo editar y almacenar configuraciones BOTÓN GLOBAL (Cómo editar los ajustes globales) Los ajustes globales están siempre en vigencia, en todos los preajustes. Presione el Botón marcado GLOBAL para acceder a estos ajustes. Luego use los botones PAGE para visualizar las opciones. Cualquier cambio que haga se almacenará... -
Página 31: Botón Para Acceder A Ajustes
d. DIRECT MONITOR (monitoreo directo). Esta ¿Qué es la latencia? función le permite escuchar el audio que envía directamente al La “latencia” es el atraso Photon X 25, sin necesidad que pase antes a través del cable entre el momento en que se USB hasta la computadora y de vuelta. -
Página 32: Botón Edit Preset (Editar Preajuste)
BOTÓN EDIT PRESET (Editar preajuste) (Cómo dar nombre a los preajustes, asignar canales y controladores MIDI) Presione el botón EDIT PRESET para acceder los valores del preajuste actual. Cómo asignar el Canal Midi Cada preajuste está asociado a un canal MIDI. Usted puede asignar cualquier controlador a un diferente canal MIDI si lo desea, pero todavía existe un canal MIDI “común”... - Página 33 Asignación de botones Presione EDIT PRESET y el botón que desea asignar. Tipos de botones “Toggle” (de conmutación) y ● Presione el botón PAGE RIGHT (Página a la “Momentary” (comentario) derecha). En modo de conmutación (Toggle), cada segundo botón ● Gire VALUE/ENTER para cambiar la función del que se presiona envía sea un botón (puede elegir entre los controladores CC, comando de activación o de...
-
Página 34: Botón De Envío Midi
BOTÓN DE ENVÍO MIDI (Cómo enviar comandos de programa, banco y de reiniciación MIDI) Presione MIDI SEND para enviar un cambio de programa MIDI, cambio de banco y comandos de reiniciar. Cómo enviar comandos para cambiar programa Presione VALUE/ENTER. La pantalla indicará el número del programa. Gire VALUE/ENTER para encontrar el número del cambio de programa que desea enviar. -
Página 35: Referencia: Lista De Valores Comunes Del Controlador Midi
Referencia: Lista de valores comunes del controlador MIDI Use esta tabla como referencia mientras configura el Photon X 25. Controlador Descripción Rango de valores Rueda de modulación 0 a 127 Controlador de soplido 0 a 127 Controlador de pedal 0 a 127 Tiempo de portamento 0 a 127 Volumen master... -
Página 36: Solución De Problemas
Solución de problemas: Síntoma Causa Solución La pantalla no se No hay Se está usando alimentación por USB, verifique ilumina. alimentación. que el interruptor de alimentación USB en la parte de atrás del Photon esté hacia fuera. Si está usando pilas o un adaptador de corriente alterna, verifique que las pilas no estén agotadas o que el adaptador esté... - Página 37 Síntoma Causa Solución Las notas de la Intente usar un sonido de piano cuando se fuente de sonido conecta por primera vez. Las baterías, están fuera del rango contrabajos y otros instrumentos pueden tener del teclado del un rango de notas MIDI limitado u otras Photon.
- Página 38 Las notas se sostienen El pedal de Apague la unidad, espere un momento y de manera constante. sostenido fue enciéndela otra vez. enchufado después de encender la unidad. Notas pegadas Intente enviar el comando de pánico debido a datos MIDI presionando MIDI CHANNEL y MIDI incompletos.
-
Página 39: Datos Técnicos
La unidad causa Cableado USB Asegúrese de que su cable USB esté blindado interferencia con blindado correctamente usando un inductor o ferrite receptores de radio y incorrectamente. para minimizar las emisiones de radiofrecuencia televisión a su del Photon. alrededor. Datos técnicos Teclado: Sensible a la velocidad, de tamaño completo y 25 notas. -
Página 40: Enregistrement Du Produit
(FRANÇAIS) Introduction Félicitations pour l’achat de votre Contrôleur MIDI Photon X 25 avec interface audio stéréo de 24 bits Alesis. Le Photon X 25 jumelle la portabilité avec une multitude de caractéristiques d’avant-garde: MIDI • Doté de 25 touches pleine taille sensibles à la dynamique et de touches facilement accesibles pour le changement d’octave. -
Página 41: Configuration Minimale Requise
Configuration minimale requise Le Photon X 25 fonctionne sous Windows XP ou Mac OS X doté d’une connexion sur port USB 1.1 ou supérieur. Les versions précédentes de ces systèmes d’exploitation ne sont pas supportées. Toute application MIDI qui permet de sélectionner l’appareil MIDI devrait être compatible avec le Photon X 25. - Página 42 This page intentionally left blank.
-
Página 43: Rear-Panel Connections
Rear-Panel Connections Prise pour adaptateur externe – Si vous ne désirez pas utiliser la connexion USB ou les 4 piles de format « C » pour alimenter le Photon X 25 il est possible d’utiliser l’adaptateur CA. (Utilisez un adaptateur 6 V CC, à borne négative 1000 mA.) Sélecteur de source d’alimentation –... - Página 44 Sortie MIDI – Branchez un câble MIDI doté de cinq broches de raccordement à la sortie « MIDI OUT » du Photon X 25 et l’extrémité du câble à l’entrée « INPUT » d’un appareil MIDI externe. Le fonctionnement du port « MIDI OUT » change selon si un câble USB est branché...
- Página 45 Top Panel Controls Clavier – Clavier pleine taille doté de touches sensibles à la dynamique et de 25 notes. Touches de sélection d’octave – Permet de transposer le clavier en octaves. Appuyez sur les deux touches simultanément pour réinitialiser le clavier. Molette de tonalité...
- Página 46 MIDI. Ne craigniez rien : Le Photon fonctionne peu importe sa désignation. Le Photon n’est pas compatible avec les versions antérieures de Windows ou Mac Vous pouvez vérifier sur notre site Internet http://www.Alesis.com pour de l’information concernant la compatibilité des systèmes d’exploitation et les mise à jour des pilotes.
- Página 47 Fonctionnement: 1. L’utilisation du clavier avec votre logiciel MIDI Commencez le plus simplement possible. Une fois branché et sous tension, réglez le canal entrant pour les données MIDI sur le module de son ou dans le logiciel. Si vous utilisez un logiciel, vous devrez probablement le configurer pour qu’il puisse utiliser le Photon ou encore l’appareil USB selon la désignation.
- Página 48 3. Enregistrement et lecture de l’audio Branchez une des extrémités d’un câble à la sortie d’un Maximisez le gain appareil audio et l’autre extrémité à la prise d’entrée Pour une meilleure sonorité d’enregistrement, réglez chaque audio du Photon X 25.Utilisez des câbles symétriques appareil audio afin d’obtenir une (TRS) ou asymétriques (TS).
- Página 49 L’édition et la sauvegarde des configurations Touche des réglages généraux (Global) (Édition des réglages généraux) Les réglages généraux (Global) sont actifs en tout temps, pour tous les préréglages. Appuyez sur la touche des réglages généraux (GLOBAL) pour accéder à ces réglages.
- Página 50 L’écoute directe (Direct Monitoring) est idéale lorsque vous désirez écouter le signal enregistré avec le moins de temps de latence possible. Cependant, si vous activez la fonction d’écoute active (Direct Monitoring) tout en écoutant le signal via votre ordinateur, il est possible que vous entendiez un effet d’écho dû au temps de latence plus élevé...
- Página 51 TOUCHE DE RAPPEL DES RÉGLAGES (RECALL SETUPS) (Chargement des préréglages) Les préréglages représentent tous les réglages des trois niveaux des boutons et touches, les molettes de tonalité et de Lorsque le bouton de rappel modulation et du dôme AXYZ du Photon X 25. Il y a 20 des réglages (Recall Setup) emplacements disponibles pour les préréglages.
- Página 52 MODIFICATION DE LA TOUCHE DES PRÉRÉGLAGES (PRESET) (Dénomination des préréglages; assignation des canaux et des contrôleurs MIDI) Appuyez sur la touche de modification des préréglages (EDIT PRESET) pour accéder aux réglages du préréglage en cours. Assignation du canal MIDI Chaque préréglage est associé à un canal MIDI. Il est possible d’assigner un contrôleur à...
- Página 53 L'assignation des boutons Utilisez la touche de niveau (LAYER) pour sélectionner le niveau que vous désirez modifier. Appuyez sur la touche de modification des préréglages (EDIT PRESET) et agitez ensuite le bouton que vous désirez modifier. ● Appuyer sur la touche page droite (PAGE RIGHT). ●...
- Página 54 Assignation des touches Appuyez sur la touche de modification des préréglages (EDIT PRESET) et appuyez ensuite le bouton que vous désirez assigner. ● Appuyez sur la touche page droite (PAGE RIGHT). ● Tournez le bouton des valeurs/validation (VALUE/ENTER) pour modifier la fonction associé à ce bouton (les choix possibles sont : contrôleurs CC, commandes MMC ou modifications de programme ou de banque).
- Página 55 Assignation du dôme AXYZ Appuyez sur la touche de modification des préréglages (EDIT PRESET) et tournez le bouton des valeurs/validation (VALUE/ENTER) jusqu’à ce vous à l’écran X Ctrl, Y Ctrl ou Z Ctrl. Pour chacun de ces réglages, vous pouvez appuyer sur la touche page droite (PAGE RIGHT) et assigner un numéro de réglage continu MIDI (CC) à...
-
Página 56: Commande De Panique (Toutes Notes Fermées)
TOUCHE D’ACHEMINEMENT MIDI (MIDI SEND) (Acheminement des commandes programme, banque et de réinitialisation MIDI) Appuyez sur la touche d’acheminement MIDI (MIDI SEND) pour modifier un programme, une banque et pour la réinitiation des commandes. Acheminement des commandes de modification des programmes Appuyez sur le bouton des valeurs/validation (VALUE/ENTER). - Página 57 Référence : Liste des valeurs principales du Contrôleur MIDI Utilisez ce tableau à titre de référence pour configurer le Photon X 25. Contrôleur Description Variation des valeurs Molette de modulation 0 à 127 Commande par le souffle 0 à 127 Commande au pied 0 à...
- Página 58 Dépannage: Symptom Cause Solution L’écran d’affichage ne Aucune Si vous utilisez l’alimentation CA, vérifiez que s’allume pas. alimentation. l’interrupteur d’alimentation USB à l’arrière du Photon est à la position « OUT ». Si vous utilisez des piles ou un adaptateur CA, vérifiez que les piles ne sont pas déchargées ou que l’adaptateur est bien branché...
- Página 59 Les notes de la Essayez d’utiliser un son de piano pour vérifier source audio sont votre installation. Les sons de batteries, des hors bande pour le basses et de certains autres instruments peuvent clavier du Photon. avoir une portée de notes MIDI plus limitée ou autres particularités.
- Página 60 Les notes sont La pédale de soutien Mettez l’appareil hors tension, attendez maintenues de façon (Sustain) a été quelques secondes et remettez le sous tension. continue. branchée après que l’appareil a été mis sous tension. Certaines notes sont Essayez la commande panique en appuyant bloquées parce que simultanément sur la touche de sélection de les données MIDI...
-
Página 61: Fiche Technique
L’appareil cause de Câblage USB Assurez vous que le câble USB est l'interférence avec les incorrectement correctement blindé à l’aide d’une bobine radios et les téléviseurs blindé. d’arrêt ou ferrite afin de minimiser les avoisinants. émissions de fréquences radio du Photon. Fiche technique Clavier : 25 notes, pleine taille et sensibles à... - Página 62 PHOTON X 25 SCHNELLBEDIENUNGSANLEITUNG (DEUTSCH) Schaltplan Herzlichen Glückwunsch zum Erwerb Ihres Alesis Photon X 25 MIDI-Controller mit 24-bit Stereoaudioschnittstelle! Der Photon X 25 ist tragbar und besitzt gleichzeitig eine Reihe von hochmodernsten Eigenschaften: MIDI • 25 anschlagdynamische Tasten in Normalgröße mit leicht zu bedienenden Tasten zur Oktavenverlagerung.
- Página 63 Minimale Systemvoraussetzungen des Computers Der Photon X 25 benötigt die Betriebssysteme Windows XP oder Mac OS X und einen USB 1.1- oder höherwertigen Anschluss. Ältere Betriebssysteme werden nicht unterstützt. Alle MIDI-Anwendungen, bei denen die MIDI-Eingänge konfiguriert werden können, sollten mit dem Photon X 25 kompatibel sein. Sehr einfache MIDI- Programme werden Ihnen jedoch nicht die Vorzüge der Drehregler und Tasten des Photon X 25 bieten.
- Página 64 This page intentionally left blank.
- Página 65 Rear-Panel Connections Anschluss für externen Adapter – Verwenden Sie den Adapter, falls Sie den Photon X 25 nicht über die USB-Verbindung oder die vier Batterien der Größe “C” mit Strom versorgen wollen. (Benutzen Sie hierzu ein 6V Gleichstromgerät mit 1000mA und negativer Spannung.) Auswahlschalter Stromquelle –...
- Página 66 MIDI-OUT-Anschluss – Verwenden Sie ein fünfpoliges MIDI-Kabel um den MIDI-OUT-Anschluss des Photon X 25 mit dem MIDI-IN-Anschluss eines externen MIDI-Geräts zu verbinden. Die Betriebsart des MIDI-Ausgangs ändert sich je nachdem, ob ein USB-Kabel an den Photon angeschlossen ist oder nicht. ●...
- Página 67 Top Panel Controls Tastatur – Eine anschlagdynamische Tastatur in Normalgröße mit 25 Noten. Oktave Auf/Ab-Tasten – Über diese Tasten erfolgt die Verlagerung der Tastatur um Oktaven. Werden beide auf einmal gedrückt, wird die Tastatur wieder auf die normale Tonlage zurückgesetzt. Tonlagenrad –...
- Página 68 Kein Grund zur Beunruhigung: der Photon funktioniert in jedem Fall, die Kennung ist egal. Der Photon ist mit älteren Versionen der Betriebssysteme Windows oder Mac nicht kompatibel. Informieren Sie sich auf der Webseite http://www.Alesis.com über die neuesten Treiber und Neuigkeiten über Kompatibilität mit Betriebssystemen.
- Página 69 Betrieb: 1. Bei Verwendung der Tastatur mit Ihrer MIDI-Software Fangen Sie auf einfache Art an. Sobald alle Geräte angeschlossen und eingeschaltet sind, setzen Sie den MIDI-Eingangskanal auf Ihrem Tonmodul oder in Ihrer Software. Falls Sie ein Anwenderprogramm verwenden, müssen Sie dieses unter Umständen auf die Verwendung des Photon oder des “USB”-Geräts einstellen.
- Página 70 3. Tonaufnahme und -Wiedergabe Zur Aufnahme schließen Sie den AUSGANG des Tongeräts an die AUDIO EIN-Buchsen des Photon X 25 an. Wie Sie beste Tonqualität erreichen Verwenden Sie hierzu symmetrische (TRS) oder Für die bestmögliche unsymmetrische (TS) 3,1 cm Kabel. Ihre Software stellen Sie Aufnahmequalität stellen Sie auf Eingang vom Photon X 25 ein.
- Página 71 6. Editieren und Abspeichern von Konfigurationen GLOBAL-TASTE (Editieren der globalen Einstellungen) Globale Einstellungen sind immer aktiviert, auch bei allen Voreinstellungen. Um zu diesen Einstellungen zu gelangen, drücken Sie die GLOBAL-Taste. Durchlaufen Sie dann die Optionen mit den PAGE-Tasten. Alle Veränderungen, die Sie vornehmen, werden sofort gespeichert.
- Página 72 d. DIREKTER MONITOR. Diese Funktion gestattet es Was ist unter Latenz zu verstehen? Ihnen, die Töne, welche Sie an den Photon X 25 senden, “Latenz” ist die Verzögerung direkt, ohne Umleitung über das USB-Kabel zum Computer, zwischen dem Moment, in vorher abzuhören.
- Página 73 PRESET-TASTE EDITIEREN (Voreinstellungen benennen; MIDI-Kanäle und Steuerungen zuordnen) Drücken Sie die EDIT PRESET-Taste, um zu den Einstellungen für die momentane Voreinstellung zu gelangen. Zuordnung des Midi-Kanals Jede Voreinstellung ist einem MIDI-Kanal zugeordnet. Falls gewünscht, können Sie jeden Controller einem verschiedenen MIDI-Kanal zuordnen, doch gibt es für die Voreinstellung immer den “allgemeinen”...
- Página 74 Zuordnung von Reglern Mit der LAYER-Taste bestimmen Sie, welche Ebene Sie editieren möchten. Drücken Sie EDIT PRESET und bewegen Sie dann einen Regler, um diesen zur Bearbeitung auszuwählen. ● Drücken Sie die PAGE RIGHT-Taste. ● Drehen Sie VALUE/ENTER, um die MIDI-Continuous-Control-(CC) Steuerungsnummer, welche diesem Regler zugeordnet ist, zu verändern.
- Página 75 Zuordnung von Tasten Drücken Sie EDIT PRESET und drücken Sie eine Taste, welche Sie zuordnen möchten. ● Drücken Sie die Taste PAGE RIGHT. ● Drehen Sie VALUE/ENTER, um die Funktion der Taste zu verändern (es besteht die Wahl zwischen CC-Steuerung, MMC-Befehlen oder Programm-/Bankwechsel) ●...
- Página 76 MIDI-SENDETASTE (Zum Senden des Programms, der Bank und der MIDI-Rücksetzbefehle) Drücken Sie MIDI SEND, um sowohl MIDI-Programm- und Bankänderungen als auch Rücksetzbefehle zu senden. Programmwechselbefehle senden Drücken Sie VALUE/ENTER. Auf der Anzeige erscheint die Programmnummer. Drehen Sie VALUE/ENTER, um die Programmwechselnummer, welche Sie senden möchten, zu finden.
- Página 77 Bezugsquelle: Liste von gebräuchlichen MIDI-Steuerungswerten Beziehen Sie sich bei der Konfiguration des Photon X 25 auf diese Liste. Steuerung Beschreibung Wertbereich Modulationsrad 0 bis 127 Atmungssteuerung 0 bis 127 Fußsteuerung 0 bis 127 Portamento-Zeit 0 bis 127 Master-Lautstärke 0 bis 127 Balance 0 bis 127 0 bis 127...
- Página 78 Beseitigung von Problemen: Symptom Cause Solution Die Anzeige leuchtet Kein Strom. Falls die Stromversorgung über den USB- nicht auf. Anschluss erfolgt, überprüfen Sie, ob der USB- Schalter auf der Rückseite des Photons auf AUS steht. Falls Sie Batterien oder einen Wechselstromadapter benutzen, stellen Sie fest, ob die Batterien geladen sind oder ob der Adapter an eine stromführende Steckdose...
- Página 79 Symptom Cause Solution Die Noten der Versuchen Sie es, indem Sie beim ersten Mal Tonquelle befinden die Klaviertöne verwenden. Trommel- und sich außerhalb des Basstöne sowie einige andere Instrumente Bereichs der unterliegen unter Umständen einem begrenzten Photon-Tastatur. MIDI-Notenbereich oder besitzen andere Eigenheiten.
- Página 80 Symptom Cause Solution Noten werden Das Sustain-Pedal Schalten Sie das Gerät aus, warten Sie einen fortlaufend gehalten. wurde Moment und schalten Sie es dann wieder ein. angeschlossen, nachdem das Gerät eingeschaltet wurde. Noten bleiben Versuchen Sie, den Panik-Befehl zu senden, aufgrund von indem Sie die Tasten MIDI CHANNEL und unvollständigen...
-
Página 81: Technische Spezifikationen
Symptom Cause Solution Tonaufnahmeprogra Überprüfen Sie, dass mm ist nicht für Tonaufnahmeprogramm darauf eingestellt ist, Verwendung des vom Photon aufzunehmen. Photon eingestellt. Bei Windows: Überprüfen Sie, dass Ihr Tonaufnahmeprogramm auf die Verwendung von WDM-Audio und nicht auf ASIO-Audio eingestellt ist. Das GerŠt verursacht UngenŸgend Zur EindŠmmung von Stšrfrequenzen vom... -
Página 82: Schema Dei Collegamenti
(ITALIANO) Schema dei collegamenti Congratulazioni per aver acquistato il Photon X 25 MIDI controller di Alesis e l´interfaccia audio stereo a 24 bit! Il Photon X 25 abbina la portatilità a tutta una serie di funzioni ai massimi livelli nel campo: MIDI •... - Página 83 Requisiti minimi computer Il Photon X 25 necessita di Windows XP o Mac OS X ed una porta USB 1.1 o superiore. Sistemi operativi precedenti non sono supportati. Qualsiasi dispositivo MIDI in cui gli ingressi MIDI possono essere configurati dovrebbe essere compatibile con il Photon X 25. Programmi MIDI molto elementari non vi consentiranno di usufruire delle rotelle, dei tasti e delle manopole del Photon X 25.
- Página 84 This page intentionally left blank.
- Página 85 Connessioni pannello posteriore Jack adattatore esterno – Inserire l´adattatore CA nel caso in cui non si desideri alimentare il Photon X 25 tramite la porta USB oppure per mezzo di quattro batterie di tipo “C”. (Servirsi di un dispositivo 6VDC, a polo negativo da 1000mA).
- Página 86 Connettore MIDI OUT 5. 5. – servirsi di un cavo MIDI a cinque poli per collegare l´uscita MIDI OUT del Photon X 25 all´ingresso INPUT di un dispositivo MIDI esterno. Il funzionamento della porta MIDI OUT cambia a seconda se un cavo USB sia collegato al Photon oppure no.
- Página 87 Top Panel Controls Tastiera – una tastiera a dimensione naturale, a 25 note, sensibile alla velocità. Tasti ottave Up/Down – servirsi di questi tasti per trasporre la tastiera in ottave. Premerli contemporaneamente per impostare nuovamente la gamma della tastiera. Rotella del Pitch –...
-
Página 88: Collegamento Plug-And-Play Ad Un Computer
“Photon” oppure come un “Dispositivo audio USB”. Questo non è un problema: il Photon funzionerà indipendentemente dalla designazione. Il Photon non è compatibile con versioni precedenti di Windows o di Mac OS. Verificare sul sito http://www.Alesis.com la presenza di aggiornamenti dei driver ed informazioni aggiornate riguardo la compatibilità dei sistemi operativi. - Página 89 Funzionamento: 1. Uso della tastiera con il software MIDI Si inizia in maniera semplice. Una volta collegato e acceso, recarsi al modulo sonoro o al software applicativo ed impostare il canale MIDI in ingresso. Nel caso dell´uso di un software, è probabile che sia necessario configurarlo per utilizzare il Photon o un dispositivo “USB”.
- Página 90 3. Registrazione Audio e Riproduzione Massimizzazione del guadagno di sequenza Per registrare, collegare l´USCITA di un dispositivo audio ai Per ottenere il migliore suono jack AUDIO IN del Photon X 25. Servirsi di cavi bilanciati registrato possibile, regolare ciascuno dei dispositivi audio (TRS) o non vilanciati (TS) ¼”.
- Página 91 4. Modifica e salvataggio configurazioni TASTO GLOBAL (Modifica delle impostazioni Global) Le impostazioni global sono sempre attive, in tutte le preimpostazioni. Premere il tasto GLOBAL per accedere a queste impostazioni. Quindi servirsi dei tasti PAGE per passare da un´opzione all´altra. Qualsiasi modifica apportata viene memorizzata immediatamente.
- Página 92 Servirsi VALUE/ENTER per selezionare “enabled” (per attivare il monitoraggio diretto) oppure “disabled” (per disattivare il monitoraggio diretto). e. INVIO SYSEX. Memorizzare le configurazioni predefinite del Photon X 25 inviandole ad un dispositivo esterno (quale il computer). Inviare una preimpostazione oppure tutte. TASTO RICHIAMO IMPOSTAZIONI (Caricamento predefiniti) I predefiniti sono istantanee delle impostazioni del Photon X...
- Página 93 TASTO EDIT PRESET (Dare un nome ai predefiniti; assegnazione canali e controller MIDI) Premere il tasto EDIT PRESET per accedere alle impostazioni per i predefiniti in corso. Assegnazione dei canali Midi Ciascun predefinito è associato ad un canale MIDI. È possibile assegnare qualsiasi controller ad un diverso canale MIDI se desiderato, ma è...
- Página 94 Assegnazione dei tasti Tipi di tasti “Toggle” Schiacciare EDIT PRESET e premere un tasto che si (commutazione) e desidera assegnare. “Momentary” (momentaneo) ● Premere il tasto PAGE RIGHT. In modalità Toggle, ciascuna pressione di un tasto invia ● Girare VALUE/ENTER per cambiare la funzione alternativamente un segnale del tasto (si può...
- Página 95 Un altro modo per assegnare i comandi È altresí possibile entrare e assegnare i comandi premendo innanzitutto EDIT PRESET e quindi girando il codificatore VALUE/ENTER. Il display mostrerà tutti i comandi disponibili. Una volta individuato il comando che si desidera modificare, premere PAGE RIGHT.
- Página 96 Riferimenti: Lista di valori comuni del controller MIDI Controller Descrizione Gamma di valori Rotella di modulazione 0 a 127 Controller Breath 0 a 127 Controller piede 0 a 127 Tempo Portamento 0 a 127 Volume Master 0 a 127 Balance 0 a 127 0 a 127 Volume canale...
-
Página 97: Risoluzione Di Problemi
Risoluzione di problemi: Sintomo Causa Soluzione Il display non si Manca la corrente. Nel caso in cui vi stiate servendo di accende. alimentazione USB, verificare che l´interruttore dell´alimentazione USB situato sul retro del Photon sia su OUT. Nel caso di uso di batterie o di un adattatore CA, verificare che le batterie non siano esaurite o che l´adattatore sia collegato ad una presa di corrente elettrica... - Página 98 Sintomo Causa Soluzione Le note della Provare a servirsi di un suono da pianoforte alla sorgente sonora prima connessione. Le percussioni e i bassi ed sono fuori dalla altri strumenti possono presentare una gamma gamma della tastiera di note MIDI limitata o altre idiosincrasie. del Photon.
- Página 99 Sintomo Causa Soluzione Note inceppate a Provare a inviare il comando Panic premendo causa di dati MIDI contemporaneamente MIDI CHANNEL e incompleti. MIDI PROGRAM. Se questo non risolve il problema, spegnere l´alimentazione dell´apparecchio, attendere qualche istante e riaccendere. Il pedale di sostegno Il pedale di sostegno Spegnere l´alimentazione dell´apparecchio, dunziona al contrario.
-
Página 100: Specifiche Tecniche
Specifiche tecniche Tastiera: 25 note, dimensione naturale, sensibile alla velocità. Controller MIDI: Controllo a tre vie AXYZ. Tasti Ottave Up/Down. Dieci tasti programmabili. Dieci manopole senza fine (360º), a tre strati indipendenti. Rotelle del Pitch e Modulation (modulazione) a dimensioni naturali con illuminazione variabile.