Publicidad
Idiomas disponibles
Idiomas disponibles
Enlaces rápidos
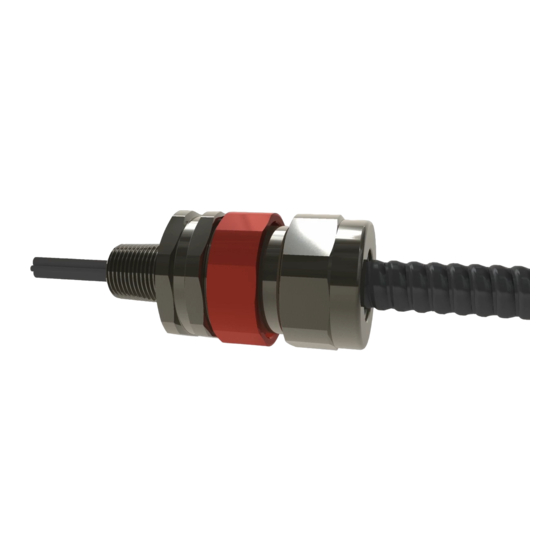
TMCX Terminator™ II Cable Gland
Installation & Maintenance Information
SAVE THESE INSTRUCTIONS FOR FUTURE REFERENCE
APPLICATION
TMCX Series Terminator
II Cable Fittings are designed for use
™
with Type MC/MC-HL jacketed metal-clad cable, interlocked
armour and continuous corrugated armour, TECK, ITC and Type
TC tray cable in hazardous (classified) locations when installed,
in accordance with NEC/CEC. TMCX Series Terminator II Cable
Fittings are cULus Listed for hazardous locations (with TSC
WARNING
To avoid risk of electrical shock, electrical power must be OFF
before and during installation and maintenance conductors,
and top off if necessary.
RECOMMENDATIONS FOR INSTALLATION
For all versions, suitable grease must be used on the thread body,
union nut and back nut. Suitable grease must be non-setting,
non-metallic, non-combustible and maintaining earthing. It can be
Eaton's Crouse-Hinds Series type HTL or STL lubricants.
CABLE PREPARATION
1. Remove jacket (and armour, if applicable) from the cable to
expose a sufficient length of conductors required for the job.
When using Type MC cable, leave a length of armour
exposed as specified in the table below:
CABLE JACKET REMOVAL TABLE
Catalog No.
Cable Jacket Removal Length
TMCX125 2
TMCX150 1, 2
1.10" (27.9mm)
TMCX200 1
TMCX250 2
1.33" (33.8mm)
TMCX300 1
TMCX200 2
TMCX250 1
TMCX300 2
1.46" (37.1mm)
TMCX350 1
TMCX400 1
TMCX350 2
1.66" (42.2mm)
TMCX400 2
Prepare cable. For Type MC, remove all fillers and shielding
back to armour. For Type TC, remove fillers back to cable
jacket. Separate uninsulated ground conductors back to
armour or sheath to allow sealing of individual strands.
1a. For Chico LiquidSeal installation: use the provided
hardwood stick and Chico X Fiber to fill in all of the
internal voids of the cable armour. Be sure to pack the
Chico X Fiber tightly in between the conductors and over
the cable insulation. Caution: X Fiber shall not extend
pass cable jacket or armour. PICTURE OF CABLE ON
NEXT PAGE.
IF 1647B • 08/15
Copyright © 2015, Eaton's Crouse-Hinds Division
IF 1647B
Epoxy Sealing Compound and Chico
LiquidSeal only) according
®
to UL Standards 514B and 2225, and CSA Standard C22.2 No.
174. They are suitable for use in NEC/CEC Class I, Divisions 1
& 2, Groups A, B, C, D; Class II, Divisions 1 & 2, Groups E, F, G;
and Class III, when installed in accordance with NEC/CEC, and
using appropriately approved cable.
Explosionproof cable fittings should be installed, inspected and
maintained by qualified and competent personnel.
2. Install TMCX into hub, wrench-tight.
3. Apply electrical tape to tip of conductors, and slide through
integral dam until armour or TC jacket contacts the dam or
armour stop.
4. Tighten back nut wrench-tight and visually inspect that
environmental seal has collapsed 360° around cable jacket. If
desired, use included torque table as a guideline.
CAUTION
To avoid risk of ignition:
1. Tools must not be allowed to damage the tapered flame
path surfaces. Do not handle sealing chambers roughly,
or use tools that might damage or scratch the tapered
surfaces.
2. Any excess sealing compound should be removed from
the exterior tapered surface of the sealing chamber
immediately.
3. The sealing chamber should be fully bottomed to the rear
assembly before assembly to the thread body.
4. Before reassembly, examine the tapered joint surfaces of
the thread body and sealing chamber. Surfaces must seat
fully against each other to provide a proper explosionproof
joint. Remove any dirt or other foreign matter from both
surfaces, including the mating threads. If either surface is
scratched, marred, corroded, or otherwise damaged, do
not reassemble. Replace the fitting.
5. After packing sealing chamber with TSC, be sure to allow
compound to harden before moving conductors.
5. Disassemble union nut and remove rear assembly from
thread body.
5a. For Chico LiquidSeal installation: remove electrical tape
and separate conductors. Use the provided Chico X
Fiber to tightly pack any gaps created inside and around
the dam. Mix liquid compound per included instructions.
Hold cable gland upright and pour liquid compound until
it reaches the top of the compound chamber. Wiggle
and separate conductors to make sure compound settles
between conductors, and top off if necessary. Maintain
assembly in vertical position until compound has gelled.
See cure graph for gel and energizing times.
IF 1647B • 08/15
Page 1
5b. For TSC installation: (with cables containing more
than four (4) conductors, Chico LiquidSeal is
recommended): unscrew and remove sealing chamber,
remove electrical tape and separate conductors.
Mix two-part epoxy sealing compound provided by
kneading and folding until a uniform color is obtained
(approximately 2-3 minutes). Pack a sufficient amount
of compound between and around conductors, using
the length and I.D. of the sealing chamber as a guide
for shaping the compound. Insert conductors into
sealing chamber and slide the sealing chamber down
over the sealing compound. As compound is getting
compressed, use a hardwood stick or dowel to remove
excess compound and prevent it from getting into the
mating threads. Screw sealing chamber into mating
thread and pack more sealing compound from the
top of the sealing chamber, making sure conductors
are properly sealed around, and the sealing chamber
is completely full. Wipe off any compound from
the sealing chamber's exterior immediately. Allow
compound to sufficiently harden before moving
conductors to avoid creating voids. Allow TSC to cure
for 24 hours before energizing equipment. Minimum
storage temperature for TSC is 40°F.
*Chico X Fiber may pass through the central dam hole only in
order to provide sufficient spacing of conductors. Chico X Fiber
shall not be filled above the level of the dam to prevent a void
in the depth of the Chico LiquidSeal.
6. Insert the rear assembly into the thread body. Tighten
union nut wrench-tight. Assembly is complete.
Torque Table
Catalog Number
TMCX1252
TMCX1501
TMCX1502
TMCX2001
TMCX2002
TMCX2501
TMCX2502
TMCX3001
TMCX3002
TMCX3502
TMCX4001
TMCX4002
Copyright © 2015, Eaton's Crouse-Hinds Division
Torque in.-lb. (N-m)
1000 (113)
1000 (113)
1000 (113)
1600 (181)
1600 (181)
1600 (181)
1600 (181)
1600 (181)
1600 (181)
1600 (181)
1600 (181)
1600 (181)
Page 2
Publicidad

Manuales relacionados para Eaton TMCX Terminator II

Resumen de contenidos para Eaton TMCX Terminator II
- Página 1 It can be assembly in vertical position until compound has gelled. See cure graph for gel and energizing times. Eaton’s Crouse-Hinds Series type HTL or STL lubricants. CABLE PREPARATION 6. Insert the rear assembly into the thread body. Tighten union nut wrench-tight.
- Página 2 All statements, technical information and recommendations contained herein are based on information and tests we believe to be reliable. The accuracy or completeness thereof are not guaranteed. In accordance with Eaton’s Crouse-Hinds Division’s “Terms and Conditions of Sale,” and since conditions of use are outside our control, the purchaser should determine the suitability of the product for his intended use and assumes all risk and liability whatsoever in connection therewith.
- Página 3 IMAGE DU CÂBLE SUR LA PAGE SUIVANTE. IMAGE DU CÂBLE SUR LA PAGE SUIVANTE. IF 1647B • 08/15 © 2015, Eaton’s Crouse-Hinds Division, Tous droits réservés. Page 5 IF 1647B • 08/15 © 2015, Eaton’s Crouse-Hinds Division, Tous droits réservés.
- Página 4 Eaton’s Crouse-Hinds Division IF 1647B 1201 Wolf Street Syracuse, New York 13208 • USA Revision 2 © 2015, Tous droits réservés. Revised 08/15 IF 1647B • 08/15 © 2015, Eaton’s Crouse-Hinds Division, Tous droits réservés. Page 7 Supercedes 09/14...
-
Página 5: Preparación Del Cable
LiquidSeal): desenrosque y retire la cámara de sellado, Cuide de que la fibra x no se extienda más allá del forro o armadura del cable. IF 1647B • 08/15 Copyright © 2015, Eaton’s Crouse-Hinds Division Page 9 IF 1647B • 08/15 Copyright © 2015, Eaton’s Crouse-Hinds Division... -
Página 6: Tabla De Selección
Eaton’s Crouse-Hinds Division IF 1647B 1201 Wolf Street, Syracuse, New York 13208 • USA Revision 2 IF 1647B • 08/15 Copyright © 2015, Eaton’s Crouse-Hinds Division Page 11 Copyright © 2015 Revised 08/15 Supercedes 09/14...