Tabla de contenido
Publicidad
Enlaces rápidos
ELECTRONIC ORGANIZER
OPERATION MANUAL
Instrucciones abreviadas en español
CONTENTS
Part Names and Tablet Key Assignments .......................................... 1
Using the Organizer for the First Time ............................................... 2
Display Symbols .................................................................................. 4
Entering Characters ............................................................................ 5
Built-in Calendar and Clock ................................................................ 6
Clock Mode .......................................................................................... 6
Alarm ................................................................................................... 8
Timer .................................................................................................... 8
Telephone Mode .................................................................................. 9
Calendar Mode .................................................................................. 10
Schedule Mode ................................................................................. 12
Anniversary Mode ............................................................................. 13
To Do Mode ....................................................................................... 15
Memo Mode ....................................................................................... 16
OZ590_1211.pm65p31_cover2
cover 1
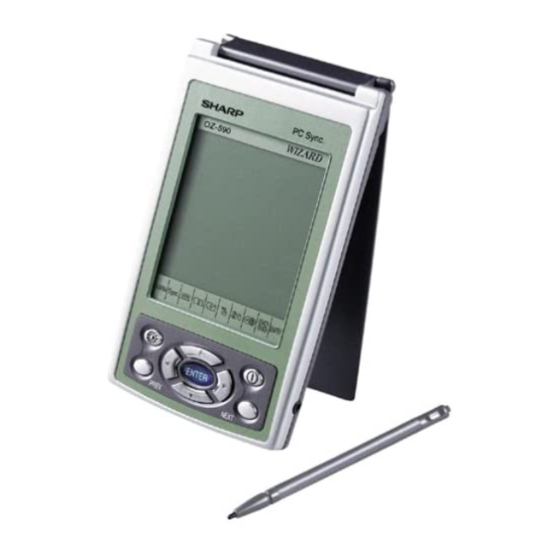
OZ - 590
Expense Mode ................................................................................... 17
Editing Entries ................................................................................... 20
Deleting Entries ................................................................................. 20
Word Translator Mode ....................................................................... 21
Calculator Mode ................................................................................ 22
Conversion Mode .............................................................................. 23
Secret Function ................................................................................. 25
Game Mode ....................................................................................... 26
Managing the Organizer's Memory ................................................... 27
Using the Included PC Software ....................................................... 27
Battery Replacement ......................................................................... 30
Specifications .................................................................................... 31
Appendix ............................................................................................ 33
Instrucciones abreviadas en español ............................................. S-1
02.12.13, 1:47 PM
MODEL
41
Publicidad
Capítulos
Tabla de contenido

Manuales relacionados para Sharp OZ-590


Resumen de contenidos para Sharp OZ-590
-
Página 1: Tabla De Contenido
ELECTRONIC ORGANIZER MODEL OZ - 590 OPERATION MANUAL Instrucciones abreviadas en español CONTENTS Part Names and Tablet Key Assignments .......... 1 Expense Mode ................... 17 Using the Organizer for the First Time ..........2 Editing Entries ................... 20 Display Symbols .................. 4 Deleting Entries ................. - Página 2 NOTICE • SHARP strongly recommends that separate permanent written records be kept of all important data. Data may be lost or altered in virtually any electronic memory product under certain circumstances. Therefore, SHARP assumes no responsibility for data lost or otherwise rendered unusable whether as a result of improper use, repairs, defects, battery replacement, use after the specified battery life has expired, or any other cause.
-
Página 3: Part Names And Tablet Key Assignments
Part Names Tablet Key Assignments Stylus (!): MAIN key (p): Synchronization mode key for PC Software (v): Telephone mode key Touch Display (©): Schedule/Calendar mode key RESET switch (∑): Memo/Anniversary mode key (on the back of the unit) (t): To Do mode key Mode keys ENTER key (y): Expense mode key... -
Página 4: Using The Organizer For The First Time
No” appears, tap “Yes”. Note: • Do not use an object with a breakable or sharp tip. 6. A dialog “System Reset Clear All Data? Yes No” appears on the screen. Use the stylus to tap “Yes” on the screen to proceed. -
Página 5: Backlight
1. Tap ! once or twice to display the second page of the Main Auto Power Off Function menu, then tap : . When none of the keys have been pressed or tapped for a specified 2. In the list of Setup items, tap to select “3. Backlight Time”. time (default: 3 minutes), the Organizer will automatically turn off to 3. -
Página 6: Display Symbols
Entering User Information Display Symbols 1. Tap ! once or twice, then tap to select :. Alarm icon: The Alarm is ON and will go off at the specified 2. In the list of Setup items, tap to select "2. User Information". time. -
Página 7: Entering Characters
Go-back key: brings back the regular keyboard set. Entering Characters Symbol key: activates a set of characters to enter symbols. Entering Characters Displays the second page of the symbol keyboard. Entering letters and numbers Menubar Displays the first page of the symbol keyboard. When the cursor enters a text entry field, a touch keyboard will pop up on the screen. -
Página 8: Built-In Calendar And Clock
Navigating the Clock mode Built-in Calendar and Clock Some icons and keys in the Clock modes can be tapped to activate functions: Precautions Tap on this icon to display menu items. Home • Calendar, Schedule, Expense, ToDo, Anniversary and Clock Clock, World Clock, Timer, and three Alarm modes allow you to enter any desired date and time between modes can be accessed through here. - Página 9 Setting the Home Clock Selecting the date format (Default: Month-Day-Year) 1. Enter the Home Clock mode; tap the h icon in the Main menu. 1. Tap !, then tap to select h or ; . Note: 2. The date format key (default: “MDY”) should be found near the •...
-
Página 10: Alarm
When the set time arrives, the Alarm will sound, and the reminder Alarm message will be displayed. Note: The Organizer has 2 types of alarm: • Each Alarm can be set independently from other Alarms. 1. Daily Alarm..Sounds every day at the specified time (for •... -
Página 11: Telephone Mode
Entry Telephone Mode <Example> Four telephone entry categories are available: Business, Personal, Enter the contact info. for a business partner, John Smith. Unfiled, and All. Selecting the Business category, for example, will 1. Tap v in the Main menu to enter the Telephone mode, then tap the display the entries categorized menu on the left side of the menubar to set the category for this new as “Business”, so that data can... -
Página 12: Calendar Mode
7. Press m and enter “619-542-7320” as the Work Number. Calendar Mode 8. Enter the rest of the fields, then tap æ to store the entry. Use the Calendar mode to quickly view/add Schedule, To Do, and The overview of the new entry will be displayed. To verify entries, Anniversary entries. - Página 13 Verifying Schedule, To Do, and Anniversary mode entries Schedule, To Do, or Anniversary entries will be indicated as dots on the right side of the day number. In this example, one or more entries in all three modes exist on the 5th.
-
Página 14: Schedule Mode
Schedule Mode 7. Set the cursor at the end time of Time bar this event. Enter "11", then "00". When done, tap ≈ to move Entry the cursor at the Alarm Time <Example> field. A project meeting will be held 8. -
Página 15: Anniversary Mode
Direct Search Anniversary Mode Direct search can be done by either the date or the description of an The Anniversary mode is used to specify the month and day of event. special events such as wedding anniversaries and birthdays. 1. In the Main menu, tap g to enter the Schedule mode. Once an Anniversary entry is made, a flag appears on the specified 2. - Página 16 5. At the Description field, enter “Nancy’s birthday”. See also Entering Characters ........... 5 To enter an apostrophe ( ), tap the s key first, then tap the Editing Entries ............20 character key. Deleting Entries ............20 6. When done, tap æ to store and activate the entry. The overview of the newly entered fields will be displayed.
-
Página 17: To Do Mode
6. At the “To Do” description entry field, up to 482 alphanumeric To Do Mode characters can be entered. Enter “Visit NY Exhibition”, then tap æ to set and activate the entry. The To Do mode is used to store your important To Do items with a priority index. -
Página 18: Memo Mode
Setting Entry Status to Done/Pending Memo Mode 1. In the Main menu, tap t to enter the To Do mode. You can store memos using the Memo mode. Up to 474 alphanu- A list of To Do entries appear. meric characters in the Memo entry field, and maximum of 20 2. -
Página 19: Expense Mode
Direct Search Expense Mode Direct search can be done by either the title or the Memo contents. The Expense function is an easy-to-use tool for tracking personal 1. In the Main menu, tap w to enter the Memo mode. and business expense information. The Expense Report allows you 2. - Página 20 6. Tap the next highlighted menu to Direct Search enter method of payment; “Cash”, Direct search can be done by either the date or the description of an “Check”, “Card”, or “Others” can be event. selected. Tap to select “Card”. 1.
- Página 21 Expense Report Editing Expense Category Names 1. Tap y to enter the Expense mode. You can change the expense category names at your convenience. 1. In the Main menu, tap y 2. Tap on the menubar to select the Expense menu, then select to enter the Expense mode.
-
Página 22: Editing Entries
Editing Entries Edit 1. Recall an entry in the desired mode. 2. Tap “, then select “Edit Entry”. The display will change to the edit mode. 3. Edit the data. j l k m: move the cursor to left, right, up or down, respectively (If the cursor is placed in a date entry field, tap ≈... -
Página 23: Word Translator Mode
• Notations are used as follows: Word Translator Mode (Am): American English (Br): British English Word Translator (adj): Adjective (adv): Adverb English-Spanish bi-directional word translator function is available (n): Noun for download. Refer to "Download Dictionary Database" on page 29 (pron): Pronoun for details. -
Página 24: Calculator Mode
Calculator Mode Example Operation Display Mixed calculation - 24 + 2 / 4 = (–24+2) ÷ 4= –5.5 The Organizer’s built-in calculator can perform arithmetic calcula- Constant/repeat calculation tions using up to 12 digits. The second figure is a constant value Tap q in the Main menu to enter Calculator mode. -
Página 25: Conversion Mode
Note: Conversion Mode • The conversion result may have a slight calculation error as a result of rounding off the number. Use as a reference only. Two Conversion modes - Metric, and Currency - can be accessed by tapping ^ or " in the Main menu. Currency Conversion Mode Conversion Table Currency conversion has 5 stages of programmable conversion. - Página 26 6. Enter the rate; 1.45. Metric Conversion Mode Up to 12 numeric characters can Twelve digit metric conversion calculations are available. be entered for the rate. Convert metric unit If you need to clear the rate number, tap c. <Example> 7.
-
Página 27: Secret Function
Changing the Password Secret Function 1. In the Main menu, tap :, then select “4. Password” in the list. The Secret function allows you to protect entries with a password, The password entry display will appear. so that no unauthorized person can access them. 2. -
Página 28: Game Mode
5. The highest pay possible is 99999. When this amount is reached, a Game Mode cornucopia will appear on the screen, filled with gold. The Organizer comes equipped with two games: “Slots”, and “Brick A message “Congratulations! You have got $99999!” will appear. Attack”. -
Página 29: Managing The Organizer's Memory
Managing the Organizer's Memory Using the Included PC Software Use the memory management function to utilize the Organizer's The CD-ROM contains software to enable exchange of data with a memory more efficiently. Note: The software consists of: • Before performing memory management, back up your data. Synchronization Software: •... - Página 30 Connecting the Organizer to Your PC Serial Port Setup 1. Turn off your PC and the Organizer. The serial port setting dialog box appears after you have finished software installation. 2. Connect the standard 9-pin connector of the PC-Link cable to the PC’s serial port.
- Página 31 Synchronization action: Desktop Utilities : Merges the data between the PC and the unit. Launch "Desktop Utilities" from the Start menu, or right-click on the : PC overwrites the data of the unit. Synchronization icon on the Windows ® : The unit overwrites the PC data. system tray, then select "Desktop Utilities..."...
-
Página 32: Battery Replacement
Battery Replacement Battery Replacement Battery replacement time Battery used When “B” is displayed, immediately replace the battery with a Type Size/Model Qty. new one. Follow the steps on page 31. Alkaline battery “AAA”/LR03 If the battery level is low, the alarm may not sound, or similarly the Backlight may not function or remain on for less than the set •... -
Página 33: Replacing The Battery
Replacing the battery Specifications • Make sure the power is turned off before replacing the battery. Model: OZ-590 • Do not press o until the battery replacement procedure is Product name: Electronic Organizer complete. Display: 80 x 111 dot matrix liquid crystal display... - Página 34 Calendar mode: From Jan.,1950 to Dec., 2150, Confirmation of Currency/Unit conversion mode: Schedule, To Do, and Anniversary mode entries 12 digits, 25 combinations of currencies (5) and can be made by the indication marks seen on metric (20) conversions the right side of the date Game mode: 2 games Schedule mode:...
-
Página 35: Appendix
Appendix Names of the cities recognized by the clock # COUNTRY CITY # COUNTRY CITY # COUNTRY CITY # COUNTRY CITY 1 Afghanistan Kabul 26 Chile Easter Island 51 Kenya Nairobi Madrid 2 Algeria Algiers Santiago 52 Mexico Acapulco 77 Sweden Stockholm 3 Argentina Buenos Aires... - Página 36 630-378-3590 Responsible Party: (7am to 7pm CST M – F) SHARP ELECTRONICS CORPORATION Sharp Plaza, Mahwah, New Jersey 07430-1163 Visit our Web Site TEL: 1-800-BE-SHARP www.sharpusa.com Tested To Comply With FCC Standards Send an E-mail FOR HOME OR OFFICE USE pdasupport@sharpsec.com...
-
Página 37: Instrucciones Abreviadas En Español
ESPAÑOL Empleo del Organizador por primera vez Instrucciones abreviadas en español 1. Primero necesitará instalar una pila. En la parte posterior del ÍNDICE Organizador, deslice el conmutador de cambio de pila hasta la Empleo del Organizador por primera vez ....... S-1 posición “REPLACE BATTERY”. -
Página 38: Función De Desactivación Automática
Función de desactivación automática Comprobación de la memoria disponible 1. Dé un toque en ! una o dos veces para visualizar la 1. Dé un toque en ! una o dos veces para visualizar la segunda página del menú principal, y luego dé un toque en segunda página del menú... -
Página 39: Desplazamiento Del Cursor
Abajo se muestra una lista de las teclas utilizadas con mayor frecuencia: Desplazamiento del cursor Teclas de mayúsculas: cuando se toquen, el modo Mueva el cursor pulsando/dando toques a j , l , k o m . cambiará entre minúsculas, mayúsculas y bloqueo de mayúsculas, para poder escribir con mayúsculas y minúsculas. -
Página 40: Modo De Reloj
Ajuste del reloj local Modo de reloj 1. Introduzca el modo del reloj local; dé un toque en el icono h en Para introducir el modo del reloj local o del reloj mundial, dé un el menú principal. toque en el icono h o ; del menú principal. Nota: •... -
Página 41: Modo De Alarma
Selección del formato de la fecha (Ajuste predeterminado: Modo de alarma Mes-Día-Año) 1. Dé un toque a h, y luego dé un toque el menú del reloj local en 1. Dé un toque a !, y luego dé toques para seleccionar h o la barra de menú. -
Página 42: Temporizador
Temporizador Modo de teléfono Se encuentran disponibles cuatro categorías de introducciones de 1. Dé un toque en ! una o dos veces, y luego encuentre y dé un teléfono: Business (negocios), Personal (personal), Unfiled (sin toque en el icono Q para introducir el modo del temporizador. archivar), y All (todos). -
Página 43: Modo De Calendario
Búsqueda Modo de calendario 1. Dé un toque en v y luego seleccione la categoría en la barra de 1. En el menú principal, dé un toque en a para introducir el menú. modo del calendario. 2. Dé un toque en “ y luego seleccione “Search Entry” en el menú. El calendario del mes actual se 3. -
Página 44: Modo De Programa De Actividades
Verificación de las introducciones en los modos de 4. Dé un toque en el día deseado del calendario, o ponga la fecha utilizando las teclas de números. Dé un toque en “09152004”, por programa, cosas a hacer, y aniversario ejemplo, para poner la fecha de introducción de septiembre 15, Las introducciones de programa, 2004. -
Página 45: Búsqueda Directa
Búsqueda directa Introduzca la fecha deseada del acontecimiento (“02142004” para febrero 14, 2004, por ejemplo). 1. En el menú principal, dé un toque en g para introducir el 4. Dé un toque en ≈ o dé un toque en el campo de descripción modo de programa. -
Página 46: Modo De Cosas A Hacer
Búsqueda directa Modo de cosas a hacer 1. En el menú principal, dé un toque en t para introducir el modo 1. En el menú principal, dé un toque en t para introducir el modo de cosas a hacer. de cosas a hacer. 2. -
Página 47: Modo De Apuntes
Modo de apuntes Modo de gastos 1. En el menú principal, dé un toque en el icono w para introducir 1. Dé un toque en y en el menú principal para introducir el el modo de apuntes. modo de gastos. 2. -
Página 48: Visualización De Introducciones Por Tipos/Categorías
Visualización de introducciones por tipos/categorías Informe de gastos 1. Dé un toque en y para introducir el modo de gastos. Se puede visualizar una lista de introducciones de gastos por tipos de pagos o por categorías de gastos. 2. Dé un toque en en la barra de menú... -
Página 49: Edición De Introducciones
3. Introduzca la palabra original deseada y pulse x. La palabra Edición de introducciones inglesa o española correspondiente se visualizará a continuación. 1. Recupere una introducción en el modo deseado. • Cuando se active el icono “ ” o “ ”... -
Página 50: Modo De Calculadora
3. Dé un toque en “ para introducir el modo de ajuste. Modo de calculadora 4. Cambie el nombre de la divisa de la izquierda en caso de ser necesario, y luego pulse m. Dé un toque en q en el menú principal para introducir el modo de la calculadora. -
Página 51: Utilización Del Software De Pc Incluido
Modo de conversión métrica Utilización del software de PC incluido La conversión métrica se encuentra disponible con el cálculo de 12 El CD-ROM contiene software para activar el intercambio de datos dígitos. con un PC. El software consiste en: Conversión de unidad métrica Software de sincronización: <Ejemplo>... -
Página 52: Preparación De Puerto Serial
Conexión del Organizador al PC Haga clic en “Auto Detect...” para permitir que la sincronización detecte automáticamente el puerto serial apropiado. Asegúrese 1. Apague su PC y el Organizador. primero de que la unidad esté conectada físicamente al PC, y luego 2. -
Página 53: Utilidades De Escritorio
Ficha de resolución de conflictos Utilidades de escritorio La ficha de resolución de conflictos del software de sincronización Haga clic con el botón derecho del le permite seleccionar la forma en que los conflictos de datos se ratón en el icono de sincronización de resuelven cuando se hacen modificaciones en los datos y se la bandeja del sistema Windows ®... - Página 54 Descarga de la base de datos del diccionario La descarga de la base de datos del diccionario le permite descargar del PC la base de datos del diccionario para el traductor de palabras. Inserte el CD-ROM, y luego haga clic en "Download..." para seleccionar el archivo que va ha descargar.
-
Página 55: Cambio De La Pila
Reemplazo de la pila Cambio de la pila Tiempo de reemplazo de la pila Pila usada Cuando se visualice “B”, reemplace inmediatamente la pila por Tipo Tamaño/Modelo Cantidad otra nueva. Siga los pasos de la página S-19~20. Pila alcalina “AAA”/LR03 Si la pila está... - Página 56 1. Apague el Organizador. 2. En la parte posterior del REPLACE BATTERY • • NORMAL OPERATION Organizador, deslice el conmutador de cambio de la pila hasta la posición “REPLACE BATTERY”, luego deslice la tapa del compartimiento de la pila para quitarla.
- Página 57 MEMO OZ590_1203.pm65 02.12.3, 8:12 PM...
- Página 58 MEMO OZ590_1203.pm65 02.12.3, 8:12 PM...
- Página 59 Product which were caused by repairs or attempted repairs performed in its original container, will be free from defective workmanship and materials, by anyone other than an authorized servicer. Nor shall Sharp be liable or in any way responsible for any incidental or consequential economic or...
- Página 60 SHARP ELECTRONICS CORPORATION Sharp Plaza, Mahwah, New Jersey 07430-1163 PRINTED IN CHINA/IMPRESO EN CHINA 02LGK (TINSE0588EHZZ) OZ590_1119.pm65_cover_ cover 4 02.12.6, 9:28 PM...