Tabla de contenido
Publicidad
Idiomas disponibles
Idiomas disponibles
Enlaces rápidos
Publicidad
Tabla de contenido

Manuales relacionados para Engel AM2000


Resumen de contenidos para Engel AM2000
- Página 1 CENTRAL AMPLIFICADORA MULTICANAL PROGRAMABLE CENTRALE D’AMPLIFICATION MULTI-CANAUX PROGRAMMABLE PROGRAMMABLE MULTICHANNEL AMPLIFIER SYSTEM AM2000 TERRESTRIAL TV MANUAL DE USUARIO MANUEL D’UTILISATION USER MANUAL...
- Página 3 ESPAÑOL CENTRAL AMPLIFICADORA MULTICANAL PROGRAMABLE AM2000 MANUAL DE USUARIO...
-
Página 4: Características
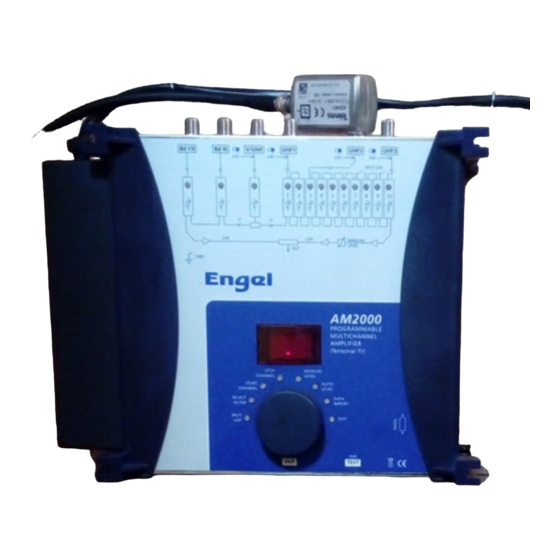
Bd I / II Bd III V/UHF UHF 1 UHF 2 UHF 3 24 V 24 V 24 V 24 V SPLIT UHF MANUAL LEVEL CARACTERÍSTICAS - Diseñado para canales analógicos y digitales, - 6 entradas: B I-II / B III / VHF-UHF y 3 entradas divididas sobre 10 clusters UHF programables, - Cada cluster puede tener de 1 a 7 canales del ancho de banda, - Fácil programación usando el pulsador rotativo. -
Página 5: Instrucciones De Seguridad
INSTRUCCIONES DE SEGURIDAD Leer con cuidado estas instrucciones antes de conectar la unidad. El voltaje viene indicado en el adaptador. Para prevenir fuego, corto-circuito, peligro de descargas: No exponga la unidad a la lluvia o humedad. Instale la unidad en un lugar seco sin filtraciones o condensaciones de agua. No la exponga a salpicaduras. -
Página 6: Descripción
UHF 3 24 V 24 V 24 V 24 V SPLIT UHF ventilación. MANUAL LEVEL Deje un espacio mínimo de 15 cm alrededor del producto para AM2000 PROGRAMMABLE MULTICHANNEL AMPLIFIER STOP MANUAL garantizar la maxima ventilación. CHANNEL LEVEL (TERRESTRIAL TV) START... -
Página 7: Operaciones
OPERACIONES Todos los parámetros son fijados con el botón de presión rotativo. Cada función y parámetros se muestran mediante un display de 2 dígitos y diferentes LEDs. PROGRAMACIÓN: Entrada modo de programación - Realice todas las conexiones necesarias y conecte el amplificador a la corriente. La versión del software sale en el display seguido de un punto. -
Página 8: Programación Clusters
- Presione el botón para confirmar la programación. LED vuelve a ponerse VERDE. Salida modo programación - Gire el botón para seleccionar el modo Exit (salir). El LED está VERDE. Exit - Presione el botón para confirmar. Un punto aparece en el display. Nota: El amplificador pasará... - Página 9 Para ajustar el número de clusters por entrada: - Gire el botón para seleccionar el modo Split UHF (Entrada UHF). El LED está VERDE. Split UHF - Presione el botón para confirmar. El LED está ROJO. Split UHF - Gire el botón para ajustar una configuración: - Presione el botón para confirmar El LED está...
- Página 10 - Gire el botón para seleccionar el modo Select Filter (Selección Filtro). Select Filter Modo está indicado con el = LED Verde LED de color VERDE. = LED Rojo - Presione el botón para entrar en el modo seleccionado. Select Filter El LED está...
- Página 11 - Gire el botón para seleccionar el canal inicial. Display - Presione el botón para confirmar. Start El LED está VERDE. Channel - Gire el botón para seleccionar el modo Stop Channel (Canal Final). Stop Channel El LED está VERDE. - Presione el botón para entrar en el modo seleccionado.
- Página 12 Notas: - Modo Monocanal: Cuando el canal de comienzo es seleccionado, el canal finalización es ajustado automáticamente con el mismo valor. Start Channel - Función de aparcado: Para desconectar el cluster, seleccione Start Channel (Canal Inicial) y ajuste canal 00. El Stop Channel (Canal Final) ira automáticamente al canal 00.
- Página 13 Para comprobar los ajustes de canal por cada cluster: - Gire el botón para seleccionar el modo Select Filter (Selección Filtro). Select Filter El LED está VERDE. - Presione el botón para entrar en el modo seleccionado. Select Filter El LED está ahora ROJO. - Gire el botón para seleccionar el cluster que desea comprobar.
-
Página 14: Ajuste De Nivel
AJUSTE DE NIVEL Los niveles son ajustados manualmente por cada entrada y/o automáticamente para los clusters. AJUSTE AUTOMÁTICO DEL NIVEL: Los niveles de BI-II / BIII /VHF-UHF no se procesan con la función de Nivel Automático. - Gire el botón para seleccionar el modo Auto Level (Nivel Automático). Auto Level El LED está... -
Página 15: Importante
- El LED de cada cluster muestra el estado de la ecualización. Notas: - El ajuste automático fija el nivel de salida del cluster a 100 dBμV (para una señal de entrada entre 50 y 80 dBμV). Si el nivel de entrada es inferior a 50 dBμV, el LED parpadeará lentamente después del procedimiento de ajuste automático. - Página 16 Gire el botón para seleccionar toda la UHF. - Presione el botón para confirmar. Select Filter El LED está VERDE. - Gire el botón para seleccionar el modo Manual Level (Nivel Manual). Manual Level El LED está VERDE. - Presione el botón para entrar en el modo seleccionado. Manual Level El LED está...
- Página 17 AJUSTE MANUAL DE NIVEL: Para ajustar manualmente el nivel. - Seleccione la entrada o cluster deseado. Ejemplo: ajustar el nievl de BI-II. Gire el botón para seleccionar el modo Select Filter (Selección Filtro). Select Filter El LED está VERDE. - Presione el botón para entrar en el modo seleccionado. Select Filter El LED está...
-
Página 18: Función Copia
24 V 24 V 24 V 24 V 24 V 24 V 24 V 24 V SPLIT UHF SPLIT UHF MANUAL MANUAL LEVEL LEVEL AM2000 AM2000 PROGRAMMABLE PROGRAMMABLE MULTICHANNEL MULTICHANNEL AMPLIFIER AMPLIFIER (TERRESTRIAL TV) (TERRESTRIAL TV) STOP MANUAL STOP MANUAL... - Página 19 - Conecte la unidad Maestra y la Esclava con un cable DSUB9 macho/macho cruzado. - Después conecte la corriente de las unidades. La versión del software aparece en el display, seguido de un punto. - Presione el botón durante más de 3 segundos para entrar en el modo de programación. 3 segundos - Gire el botón para seleccionar el modo Data Import.
-
Página 20: Reset General
Bd I / II Bd III V/UHF UHF 1 UHF 2 UHF 3 24 V 24 V 24 V 24 V SPLIT UHF MANUAL LEVEL AM2000 PROGRAMMABLE MULTICHANNEL AMPLIFIER STOP MANUAL (TERRESTRIAL TV) CHANNEL LEVEL START AUTO CHANNEL LEVEL SELECT... - Página 21 Bd I / II Bd III V/UHF UHF 1 UHF 2 UHF 3 24 V 24 V 24 V 24 V SPLIT UHF MANUAL LEVEL AM2000 PROGRAMMABLE MULTICHANNEL AMPLIFIER STOP MANUAL (TERRESTRIAL TV) CHANNEL LEVEL START AUTO CHANNEL LEVEL SELECT...
-
Página 22: Diagrama De Bloques
DIAGRAMA DE BLOQUES ESPECIFICACIONES TÉCNICAS... - Página 25 FRANÇAIS CENTRALE D’AMPLIFICATION MULTI-CANAUX PROGRAMMABLE AM2000 MODE D’EMPLOI...
- Página 26 Bd I / II Bd III V/UHF UHF 1 UHF 2 UHF 3 24 V 24 V 24 V 24 V SPLIT UHF MANUAL LEVEL SPECIFICATIONS - Développé pour la réception des canaux numériques et analogiques. - 6 entrées pour l‘amplification des signaux: B I-FM / B III / VHF-UHF avec filtrage / égalisation de 10 clusters provenant de 3 entrées UHF paramétrables.
-
Página 27: Consignes De Securite
CONSIGNES DE SECURITE Lire attentivement ces instructions avant le branchement au réseau électrique. La plaque signalétique sur l’alimentation indique la tension de fonctionnement. Afin d’éviter tout risque de court-circuit ou de choc électrique: Ne pas exposer cet appareil à la pluie ou à l’humidité. Installer le produit dans un lieu sec, sans infiltration ni condensation d’eau. - Página 28 24 V 24 V 24 V 24 V SPLIT UHF refroidisement. Laisser un espace MANUAL LEVEL minimum de 15 cm autour du produit pour garantir une ventilation maximale. AM2000 PROGRAMMABLE MULTICHANNEL AMPLIFIER STOP MANUAL (TERRESTRIAL TV) CHANNEL LEVEL START AUTO...
- Página 29 FONCTIONNEMENT Tous les paramètres sont réglés par bouton poussoir rotatif. Chaque fonction et paramètre sont indiqués sur un afficheur à 2 digits et par différentes LED. PROGRAMMATION: - Faire tous les branchements nécessaires et relier l’amplificateur au secteur. La version du software est affichée, suivie d’un point.
- Página 30 - Appuyer sur le bouton pour confirmer la valeur du paramètre. LED retourne à la couleur VERTE. Répéter cette section pour fixertous les paramètres - Tourner le bouton pour sélectionner le mode Exit (Sortie). La LED est VERTE. Exit - Appuyer sur le bouton pour confirmer. Un point est affiché.
- Página 31 Pour configurer le nombre de cluster(s) par entrée: - Tourner le bouton pour sélectionner le mode Split UHF. La LED est VERTE. Split UHF - Appuyer sur le bouton pour confirmer. La LED est ROUGE. Split UHF - Tourner le bouton pour choisir une configuration: - Appuyer sur le bouton pour confirmer.
- Página 32 - Tourner le bouton pour sélectionner le mode Select Filter. Select Filter Le mode est indiqué = LED verte par une LED VERTE. = LED rouge - Appuyer sur le bouton rotatif pour accéder au mode sélectionné. Select Filter La LED est à présent ROUGE. - Dans ce mode, tourner le bouton pour sélectionner le cluster à...
- Página 33 -Tourner le bouton pour sélectionner le canal le début. Affichage - Appuyer sur le bouton pour confirmer. Start La LED est VERTE. Channel - Tourner le bouton pour sélectionner le mode Stop Channel (Canal de Fin). Stop Channel La LED est VERTE. - Appuyer sur le bouton rotatif pour accéder au mode sélectionné.
- Página 34 - Appuyer sur le bouton pour confirmer. Stop Channel La LED est VERTE. Remarques: - Mode monocanal: Lorsque le mode Start Channel (Canal de Début) est sélectionné, le Canal de Fin (Stop Channel) est automatiquement mis sur la même valeur. Start Channel - Pour désactiver un cluster, sélectionner Start Channel (Canal de Début) et mettre la valeur 00.
- Página 35 Pour vérifier les réglages de chaque cluster: - Tourner le bouton pour choisir le mode Select Filter. Select Filter La LED est VERTE. - Appuyer sur le bouton rotatif pour accéder au mode sélectionné. Select Filter La LED est à présent ROUGE. - Dans ce mode, choisir le cluster à...
- Página 36 REGLAGE DU NIVEAU Les niveaux sont réglés manuellement pour chaque entrée et / ou automatiquement pour les clusters UHF. Réglage automatique de niveau: Le réglage des niveaux BI-II / BIII / VHF-UHF n’est pas automatique. - Tourner le bouton pour choisir le mode Auto Level (Niveau Automatique). Auto Level - Appuyer sur le bouton rotatif pendant plus de 3 secondes pour lancer la procédure de réglage...
-
Página 37: Important
- Chaque LED cluster, indique l’état d’égalisation. Remarques: - Le réglage automatique fixe le niveau de sortie des clusters à 100 dBμV (pour un niveau d’entrée compris entre 50 et 80 dBμV). Si le niveau d’entrée est inférieur à 50 dBμV, la LED clignotera lentement après la procédure de réglage automatique. - Página 38 Tourner le bouton pour sélectionner tout l’ UHF. - Appuyer sur le bouton pour confirmer. Select Filter La LED est VERTE. - Tourner le bouton pour sélectionner le mode Manual Level mode. Manual Level La LED est VERTE. - Appuyer le bouton rotatif pour accéder au mode sélectionné. Manual Level La LED est à...
- Página 39 RÉGLAGE DE NIVEAU MANUEL: Pour régler manuellement le niveau. - Sélectionner l’entrée ou le cluster à régler. Exemple: réglage du niveau BI-II Tourner le bouton pour choisir le mode Select Filter. Select Filter La LED est VERTE. - Appuyer sur le bouton rotatif pour accéder au mode sélectionné. Select La LED est à...
- Página 40 24 V 24 V 24 V 24 V 24 V 24 V 24 V 24 V SPLIT UHF SPLIT UHF MANUAL MANUAL LEVEL LEVEL AM2000 AM2000 PROGRAMMABLE PROGRAMMABLE MULTICHANNEL MULTICHANNEL AMPLIFIER AMPLIFIER (TERRESTRIAL TV) (TERRESTRIAL TV) STOP MANUAL STOP MANUAL...
- Página 41 - Relier l’amplificateur maître et esclave par un cordon DSUB9 mâle/mâle croisé. - Brancher ensuite les amplificateurs au secteur. La version software est affichée, suivie d’un point. - Appuyer sur le bouton rotatif pendant plus de 3 secondes pour accéder au mode programmation. 3 secondes - Tourner le bouton pour sélectionner le mode Data Import (Importation Données).
-
Página 42: Remise A Zero
Bd I / II Bd III V/UHF UHF 1 UHF 2 UHF 3 24 V 24 V 24 V 24 V SPLIT UHF MANUAL LEVEL AM2000 PROGRAMMABLE MULTICHANNEL AMPLIFIER STOP MANUAL (TERRESTRIAL TV) CHANNEL LEVEL START AUTO CHANNEL LEVEL SELECT... - Página 43 Bd I / II Bd III V/UHF UHF 1 UHF 2 UHF 3 24 V 24 V 24 V 24 V SPLIT UHF MANUAL LEVEL AM2000 PROGRAMMABLE MULTICHANNEL AMPLIFIER STOP MANUAL (TERRESTRIAL TV) CHANNEL LEVEL START AUTO CHANNEL LEVEL SELECT...
-
Página 44: Schema De Principe
SCHEMA DE PRINCIPE CARACTERISTIQUES TECHNIQUES... - Página 47 ENGLISH PROGRAMMABLE MULTICHANNEL AMPLIFIER SYSTEM AM2000 USER MANUAL...
- Página 48 Bd I / II Bd III V/UHF UHF 1 UHF 2 UHF 3 24 V 24 V 24 V 24 V SPLIT UHF MANUAL LEVEL FEATURES - Designed for both digital and analogue channels. - 6 inputs : B I-II / B III / VHF-UHF and 3 UHF inputs splitted over 10 UHF programmable clusters.
-
Página 49: Safety Instructions
SAFETY INSTRUCTIONS Read carefully these instructions before connecting the unit. The operating voltage is indicated on the adapter. To prevent fire, short circuit, shock hazard: Do not expose the unit to rain or moisture. Install the unit in a dry location without infiltration or condensation of water. Do not expose it to dripping or splashing. - Página 50 UHF 2 UHF 3 24 V 24 V 24 V 24 V SPLIT UHF space of 15 cm. around the product to MANUAL LEVEL guarantee a maximum ventilation. AM2000 PROGRAMMABLE MULTICHANNEL AMPLIFIER STOP MANUAL (TERRESTRIAL TV) CHANNEL LEVEL AUTO START...
- Página 51 OPERATION All parameters are set with the rotary push button. Each function and parameters are shown on 2 digits display and different LEDs. PROGRAMMING: Enter Programming Mode - Make all the necessary connections and connect amplifier to mains. The software version is displayed, followed by a dot.
- Página 52 - Push the button to confirm the parameter setting. LED returns to a GREEN color. Exit Programming Mode - Turn the button select Exit mode. The LED is GREEN. Exit - Push the button to confirm. A dot is displayed. Note: The amplifier will go in “stand-by”...
- Página 53 To set the number of cluster(s) per input: - Turn the button to select Split UHF mode. The LED is GREEN. Split UHF - Push the button to confirm. The LED is RED. Split UHF - Turn the button to set one configuration: - Push the button to confirm.
- Página 54 - Turn the button to select the Select Filter mode. Select Filter Mode is indicated with = green LED a GREEN colored RED = red LED - Push the rotary button to enter the selected mode. Select Filter The LED is now RED colored. - Inside the mode, turn the button to select the cluster to be set.
- Página 55 - Turn the button to select the start channel. Display - Push the button to confirm. Start The LED is GREEN. Channel - Turn the button to select the Stop Channel mode. Stop Channel The LED is GREEN. - Push the rotary button to enter the selected mode. Stop Channel The LED is now RED colored.
- Página 56 - Push the button to confirm. Stop Channel The LED is GREEN. Notes: - Single channel mode: When the Start Channel is selected, the Stop Channel is automatically set at the same value. Start Channel - Park function: to swith off the cluster, select Start Channel and set 00. The Stop Channel goes automaticaly to 00.
- Página 57 To check the channel settings of each cluster: - Turn the rotary button to select Select Filter. Select Filter The LED is GREEN. - Push the rotary button to enter the selected mode. Select Filter The LED is now RED colored. - Turn the button to choose the cluster to be checked.
-
Página 58: Level Adjustment
LEVEL ADJUSTMENT Levels are manually set for each input and / or automatically for the UHF clusters. AUTOMATIC LEVEL SETTING: The levels of BI-II / BIII / VHF-UHF are not processed in the Auto Level function. - Turn the button to choose the Auto Level. Auto Level The LED is GREEN. - Página 59 - Each cluster’s LED shows the status of equalization. Notes: - The automatic level adjustament set the output level of the clusters at 100 dBμV (for an input level between 50 to 80 dBμV). If the input level is less than 50 dBμV, the LED will blink slowly after the automatic level adjustment. If the input level is higher than 80 dBμV, the LED will blink rapidly after the automatic level adjustment.
- Página 60 Turn the button to select all UHF. - Push the button to confirm. Select Filter The LED is GREEN. - Turn the button to select the Manual Level mode. Manual Level The LED is GREEN. - Push the rotary button to enter the select mode. Manual Level The LED is now RED colored.
- Página 61 MANUALLY LEVEL SETTING: To set manually the level. - Select the desired input or cluster. Example> setting the level of BI-II (UK version = BII) Turn the button to choose the Select Filter mode. Select Filter The LED is GREEN. - Push the rotary button to enter the select mode.
- Página 62 24 V 24 V 24 V 24 V 24 V 24 V 24 V 24 V SPLIT UHF SPLIT UHF MANUAL MANUAL LEVEL LEVEL AM2000 AM2000 PROGRAMMABLE PROGRAMMABLE MULTICHANNEL MULTICHANNEL AMPLIFIER AMPLIFIER (TERRESTRIAL TV) (TERRESTRIAL TV) STOP MANUAL STOP MANUAL...
- Página 63 - Connect master and slave unit with a DSUB9 male/male crossed cable. - Then connect mains to the units. The software version is displayed, followed by a dot. - Push on the rotary button for more than 3 seconds to enter into programming mode. 3 seconds - Turn the button to select the Data Import mode.
- Página 64 Bd I / II Bd III V/UHF UHF 1 UHF 2 UHF 3 24 V 24 V 24 V 24 V SPLIT UHF MANUAL LEVEL AM2000 PROGRAMMABLE MULTICHANNEL AMPLIFIER STOP MANUAL (TERRESTRIAL TV) CHANNEL LEVEL START AUTO CHANNEL LEVEL SELECT...
- Página 65 Bd I / II Bd III V/UHF UHF 1 UHF 2 UHF 3 24 V 24 V 24 V 24 V SPLIT UHF MANUAL LEVEL AM2000 PROGRAMMABLE MULTICHANNEL AMPLIFIER STOP MANUAL (TERRESTRIAL TV) CHANNEL LEVEL START AUTO CHANNEL LEVEL SELECT...
-
Página 66: Block Diagram
BLOCK DIAGRAM TECHNICAL SPECIFICATIONS... - Página 68 Teléfono de asistencia: 902 102 730 France Tel. Call Center: 01 60 63 76 50 ENGEL AXIL, S.L. ENGEL SYSTEMS, SARL Puig dels Tudons, 6 10, Rue du Platine Pol. Ind. Santiga (Parc d’Activités) Secteur 6 08210 Barberà del Vallès...