Stihl BR 500 Manual De Instrucciones
Ocultar thumbs
Ver también para BR 500:
- Manual de instrucciones (84 páginas) ,
- Instrucciones de servicio (66 páginas) ,
- Manual de instrucciones (82 páginas)
Tabla de contenido
Publicidad
Idiomas disponibles
Idiomas disponibles
Enlaces rápidos
STIHL BR 500, 550, 600
STIH)
Instruction Manual
Manual de instrucciones
Warning!
For safe operation follow all safety
precautions in Instruction Manual - improper
use can cause serious injury.
Advertencia!
Para su seguridad durante el manejo de este
producto, siga siempre las precauciones de
seguridad dadas en el manual de
instrucciones - el uso indebido puede causar
lesiones graves.
Publicidad
Capítulos
Tabla de contenido

Manuales relacionados para Stihl BR 500


Resumen de contenidos para Stihl BR 500
- Página 1 STIH) STIHL BR 500, 550, 600 Instruction Manual Manual de instrucciones Warning! For safe operation follow all safety precautions in Instruction Manual - improper use can cause serious injury. Advertencia! Para su seguridad durante el manejo de este producto, siga siempre las precauciones de...
-
Página 2: Tabla De Contenido
Storing the Machine ....... 30 To receive maximum performance and Assembling the Blower – Maintenance Chart ......31 satisfaction from your STIHL blower, it is with non-adjustable Parts and Controls - important that you read and understand blowing attachment ......11... -
Página 3: Guide To Using This Manual
STIHL dealer for illustration. environment. assistance. Example: Therefore some changes, modifications Loosen the screw (1) and improvements may not be covered Lever (2) ... in this manual. BR 500, BR 550, BR 600... -
Página 4: Ignition System
Safety Precautions Warning! Most of these safety precautions and Constant operational readiness warnings apply to the use of all STIHL The use of any blower blowers. Different models may have This unit’s ignition system is always may be dangerous. It is different parts and controls. - Página 5 English / USA Your STIHL blower is equipped with an Proper Clothing Warning! antivibration system (AV). The AV Warning! system is designed to reduce the Use of this product can generate dust, transmission of engine vibrations to the To reduce the risk of injury, the operator mists, and fumes containing chemicals operator's body.
- Página 6 STIHL blower, their use may be crystalline silica as a substance known ANSI Z 87.1 (or your applicable national extremely dangerous. to cause cancer. When encountering standard).
- Página 7 When transporting your unit in a operator to the ground. For these units Warning! vehicle, properly secure it to prevent STIHL offers an optional kit for use in Gasoline is an extremely turnover, fuel spillage and damage to the especially dry and dusty conditions. The flammable fuel.
- Página 8 Using the grip, turn the cap firmly chipping). If any damage is found, stop clockwise as far as it will go (approx. a using the unit and contact your STIHL Warning! quarter turn). dealer for repair. Check for fuel leakage while refueling and during operation.
- Página 9 You may also permanently damage the engine. Have your muffler serviced and repaired by your STIHL Servicing Dealer only. BR 500, BR 550, BR 600...
- Página 10 Pay attention to the direction of the wind, other confined areas. i.e., do not work against the wind. Keep the space behind and beside the engine clear at all times to allow for the escape of hot and toxic exhaust fumes. BR 500, BR 550, BR 600...
-
Página 11: Working Techniques
The blower can be used for clearing leaves, grass, paper, dust and light snow in yards, gardens, sports stadiums, parks, driveways and parking lots. It is also suitable for drying cars and clearing forest paths. BR 500, BR 550, BR 600... -
Página 12: Assembling The Blower - With Non-Adjustable Blowing Attachment
Use the specified spark plug Before storing for longer than a few and make sure it and the ignition lead days, always empty the fuel tank. are always in good condition. See “Guide to Using the Manual” BR 500, BR 550, BR 600... - Página 13 (7) (without retainer clamp (9) (with retainer for throttle for throttle cable) – screw recess cable) – screw recess and retainer facing you. facing you. Pass the discharge wire (1) through the pleated hose (7). BR 500, BR 550, BR 600...
- Página 14 The hook on the discharge wire must be attached to the eye (arrow). Tighten down the screw (12) firmly. min. 1 cm min. 1/2" – The discharge wire must project at least 1 cm. BR 500, BR 550, BR 600...
- Página 15 Clip throttle cable (4) with sleeve (5) and then remove them. to retainer (6). Move the control handle (1) along the tube to the most comfortable position. Tighten down the screw (3) firmly. BR 500, BR 550, BR 600...
-
Página 16: Assembling The Blower - With Length-Adjustable Blowing Attachment
Push blower tube (1) onto blower opening in the backplate. conductive control handle. tube (2) and engage it in one of the slots (3). See “Guide to Using the Manual” BR 500, BR 550, BR 600... - Página 17 8 = Line up the hose clamp (8) (with recess facing you. the blower tube (2) and engage it on retainer for throttle cable) – screw the lug (12). recess and retainer facing you. BR 500, BR 550, BR 600...
- Página 18 Clip throttle cable (4) with sleeve (5) to retainer (6). Move the control handle (1) along Attach blower tube to handle the tube to the most comfortable opening in the backplate. position. Tighten down the screw (3) firmly. BR 500, BR 550, BR 600...
-
Página 19: Adjusting The Throttle Cable
Move the throttle trigger to the full throttle position – as far as stop. Turn the screw in the throttle trigger slowly clockwise until you feel initial resistance. Lift the tabs of the two sliding adjusters. BR 500, BR 550, BR 600... -
Página 20: 4-Mix Engine
4-MIX Engine Fuel The STIHL 4-MIX engine features gas This engine is certified to operate on Use only STIHL two-stroke engine oil or oil lubrication and must be run on a fuel unleaded gasoline and the STIHL two- equivalent high-quality two-stroke mixture of gasoline and engine oil. -
Página 21: Fueling
Dispose of empty mixing-oil canisters in the tank to release slowly. only at authorized disposal locations. Rotate the cap about 1/4 turn counterclockwise and remove. BR 500, BR 550, BR 600... -
Página 22: Winter Operation
If the clip does not lie completely flat on problems. the cap and the lug does not engage the recess (see arrow), the cap is not properly closed. You must repeat the above steps. See “Guide to Using this Manual” BR 500, BR 550, BR 600... -
Página 23: Information Before You Start
Also use this position if the engine position # has been running but is still cold. Press fuel pump bulb at least five times – even if the bulb is filled with fuel. BR 500, BR 550, BR 600... - Página 24 Make sure you have a firm footing: Hold the machine firmly with your left hand on the housing and put one foot against the base to prevent it slipping. BR 500, BR 550, BR 600...
- Página 25 Engage the throttle trigger (2) in the At very low outside temperatures full throttle position. Continue cranking until the engine Open the throttle slightly – warm up runs. the engine for a short period. BR 500, BR 550, BR 600...
-
Página 26: Stopping The Engine
If there is a noticeable loss of engine Fit the filter cover. power: Insert and tighten down the screws Turn the choke knob to l firmly. Take out the screws (1). Remove the filter cover (2). BR 500, BR 550, BR 600... -
Página 27: Motor Management
With this carburetor it is only possible to make corrections to the high speed and Low speed screw (L) is open 3/4 low speed screws within fine limits. turn. Start and warm up the engine. see "Guide to Using this Manual" BR 500, BR 550, BR 600... -
Página 28: Adjusting Idle Speed
It is usually necessary to change the which may result in trouble in operation. setting of the idle speed screw (LA) after every correction to the low speed screw (L). BR 500, BR 550, BR 600... -
Página 29: Replacing Starter Rope And Rewind Spring
– take care to avoid injury. arcing that could ignite combustible fumes and cause a fire. Carefully remove the rope rotor with washer (4) and pawls (5). BR 500, BR 550, BR 600... - Página 30 (7) and secure it with a simple overhand knot. Lubricate the rope rotor bore with non-resinous oil. Push the rope rotor onto the starter post (8) and turn it back and forth to engage the rewind spring’s anchor loop. BR 500, BR 550, BR 600...
-
Página 31: Storing The Machine
If this is not the screw it in position. case, the spring is overtensioned and could break. Take one turn of rope off the rotor. BR 500, BR 550, BR 600... -
Página 32: Maintenance Chart
Check Blower air intake screen Clean Throttle cable Adjust Check Discharge wire (machines with non- adjustable blowing attachment) Replace Safety labels Replace STIHL recommends that this work be done by a STIHL servicing dealer BR 500, BR 550, BR 600... -
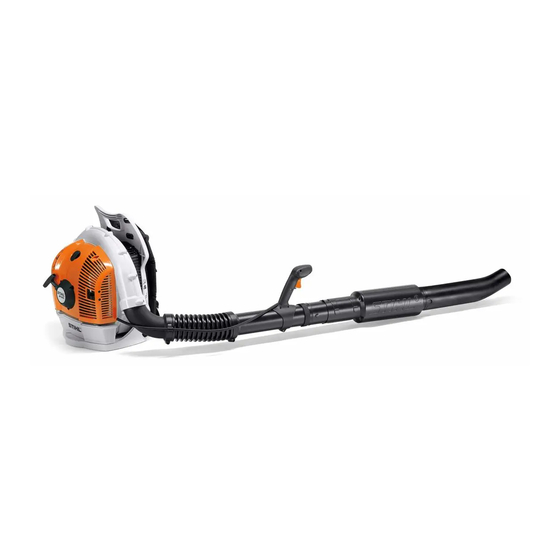
Página 33: Parts And Controls - With Non-Adjustable Blowing Attachment
1 Nozzle, straight* 2 Nozzle, curved* 3 Blower tube BR 550 / 600* 4 Blower tube BR 500* 5 Blower tube BR 500 / 550 / 600 6 Control handle 7 Throttle trigger 8 Setting lever 9 Pleated hose... - Página 34 For run and stop. Sets the throttle to For tuning carburetor. various positions or stops the 18. Choke Knob engine. Eases engine starting by enriching Pleated Hose mixture. For blowing in the desired direction. 10. Harness For carrying the unit. BR 500, BR 550, BR 600...
-
Página 35: Parts And Controls - With Length-Adjustable Blowing Attachment
1 Nozzle, straight* 2 Nozzle, curved* 3 Blower tube BR 550 / 600* 4 Blower tube BR 500* 5 Blower tube BR 500 / 550 / 600 6 Control handle 7 Throttle trigger 8 Setting lever 9 Pleated hose... - Página 36 For run and stop. Sets the throttle to Eases engine starting by enriching various positions or stops the mixture. engine. Pleated Hose For blowing in the desired direction. 10. Harness For carrying the unit. BR 500, BR 550, BR 600...
-
Página 37: Specifications
(A) Displacement: 3.95 ci (64.8 cm (3,5 mm dia. x 960 mm) BR 500 Bore: 2,55 in (50 mm) BR 550 Stroke: 1.3 in (33 mm) BR 600 Idle speed: 2 500 rpm BR 500, BR 550, BR 600... -
Página 38: Special Accessories
Original STlHL parts can be identified by the STlHL part number, the STIHl logo and, in some cases, by the STlHL parts symbol (. This symbol may appear alone on small parts. BR 500, BR 550, BR 600... -
Página 39: Stihl Incorporated Federal Emission Control Warranty Statement
You are responsible for presenting your small off-road equipment engine to a Obligations Coverage: STIHL service center as soon as a The U.S. Environmental Protection In the U.S., 1997 and later model year problem exists. The warranty repairs will Agency (EPA) and STIHL Incorporated... -
Página 40: Warranty Work
Any such work shall be free of and oil may require shorter maintenance charge to the owner if it is determined intervals. that a warranted part is defective. BR 500, BR 550, BR 600... -
Página 41: Stihl Incorporated California Exhaust And Evaporative Emissions Control Warranty Statement
English / USA For California only: STIHL Incorporated California Exhaust and Evaporative Emissions Control Warranty Statement Your Warranty Rights and Manufacturer’s Warranty You are responsible for presenting your small off-road equipment engine to a Obligations Coverage STIHL Service center as soon as the... - Página 42 DEFECTS WARRANTY PERIOD, see The owner must not be charged for STIHL Incorporated at no cost to the above. A statement in such written diagnostic labor that leads to the owner. instructions to the effect of "repair or...
-
Página 43: Trademarks
STIHL MiniBoss™ component that has a factory installed, and properly operating, adjustment STIHL MotoPlus 4™ limiting device is still eligible for warranty STIHL Multi-Cut HomeScaper Series™ coverage. Stihl Outfitters™ BR 500, BR 550, BR 600... - Página 44 STIHL Territory™ TapAction™ TrimCut™ This listing of trademarks is subject to change. Any unauthorized use of these trademarks without the express written consent of ANDREAS STIHL AG & Co. KG, Waiblingen is strictly prohibited. BR 500, BR 550, BR 600...
- Página 45 English / USA BR 500, BR 550, BR 600...
- Página 46 ......78 Comuníquese con el concesionario o de largo ajustable ......59 Specifications ......... 80 distribuidor de STIHL si no se entiende Ajuste del cable Accesorios especiales ....81 alguna de las instrucciones dadas en el del acelerador ......... 62 Mantenimiento y presente manual.
-
Página 47: Guía Para El Uso De Este Manual
Suelte el tornillo (1) concesionario STIHL para obtener la ayuda que requiera. Palanca (2) ... Por lo tanto, es posible que algunos cambios, modificaciones y mejoramientos no hayan sido descritos en este manual. BR 500, BR 550, BR 600... -
Página 48: Sistema De Encendido
Pida a su concesionario gado. STIHL que le enseñe el manejo del Esté alerta. Si se cansa durante el soplador. Respete todas las disposicio- manejo de la máquina, tómese un des- nes, reglamentos y normas de seguri- canso. - Página 49 NIOSH/MSHA para el material en uso. BR 500, BR 550, BR 600...
- Página 50 STIHL. Si bien es Además, el estado de California y algu- que satisfagan la norma posible conectar al soplador STIHL cier- nas otras autoridades han colocado a la ANSI Z 87.1 (o la norma nacional...
- Página 51 No fume cerca del combustible, ni acer- causar lesiones graves debido al que ningún fuego o llama al mismo. aumento de las vibraciones o de los incendios que resulten de las fugas del combustible. BR 500, BR 550, BR 600...
- Página 52 Si la anteriores. vapores de combustible. mancha, cámbiesela inmediatamente. Condición del rotor y la caja del ven- Siempre guarde la gasolina en un tilador. envase aprobado para ello. BR 500, BR 550, BR 600...
- Página 53 Además, se podría dañar permanente- mente el motor. Haga reparar el silencia- dor únicamente por el concesionario de servicio STIHL. BR 500, BR 550, BR 600...
- Página 54 Mantenga despejados los espacios detrás del motor y a sus costados en todo momento para permitir el escape de los vapores calientes y tóxicos. BR 500, BR 550, BR 600...
- Página 55 También es adecuado para secar auto- móviles y despejar caminos en bosques. BR 500, BR 550, BR 600...
-
Página 56: Armado Del Soplador - Con Accesorio Soplador No Ajustable
única- Guarde el soplador en un lugar seco, mente en el taller de servicio de STIHL. elevado o con llave lejos del alcance de Revise si la tapa de llenado tiene fugas los niños. - Página 57 – la cavidad nillo y el retenedor deben apuntar para el tornillo debe apuntar hacia hacia su persona. su persona. Pase el alambre de descarga (1) a través de la manguera con pliegues (7). BR 500, BR 550, BR 600...
- Página 58 El gancho en el alambre de des- ilustrada. carga siempre debe estar fijado al ojal (flecha). Apriete el tornillo (12) firmemente. min. 1 cm min. 1/2" – El alambre de descarga deberá sobresalir por lo menos 1 cm. BR 500, BR 550, BR 600...
-
Página 59: Desarmado De Los Tubos Y Del Mango De Control
(5) al retenedor (6). los. Deslice el mango de control (1) a lo largo del tubo para ponerlo en la posición más cómoda. Apriete el tornillo (3) firmemente. BR 500, BR 550, BR 600... -
Página 60: Colocación De La Ayuda Para Transporte
Fije el tubo del soplador a la aber- ductivo. el tubo (2) y engánchelo en una de tura de mango en la placa para la las ranuras (3). espalda. Vea “Guía para el uso del manual” BR 500, BR 550, BR 600... - Página 61 – la cavidad para el del soplador (2) y engánchela en la del acelerador) – la cavidad para el tornillo debe apuntar hacia su per- orejeta (12). tornillo y el retenedor deben apuntar sona. hacia su persona. BR 500, BR 550, BR 600...
- Página 62 Deslice el mango de control (1) a lo Fije el tubo del soplador a la aber- largo del tubo para ponerlo en la tura de mango en la placa para la posición más cómoda. espalda. Apriete el tornillo (3) firmemente. BR 500, BR 550, BR 600...
-
Página 63: Ajuste Del Cable Del Acelerador
– contra el tope. Apriete el tornillo del gatillo de ace- leración lentamente en sentido horario hasta que se sienta la resis- tencia inicial. Levante las pestañas de las dos hebillas deslizantes de ajuste. BR 500, BR 550, BR 600... -
Página 64: Motor 4-Mix
50 a 1 de gaso- motores de dos tiempos o un aceite de una mezcla de gasolina y aceite para lina sin plomo y aceite STIHL para moto- marca equivalente para motores de dos motor. -
Página 65: Llenado De Combustible
Deseche los envases vacíos usados haber acumulado en el tanque se para mezclar el aceite únicamente en Gire la tapa aproximadamente 1/4 disipe lentamente. vertederos autorizados para ello. de vuelta en sentido contrahorario y quítela. BR 500, BR 550, BR 600... -
Página 66: Manejo Durante El Invierno
(vea la flecha), la tapa no está debidamente cerrada. Debe repetir los pasos anteriores. Vea “Guía para el uso de este manual” BR 500, BR 550, BR 600... -
Página 67: Información Previa Al Arranque
# todavía se encuentra frío. veces, aunque el bulbo esté lleno de combustible. BR 500, BR 550, BR 600... - Página 68 Asegúrese de tener los pies bien apoyados: Agarre la máquina firme- mente colocando la mano izquierda sobre la caja y ponga un pie contra la base para impedir que se des- place. BR 500, BR 550, BR 600...
- Página 69 A temperaturas ambiente muy bajas Enganche el gatillo de aceleración Abra el acelerador levemente – (2) en la posición de aceleración caliente el motor por un período máxima. breve. Continúe haciendo girar el motor hasta que arranque. BR 500, BR 550, BR 600...
-
Página 70: Sustitución Del Filtro De Aire
Si se produce una pérdida notable de Coloque la tapa del filtro. potencia del motor: Inserte los tornillos y apriételos fir- Gire la perilla del estrangulador a I memente. Saque los tornillos (1). Quite la cubierta del filtro (2). BR 500, BR 550, BR 600... -
Página 71: Manejo Del Motor
Abra el tornillo de velocidad baja (L) pequeña. 3/4 de vuelta. Arranque el motor y caliente. vea "Guía para el uso de este manual" BR 500, BR 550, BR 600... -
Página 72: Revisión De La Bujía
Generalmente es necesario cambiar el ajuste del tornillo de ralentí (LA) des- pués de cada corrección hecha al torni- llo de velocidad baja (L). BR 500, BR 550, BR 600... -
Página 73: Sustitución De La Cuerda De Arranque Y Resorte De Rebobinado
– tome medi- encender los vapores del combusti- das para evitar lesiones. ble, provocando un incendio. Quite cuidadosamente el rotor de la cuerda con la arandela (4) y los trin- quetes (5). BR 500, BR 550, BR 600... - Página 74 Lubrique la cavidad del rotor de la cuerda con aceite sin resina. Empuje el rotor en el poste del arrancador (8) y gírelo hacia uno y otro lado para enganchar la espiral de anclaje del resorte de rebobi- nado. BR 500, BR 550, BR 600...
-
Página 75: Tensado Del Resorte De Rebobinado
En caso contra- en su lugar. rio, el resorte está sobretensado y podría romperse. Quítele una vuelta de la cuerda al rotor. BR 500, BR 550, BR 600... -
Página 76: Tabla De Mantenimiento
Rejilla de la toma de aire del soplador Limpiar Cable del acelerador Ajuste Revisar Alambre de descarga (máquinas con accesorio soplador no ajustable) Reemplazar Etiquetas de seguridad Reemplazar STIHL recomienda que un conce- sionario de servicio STIHL efectúe este trabajo BR 500, BR 550, BR 600... -
Página 77: Piezas Y Controles - Con Accesorio Soplador No Ajustable
1 Boquilla recta* 2 Boquilla curva* 3 Tubo del soplador BR 550 / 600* 4 Tubo del soplador BR 500* 5 Tubo del soplador BR 500 / 550 / 600* 6 Mango de control 7 Gatillo de aceleración 8 Palanca de ajuste 9 Manguera con pliegues 10 Arnés... -
Página 78: Definiciones
Para afinar el carburador. apaga el motor. 18. Perilla de estrangulador Manguera con pliegues Facilita el arranque del motor al Para soplar en el sentido deseado. enriquecer la mezcla. 10. Arnés Para portar la unidad. BR 500, BR 550, BR 600... -
Página 79: Piezas Y Controles - Con Accesorio Soplador De Largo Ajustable
1 Boquilla recta* 2 Boquilla curva* 3 Tubo del soplador BR 550 / 600* 4 Tubo del soplador BR 500* 5 Tubo del soplador BR 500 / 550 / 600* 6 Mango de control 7 Gatillo de aceleración 8 Palanca de ajuste 9 Manguera con pliegues 10 Arnés... - Página 80 18. Perilla de estrangulador acelerador a varias posiciones o Facilita el arranque del motor al apaga el motor. enriquecer la mezcla. Manguera con pliegues Para soplar en el sentido deseado. 10. Arnés Para portar la unidad. BR 500, BR 550, BR 600...
-
Página 81: Specifications
Cuerda de arranque: BR 600 Diámetro: 50 mm 3,5 mm diám. x 960 mm (2,55 pulg) (0,14 pulg diám. x 37,8 pulg) 42 mm (1,7 pulg) 33 mm (1,3 pulg) Ralentí: 2 500 rpm BR 500, BR 550, BR 600... -
Página 82: Accesorios Especiales
Solamente los talleres autoriza- dos por STIHL deben llevar a cabo los demás trabajos de reparación. Los reclamos de garantía presentados después de realizadas las reparaciones serán aceptados únicamente si las mis-... -
Página 83: Declaración De Garantía De Stihl Incorporated Sobre Sistemas De Control De Emisiones Según Normas Federales
/ EE.UU No para California: Declaración de garantía de STIHL Incorporated sobre sistemas de control de emisiones según normas Federales Sus derechos y obligaciones de costo alguno, incluido el diagnóstico (si reducirá las obligaciones de la garantía el trabajo de diagnóstico fue realizado del fabricante del motor. -
Página 84: Diagnóstico
STIHL. La prueba del sistema Lleve el producto a cualquier centro de reglamentos aplicables durante un de control de emisiones se realiza ya servicio autorizado por STIHL y pre- período de dos años. -
Página 85: Estado De California
/ EE.UU Solamente para California: Declaración de garantía de STIHL Incorporated sobre el control de emisiones de gases de escape y emisiones por evaporación para el Estado de California Sus derechos y obligaciones de En los casos de existir una condición ser consciente de que STIHL Incorpora- amparada bajo garantía, STIHL Incorpo-... - Página 86 (4) punto de sustitución programado para el garantizada que todavía está bajo componente. garantía. más abajo. Un componente reparado o BR 500, BR 550, BR 600...
-
Página 87: Marcas Comerciales
STIHL Series™ Incorporated demuestra el maltrato, negligencia o mantenimiento incorrecto STIHL Magnum /Stihl-Magnum™ del producto de STIHL, y que tal mal- STIHL MiniBoss™ trato, negligencia, o mantenimiento STIHL MotoPlus 4™ incorrecto era la causa directa de la necesidad de reparación o sustitución... - Página 88 TapAction™ TrimCut™ Esta lista de marcas comerciales está sujeta a cambios. Queda terminantemente prohibido todo uso de estas marcas comerciales sin el consentimiento expreso por escrito de ANDREAS STIHL AG & Co. KG, Waiblingen. BR 500, BR 550, BR 600...
- Página 89 / EE.UU BR 500, BR 550, BR 600...
- Página 90 ! WARNING! ! WARNING! ! ADVERTENCIA! The engine exhaust from this product The engine exhaust from this product El gas de escape del motor de esta máquina contiene productos químicos que en el estado de contains chemicals known to the State contains chemicals known to the State California son considerados como causantes de of California to cause cancer, birth...