Publicidad
Enlaces rápidos
Do not contact the store for parts.
Individual stores do not stock parts.
For missing or damaged parts please call anytime at 1-877-490-3338
We guarantee immediate service.
For customer comments please email us at customer.service@pinnacledesign.net
Visit us at www.pinnacledesign.net
Ne pas contacter le magasin
Pour les pièces qui manquent ou des pièces endomager téléphonez au 1-877-490-3338
Nous assurons un service rapide.
Pour commentaires, s'adresser à customer.service@pinnacle.net
Visiter nous à www.pinnacledesign.net
Si tienen falta de piezas, favor de no devlver este prducto al almacen.
Nuestro departamento de servicio tiene mucho orgullo en darle ayuda en la manera mas eficiente y lo pronto possible. Si es necesario de obtener
piezas de repuesto, favor de llamar 1-877-490-3338.
Nosotros garantizamos servicio imediato.
Para comentarios de cliente por favor nos manda correo electrónico a customers.serveice@pinnacledesign.net
Visita nuestro sitio electrónico a www.pinnacledesign.net
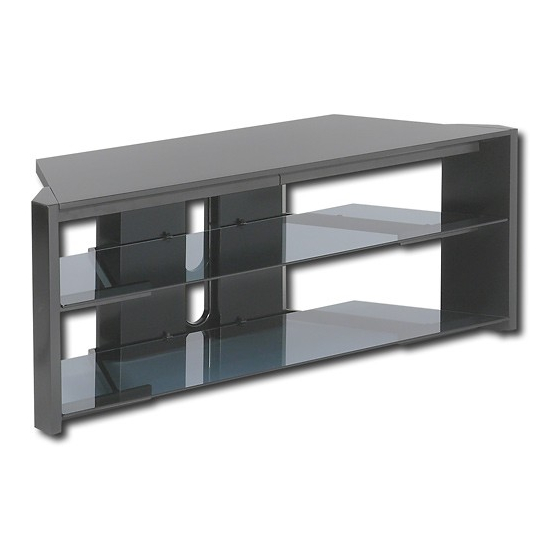
TV STAND
Model TR50X3B
TV STAND
MODEL TR50X3B
Soporte de televisión
Modelo TR50X3B
Publicidad

Resumen de contenidos para Pinnacle Design TR50X3B
- Página 1 TV STAND Model TR50X3B TV STAND MODEL TR50X3B Soporte de televisión Modelo TR50X3B Do not contact the store for parts. Individual stores do not stock parts. For missing or damaged parts please call anytime at 1-877-490-3338 We guarantee immediate service.
- Página 2 Thank you for purchasing an item for Pinnacle Design. Pinnacle Design garantit ce produit libre de défaut de matériaux ou de fabrication et s’engage à remidier tout problème qui se manifeste durant la première année, effectif de la date original d’achat. Cette garantie s’applique seulement à la réparation ou au remplacement de pièces défectueuse et n’inclut aucune main-d’oeuvre d’assemblage.
- Página 3 Parts Identification List Liste de Pièce Lista de Identificación de las Piezas Part Hardware Part Name/# Quantity Pièce Quincaillerie Quincaillerie Quantité Piezas Numeros de las Piezas Ferreteria Quantidad 3 pcs Cam / CAM001 Extra Short Bolt / MS003 4 pcs 8 pcs Short Bolt / MS001 4 pcs...
- Página 4 Parts Identification List Liste de Pièce Lista de Identificación de las Piezas Part Hardware Part Name/# Quantity Pièce Quincaillerie Quincaillerie Quantité Piezas Numeros de las Piezas Ferreteria Quantidad 6 pcs Adjustable Glide / AG001 Cam Bolt / CAM002 3 pcs 4 pcs Wire Management Clip / WC001 Hex Wrench / HW001...
- Página 5 Quantité Piezas Numeros de las Piezas Ferreteria Quantidad Back Panel / TR50X3B-A 1 pc Left Back Panel / TR50X3B-B 1 pc Right Back Panel / TR50X3B-C 1 pc Left Leg / TR50X3B-D 1 pc Right Leg / TR50X3B-E 1 pc...
- Página 6 Quantité Piezas Numeros de las Piezas Ferreteria Quantidad Right 56” Leg Extension / 1 pc TR50X3B-K Metal Support / TR50X3B-L 4 pcs Adjustable Metal Support / 2 pcs TR50X3B-M Wooden Rail / TR50X3B-N 1 pc Glass Shelf / TR50X3B-P 2 pcs...
- Página 7 STEP 1 Slide Wooden Rail (N) into Adjustable Metal Rail STEP 2 (M) as shown. Gliser Wooden Rail (N) dans Adjustable Metal Rail (M). Resbala Wooden Rail (N) en Adjustable Metal Rail (M) como en la esquema.
- Página 8 Attach Wooden Rail (N) and Adjustable Metal Rails STEP 3 (M) to Top Shelf (F) using Short Bolt (3). NOTE: You may need to use the Leg Extensions (G,H or J,K) for your size television. Insert Wooden Dowels (14) in the end of the Leg Extensions (G,H or J,K) as shown.
- Página 9 Screw Adjustable Glides (9) into parts (A). STEP 4 Connect Back Panel (A) to Top (F) by inserting Cams (1) into back panel (A) as shown. Viser Adjustable Glides (9) dans la partie (A). Attacher le Back Panel (A) au Top (F) inserer Cams (1) dans le back panel (A). Atornilla Adjustable Glides (9) en partes (A).
- Página 10 Attach Metal Supports (L) to Back Panel (A) to STEP 5 Left Back Panel (B) and Right Back Panel (C) with Long Bolts (4) and Extra Short Bolts (2). Attacher Metal Supports (L) au Back Panel (A) au Left Back Panel (B) et Right Back Panel (C) avec Long Bolts (4) et Extra Short Bolts (2).
- Página 11 Attach Left Leg (D) and Right Leg (E) to STEP 6 Adjustable Metal Rail (M) and Metal Supports (L) using Extra Long Bolt (5) as shown. Screw Adjustable Glides (9) into Left Leg (D) and Right Leg (E). Attacher Left Leg (D) et Right Leg (E) au Adjustable Metal Rail Part 9 (M) et Metal Supports (L) avec Extra Long Bolt (5).
- Página 12 Screw Glass Shelf Clips (6) into Back Panel (B) STEP 7 and Back Panel (C). Viser Glass Shelf Clips (6) dans Back Panel (B) et Back Panel (C). Atornilla Glass Shelf Clips (6) en Back Panel (B) y Back Panel (C).
- Página 13 Place Rubber Bumpers (13) on Metal Supports STEP 8 (L) as shown. Carefully slide Glass Shelves (P) onto Metal Supports (L). Placer Rubber Bumpers (13) sur Metal Supports (L). Soigneusement glisser Glass Shelves (P) sur Metal Supports (L). Part 13 Mete Rubber Bumpers (13) en Metal Supports (L) como en la esquema.


