Tabla de contenido
Publicidad
Idiomas disponibles
Idiomas disponibles
Enlaces rápidos
Publicidad
Tabla de contenido

Resumen de contenidos para Punktal PK-292LIC
- Página 1 Licuadora PK-292LIC decó...
- Página 2 Desenchufe de la toma de corriente cuando no esté en uso y antes de limpiar. Si el cable de alimentación está dañado, debe ser sustituido por el Servicio Técnico PUNKTAL o por personas cali cadas de manera similar para evitar un peligro. Este aparato está destinado a ser utilizado en aplicaciones domésticas y similares tales como: –...
- Página 3 Cuando se utilizan aparatos eléctricos, para reducir el riesgo de incendio, descarga eléctrica y/o lesiones a las personas, siempre se deben seguir las precauciones básicas de seguridad, incluyendo las siguientes; debe respetar las siguientes advertencias de seguridad: ADVERTENCIA: Las cuchillas son extremadamente a ladas. Manéjelas con precaución. 1.
-
Página 4: Descripción
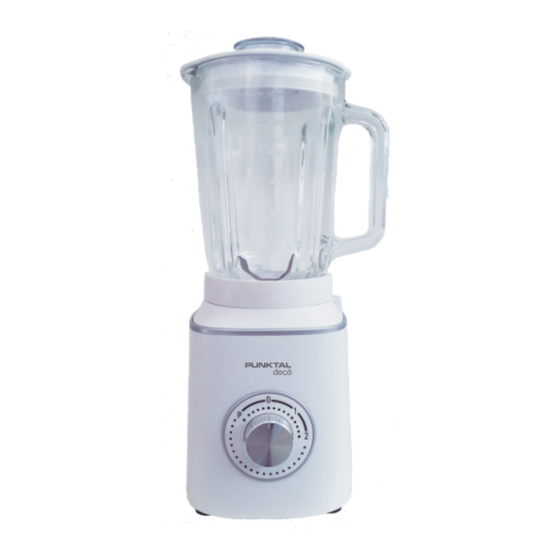
DESCRIPCIÓN Descripción 1. Tapa de medida dosi cadora 2. Tapa de la jarra 3. Sello de silicona 4. Trinquete del motor 5. Jarra de vidrio 6. Unidad principal 7. Llave de velocidades 8. Panel indicador de velocidades 9. Soporte de jarra 10. Pies de goma 11. -
Página 5: Método De Limpieza
- Inserte la jarra sobre la unidad principal y sostenga el asa de la jarra para girarla en sentido horario, hasta accionar el sistema de seguridad, que permite el funcionamiento del producto (ver Fig. 5). - Seleccione la velocidad deseada: P para pulso, 1 y 2 para velocidades continuas. -
Página 6: Accesorio Picador
ACCESORIO PICADOR Tapa del vaso Cuchillas Vaso de molienda seca Trinquete superior INSTRUCCIONES 1. Coloque la unidad principal en una mesa de trabajo plana y seca, asegúrese de que la perilla del interruptor esté ajustada a "0" antes de enchufar la alimentación (consulte la gura 1) y conecte una fuente de alimentación que cumpla los requisitos de la placa de identi cación de la unidad principal. -
Página 7: Disposición Final Del Producto
4. Para procesar, gire la perilla en sentido antihorario a "P" varias veces. Figura 6 5.Dependiendo del volumen y la variedad de alimentos procesados, repetir el procedimiento. 6.Después de su uso, gire la perilla del interruptor a "0" (como se muestra en la Figura 6), desenchufe el cable de alimentación, gire el vaso en sentido antihorario unos 30 grados y a continuación, retírelo (ver gura 7). - Página 8 Blender PK-292LIC decó...
-
Página 9: Safety Instructions
Please read the instructions for use carefully prior to using the product, store these in a safe place for future reference. SAFETY INSTRUCTIONS This appliance can be used by children aged from 8 years and above and persons with reduced physical, sensory or mental capabilities or lack of experience and knowledge if they have been given supervision or instruction concerning use of the appliance in a safe way and understand the hazards involved. - Página 10 When using electrical appliances, to reduce the risk of re, electric shock, and/or injury to persons, basic safety precautions should always be followed, including the following; You should respect the following safety warnings: WARNING: the blades of the knife are extremely sharp. Handle them with caution. 1.
- Página 11 DESCRIPTION Description 1. Center small cup 2. Mixing cup lid 3. Cup lid seal 4. Motor clutch 5. Glass cup 6. body 7. Switch knob 8. switch panel 9. Cup holder 10. Rubber feet 11. Upper clutch HOW TO USE THE MIXING CUP - Place the main unit on a at, dry workbench, make sure that the switch knob is set to "0"...
-
Página 12: Cleaning Method
After inserting the drive connector of the lower end of the mixing cup vertically aligned with the output shaft of the motor base, hold the handle of the cup to rotate the cup clockwise, and snap the cup into the lock on the main unit to confirm the installation When the stirring cup holder presses the safety ejector lever on the host, the safety switch in the host is touched) (see Figure 5). - Página 13 ACCESSORY DRY GRINDING CUP Cup lid Dry sharpening Knife Dry grinding cup Upper clutch INSTRUCTIONS 1. Place the main unit on a at, dry workbench, make sure that the switch knob is set to "0" before turning on the power (see Figure 1), and plug in a power source that meets the requirements on the main unit's nameplate.
- Página 14 4. When processing, rst turn the knob counterclockwise to “P” for several times, and then turn the knob to the corresponding “Gear” to process. Position, if higher speed is needed, turn the switch knob to the "2nd gear" position. (Figure 6) 5.Depending on the volume and variety of processed foods, users can choose 2 gears from low to high, that is, low gear with small capacity...
-
Página 15: Importador En Uruguay
Importador en Uruguay PUNKTAL S.A. SERVICIO OFICIAL PUNKTAL Calle Cuareim 1544 Montevideo – Uruguay Tel: 598 29003538 service@punktal.com.uy... - Página 16 PK-292LIC Potencia: 600W Capacidad: 1.5 Litros...
