Tabla de contenido
Publicidad
Idiomas disponibles
Idiomas disponibles
Enlaces rápidos
ENGLISH
To Start
1. Install the batteries.
2. Attach the sensor detector either directly to the readout unit or by using the adapter cable.
3. To turn the meter on, press and hold ON/OFF for two seconds.
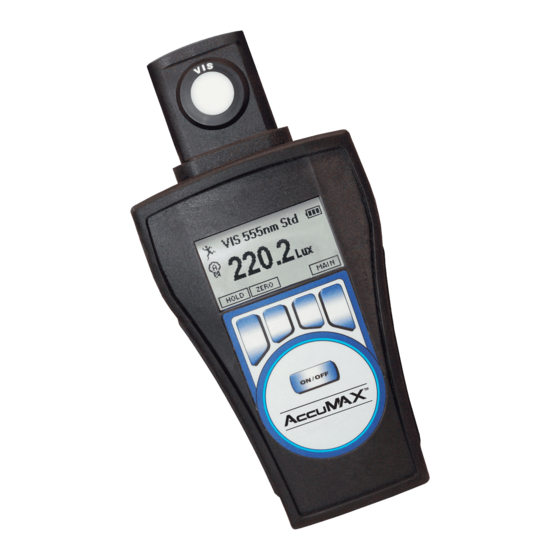
4. The AccuMAX automatically opens in OPERATION mode (see screen below) and begins to take readings.
Shine the light directly over the sensor of interest (UV or VIS) on the dual detector. The meter will instantly read and display
the light level for each wavelength (intensity/unit area).
5. Display and Icons:
The AccuMAX uses a liquid crystal display (LCD) with a combination of easy-to-read icons and alphanumeric characters to
denote readings, units, operating mode and meter status in a four-line format. UV and VIS level readings are automatically
adjusted for the magnitude of the measurement (autoranging) and then displayed with the appropriate 4-digit resolution units.
For example: 12,000 µW/cm
wide range of light levels. Icons provide a quick glance at data type and the available functions at every operational screen.
Running Man Icon––
Meter in running operation
Open Hand Icon––
Holds data-constant display
Mountain peak Icon––
Peak value displayed
XRP-3000 Radiometer/Photometer Quick Guide
Thank you for purchasing the AccuMAX™ meter.
This Quick Guide is intended to get you started as soon as possible.
UV-A sensor
Visible sensor
Dual-sensor detector
(XDS-1000)
Meter readout unit
(XR-1000)
Detected sensor wavelengths
Operation mode
Data type
Available menu-driven operations,
correspond to keypad buttons
2
would be displayed as 12.00 mW/cm
Absolute readings displayed
Bulb Z Icon––Zero readings
with ambient light subtracted
Freezes data during integration
Water-resistant
adapter
2
. This enables the readout unit to accept and respond to a
Bulb A Icon––
Snowflake Icon––
™
Battery power bars
UV-A reading
Visible reading
Battery Power Bars
Hourglass Icon––Integration of
light levels––continuous count
Circular Arrows Icon––
Integration in progress
Publicidad
Tabla de contenido

Resumen de contenidos para Spectronics Spectroline AccuMax XRP-3000
- Página 1 ENGLISH ™ XRP-3000 Radiometer/Photometer Quick Guide Thank you for purchasing the AccuMAX™ meter. This Quick Guide is intended to get you started as soon as possible. To Start 1. Install the batteries. 2. Attach the sensor detector either directly to the readout unit or by using the adapter cable. UV-A sensor Visible sensor Dual-sensor detector...
-
Página 2: Preventative Maintenance
6. To change meter display settings (Unit of Measure, Contrast, Backlight or Language) press MAIN, then press DOWN to select the SETTINGS option, and then press ENTER. Press UP or DOWN until the parameter to be changed is highlighted, and then press ENTER to select and change that setting by following the screen prompts. -
Página 3: Pour Commencer
Français ™ Radiomètre/photomètre XRP-3000—Guide pratique Nous vous remercions d’avoir acheté ce radiomètre/photomètre AccuMAX™. Ce Guide pratique est destiné à vous permettre d’utiliser l’appareil le plus rapidement possible. Pour commencer 1. Installer les piles. 2. Brancher le détecteur à capteurs, soit directement à l’afficheur soit avec le câble d’adaptation. Capteur UV-A Capteur de lumière visible... -
Página 4: Entretien Préventif
6. Pour modifier les paramètres d'affichage de l’appareil (unités de mesure, rétroéclairage ou langue) appuyer sur PPAL, puis appuyer sur BAS pour sélectionner l'option RÉGLAGES puis appuyer sur ENTRER. Appuyer sur HAUT ou BAS pour sélectionner le paramètre à changer, puis sur ENTRER pour sélectionner le paramètre en question et le changer, en suivant les messages écran. -
Página 5: Pantalla E Íconos
Español ™ Guía rápida para el radiómetro/fotómetro XRP-3000 Gracias por haber adquirido el medidor AccuMAX™. Esta Guía rápida tiene como objetivo iniciarlo en el uso del medidor tan pronto como sea posible. Inicio 1. Coloque las baterías. 2. Conecte el detector del sensor directamente con la unidad de lectura o utilizando un cable adaptador. Sensor UV-A Sensor visible Detector de sensor... -
Página 6: Lectura De Luz Visible Alta
6. Para cambiar los ajustes de la pantalla del medidor (Unidad de medida, Contraste, Luz de fondo o Lenguaje), presione PPAL, luego presione ABAJO para seleccionar la opción AJUSTES y presione ENTER. Presione ARRIBA o ABAJO hasta que se ilumine el parámetro a cambiar y luego presione ENTER para seleccionar y cambiar el ajuste siguiendo las indicaciones en pantalla. - Página 7 Deutsch ™ XRP-3000 Radiometer-/Photometer-Kurzanleitung Wir danken Ihnen dafür, dass Sie ein AccuMAX™-Messgerät gekauft haben. Diese Kurzanleitung hilft Ihnen dabei, es so schnell wie möglich benutzen zu können. Zu Beginn 1. Batterien einlegen. 2. Sensordetektor entweder direkt am Ablesegerät anbringen oder mittels des Adapterkabels. UV-A-Sensor VIS-Sensor Dual-Sensordetektor...
- Página 8 6. Um die Anzeigeeinstellungen des Messgeräts (Maßeinheit, Kontrast, Display-Beleuchtung oder Sprache) zu ändern, betätigen Sie MENU, sodann AB, um die Option EINSTELLUNGEN auszuwählen, und betätigen Sie dann EING. Betätigen Sie AUF oder AB, bis der zu ändernde Parameter hervorgehoben wird, und betätigen Sie dann EING, um diese Einstellung auszuwählen und unter Befolgung der Bildschirmanzeigen zu ändern.