Publicidad
Idiomas disponibles
Idiomas disponibles
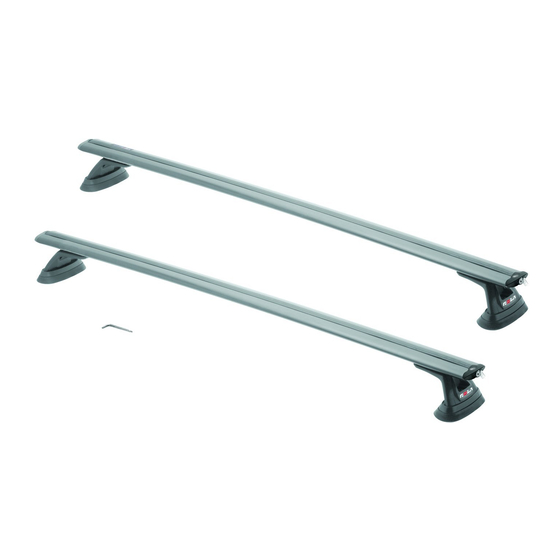
Parts list
M8 spring washer
M6 mounting bolt
M8 washer
Clamp plate
Cross bar
M8 x 20mm Bolt
end caps
Tools
needed
10mm socket and wrench
Note: Prior to Assembly
Prior to assembling your cross bar kit check that the kit contains all the parts you will need to fit the cross bars.
Refer to parts lists for guidance. Please read these instructions before assembly.
Fig. 1
Anchor Point Cover
Sept 1: Removing the vehicles anchor point covers
On the vehicle roof you will find 4 Anchor Point Covers. Carefully remove these covers by sliding in the
direction shown on the cover, to reveal the clip bracket (fig. 1-A). Using a 10mm socket wrench, replace
existing clip bracket with the ROLA Adapter Bracket reusing the bolts that secured the clip bracket, as shown
(fig. 1-B & C).
NOTE: Take care when removing Trim Covers to avoid damaging Trim Cover Clips. Covers can not be replaced
while rack is mounted. Covers can be replaced over the ROLA supplied Adapter Bracket. Store the Anchor
Point Covers and existing brackets safely while the Roof Racks are in use.
Step 2: Installing Rubber Gaskets and Adaptor
Position the rubber gaskets over the anchor points as
shown in (fig. 2).
Ensure that the gasket is properly aligned.
If your gasket has a directional arrow this always points
toward the front of vehicle.
Ensure that the gasket slots are centered over the
anchor point threads in the roof.
Place the plastic adaptors into the gasket's recessed
top surface (fig. 3).
Location of anchor points on vehicle
59722-3-4N Rev 2-20-12
Fitting Instructions
APE (Anchor Point Extended)
Cross Bar Kits with Adapter
Bracket
M8 hex nut
L wrench
End cap key
End support
A
Remove Anchor Point Cover.
Printed in China
PART No:
CARRYING CAPACITY:
Under Cover
Plastic adaptor
Rubber Gasket
13mm or adjustable wrench
B
Remove existing clip bracket. Keep bolts
to fasten ROLA Adapter Bracket.
Rubber Gasket
Anchor point
Vehicle's roof
Fig. 2
59722, 59723,
59724
50Kgs/
110 Lbs
Cross Bars
ROLA Adapter Bracket
C
Fasten ROLA Adapter Bracket
with same bolts.
Plastic adaptor
Vehicle's roof
Front of
vehicle
Fig. 3
Pg 1 of 2
Publicidad
Tabla de contenido

Resumen de contenidos para Rola 59722
- Página 1 (fig. 1-A). Using a 10mm socket wrench, replace existing clip bracket with the ROLA Adapter Bracket reusing the bolts that secured the clip bracket, as shown (fig. 1-B & C).
- Página 2 Additional buffer strips may be Cover strip Fig. 7 purchased from ROLA if needed. REGULARLY CHECK THE TIGHTNESS OF CROSS BAR ATTACHMENTS. Ensure bars are parallel and straps are tightened against Loads should be evenly distributed and secured the side rails.
-
Página 3: Lista De Partes
Las tapas no se pueden reemplazar mientras la parrilla está instalada. Las tapas se pueden reemplazar sobre el soporte adaptador suministrado por ROLA. Guarde las tapas de los puntos de anclaje y los soportes existentes de manera segura mientras las parrillas para el techo estén en uso. -
Página 4: Kits De Travesaños Con Soporte Adaptador
Fig. 7 bloquee. Se podrían comprar correas amortiguadoras de ROLA si fueran necesarias. REVISE CON FRECUENCIA LA FIRMEZA DE LA INSTALACIÓN DE LOS TRAVESAÑOS Verifique que las barras estén paralelas y que las Las cargas deben distribuirse de manera uniforme y asegurarse. -
Página 5: Nomenclature Des Pièces
(fig. 1-A). à l'aide d'un cliquet à douille 10 mm, remplacer la bride existante par l'adaptateur ROLA à l'aide des mêmes boulons qui fixent la bride, comme illustré... - Página 6 Une Attention bords intérieure fois les accessoires installés, replacez les capuchons coupants d'extrémité et verrouillez. On peut se procurer des bandes de remplissage additionnelles auprès de ROLA si nécessaire. Faire glisser au bout Bande de remplissage extérieure Fig. 7 VÉRIFIER RÉGULIÈREMENT LE SERRAGE DES FIXATIONS DES TRAVERSES.


