Publicidad
Idiomas disponibles
Idiomas disponibles
Enlaces rápidos
Inspection After Installation
- Make sure that all the associated hardware is tightened and the cargo carrier does not shift.
Care and Cleaning
- Avoid the use of automatic "brush-style"car washes.
- Do not use cleaning solvents of any kind.
- Wash only with mild soap and dy with a clean cloth.
- Do not use the cargo carrier as a handle.
- If you carry items in the cargo carrier, make sure the items are securely fastened
- Periodically check all components for tightness.
Congratulations!
You have purchased one of the many quality Lund
We take the utmost pride in our products and want you to enjoy years of satisfaction from your
investment. We have made every effort to ensure that your product is top quality in terms of fit,
durability, finish, and ease of installation.
Lund International, Lund Accessories Division
775 Tipton Industrial Drive, Building 2, Suite F
Lawrenceville, GA 30045
800-328-5863 • Fax 800-782-5448 • Visit us at lundinternational.com
© 2004 Lund International, Inc. All rights reserved.
Lund® and the Lund® logo are trademarks of Lund International, Inc.
45044
Rev. B
branded products offered by Lund International,Inc.
Page 4 of 4
Installation Instructions
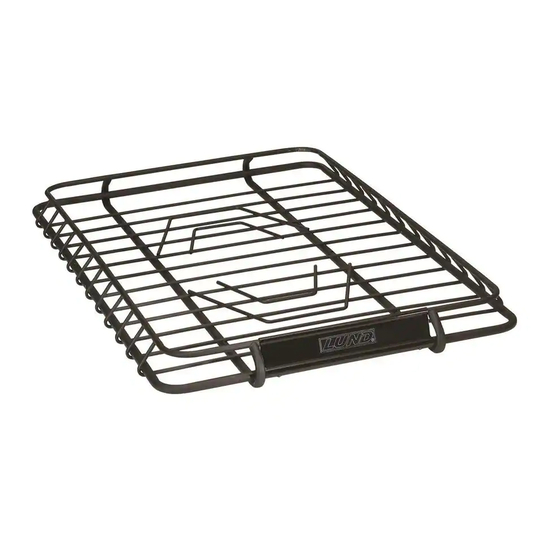
Cargo Carrier
For proper installation and best possible fit, please read all instructions BEFORE you begin.
For technical assistance or to obtain missing parts, please call Customer Service at 1-800-328-5863.
Important Safety Information
CAUTION - Read completely and understand the instructions before installing Cargo
Carrier. Before Driving, insure that the cargo carrier is properly secured to the vehicle. Do
NOT exceed 200 lbs. or the vehicle manufacturer's suggested weight limits for the cargo
rack whichever is less.
Contents
Small Basket: Kit # - 601011
Large Basket: Kit # - 601012
Basket Left
Qty. 1
Basket Right
Qty. 1
Tools Required
Rubber Mallet
Drill with Phillips head tip extention
45044
Rev. B
Part Number: 601011 - Small Basket
601012 - Large Basket
Hardware Kit #: 60101XHD
Self Tapping
Screw
Qty. 2
Top Clamp
Star Knob
Qty. 4
Qty. 8
U-Bolt
M6-1 Nut
Qty. 4
Qty. 8
Page 1 of 4
Publicidad

Resumen de contenidos para LUND 601011
- Página 1 Lawrenceville, GA 30045 800-328-5863 • Fax 800-782-5448 • Visit us at lundinternational.com © 2004 Lund International, Inc. All rights reserved. Lund® and the Lund® logo are trademarks of Lund International, Inc. Page 4 of 4 Page 1 of 4 45044 45044 Rev.
-
Página 2: Assembly Steps
Assembly Steps Assemble the cargo carrier as shown. Use a rubber mallet, if needed, to M6-1 Nuts mate the halves. Lock the carrier together use the tapping screws as Star Knobs shown. Top Clamp U-Bolt Halves Cargo Self Tapping Screw (2) Required Clamp Installation (4X) - Página 3 Félicitations! Panier gauche Quantité. 1 Vous avez acheté l'un des nombreux produits de qualité offerts par Lund International. Nous sommes extrêmement fiers de nos produits et souhaitons que vous tiriez des années de satisfaction de votre Panier droit Étrier fileté...
-
Página 4: Étapes D'iNstallation
Étape D'Assemblée Assembler la malle comme illustré. Au besoin, utiliser un maillet en caoutchouc pour assembler les moitiés. M6-1 Nuts Assembler la malle au moyen des vis taraudées, comme illustré. Bouton en étoile Collier supérieur Étrier fileté Moitiés de malle Vis taraudeuse (2) Requis Installation De Bride... - Página 5 Felicitaciones! Cesta de la izquierda Qty. 1 Ha comprado uno de los tantos productos de calidad que ofrece Lund International. Nos enorgullecemos enormemente por nuestros productos y queremos que disfrute durante años de su Cesta de la M6-1 Tornillo en "U"...
-
Página 6: Pasos De La Asamblea
Pasos De la Asamblea Ensamble el transportador de cargas tal como se muestra. En caso de ser necesario, utilice un mazo de goma para M6-1 Nuts unir las mitades. Ensamble las partes del transportador utilizando los tornillos autorroscantes tal como se muestra Perilla en forma de estrella Anclaje superior Tornillo en "U"...

