
Manuales relacionados para Dragon Touch DK01 Mini Drone


Resumen de contenidos para Dragon Touch DK01 Mini Drone
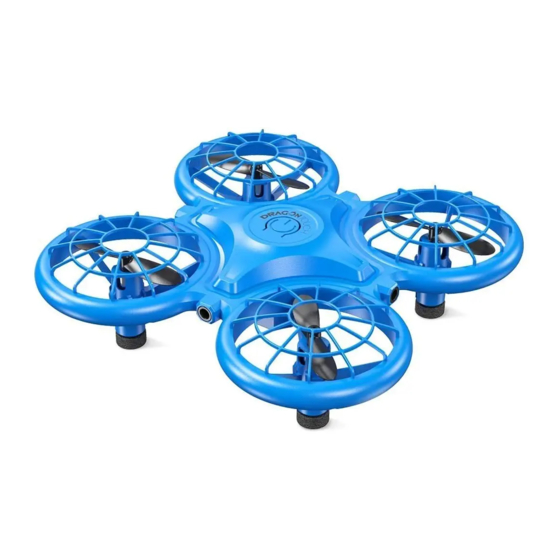
- Página 1 AGES USER MANUAL Dragon Touch DK01 Mini Drone V1.0 Please read this manual before operating your drone, and keep it for further reference.
- Página 2 CONTENTS 01 - 19 20 - 38 39 - 57 58 - 76 77 - 95...
-
Página 3: Package Contents
Battery capacity: 3.7V/500mAh Charging time: 60 minutes Flight time: 6 minutes Remote distance: 60 meters Standard Gravity Sensor DK01 Mini Drone × 1 Remote Control × 1 Remote Control x 1 Gravity Sensor Remote Control Battery capacity: 3.7V/150mAh Charging time: 30 minutes... -
Página 4: Getting Started
Standard Remote Control GETTING STARTED Charging and installing the battery Power switch 1. Charge the drone battery. High/Low speed switch 3D Flip One key take-off/ Infrared Forward fine-tuning obstacle avoidance Left joystick Right joystick Backward fine-tuning Headless mode Leftward fine-tuning 5V/1A or 5V/2A One key return Rightward fine-tuning... -
Página 5: Flight Operation
3. Charge the gravity sensor remote control. 6. The battery of the waterdrop remote control is not rechargeable. Note: • For your safety, please use the original battery and USB cables provided. • The battery life will be reduced when it is used in cold weather. •... - Página 6 2. Calibrate DIRECTIONS Simultaneously move the left joystick to the bottom right at a 45° angle and move Left joystick the right joystick to the bottom left at a 45° angle and hold for 3 seconds to Ascend and descend: Push the Left joystick forward and the drone will ascend; calibrate the drone.
- Página 7 Leftward and rightward: Pull the Right joystick leftward and the drone will fly 360° Flip leftward; pull it rightward and the drone will fly rightward. After flying the drone to an altitude of over 2 meters, press the Right joystick and 360°...
- Página 8 Headless mode pairing is completed, the LEDs on both the drone and remote will remain on. Press the Headless mode button to activate the function. The LEDs on the drone will flash and users will hear a beeping sound from the remote. In this mode, the drone will fly following the direction of the Right joystick regardless of the position of your drone’s head or tail.
- Página 9 Directions Rotate left: Press and hold the Finger button during the flight, then lean your fist Forward: Release the Finger button during the flight, then tilt your fist downward. leftward. Backward: Release the Finger button during the flight, then tilt your fist upward. Rotate right: Press and hold the Finger button during the flight, then lean your fist rightward.
- Página 10 Infrared obstacle avoidance 2. Calibrate Continuously press the Finger button 3 times to activate infrared obstacle Press the Power button on the drone. The LEDs on the drone will start flashing avoidance mode during the flight. The LEDs on the drone will flash 3 times, then quickly.
-
Página 11: Troubleshooting Guidance
Directions CAUTION Ascend: Put your hand under the drone. 1. When the battery status of the drone or remote control is low, it may affect the Descend: When the drone flies over an altitude of 1.2 meters, it will slowly descend remote distance. - Página 12 Fernbedienung × 1 • Make sure you turn off the gravity sensor remote and the standard remote. CONTACT US For any inquiries about Dragon Touch products, please feel free to contact us, and we will respond within 24 hours. E-mail: cs@dragontouch.com Wassertropfenförmige...
-
Página 13: Produktspezifikationen
PRODUKTSPEZIFIKATIONEN Standardfernbedienung Drohne Stromschalter Abmessungen: 170mm x 170mm x 38mm Hoch-/Niedriggesch- Batteriekapazität: 3.7V/500mAh 3D Flip windigkeitsschalter EIN-SCHLÜSSEL-START/ Ladezeit: 60 Minuten Vorwärts- Infrarot Feinabstimmung Hindernisvermeidung Flugzeit: 6 Minuten Rechter Joystick Linker Joystick Fernentfernung: 60 Meter Rückwärts- Feinabstimmung Headless-Modus Feinabstimmung Schwerkraftsensor-Fernbedienung EIN-SCHLÜSSEL- nach links Rückkehr Feinabstimmung... -
Página 14: Fertig Machen
FERTIG MACHEN 3. Laden Sie die Fernbedienung des Schwerkraftsensors auf. Laden und Installieren des Akkus 1. Laden Sie den Drohnenakku auf. 5V/1A oder 5V/2A 5V/1A oder 5V/2A Aufladen: rote LED Voll aufgeladen: grüne LED Aufladen: rote LED Voll aufgeladen: grüne LED 4. - Página 15 6. Der Akku der Wassertropfen-Fernbedienung ist nicht wiederaufladbar. 2. Kalibrieren Hinweis: Bewegen Sie gleichzeitig den linken Joystick in einem Winkel von 45° nach rechts • Verwenden Sie zu Ihrer Sicherheit die Originalbatterie und die mitgelieferten unten und den rechten Joystick in einem Winkel von 45° nach links unten und USB-Kabel.
- Página 16 Links und rechts: Ziehen Sie den rechten Joystick nach links, und die Drohne fliegt RICHTUNGEN nach links. Ziehen Sie es nach rechts und die Drohne fliegt nach rechts. Linker Joystick Auf- und absteigen: Drücken Sie den linken Joystick nach vorne, und die Drohne steigt auf.
- Página 17 360° Flip Headless-Modus Nachdem Sie die Drohne auf eine Höhe von über 2 Metern geflogen haben, Drücken Sie die Headless-Modus-Taste, um die Funktion zu aktivieren. Die LEDs drücken Sie den rechten Joystick und die 360° Flip-Taste, um die 360° Flip-Funktion an der Drohne blinken und Benutzer hören einen Piepton von der Fernbedienung.
- Página 18 Halten Sie die Ein-/Aus-Taste gedrückt, um die Fernbedienung einzuschalten. Die Richtungen LEDs blinken und die Fernbedienung wird automatisch mit der Drohne gekoppelt. Vorwärts: Lassen Sie die Fingertaste während des Fluges los und neigen Sie dann Wenn das Pairing abgeschlossen ist, leuchten die LEDs sowohl an der Drohne als Ihre Faust nach unten.
- Página 19 Nach links drehen: Halten Sie während des Flugs die Fingertaste gedrückt und Vermeidung von Infrarothindernissen lehnen Sie dann Ihre Faust nach links. Drücken Sie dreimal kontinuierlich die Fingertaste, um den Infrarot- Nach rechts drehen: Halten Sie während des Flugs die Fingertaste gedrückt und Hindernisvermeidungsmodus während des Flugs zu aktivieren.
-
Página 20: Sicherheitshinweise
2. Kalibrieren Links: Legen Sie Ihre Hand auf die rechte Seite der Drohne. Drücken Sie den Netzschalter an der Drohne. Die LEDs an der Drohne beginnen Rechts: Legen Sie Ihre Hand auf die linke Seite der Drohne. schnell zu blinken. Die Kalibrierung ist abgeschlossen, wenn die LEDs langsam blinken. -
Página 21: Anleitung Zur Fehlerbehebung
1. Drohnen-LEDs leuchten nicht. KONTAKTIERE UNS • Drücken Sie den Netzschalter an der Drohne. Bei Fragen zu Dragon Touch Produkten wenden Sie sich bitte an uns. Wir werden • Ersetzen oder laden Sie den Akku der Drohne. innerhalb von 24 Stunden antworten. -
Página 22: Contenidos Del Paquete
Tiempo de carga: 60 minutos Tiempo de vuelo: 6 minutos Distancia remota: 60 metros Mando a distancia Sensor de gravedad DK01 Mini Drone × 1 estándar × 1 Mando a distancia × 1 Control remoto del sensor de gravedad Capacidad de la batería: 3.7V/150mAh... -
Página 23: Para Empezar
Mando a distancia estándar PARA EMPEZAR Carga e instalación de la batería Interruptor de alimentación 1. Cargue la batería del dron. Interruptor de 3D Flip velocidad alta/baja Despegue con una tecla Infrarrojo Adelante giro fino evitación de obstáculos Joystick izquierdo Joystick derecho Giro fino hacia atrá... -
Página 24: Operacion De Vuelo
3. Cargue el control remoto del sensor de gravedad. 6. La batería del mando a distancia waterdrop no es recargable. Nota: • Para su seguridad, por favor utilice la batería original y los cables USB proporcionados. • La duración de la batería se reducirá cuando se utilice en climas fríos. •... -
Página 25: Direcciones
2. Calibrar DIRECCIONES Simultáneamente mueva el joystick izquierdo hacia la parte inferior derecha en un Joystick izquierdo ángulo de 45° y mueva el joystick derecho hacia la parte inferior izquierda en un Ascender y descender: Empuje el joystick izquierdo hacia adelante y el dron ángulo de 45°... -
Página 26: Interruptor De Velocidad
Hacia la izquierda y hacia la derecha: Tire del joystick derecho hacia la izquierda Volteo de 360° y el dron volará hacia la izquierda; tire de él hacia la derecha y el dron volará hacia Después de volar el dron a una altitud de más de 2 metros, presione el joystick la derecha. - Página 27 modo, el dron volará siguiendo la dirección del joystick derecho automáticamente con el dron. Cuando se complete el emparejamiento, los LED independientemente de la posición de la cabeza o la cola de su dron. Presione el tanto del dron como del control remoto permanecerán encendidos mismo botón nuevamente para salir de este modo.
- Página 28 Direcciones Girar a la izquierda: Mantén presionado el botón de dedo durante el vuelo, luego Hacia adelante: Suelta el botón de dedo durante el vuelo, luego inclina tu puño inclina tu puño hacia la izquierda. hacia abajo. Girar a la derecha: Mantén presionado el botón de dedo durante el vuelo y luego Hacia atrás: Suelta el botón de dedo durante el vuelo, luego inclina el puño hacia inclina el puño hacia la derecha.
-
Página 29: Vuelo Con El Mando A Distancia Waterdrop
Evitación de obstáculos por infrarrojos 2. Calibrar Presione continuamente el botón de dedo 3 veces para activar el modo de Presiona el botón de Encendido del dron. Los LED del dron comenzarán a evitación de obstáculos por infrarrojos durante el vuelo. Los LED del dron parpadear rápidamente. -
Página 30: Mantenimiento
Direcciones PRECAUCIÓN Ascender: Pon tu mano debajo del dron. 1. Cuando el estado de la batería del dron o del control remoto es bajo, puede Descender: Cuando el dron vuela a una altitud de 1,2 metros, descenderá afectar la distancia remota. lentamente de forma automática. -
Página 31: Contenu Du Colis
Batterie × 2 Cable USB × 1 de Goutte d'Eau × 1 CONTÁCTENOS Para cualquier consulta sobre los productos Dragon Touch, sin duda en contactarnos, y le responderemos dentro de las 24 horas. Correo electrónico: cs@dragontouch.com Sitio web oficial: www.dragontouch.com Tournevis ×... -
Página 32: Spécifications Du Produit
Télécommande standard SPÉCIFICATIONS DU PRODUIT Drone Interrupteur Dimensions: 170 mm x 170 mm x 38 mm Commutateur Haute/ Retournement 3D Capacité de la batterie: 3,7 V / 500 mAh Basse Vitesse Décollage par un Temps de charge: 60 minutes Réglage Fin vers l'Avant Bouton/Infrarouge Évitement d'Obstacle Temps de vol: 6 minutes... - Página 33 COMMENCER 3. Charger la télécommande du capteur de gravité. Charger et Installer la Batterie 1. Charger la batterie du drone. 5V/1A ou 5V/2A Chargement: LED rouge 5V/1A ou 5V/2A Complètement chargé: LED verte Chargement: LED rouge Complètement chargé: LED verte 4.
-
Página 34: Opération De Vol
6. TLa batterie de la télécommande en forme de goutte d'eau n'est pas 2. Étalonner rechargeable. Déplacez simultanément le gauche levier oscillant vers le bas à droite à un angle Remarque: de 45° et déplacez le droite levier oscillant vers le bas à gauche à un angle de 45° •... - Página 35 Vers la gauche et la droite: Tirez le droite levier oscillant vers la gauche et le DIRECTIONS drone volera vers la gauche; tirez-le vers la droite et le drone volera vers la droite. Le Gauche Levier Oscillant Monter et descendre: Poussez le gauche levier oscillant vers l'avant et le drone montera;...
- Página 36 Retournement 360° Dans ce mode, le drone volera en suivant la direction du droite levier oscillant Après avoir piloté le drone à une altitude de plus de 2 mètres, appuyez sur le quelle que soit la position de la tête ou de la queue de votre drone. Appuyez à droite levier oscillant et le bouton retournement 360°...
- Página 37 s'associera automatiquement avec le drone. Lorsque l'appairage est terminé, Instructions les LED du drone et de la télécommande resteront allumés. Avant: Relâchez "bouton doigt" pendant le vol, puis inclinez votre poing vers le bas. Arrière: Relâchez "bouton doigt" pendant le vol, puis inclinez votre poing vers le haut.
-
Página 38: Arrêt D'uRgence
Rotation à gauche: Appuyez sur "bouton doigt" enfoncé pendant le vol, puis Évitement d'obstacles infrarouge penchez votre poing vers la gauche. Appuyez continuellement 3 fois sur "bouton doigt" pour activer le mode Rotation à droite: Appuyez sur "bouton doigt" enfoncé pendant le vol, puis d'évitement d'obstacles infrarouge pendant le vol. -
Página 39: Conseils De Sécurité
Instructions 2. Étalonner Monter: Mettez votre main sous le drone. Appuyez sur le bouton d'alimentation du drone. Les LED du drone commenceront Descendre: Lorsque le drone vole à une altitude de 1,2 mètre, il descendra à clignoter rapidement. L'étalonnage est terminé lorsque les LED clignotent lentement automatiquement. -
Página 40: Guide De Dépannage
CONTACTEZ-NOUS GUIDE DE DÉPANNAGE Pour toute demande de renseignements sur les produits Dragon Touch, n'hésitez 1. Les LED du drone ne s'allument pas. pas à nous contacter et nous vous répondrons dans les 24 heures. -
Página 41: Contenuto Del Pacco
Tempo di carica: 60 minuti Tempo di volo: 6 minuti Distanza remota: 60 metri Telecomando Telecomando con DK01 Mini Drone × 1 standard × 1 sensore di gravità x 1 Telecomando con sensore di gravità Capacità della batteria: 3.7V/150mAh Tempo di carica: 30 minuti... -
Página 42: Telecomando Standard
Telecomando standard INIZIARE Carica e installazione della batteria Interruttore di alimentazione 1. Carica la batteria del drone. Interruttore alta/ bassa velocità 3D Flip Una chiave di decollo/ Regolazione esigua Infrarosso verso avanti evitamento degli ostacoli Joystick destro Joystick sinistro Regolazione esigua all'indietro Modalità... -
Página 43: Volo Con Il Telecomando Standard
3. Caricare il telecomando del sensore di gravità. 6. La batteria del telecomando waterdrop non è ricaricabile. Nota: • Per la vostra sicurezza, utilizzate la batteria originale e i cavi USB forniti. • La durata della batteria si riduce se viene utilizzata a basse temperature. •... - Página 44 2. Calibrare INDICAZIONI Contemporaneamente sposta il joystick sinistro in basso a destra con un angolo Joystick sinistro di 45° e sposta il joystick destro in basso a sinistra con un angolo di 45° e tienilo Salire e scendere: Spingere il joystick sinistro in avanti e il drone salirà; tiralo premuto per 3 secondi per calibrare il drone.
- Página 45 Verso sinistra e verso destra: Tirare il joystick destro verso sinistra e il drone Capovolgi a 360° volerà verso sinistra; tiralo verso destra e il drone volerà verso destra. Dopo aver fatto volare il drone a un'altitudine di oltre 2 metri, premere il joystick destro e il pulsante di Capovolgi a 360°...
- Página 46 In questa modalità, il drone volerà seguendo la direzione del joystick destro Una volta completato l'accoppiamento, i LED sia sul drone che sul telecomando indipendentemente dalla posizione della testa o della coda del drone. Premere di rimarranno accesi. nuovo lo stesso pulsante per uscire da questa modalità. Evitamento degli ostacoli a infrarossi Premere il pulsante di decollo a una chiave/evita ostacoli a infrarossi per attivare la modalità...
- Página 47 Indicazioni Ruota a sinistra: Tieni premuto il pulsante Dito durante il volo, quindi inclina il Avanti: Rilascia il pulsante del dito durante il volo, quindi inclina il pugno verso il pugno verso sinistra. basso. Ruota a destra: Tieni premuto il pulsante Dito durante il volo, quindi inclina il Indietro: Rilascia il pulsante del dito durante il volo, quindi inclina il primo verso pugno verso destra.
-
Página 48: Volo Con Il Telecomando Waterdrop
Evitamento degli ostacoli a infrarossi 2. Calibrare Premere continuamente il pulsante Dito 3 volte per attivare la modalità di Premi il pulsante di accensione sul drone. I LED sul drone inizieranno a prevenzione degli ostacoli a infrarossi durante il volo. I LED sul drone lampeggiare rapidamente. -
Página 49: Guida Alla Risoluzione Dei Problemi
Indicazioni ATTENZIONE Salita: Metti la mano sotto il drone. 1. Quando lo stato della batteria del drone o del telecomando è basso, potrebbe Discesa: Quando il drone vola sopra un'altitudine di 1,2 metri, scenderà influire sulla distanza remota. lentamente automaticamente. 2. - Página 50 7. Il telecomando waterdrop non funziona. • Assicurarsi di spegnere il telecomando del sensore di gravità e il telecomando standard. CONTATTACI Per qualsiasi domanda sui prodotti Dragon Touch, non esitate a contattarci e risponderemo entro 24 ore. E-mail: cs@dragontouch.com Official website: www.dragontouch.com...