Publicidad
Idiomas disponibles
Idiomas disponibles
Enlaces rápidos
π
H-1132
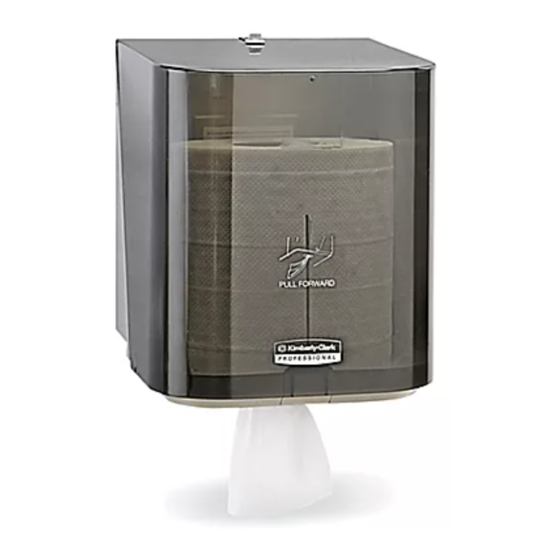
CENTER PULL TOWEL
DISPENSER
TOOLS NEEDED
Drill
Drill Bit
Dispenser x 1
NOTE: For both permanent and temporary
mounting, ensure that proper mounting
hardware is used for appropriate wall
composition. Enclosed hardware may not be
compatible with your wall surface.
PERMANENT MOUNTING
1. Place opened dispenser in intended mounting
position and mark location of three screw holes.
Recommended mounting height is 56" from floor to
bottom of dispenser. (See Figure 1)
Figure 1
2. Install top two screws halfway into wall.
Position dispenser on screws.
PAGE 1 OF 6
1-800-295-5510
uline.com
Phillips Screwdriver
Level
Mounting Bracket x 1
MOUNTING INSTRUCTIONS
56"
Tape Measure
PARTS
Screw x 3
3. Install bottom screw through hole in dispenser
and tighten.
4. Finish tightening top two screws.
TEMPORARY OR PORTABLE MOUNTING
1. Place mounting bracket in position and mark
location of two screw holes. Recommended
mounting height is 65.5" from floor to top of bracket.
(See Figure 2)
Figure 2
Mounting Bracket
2. Screw bracket to wall and mount dispenser.
NOTE: Temporary mounting may be made
permanent by installing third (bottom) screw
through hole in dispenser back.
Para Español, vea páginas 3-4.
Pour le français, consulter les pages 5-6.
Wall Anchor x 3
65.5"
Key x 1
0220 IH-1132
Publicidad

Resumen de contenidos para Uline H-1132
- Página 1 Para Español, vea páginas 3-4. Pour le français, consulter les pages 5-6. π H-1132 1-800-295-5510 uline.com CENTER PULL TOWEL DISPENSER TOOLS NEEDED Drill Drill Bit Phillips Screwdriver Level Tape Measure PARTS Dispenser x 1 Mounting Bracket x 1 Screw x 3...
- Página 2 NOTE: If cover is not locking, twist key counterclockwise to close latch mechanism. 7. Begin dispensing. Tear off the first few crumpled sheets. (See Figure 6) Figure 6 ITEM # BRAND SETTING S-7724 Uline S-15752 Uline S-7725 Scott S-11827 Scott S-12851 Kleenex NOTE: To clean, use a soft wipe with mild soap and water.
-
Página 3: Despachador De Extracción Central
π H-1132 800-295-5510 uline.mx DESPACHADOR DE EXTRACCIÓN CENTRAL HERRAMIENTAS NECESARIAS Taladro Broca Desarmador Nivel Cinta de Cruz de Medir PARTES 1 Despachador 1 Soporte para Instalación 3 Tornillos 3 Taquetes 1 Llave INSTRUCCIONES DE INSTALACIÓN NOTA: Tanto para instalación permanente 3. -
Página 4: Instrucciones De Carga
7. Comience a despachar. Quite las primeras hojas arrugadas. (Vea Diagrama 6) NOTA: Para limpiar use un paño suave con jabón suave y agua. MODELO NO. MARCA CONFIGURACIÓN Diagrama 6 S-7724 Uline S-13796 Uline S-7725 Scott S-11827 Scott S-12851 Kleenex... -
Página 5: Outils Requis
π H-1132 1-800-295-5510 uline.ca DISTRIBUTEUR DE SERVIETTES À TIRAGE CENTRAL OUTILS REQUIS Perceuse Mèche Tournevis Niveau à Ruban à de perceuse cruciforme bulles mesurer PIÈCES Distributeur x 1 Support de fixation x 1 Vis x 3 Ancrage mural x 3 Clé... -
Página 6: Instructions De Chargement
7. Amorcez la distribution. Arrachez les premières feuilles froissées. (Voir Figure 6) REMARQUE : Pour nettoyer, utilisez un chiffon Nº D'ARTICLE MARQUE RÉGLAGE doux avec un savon doux et de l'eau. Figure 6 S-7724 Uline Nº 3 S-13796 Uline Nº 3 S-7725 Scott Nº 1 S-11827 Scott Nº...


