Tabla de contenido
Publicidad
Enlaces rápidos
Publicidad
Tabla de contenido

Resumen de contenidos para JEWADO Stair 'n Go
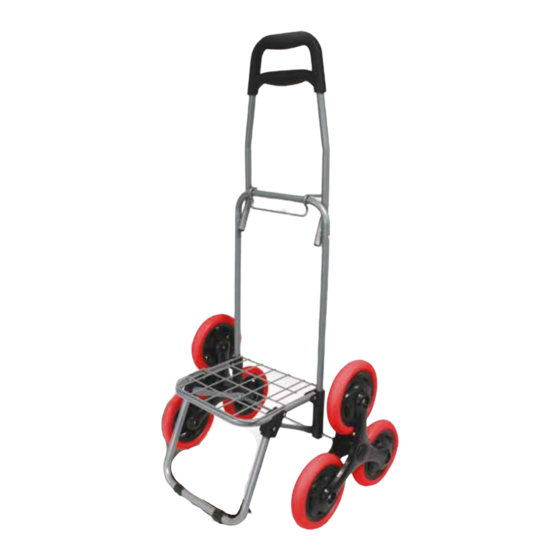
- Página 2 Main frame Safety clip Chasis principal Clip de seguridad Châssis principal Clip de sécurité Hauptgestell Sicherheitsclip Telaio principale Clip di sicurezza Armação principal Fixação de segurança Hoofdframe Veiligheidsclip Main handle Tray support Asa principal Soporte de la bandeja Anse principale Support du plateau Haltegriff Bodenstütze...
- Página 3 (1.1) Upper section (2) Main handle (1.1).Parte superior (2) Asa principal (1.1) Haut du châssis (2) Anse principale (1.1). Oberer Teil (2) Haltegriff (1.1) Parte superiore (2) Maniglia principale (1.1) Parte superior (2) Asa principal (6) Bolts (x 4) (1.1).Bovendeel (2) Hoofdhandgreep (6) Pernos de fijación (4 unidades) (6) Goupilles (x4)
-
Página 5: Installation Instructions
the length of the metal rod (7) (Figure 4), so that they are English positioned on either side of the piece of plastic. Thank you for purchasing the amazing STAIR ‘N GO WARNING: Take care not to hurt your fingers when inser- CART®, the revolutionary, lightweight foldable cart you ting the bolts (6) into the holes. -
Página 6: No Corra Mientras Está Utilizando Stair 'N Go
totalmente fijado en la posición correcta antes de usarlo. CART® (Figure A). 3. No corra mientras está utilizando STAIR ‘N GO 2. Gently push the lower tray support upwards in order to fold up the tray (5) (Figure B). Your STAIR ‘N GO CART is CART®. - Página 7 levemente el soporte inferior de la bandeja hacia abajo Français para desplegar la bandeja (5) (Imagen 6). Nous vous remercions de la confiance que vous nous 7. Para colocar la bolsa STAIR ‘N GO CART® (8), prime- avez témoignée en achetant l’incroyable STAIR ‘N GO ro coloque la base de la bolsa en su interior y después CART®, un chariot de courses léger, pliant et révolu- asegúrela introduciendo la solapa por el centro del asa...
-
Página 8: Tabla De Contenido
Lorsque vous montez un escalier, les six roues du STAIR barre horizontale située entre le bas (1.2) et le haut du ‘N GO CART® se relaient pour monter les marches à tour châssis (1.1) pour immobiliser le haut du châssis (1.1) du STAIR ‘N GO CART®... -
Página 9: Wichtige Hinweise
WARNUNG: Wenn sich das 3-Räder-Teil (4) von der Me- - 1 STAIR ‘N GO CART® Tasche tallstange löst (7), bedeutet das, dass es nicht fest genug 2. Wichtige Hinweise auf die Metallstange gesteckt wurde (7). Wiederholen Sie den Aufsteckvorgang, bis Sie ein Knacken hören und zie- 1. - Página 10 zu bringen, drücken Sie auf den Knopf in der Mitte der 1. Con il carrello posizionato orizzontalmente su una su- Außenseite eines 3-Räder-Teils (4) (Abbildung C) und perficie piana, dispiegare la parte superiore (1.1) come indicato nella Figura 1. halten den Trolley dabei gut fest. Wiederholen Sie nun denselben Vorgang mit dem 3-Räder-Teil auf der anderen 2.
- Página 11 - 1 STAIR ‘N GO CART® 6. Istruzioni per l’uso di STAIR ‘N GO CART® - 1 saco STAIR ‘N GO CART® È sufficiente tirare il carrello STAIR ‘N GO CART® e il suo design innovativo si occuperà del resto! 2.
- Página 12 corretamente encaixadas na barra metálica (7). tos de fabrico sujeita aos prazos estipulados pela legis- ADVERTÊNCIA: Se as rodas (4) se soltarem da barra lação em vigor em cada país. Esta garantia não cobre os danos decorrentes de um uso metálica (7), significa que não ficaram corretamente en- caixadas na mesma (7).
-
Página 13: Montage-Instructies
ties. zich op het koord bevindt en trekt u aan het koord door middel van de veiligheidsknop. 3. Onderdelen - Om de zak te openen handelt u in omgekeerde vol- Afbeelding A.1 gorde. 2. Instructies voor het onderhoud: 4. Montage-instructies De zak kan niet in de wasmachine worden gewassen.