Publicidad
Enlaces rápidos
USER MANUAL
Hereby, MOB, declares that item MO9507 is in Compliance with
the essential requirements and other relevant conditions of
Directive 2014/30/EU. A copy of the DOC (Declaration of
Conformity) is available at: DOC@reclamond.com or
MOB, PO BOX 644, 6710 BP (NL).
PO: 41-XXXXXX
Made in China
Publicidad

Resumen de contenidos para MOB MO9507
- Página 1 USER MANUAL Hereby, MOB, declares that item MO9507 is in Compliance with the essential requirements and other relevant conditions of Directive 2014/30/EU. A copy of the DOC (Declaration of Conformity) is available at: DOC@reclamond.com or MOB, PO BOX 644, 6710 BP (NL).
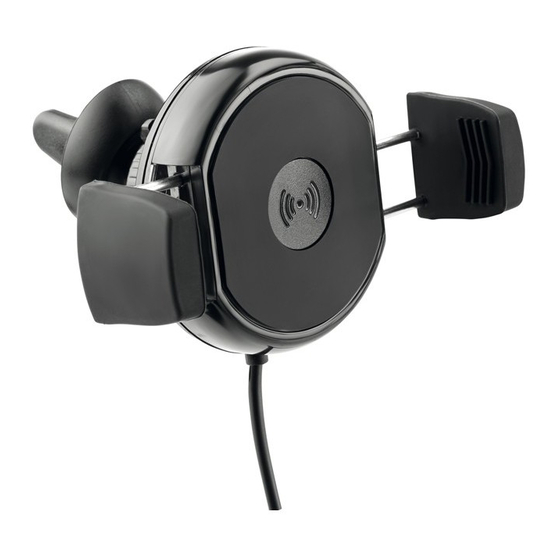
- Página 2 MO9507 Car Wireless Charger Mount on Vent Specifications Material: Input: 5V/2A Output: 5V/1A Wireless Transmission Power: ≤8MM Charging Distance: Working Efficiency: 70% Max Working Frequency: 100‐150KHz With FOD Function 40°F (5°C) – 95°F (35°C) Operational Temperature: What is included 1. Wireless Charger 2.
- Página 3 4. Then your phone should indicate it is charging. If it does not, reposition the phone in the cradle. 5. The LED will turn blue and remain on while the phone is charging. Remarks: To adjust viewing position, loosen the tightening ring, adjust to the optimal viewing angle, then retighten.
- Página 4 Installation des Halters an der Entlüftung 1. Halten Sie die Taste für die Klemmhalterung auf der Rückseite der Lüftungshalterung gedrückt. 2. Während Sie die Taste für die Klemmhalterung gedrückt halten, stecken Sie die Öffnung der Lüftungshalterung in das Lüftungsgitter des Fahrzeugs und lassen dann die Taste los. 3.
- Página 5 Chargeur sans fil de voiture pour smartphone Spécifications techniques Matière: Entrée: 5V / 2A Sortie: 5V / 1A Puissance de transmission sans fil: ≤8mm Distance de chargement: Efficacité de chargement: 70% Max Fréquence de fonctionnement: 100‐150KHz Sécurité intelligente avec détection d'objets externes, FOD (Foreign Object Detection) 5°C –...
- Página 6 n'est pas le cas, repositionnez le téléphone dans la station d’accueil 5. Le voyant LED devient bleu et reste allumé pendant le chargement du téléphone. Remarque Pour régler l’angle de visualisation, desserrez la bague de serrage, ajustez l'angle de vue optimal, puis resserrez. Attention –...
- Página 7 Pasos para la instalación del soporte para rejilla de ventilación 1. Presione y sujete firmemente el botón de la abrazadera detrás del soporte para rejilla de ventilación. 2. Manteniendo presionado el botón de la abrazadera, introduzca el extremo abierto del soporte en la rejilla de ventilación del coche, y luego suelte el botón.
- Página 8 leen y siguen los avisos y las instrucciones de uso. Car Wireless Charger Mount on Vent Specifiche Materiale: Input: 5V/2A Output: 5V/1A Potenza di trasmissione Wireless: 5W ≤8MM Distanza di carica: Efficienza: 70% Max Frequenza: 100‐150KHz Funzione FOD 40°F (5°C) – 95°F (35°C) Temperatura in attività: Cosa include 1.
- Página 9 4. Quindi il telefono dovrebbe indicare che è in carica. In caso contrario, riposizionare il telefono nella base. 5. Il LED diventa blu e rimane acceso mentre il telefono è in carica. Note: Per regolare la posizione di visione allentare l'anello di serraggio, regolare l'angolo di visione ottimale, quindi serrare nuovamente.
- Página 10 Ventilator Installatie stappen 1. Druk stevig en houdt de bevestig knop tegen de achterkant van de ventilator. 2. Terwijl u tegelijk duwt en de knop ingedrukt houdt, bevestig de open kant van de bevestiging in de ventilator, laat dan de knop los.
- Página 11 Dane techniczne Materiał: Wejście: 5V / 2A Wyjście: 5V / 1A Bezprzewodowa moc transmisji: 5 W Odległość ładowania: ≤ 8 mm Efektywność pracy: 70% Max Częstotliwość pracy: 100-150 KHz Z funkcją FOD Temperatura pracy: 40 ° F (5 ° C) - 95 ° F (35 ° C) Zawartość...
- Página 12 Uwagi: Aby wyregulować pozycję oglądania, poluzuj docisk, dopasuj do optymalnego kąta widzenia, a następnie ponownie zaciśnij. Ostrzeżenie! 1. Nie należy modyfikować, rozmontowywać, otwierać, upuszczać, kruszyć, dziurawić ani rozdrabniać produktu. 2. Nie wystawiaj produktu na działanie deszczu ani wody. 3. Trzymaj produkt z dala od otwartego ognia lub światła słonecznego, aby zapobiec gromadzeniu się...


