Publicidad
Enlaces rápidos
G
J
K
H
C
E
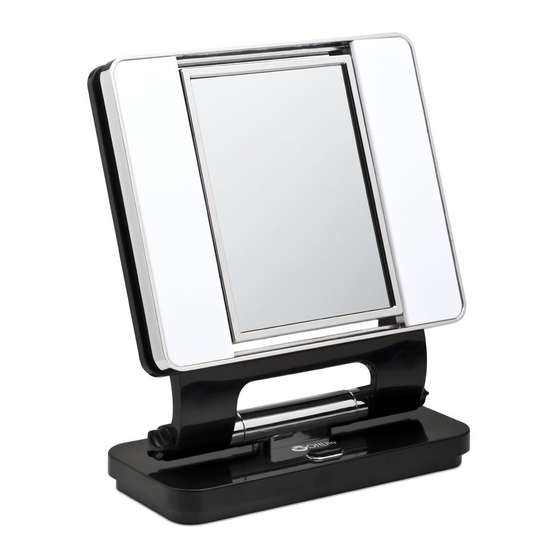
Dual Sided Makeup Mirror
B5747R B59PNR B92003 B92G53 B92BG3 B92G53
B922W3
REV051711
ENGLISH
CONGRATULATIONS!
You've purchased the finest in natural
lighting technology with your new OttLite
product.
PRODUCT REGISTRATION FORM
Please complete the enclosed Product
Registration Form and return it today
by mail, or register online by going to:
http://warranty.OttLite.com.
WARNING: To prevent electric shock,
make sure the lamp is not plugged in
until all assembly steps are complete.
LAMP ASSEMBLY
1. Remove all packaging from lamp and
place base (A) down on a flat steady sur-
face.
2. Grasp the stand (D) at both sides and
J
raise, by rotating, to its upright position.
Tighten thumbnuts (B, C) as needed to
hold the stand (D) in place.
D
3. Refer to BULB INSTALLATION AND
REMOVAL to install bulb(s) (K).
4. Plug the cord into a standard 120Vac
outlet.
G
5. To turn the lamp on or off depress the
pushbutton switch (E) located in the front
of the base (A).
F
6. Select the magnified or non-magnified
mirror by rotating the mirror body (F).
7. To lower the mirror, loosen thumbnuts
(B, C) slightly by rotating counterclockwise,
grasp the stand (D) and lower the mirror
onto the base (A).
B
NOTE: DO NOT FORCE THE STAND TO
MOVE as lamp damage may occur.
A
BULB INSTALLATION/REMOVAL
1. Make sure that the lamp is not plugged
into an electrical outlet.
CAUTION!
If the external flexible cable or cord of this luminaire is damaged, it shall be exclusively replaced by the
cdo-011
manufacturer or its service agent or a similar qualified person in order to avoid a hazard. Indoor use only.
Dual Sided Makeup Mirror
2. If the lamp has been in use, allow it to
cool approximately five minutes before
®
proceeding.
3. Lower the mirror to its most flat position.
4. Use a thin non-metal object (such as a
credit card) to slip between the lens (J) and
lamp housing at point (G). Gently apply
upward
pressure to remove the lens away from the
mirror body. The holding tabs and then lift
the lens away from the housing.
5. If a bulb (K) is already installed in the
lamp, remove it by pushing the bulb away
from the bulb socket (H).
6. Install the bulb (K) by aligning the bulb
pins with the socket (H) receptacles then
push the bulb into the socket. A click
should be heard as the socket captures
the bulb.
7. Give a slight tug on the bulb to verify
that it is being held at the socket.
8. Lay the lens (J) back onto the housing
being careful to keep the rounded edges
to the outside of the lamp. Align the inside
tabs with the slots in the housing, rotate
the lens down and snap into place by
pressing along the outer edge.
Please note that in operation, OttLite
®
tubes are not dimmable.
Enjoy your OttLite
Dual Sided Makeup
®
Mirror!
This lighting system is designed for
use with OttLite
type
tubes (Style
®
Number PL13-E). Use of other products
voids the warranty and may result in
damage to the lighting system.
For more information on purchasing
replacement tubes/bulbs please go to
www.OttLite.com/replacement13wtube
CAUTION! IMPORTANT SAFETY INSTRUCTIONS:
THIS PORTABLE LAMP HAS A POLARIZED PLUG (ONE BLADE IS WIDER THAN THE OTHER) AS A FEATURE TO
REDUCE THE RISK OF ELECTRIC SHOCK. THIS PLUG WILL FIT IN A POLARIZED OUTLET ONLY ONE WAY. IF
THE PLUG DOES NOT FIT FULLY IN THE OUTLET, REVERSE THE PLUG. IF IT STILL DOES NOT FIT, CONTACT A
QUALIFIED ELECTRICIAN. NEVER USE WITH AN EXTENSION CORD UNLESS PLUG CAN BE FULLY INSERTED.
DO NOT ALTER THE PLUG.
CAUTION:
TO PREVENT ELECTRIC SHOCK, MATCH WIDE BLADE OF PLUG TO WIDE SLOT,
FULLY INSERT.
¡ PRECAUCIÓN! INSTRUCCIONES DE SEGURIDAD
IMPORTANTES:
ESTA LÁMPARA PORTÁTIL TIENE UN ENCHUFE POLARIZADO (UNA DE SUS PATAS ES MÁS ANCHA QUE LA
OTRA) COMO CARACTERISTICA PARA REDUCIR EL RIESGO DE UNA DESCARGA ELÉCTRICA. ESTE ENCHUFE
ENCAJARÁ EN CUALQUIER TOMACORRIENTE POLARIZADO SOLO DE UNA MANERA. SI EL ENCHUFE NO CALZA
COMPLETAMENTE EN EL TOMACORRIENTE DÉLE LA VUELTA. SI AÚN NO ENCAJA, PÓNGASE EN CONTACTO
CON UN ELECTRICISTA CALIFICADO. NUNCA UTILICE UNA EXTENSIÓN A NO SER QUE EL ENCHUFE PUEDA
SER TOTALMENTE INSERTADO. NO ALTERE EL ENCHUFE.
PRECAUCIÓN:
PARA PREVENIR UNA DESCARGA ELÉCTRICA, HAGA COINCIDIR LA PATA
ANCHA DEL ENCHUFE CON LA RANURA ANCHA, INSERTE TOTALMENTE.
AVERTISSEMENT! IMPORTANTES DIRECTIVES
DE SÉCURITÉ:
CETTE LAMPE PORTATIVE EST MUNIE D'UNE FICHE POLARISÉE (UNE LAME PLUS LARGE QUE L'AUTRE). CE
DISPOSITIF DE SÉCURITÉ DIMINUE LE RISQUE DE CHOCS ÉLECTRIQUES PUISQUE LA FICHE NE S'INSÈRE
DANS LA PRISE QUE D'UN SEUL CÔTÉ. SI ELLE N'ENTRE PAS DANS LA PRISE, INVERSEZ-LA. SI ELLE
N'ENTRE TOUJOURS PAS, CONTACTEZ UN ÉLECTRICIEN QUALIFIÉ. N'UTILISEZ JAMAIS AVEC UNE RALLONGE
SAUF SI LA FICHE S'INSÈRE ENTIÈREMENT. NE MODIFIEZ PAS CE DISPOSITIF DE SÉCURITÉ.
AVERTISSEMENT:
POUR ÉVITER LES CHOCS ÉLECTRIQUE, INSÉREZ LE BOUT LARGE DE LA
FICHE DANS LA GRANDE FENTE ET POUSSEZ JUSQU'AU BOUT.
Publicidad

Resumen de contenidos para OttLite B5747R
- Página 1 POUR ÉVITER LES CHOCS ÉLECTRIQUE, INSÉREZ LE BOUT LARGE DE LA FICHE DANS LA GRANDE FENTE ET POUSSEZ JUSQU’AU BOUT. B5747R B59PNR B92003 B92G53 B92BG3 B92G53 CAUTION! If the external flexible cable or cord of this luminaire is damaged, it shall be exclusively replaced by the...
- Página 2 ¡ PRECAUCIÓN! ATTENTION! B5747R B59PNR B92003 B92G53 B92BG3 B92G53 Si el cable o cordón flexible externo de esta luminaria está dañado, debe ser exclusivamente reemplazado por Si le câble ou le cordon souple externe de ce lampadaire est endommagé, celui-ci doit être remplacé exclusive- el fabricante o su agente de servicio o una persona calificada similar a fin de evitar un riesgo.