Publicidad
Enlaces rápidos
Intermatable and compatible with competitive same nose cam-type products - can be retrofitted to existing locations
and power distribution systems.
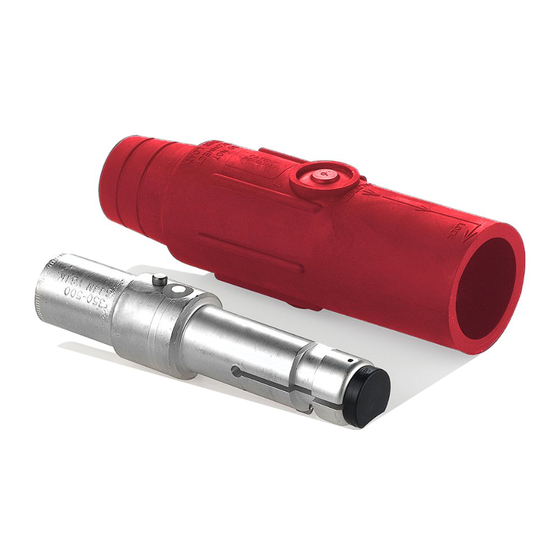
22 Series Ball Nose In-Line
Positive latching - provides heavy duty, completely insulated connections which are vibration resistant and positively lock
into place.
Detachable Connectors
Shatter and crack proof - high durometer thermoplastic elastomer (TPE) or neoprene rubber sleeve.
Rated: 600V, up to 690A continuous current using
Color coded insulating sleeves - fast and easy phase identification.
500MCM or 750MCM cable with 90° C insulation
Cable Size: 250MCM - 750MCM
Prevents arcing and burning - no movement of contact surfaces.
23 Series Taper Nose In-Line
Cam adjustment screw - positively increase or decrease cam tension.
Detachable Connectors
Fast connect/disconnect - twist and pull provided by double cam male and guide boss in female.
Rated: 600V, up to 690A continuous current using
High conductivity - positive, vibration proof connection provided by double cam design.
500MCM or 750MCM cable with 90° C insulation
Wide variety of applications - usable with a wide range of cable sizes and amperage ratings.
Cable Size: 250MCM - 750MCM
The 22 and 23 Series have been ETL tested to Navy specifications.
INSTALLATION INSTRUCTIONS
Connecteurs en ligne amovibles
• (1) Razor Cutting Blade
• (1) Flat Head Screw Driver
de type sphérique (22)
• (1) Allen Wrench
Valeurs nominales : 600 V, jusqu'à 690 A en
• (1) Pliers
courant continu au moyen d'un câble 500MCM ou
* Provided
750MCM à isolant résistant à 90 °C
Calibre de câble : 250MCM à 750MCM
WARNING:
Connecteurs en ligne amovibles
REGULATIONS.
de type conique (23)
WARNING:
Valeurs nominales : 600 V, jusqu'à 690 A en
ELECTRICIAN.
courant continu au moyen d'un câble 500MCM ou
WARNING:
750MCM à isolant résistant à 90 °C
SIZE. ACCEPTABLE CORD TYPES INCLUDE; TYPE "W".
Calibre de câble : 250MCM à 750MCM
CAUTION:
TAPER NOSE ASSEMBLIES WILL NOT MATE PROPERLY WITH BALL NOSE ASSEMBLIES.
DIRECTIVES
TO ASSEMBLE:
Conectores Separables de Nariz
1.
WARNING:
Redonda, Serie 22 en Línea
THAT THE POWER IS OFF BEFORE WIRING!
2. Strip approx. 1-7/16" of the jacket off the cable end (refer to Figures 1 & 2).
Capacidad: 600V, hasta 690A de corriente continua
usando cable 500MCM o 750MCM con aislante de 90˚C.
3. Insert the exposed cable all the way into the contact. Crimp the copper tube using a crimping tool with appropriate
crimping nests or use a vise with a crimping die.
Tamaño del Cable: 250MCM - 750MCM
4. Spray Lube into the sleeve and onto the cable end (you can also use liquid soap or cable pulling compound). Push the
Conectores Separables de Nariz
sleeve over the contact ensuring that the arrow on the sleeve is aligned with the release pin on the contact as shown in
Cónica, Serie 23 en Línea
Figures 1 & 2.
NOTE: If necessary, fill any gap between cable and sleeve with a standard electrical grade tape before inserting contact
Capacidad: 600V, hasta 690A de corriente continua
all the way into sleeve.
usando cable 500MCM o 750MCM con aislante de 90˚C.
Keep pushing until the locator pin slides into the "U"-shaped groove in the locking ring inside the sleeve. The "U"-shaped
Tamaño del Cable: 250MCM - 750MCM
groove prevents the contact from rotating when being mated. Ensure that the release pin on the sleeve engages the
INSTRUCCIONES DE INSTALACION
release lever on the contact when depressed. Once assembled, the contact should protrude approx. 3/4" (male contact
only) from the sleeve.
NOTES:
LIMITED 2 YEAR WARRANTY AND EXCLUSIONS
• DO NOT coat contact or inside diameter of sleeve where contact fits, as this may cause the contact to slip within
Leviton warrants to the original consumer purchaser and not for the benefit of
anyone else that this product at the time of its sale by Leviton is free of defects
• Use a Com-a-Long tool to pull contact into sleeve.
in materials and workmanship under normal and proper use for two years from
the purchase date. Leviton's only obligation is to correct such defects by repair
5. To adjust cam on male contact, turn cam set screw clockwise to increase and counter-clockwise to decrease.
or replacement, at its option, if within such two year period the product is returned
prepaid, with proof of purchase date, and a description of the problem to Leviton
6. To disassemble, remove contact by cutting through sleeve and/or cable.
Manufacturing Co., Inc., Att: Quality Assurance Department, 59-25 Little
Neck Parkway, Little Neck, New York 11362-2591. This warranty excludes and
there is disclaimed liability for labor for removal of this product or reinstallation.
This warranty is void if this product is installed improperly or in an improper
environment, overloaded, misused, opened, abused, or altered in any manner,
or is not used under normal operating conditions or not in accordance with any
labels or instructions. There are no other or implied warranties of any kind,
including merchantability and fitness for a particular purpose, but if any implied
warranty is required by the applicable jurisdiction, the duration of any such implied
warranty, including merchantability and fitness for a particular purpose, is limited
to two years. Leviton is not liable for incidental, indirect, special, or consequential
damages, including without limitation, damage to, or loss of use of, any
equipment, lost sales or profits or delay or failure to perform this warranty
obligation. The remedies provided herein are the exclusive remedies under this
warranty, whether based on contract, tort or otherwise.
For Technical Assistance Call:
1-800-824-3005 (U.S.A Only)
www.leviton.com
PK-93012-10-02-0A
PK-93012-10-02-0A
1
ENGLISH
FEATURES
ITEMS AND TOOLS NEEDED FOR ASSEMBLY
• (1) Can of Leviton Spray Lube
• (1) Wire Cutter
• (1) Contact & Sleeve (Same Sex)*
• (1) Com-a-Long tool
INSTALLATION INSTRUCTIONS
TO BE INSTALLED AND/OR USED IN ACCORDANCE WITH APPROPRIATE ELECTRICAL CODES AND
IF YOU ARE NOT SURE ABOUT ANY PART OF THESE INSTRUCTIONS, CONSULT A QUALIFIED
USE "CU" CABLE ONLY. DO NOT EXCEED RATED CABLE AMPACITY FOR CORRESPONDING CABLE
FEMALE CONTACTS FOR TAPER NOSE AND BALL NOSE DEVICES ARE NOT INTERCHANGABLE.
TO AVOID FIRE, SHOCK OR DEATH, TURN OFF POWER AT CIRCUIT BREAKER OR FUSE AND TEST
sleeve.
CARACTÉRISTIQUES
Interconnectables et compatibles avec les connecteurs à cames du même type d'autres marques - peuvent être
insérés dans les installations et systèmes de distribution électrique existants.
Enclenchement mécanique - assure des connexions robustes, entièrement isolées qui résistent aux vibrations et restent
toujours bien verrouillées.
À l'épreuve des fissures et des craquelures - gaine en caoutchouc néoprène ou élastomère thermoplastique d'une
dureté supérieure.
Manchons isolés et chromocodés - facilitent et accélèrent l'identification des phases.
Préviennent la formation d'arcs et le grillage - les surfaces de contact ne se déplacent pas.
Vis de réglage des cames - permet d'augmenter ou de réduire mécaniquement la tension exercée sur les cames.
Raccordement et débranchement rapides - grâce aux deux cames du connecteur mâle et à la saillie de guidage du
connecteur femelle, il suffit de tourner et de séparer.
Conductivité élevée - connexion efficace à l'épreuve des vibrations assurée par une conception à deux cames.
Large éventail d'applications - peuvent être utilisés avec une gamme étendue de câbles présentant divers calibres ou
courants nominaux.
Les dispositifs des gammes 22 et 23 répondent aux exigences de la Marine américaine.
ARTICLES ET OUTILS REQUIS POUR L'ASSEMBLAGE
• Lame de rasoir (1)
• Canette d'agent d'étanchéité Spray Lube de Leviton (1)
• Tournevis ordinaire (1)
• Coupe-fils (1)
• Clé Allen (1)
• Contacteur et manchon (mâle-mâle/femelle-femelle) (1)*
• Pince (1)
• Outil d'insertion «
* Fourni
DIRECTIVES D'INSTALLATION
AVERTISSEMENT :
INSTALLER OU UTILISER CONFORMÉMENT AUX CODES DE L'ÉLECTRICITÉ EN VIGUEUR.
AVERTISSEMENT :
À DÉFAUT DE BIEN COMPRENDRE LES DIRECTIVES SUIVANTES, EN TOUT OU EN PARTIE,
ON DOIT FAIRE APPEL À UN ÉLECTRICIEN QUALIFIÉ.
AVERTISSEMENT :
N'UTILISER QUE DU CÂBLE DE CUIVRE EN EN RESPECTANT LE COURANT NOMINAL EN
FONCTION DU CALIBRE (TYPE W).
MISE EN GARDE :
LES CONTACTEURS FEMELLES DES DISPOSITIFS DE TYPES CONIQUE ET SPHÉRIQUE NE
SONT PAS INTERCHANGEABLES; LES CONNECTEURS À POINTE CONIQUE NE PEUVENT S'ACCOUPLER AVEC
CEUX À POINTE SPHÉRIQUE.
ASSEMBLAGE :
1.
AVERTISSEMENT :
POUR ÉVITER LES RISQUES D'INCENDIE, DE CHOC ÉLECTRIQUE OU
D'ÉLECTROCUTION, COUPER LE COURANT AU FUSIBLE OU AU DISJONCTEUR ET S'ASSURER QUE LE
CIRCUIT SOIT BIEN COUPÉ AVANT DE PROCÉDER À L'INSTALLATION.
2. Dégainer le câble sur environ 3,5 cm (se reporter aux figures 1 et 2).
3. Insérer les fils exposés du câble jusqu'au fond du connecteur. Sertir le tube en cuivre au moyen d'une pince ou d'un
étau dotés d'encoches de la taille appropriée.
4. Vaporiser de l'agent d'étanchéité Spray Lube à base de silicone de Leviton dans le manchon et sur l'extrémité du câble
(on peut aussi se servir de savon liquide ou d'un composé pour faciliter le tirage des câbles). Glisser le manchon sur le
contact en alignant la flèche du premier avec la patte de dégagement du second, tel qu'illustré aux figures 1 et 2.
REMARQUE : Le cas échéant, remplir au moyen de ruban isolant tout interstice entre le câble et le manchon, puis insérer
le contacteur jusqu'au fond de ce dernier.
Continuer de pousser jusqu'à ce que le doigt de positionnement glisse dans la rainure en U de l'anneau de blocage à
l'intérieur du manchon. Cette rainure empêche le contact de sortir par l'arrière du manchon ou de tourner lorsqu'on
accouple le connecteur. S'assurer que la patte de dégagement du manchon actionne le levier de dégagement du
contact lorsqu'on appuie dessus. Bien inséré, le contact devrait dépasser d'environ 2 cm du manchon (mâle contacteur
seulement).
REMARQUES :
• Afin d'éviter que les contacteurs glissent à l'intérieur du manchon, NE PAS enduire ni ces premiers, ni le diamètre
interne de ce dernier.|
• Se servir d'un outil d'insertion « Com-a-Long » pour enfoncer le contact dans le manchon.
5. Pour régler la tension des cames des contacteurs mâles, tourner la vis de réglage vers la droite pour l'augmenter, et
vers la gauche pour la réduire.
6. Pour désassembler, retirer le contacteur, en coupant la gaine ou le câble pour l'atteindre.
6/20/01, 5:43 PM
FRANÇAIS
Com-a-Long
» (1)
Publicidad

Manuales relacionados para Leviton 22 Serie


Resumen de contenidos para Leviton 22 Serie
- Página 1 NOTE: If necessary, fill any gap between cable and sleeve with a standard electrical grade tape before inserting contact Capacidad: 600V, hasta 690A de corriente continua 4. Vaporiser de l’agent d’étanchéité Spray Lube à base de silicone de Leviton dans le manchon et sur l’extrémité du câble all the way into sleeve.
- Página 2 Cable Tubo plegador Pivote Com-a-Long mâle 4. Rocíe la Silicona Lube de Leviton dentro de la manga y en la punta del cable (también puede usar jabón líquido o quiera garantía implicada, incluyendo mercadotecnia y propiedad Câble Jalador Macho para un propósito en particular, es limitada a dos años. Leviton no componentes que puedan jalar el cable).
- Página 3 FOLD SCHEME 17.0¨ Front Panel Cat. No. 11.0¨ Front Panel Cat. No. Front Panel Cat. No. FINAL Fold Line Panel Line #'s = Fold Sequence PK-93012-10-02-0A 6/20/01, 5:43 PM...