Tabla de contenido
Publicidad
Idiomas disponibles
Idiomas disponibles
Enlaces rápidos
Publicidad
Tabla de contenido

Manuales relacionados para Steren CAR-210

Resumen de contenidos para Steren CAR-210
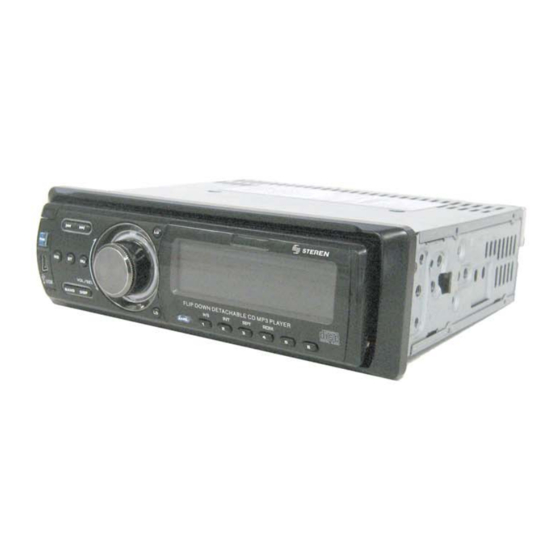
- Página 2 Before using your new SD & fl ash drive MP3 encoder car stereo, Before using your new SD & fl ash drive MP3 encoder car stereo, please read this instruction manual to prevent any damage. Put it please read this instruction manual to prevent any damage. Put it away in a safe place for future references.
- Página 3 1.- On / Off Press and hold for 2 seconds to power the car stereo on. Press and hold 2 seconds to power it off. 2.- Release Press to release the frontal panel 3.- Volume / Selector Allows you to set the volume level (turn it right or left) Press to switch between: Bass: Set the bass frequencies Treble: Set the treble frequencies...
- Página 4 8.- Sensor Lights on when the frontal panel is out of the main body 9.- Restart Press this button when: - The initial installation is completed - Function buttons do not operate - An error is displayed in the screen Remember, you must use a thin metal object to press the button, but do not use any sharp object.
- Página 5 17.- Random / Memory 4 In CD mode allows you to play the songs, randomly. RDM word displays in screen. In Radio mode allows you to get access to memory 4 18.- Memory 5 In Radio mode allows you to get access to memory 5 19.- Memory 6 In Radio mode allows you to get access to memory 6 20.- Stereo / Mono...
-
Página 6: Remote Control
REMOTE CONTROL DISP A.P. MODE BAND LOUD 1.- On / Off Press to power the car stereo on / off. 2.- Play / Pause / Memory 1 Play a song contained in a CD, fl ash memory or SD card Pause a song In radio mode allows you to access the memory 1 3.- Intro / Memory 2... - Página 7 4.- Repeat / Memory 3 In CD mode allows you to activate the repeat function, repeat all disc or deactivate the function. In Radio mode allows you to get access to memory 3 5.- Random / Memory 4 In CD mode allows you to play the songs, randomly. RDM word displays in screen.
- Página 8 17.- Band In radio mode, press band to switch between different radio bands: FM1, FM2, FM3, AM1, AM2. 18.- Tune seek / Track In radio mode allows you to seek a frequency In CD mode, jumps to previous / next track 19.- Selector Press to switch between: Bass: Set the bass frequencies...
- Página 9 3.- Remove the holder and place it on the dashboard. 4.- Connect wires (Refer to Wire Connections). 5.- Install the rear holder. 6.- Place the main body into the holder. 7.- To fi nalize, replace the external cover. If you want to remove the frontal panel: 1.- Press Release button.
- Página 10 3.- Enclose the front panel for safe keeping into the supplied protective case. To replace the front panel: 1.- Put the right hole from the frontal panel into the main body. 2.- Press to the right and place the left hole from the frontal panel into the main body left contact, press until you hear a click.
-
Página 11: Usb Devices
Make sure that the frontal panel is fi rmly attached , otherwise Make sure that the frontal panel is fi rmly attached , otherwise Release button or other buttons may not function. Release button or other buttons may not function. Do not touch the contacts on the frontal panel or the main body, Do not touch the contacts on the frontal panel or the main body, may result in poor electrical contact. -
Página 12: Wire Connections
Track search In MP3 mode, press and hold AMS 5 seconds to select Track search option, after select the track with 1 or 2 digits, the songs will play after pressing Selector button. WIRE CONNECTIONS ENGLISH-12... -
Página 13: Troubleshotting
TROUBLESHOTTING Problem Solution Car ignition key is not placed in the switch, place it and power the car on Cannot power on Fuse is blown, replace it A CD is already loaded, remove it and insert a new one You are loading the CD in reverse direction. Turn it up and try again The CD is extremely dirty or has a defect. - Página 14 SPECIFICATIONS Input: 12 – 14,4V Impedance: 4ohm Output: 25Wx4 Chassis dimensions: 178x163x50mm Weight: 1,3kg Tone controls Bass (at 100Hz): +10dB Treble (at 10k): +10dB CD player SNR: More than 60dB Channel separation: More than 60dB Frequency response: 20Hz – 20kHz FM radio Frequency range (MHz): 87,5 –...
- Página 16 Antes de utilizar su nuevo Autoestéreo lea este instructivo para Antes de utilizar su nuevo Autoestéreo lea este instructivo para evitar cualquier mal funcionamiento. Guárdelo para futuras evitar cualquier mal funcionamiento. Guárdelo para futuras referencias. referencias. IMPORTANTE No intente desarmar el equipo, puede estar expuesto a radiaciones peligrosas.
- Página 17 1.- Encendido / Apagado Presione por 2 segundos este botón para encender el equipo. Presione 2 segundos más para apagarlo 2.- Liberar Este botón permite liberar el panel frontal del autoestéreo 3.- Volumen / Selector Permite ajustar el volumen moviendo el control hacia la derecha o izquierda.
- Página 18 Si se encuentra en el modo de Reloj, mantenga presionado el botón DISP por 2 segundos, el reloj comenzará a parpadear y podrá ajustar la hora. Mueva hacia la derecha el botón de Volumen / Selector para cambiar la hora, mueva hacia la izquierda para cambiar los minutos, presione nuevamente DISP para guardar los cambios 7.- Pantalla de LCD Muestra diferentes opciones...
- Página 19 Hace una pausa durante la reproducción de una canción En modo de radio permite acceder a la estación almacenada en la memoria 1 15.- Intro / Memoria 2 En modo de CD permite escuchar los primeros 10 segundos de cada canción Cuando desee escuchar una canción de modo completo, presione Play una vez.
- Página 20 22.- Énfasis de graves Presione para activar o desactivar la función de énfasis de frecuencias graves. 23.- Botón de expulsión Permite liberar el CD 24.- Ranura de CD Permite introducir un CD 25.- Sensor infrarrojo Sensor de recepción de señales infrarrojas del control remoto 26.- Conector mini USB Permite conectar un dispositivo USB que contenga música 27.- Ranura SD...
-
Página 21: Control Remoto
CONTROL REMOTO DISP A.P. MODE BAND LOUD 1.- Encendido Presione para encender / apagar el equipo 2.- Reproducción / Pausa / Memoria 1 Comienza la reproducción de una canción contenida en un CD, memoria fl ash o tarjeta SD Hace una pausa durante la reproducción de una canción En modo de radio permite acceder a la estación almacenada en la memoria 1 3.- Intro / Memoria 2... - Página 22 4.- Repetición / Memoria 3 En modo de CD permite activar la función de repetición (Repeat ON), todo el disco (Disc Repeat) o desactivar la función de repetición (Repeat OFF). En modo de radio permite acceder a la estación almacenada en la memoria 3 5.- Aleatorio / Memoria 4 En modo de CD este botón permite reproducir las canciones de forma...
-
Página 23: Instalación
15.- A.P Permite cambiar entre las diferentes estaciones de radio almacenadas en memoria 16.- Loc / DX Presione LOC para seleccionar la recepción de una estación con señal fuerte o débil. Si presiona LOC una vez, el mensaje LOC aparecerá en pantalla y únicamente se escucharán estaciones locales (si están disponibles). - Página 24 2.- Inserte las llaves proporcionadas en los costados del auto-estéreo hasta que escuche un clic. 3.- Retire el sujetador y colóquelo en el tablero del automóvil. 4.- Conecte los cables (consulte la sección de Conexiones Eléctricas). 5.- Coloque el soporte trasero de la unidad. 6.- Coloque el cuerpo principal en el sujetador.
- Página 25 Si desea remover el panel frontal: 1.- Presione el botón de Liberar. El panel frontal se abrirá. 2.- Para remover el panel, tómelo sin hacer presión sobre la pantalla de LCD y jale hacia la derecha y hacia fuera. 3.- Coloque el panel frontal en su estuche a fi n de protegerlo. Para colocar el panel frontal: 1.- Coloque el agujero del lado derecho del panel frontal en el contacto del cuerpo principal del lado derecho.
-
Página 26: Como Insertar La Tarjeta Sd
Asegúrese de que el panel frontal ha sido correctamente Asegúrese de que el panel frontal ha sido correctamente colocado, de otra forma el botón de liberar u otros botones podrían colocado, de otra forma el botón de liberar u otros botones podrían no funcionar. - Página 27 OPERACIÓN DE MP3 Modos de búsqueda MP3 La búsqueda de archivos, pistas y caracteres MP3 es posible utilizando el botón de Banda. Durante el modo MP3, presione el botón de Banda por 5 segundos para seleccionar la opción Track (pista), File (archivo) o Character (Caracter).
-
Página 28: Conexiones Eléctricas
CONEXIONES ELÉCTRICAS ESPAÑOL-13... -
Página 29: Problemas Y Soluciones
PROBLEMAS Y SOLUCIONES Problema Solución La llave de encendido no está colocada en el switch, colóquela y encienda el automóvil No enciende El fusible está quemado, reemplácelo por uno nuevo Un CD se encuentra dentro del autoestéreo, retírelo y posteriormente inserte el CD que desee Está... -
Página 30: Especificaciones
ESPECIFICACIONES Entrada: 12 – 14,4V Impedancia: 4ohms Salida: 25Wx4 Dimensiones chasis: 178x163x50mm Peso: 1,3kg Controles de tono Graves (a 100Hz): +10dB Agudos (a 10k): +10dB Reproductor de CD Relación señal-ruido: Mayor a 60dB Separación de canales: Mayor a 60dB Frecuencia de respuesta: 20Hz –... - Página 31 3.- The repairing time will not exceed 30 natural days, from the day the claim was received. 4.- Steren sell parts, components, consumables and accesories to costumer, as well as war- ranty service, at any of the addresses mentioned later.
-
Página 32: Esta Póliza No Se Hara Efectiva En Los Siguientes Casos
1.- Para hacer efectiva la garantía, presente ésta póliza y el producto, en donde fue adquirido o en Electrónica Steren S.A. de C.V. 2.- Electrónica Steren S.A de C.V. se compromete a reparar el producto en caso de estar defectuoso sin ningún cargo al consumidor. Los gastos de transportación serán cubiertos por el proveedor.