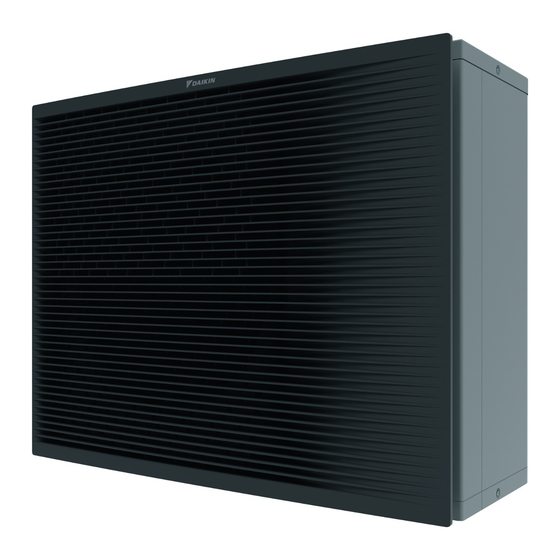
Daikin Altherma EPRA14DAV3 Manual De Instalación
Ocultar thumbs
Ver también para Altherma EPRA14DAV3:
- Manual de instrucciones (320 páginas) ,
- Guía de referencia del instalador (308 páginas) ,
- Manual de instalación (25 páginas)
Resumen de contenidos para Daikin Altherma EPRA14DAV3
- Página 1 Installation manual Daikin Altherma 3 H HT EPRA14DAV3 EPRA16DAV3 EPRA18DAV3 EPRA14DAW1 Installation manual EPRA16DAW1 English Daikin Altherma 3 H HT EPRA18DAW1...
- Página 2 (mm) ≤500 ≤500 General ≥500 ≥1000 ≥300 Top-side obstacle ≤500 ≤500 ≥300 ≥300 ≥1000 ≥150 ≥500 ≥500 ≥500 ≥300 No top-side obstacle ≥100 ≥500 3D124412...
- Página 3 2P586101-1...
- Página 4 2P586101-1...
-
Página 5: Tabla De Contenido
To insulate the water piping ........10 Latest revisions of the supplied documentation may be available on 5 Electrical installation the regional Daikin website or via your dealer. About electrical compliance............11 The original documentation is written in English. All other languages Guidelines when connecting the electrical wiring...... -
Página 6: Unit Installation
Installation manual – Discharge grille Make sure installation, servicing, maintenance and repair NOTICE comply with instructions from Daikin and with applicable legislation (for example national gas regulation) and are Unpacking – Front corners. When you remove the front executed only by authorised persons. -
Página 7: To Provide Drainage
O-ring. Make sure the O-ring is installed correctly to prevent leakage. To open the outdoor unit DANGER: RISK OF ELECTROCUTION DANGER: RISK OF BURNING 3.2.3 To provide drainage Make sure that condensation water can be evacuated properly. EPRA14~18DAV3+W1 Installation manual Daikin Altherma 3 H HT 4P586100-1 – 2019.07... -
Página 8: To Remove The Transportation Stay
Lowest expected Prevent from Prevent from outdoor bursting freezing temperature –5°C –10°C –15°C –20°C — –25°C — Water OUT (screw connection, male, 1") Installation manual EPRA14~18DAV3+W1 Daikin Altherma 3 H HT 4P586100-1 – 2019.07... - Página 9 Adding glycol to the water circuit reduces the maximum allowed water volume of the system. For more information, see the installer reference guide (topic "To check the water volume and flow rate"). EPRA14~18DAV3+W1 Installation manual Daikin Altherma 3 H HT 4P586100-1 – 2019.07...
-
Página 10: To Insulate The Water Piping
▪ Protection against freezing: the glycol will prevent the 30~40 liquid inside the piping from freezing. 40~50 For other cases the minimum insulation thickness can be determined using the Hydronic Piping Calculation tool. Installation manual EPRA14~18DAV3+W1 Daikin Altherma 3 H HT 4P586100-1 – 2019.07... -
Página 11: Electrical Installation
2 Insert the cables at the back of the unit, and route them through the factory-mounted cable sleeves into the switch box. For the power supply, use the factory-mounted cable. EPRA14~18DAV3+W1 Installation manual Daikin Altherma 3 H HT 4P586100-1 – 2019.07... -
Página 12: In Case Of W1 Models
V3 models. For more information about the power saving function ([9.F] or overview field setting [E‑08]), see the installer reference guide. 5.3.2 In case of W1 models 1 Power supply cable: Installation manual EPRA14~18DAV3+W1 Daikin Altherma 3 H HT 4P586100-1 – 2019.07... - Página 13 ▪ Connect the wires to the terminal block (make sure the numbers match with the numbers on the indoor unit) and the earth screw. ▪ Fix the cable with a cable tie. Wires: (3+GND)×1.5 mm² — EPRA14~18DAV3+W1 Installation manual Daikin Altherma 3 H HT 4P586100-1 – 2019.07...
-
Página 14: To Reposition The Air Thermistor On The Outdoor Unit
Required accessory (delivered with the unit): Thermistor fixture. Install the lower part of the discharge grille 1 Insert the hooks. 2 Insert the ball studs. 3 Fix the 2 lower screws. Click 2× Installation manual EPRA14~18DAV3+W1 Daikin Altherma 3 H HT 4P586100-1 – 2019.07... -
Página 15: To Remove The Discharge Grille, And Put The Grille In Safety Position
3 Rotate the lower part of the discharge grille. 9 Fix the 6 remaining screws. 6× 4 Align the ball stud and hook on the grille with their counterparts on the unit. EPRA14~18DAV3+W1 Installation manual Daikin Altherma 3 H HT 4P586100-1 – 2019.07... -
Página 16: To Prevent The Outdoor Unit From Falling Over
(field supply). 4 Attach the ends of the cables and tighten them. NOTICE Discharge grille. Do NOT use too much force to prevent damage to the discharge grille. Installation manual EPRA14~18DAV3+W1 Daikin Altherma 3 H HT 4P586100-1 – 2019.07... -
Página 17: Technical Data
Refrigerant flow: Outdoor air Heating Compressor discharge Cooling Compressor suction Air heat exchanger, distributor Air heat exchanger, middle Refrigerant liquid Compressor shell Compressor port Entering water R10T Leaving water EPRA14~18DAV3+W1 Installation manual Daikin Altherma 3 H HT 4P586100-1 – 2019.07... -
Página 18: Wiring Diagram: Outdoor Unit
Printed circuit board (noise filter) X1M, X2M Terminal strip Printed circuit board (leakage current) Electronic expansion valve (main) Printed circuit board (ACS) Electronic expansion valve (injection) Printed circuit board (flash) Installation manual EPRA14~18DAV3+W1 Daikin Altherma 3 H HT 4P586100-1 – 2019.07... - Página 19 Thermistor (entering water) R10T Thermistor (leaving water) R11T Thermistor (fin) S1NPH High pressure sensor S1PH, S2PH High pressure switch S1PL Low pressure switch Current transfo V1R, V2R (A2P) IGBT power module EPRA14~18DAV3+W1 Installation manual Daikin Altherma 3 H HT 4P586100-1 – 2019.07...
- Página 20 4P586100-1 0000000I 4P586100-1 2019.07...


