Publicidad
Idiomas disponibles
Idiomas disponibles
Enlaces rápidos
TOOLS REQUIRED
Safety goggles
Phillips screwdriver
Tube cutter
Utility knife
Installation
1
PREPARING FOR INSTALLATION
Select a cold water supply pipe located as closely as possible to the
appliance. Close the main water shut-off valve.
Open a faucet located near the installation to relieve pressure
in the line.
3
DETERMINING THE WATER INLET TYPE
If a threaded connection is required, use the threaded quick-connect
adapter (C) and skip to step 4.
If a polyethylene connection is required, use the quick-connect
coupling (D) and skip to step 5.
C
Use and Care Guide
Polyethylene Ice Maker
Supply Line Kit
Adjustable wrench
D
Model 7252-25-14-PTC-EB
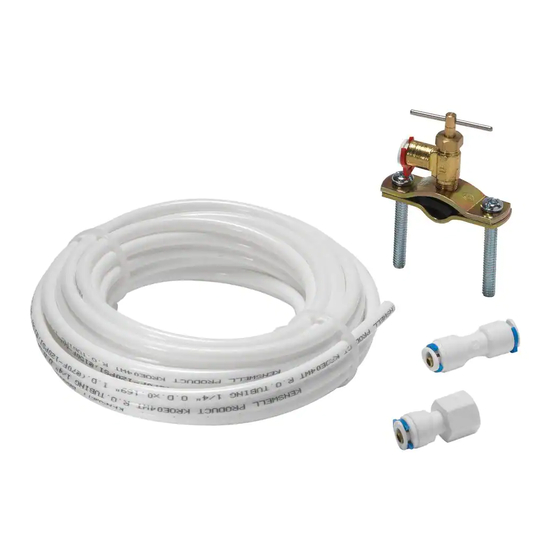
PACKAGE CONTENTS
A - 1/4 in. OD x 25 ft.
B - Quick-connect
Polyethylene tubing
saddle valve
2
CUTTING THE TUBING
Using a utility knife or tube cutter, cut the polyethylene tubing (A) at one of
the marked locations.
NOTE: When properly cut, the marked line on the tubing (2.1) will be
ush with the push-to-connect opening after it is inserted into the
saddle valve (B).
A
B
4
CONNECTING TO A THREADED INLET
Connect the threaded quick-connect adapter (C) onto the water inlet (4.1)
on the back of the refrigerator by threading the adapter onto the water
inlet. Hand tighten and then tighten a quarter turn with a wrench. Do not
overtighten.
Insert one end of the polyethylene tubing (A) into the threaded
quick-connect adapter (C) over the captive stiffener. Push the
polyethylene tubing (A) all the way in until the tubing bottoms out.
Coil at least 8 ft. of polyethylene tubing (A) behind the refrigerator
to allow the refrigerator to be moved away from the wall for cleaning
and servicing.
Run the free end of the polyethylene tubing (A) to the cold water
supply pipe.
C
4.1
Item
0000 000 000
C - Threaded
D - Quick-connect
quick-connect
coupling
adapter
A
A
2.1
C
A
HOMEDEPOT.com
Please contact 1-800-305-1726 for further assistance.
Publicidad

Resumen de contenidos para Everbilt 7252-25-14-PTC-EB
- Página 1 Use and Care Guide Item 0000 000 000 Polyethylene Ice Maker Model 7252-25-14-PTC-EB Supply Line Kit TOOLS REQUIRED PACKAGE CONTENTS Safety goggles Phillips screwdriver Adjustable wrench A - 1/4 in. OD x 25 ft. B - Quick-connect C - Threaded...
- Página 2 Installation (continued) CONNECTING TO A POLYETHYLENE INLET CONNECTING THE SADDLE VALVE Insert one end of the polyethylene tubing (A) into one end of the The quick-connect saddle valve (B) should be attached to the top section quick-connect coupling (D) over the captive stiffener. Push the of the clamp (6.1).
- Página 3 Guía de Uso y Cuidados Artículo 0000 000 000 Kit de Tubería de Polietileno Modelo 7252-25-14-PTC-EB para Máquina de Hielo HERRAMIENTAS NECESARIAS CONTENIDO DEL PAQUETE Gafas de seguridad Destornillador Llave ajustable A - Tubería de B - Válvula de C - Adaptador...
- Página 4 Instalación (continuación) CONECTAR A UNA ENTRADA DE POLIETILENO CONECTAR LA VÁLVULA DE ASIENTO Inserte un extremo del tubo de polietileno (A) en un extremo del La válvula de asiento de conexión rápida (B) debe estar unida a la sección acoplamiento rápido (D) sobre el refuerzo cautivo. Empuje el tubo de superior de la abrazadera (6.1).
