Tabla de contenido
Publicidad
Idiomas disponibles
Idiomas disponibles
Enlaces rápidos
Publicidad
Tabla de contenido

Resumen de contenidos para Steren CAR-950
- Página 2 Before using your new Five-band parametric equalizer, Before using your new Five-band parametric equalizer, please read this instruction manual to prevent any damage. please read this instruction manual to prevent any damage. Put it away in a safe place for future references. Put it away in a safe place for future references.
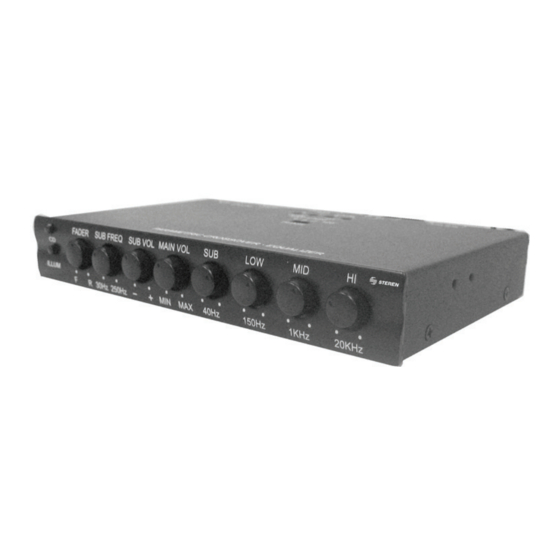
- Página 3 7.- Mid Equalizer level control for Mid frequencies 8.- Hi Equalizer level control for Hi frequencies 9.- CD Push to switch between Radio or CD mode (in case you have connected both devices). 10 Illum Choose between green or amber color illumination REAR CONTROLS 1.- Rear speakers connectors Allows you to connect the rear speakers through a power source.
- Página 4 5.- Subwoofer output jacks Use this connector to install a subwoofer (through a power source) 6.- Wires Use this cables to connect the equalizer to the car stereo and the car battery OTHER CONTROLS 1.- Phase This switch allows you to select the correct phase for the subwoofer output signal and then, compensate the synchronization differences between the subwoofer output and the front / rear signals output.
- Página 5 INSTALLATION 1.- Locate the place where you want to install the equalizer. Be sure to install it in a place whit no excessive vibrations exist, moreover, free of dust and far from extreme temperatures. 2.- Connect the red cable to the Battery (12V). 3.- Connect the black cable to the Ground.
- Página 6 Input sensitivity: 150mV Input impedance: 10kohms Stereo separation: 82dB a 1kHz Operation voltage: 11V – 16V, negative ground Output impedance: 50kohms Dimensions: 25 x 177 x 155mm The characteristics for this device are subject to change The characteristics for this device are subject to change without notice.
-
Página 8: Controles Frontales
Antes de utilizar su nuevo Ecualizador paramétrico, lea Antes de utilizar su nuevo Ecualizador paramétrico, lea este instructivo para evitar cualquier mal funcionamiento. este instructivo para evitar cualquier mal funcionamiento. Guárdelo para futuras referencias. Guárdelo para futuras referencias. IMPORTANTE Siempre utilice un paño suave, limpio y seco para limpiar el equipo. -
Página 9: Controles Traseros
5.- Sub bajos Permite ecualizar las frecuencias sub bajas en un rango de 40Hz 6.- Bajos Ecualiza las frecuencias bajas en un rango de 150Hz 7.- Medios Ecualiza las frecuencias medias en un rango de 1KHz 8.- Altos Permite ecualizar las frecuencias altas en un rango de 20KHz 9.- CD Presione para seleccionar entre el modo de Radio o de CD (en caso de que tenga conectados ambos equipos) -
Página 10: Controles Superiores
3.- Entrada para Radio Permite conectar un equipo de radio 4.- Entrada para CD Conector para reproductor de CD 5.- Conector de salida de sub woofer Utilice este conector para instalar un sub woofer (a través de una fuente de poder) 6.- Cables de conexión Estos cables se utilizan para conectar el ecualizador al auto estéreo y la batería del automóvil. -
Página 11: Instalación
INSTALACIÓN 1.- Localice el lugar en su automóvil donde desea instalar el ecualizador. Asegúrese de que sea un lugar donde no existan vibraciones excesivas así como también que esté libre de polvo y temperaturas extremas. 2.- Conecte el cable rojo a la Batería (12V). 3.- Conecte el cable negro a Tierra. -
Página 12: Especificaciones
ESPECIFICACIONES Crossover paramétrico: 30 – 250kHz Ganancia / Atenuación: 18dB Ecualizador de 4 bandas: Sub: 40Hz Bajos: 150Hz Medios: 1kHz Altos: 20kHz Respuesta de frecuencia: 20Hz – 25kHz Voltaje máximo de salida: 7V RMS THD: 0,05% Sensibilidad de entrada: 150mV Impedancia de entada: 10kohms Separación estéreo:... - Página 13 3.- The repairing time will not exceed 30 natural days, from the day the claim was received. 4.- Steren sell parts, components, consumables and accesories to costumer, as well as warranty service, at any of the addresses mentioned later. THIS WARRANTY IS VOID IN THE NEXT CASES:...
-
Página 14: Póliza De Garantía
1.- Para hacer efectiva la garantía, presente ésta póliza y el producto, en donde fue adquirido o en Electrónica Steren S.A. de C.V. 2.- Electrónica Steren S.A de C.V. se compromete a reparar el producto en caso de estar defectuoso sin ningún cargo al consumidor. Los gastos de transportación serán cubiertos por el proveedor.