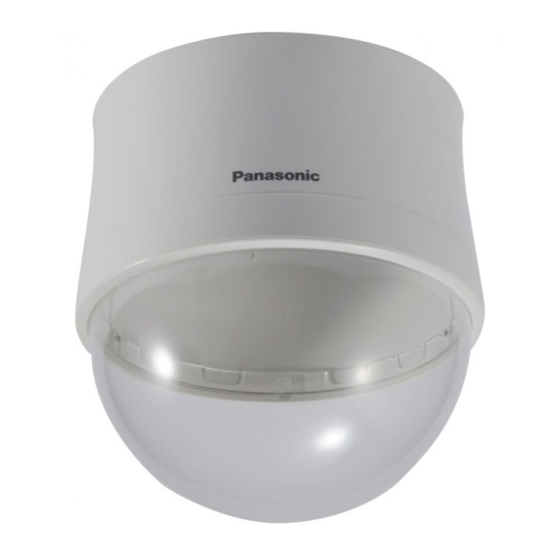
Tabla de contenido
Publicidad
Idiomas disponibles
Idiomas disponibles
Enlaces rápidos
WV-CS5S
Precautions
•
Installation work requires technique and experience.
•
Failure to observe this may cause injury or damage to the product.
•
Be sure to consult the dealer.
Mounting procedures
Read along with the Installation Guide of the camera body.
Step 1
Connect the cables to the camera, and fix them to the ceiling. (Refer to the Installation Guide of the camera in use.)
Step 2
Remove the bottom decorative cover, and attach the dome cover to the top decorative cover.
Decorative cover (Top)
Decorative cover (Bottom)
•
The decorative cover (Bottom) is not used.
•
The decorative cover is secured with hooks at 3 points.
The dome cover is also secured with the same hooks.
WV-CS5C
Before attempting to connect or operate this product,
please read these instructions carefully and save this manual for future use.
WV-CS5S is a smoke type, WV-CS5C is a clear type.
Remove
Operating Instructions
Included Installation Instructions
Dome Cover
WV-CS5S
Model No.
WV-CS5C
Match the markings.
Dome cover
Publicidad
Tabla de contenido

Resumen de contenidos para Panasonic WV-CS5S
- Página 1 Model No. WV-CS5C Before attempting to connect or operate this product, please read these instructions carefully and save this manual for future use. WV-CS5S is a smoke type, WV-CS5C is a clear type. Precautions • Installation work requires technique and experience.
-
Página 2: Standard Accessories
Step 3 Remove the protective sheet from the lens surface of the camera. Step 4 Align the "|" mark of the decorative (Top) and the arrow mark of the camera body, and insert the cover from the bottom. After inserting the decorative cover, rotate it clockwise when looking at it from underneath by 2 steps to engage the cover by pushing it up as shown in the drawing below. - Página 3 DEUTSCHE AUSGABE (GERMAN VERSION) Vorsichtsmaßregeln • Installationsarbeiten erfordern Fachkenntnisse und Erfahrung. • Andernfalls besteht die Gefahr von Verletzungen oder Schäden am Produkt. • Unbedingt einen Fachhändler konsultieren. Montagevorgänge In Verbindung mit dem dem Kameragehäuse beiliegenden Installationshandbuch lesen. Schritt 1 Die Kabel an die Kamera anschließen und an der Decke befestigen. (Siehe das der Kamera beiliegende Installationshandbuch.) Schritt 2 Die untere Abdeckblende entfernen und die Dome-Abdeckung an der oberen Abdeckblende befestigen.
-
Página 4: Technische Daten
Schritt 3 Die Schutzfolie vom Objektiv der Kamera abziehen. Schritt 4 Die Markierung "|" an der (oberen) Abdeckblende auf die Pfeilmarkierung am Kameragehäuse ausrichten und die Abdeckung von unten her aufsetzen. Die Abdeckblende gemäß Abbildung andrücken und in 2 Stufen nach rechts drehen (von der Unterseite her gesehen), bis sie fest sitzt. -
Página 5: Mesures De Précaution
VERSION FRANÇAISE (FRENCH VERSION) Mesures de précaution • Les travaux d'installation exigent des connaissances techniques et de l'expérience. • Le fait de ne pas respecter cette recommandation risque de blesser quelqu'un voire endommager ce produit. • Faire en sorte de consulter le distributeur. Procèdures de fixation Lire avec le guide d'installation du bloc de caméra vidéo. -
Página 6: Caractéristiques Techniques
Étape 3 Retirer la feuille de protection de la surface de l'objectif de la caméra vidéo. Étape 4 Aligner le repère "|" de la partie décorative (supérieur) et le repère en flèche du bloc de caméra vidéo et insérer le couvercle par la base. -
Página 7: Procedimiento De Instalación
VERSION ESPAÑOLA (SPANISH VERSION) Precauciones • Es necesario poseer técnica y experiencia para realizar el trabajo de instalación. • Si no se sigue esta indicación, pueden producirse lesiones o causarse daños en el producto. • Consúltelo sin falta al distribuidor. Procedimiento de instalación Léalo consultando la guía de instalación del cuerpo de la cámara. -
Página 8: Especificaciones
Paso 3 Extraiga la lámina protectora de la superficie del objetivo de la cámara. Paso 4 Alinee la marca "|" de la cubierta decorativa (superior) y la marca de la flecha del cuerpo de la cámara e inserte entonces la cubierta desde debajo. -
Página 9: Procedure Di Montaggio
VERSIONE ITALIANA (ITALIAN VERSION) Precauzioni • I lavori di installazione richiedono tecnica ed esperienza. • La mancata osservanza di questa precauzione può causare ferite o danni al prodotto. • Non esitare a rivolgersi al rivenditore. Procedure di montaggio Leggere queste istruzioni insieme alla Guida all’installazione del corpo della telecamera. Passaggio 1 Collegare i cavi alla telecamera e fissarli al soffitto. -
Página 10: Dati Tecnici
Passaggio 3 Rimuovere il foglio di protezione dalla superficie dell'obiettivo della telecamera. Passaggio 4 Allineare il segno "|" del coperchio decorativo (superiore) con la freccia del corpo della telecamera e inserire il coperchio dalla parte inferiore. Dopo aver inserito il coperchio decorativo ruotarlo di due scatti in senso orario guardandolo da sotto, in modo da innescare il coperchio premendo verso l'alto come illustrato nel disegno seguente. -
Página 11: Меры Предосторожности
РУССКАЯ ВEРСИЯ (RUSSIAN VERSION) Меры предосторожности • Монтажные работы требуют технических навыков и опыта. • Несоблюдение этого требования может привести к травмам или повреждению продукта. • Нужно обязательно обращаться к дилеру. Процедура монтажа Читайте вместе с Руководством по монтажу корпуса камеры. Шаг... -
Página 12: Технические Характеристики
Шаг 3 Снимите защитную пленку с поверхности объектива камеры. Шаг 4 Совместите метку "|" на декоративной накладке (верхней) и стрелку на корпусе камеры и вставьте крышку снизу. Вставив декоративную накладку, поверните ее по часовой стрелке, если смотреть на нее снизу, на 2 шага, чтобы закрепить крышку, потянув... -
Página 13: Важная Информация
Важная информация [Русский язык] Декларация о Соответствии Требованиям Технического Регламента об Ограничении Использования некоторых Вредных Веществ в электрическом и электронном оборудовании (утверждённого Постановлением №1057 Кабинета Министров Украины) Изделие соответствует требованиям Технического Регламента об Ограничении Использования некоторых Вредных Веществ в электрическом и... - Página 16 Authorised Representative in EU: https://www.panasonic.com/ca/ Panasonic Testing Centre Panasonic Marketing Europe GmbH Winsbergring 15, 22525 Hamburg, Germany Printed in China Gedruckt in China Imprimé en Chine Impreso en China Напечатано в Китае © Panasonic i-PRO Sensing Solutions Co., Ltd. 2019 Ns0813-3109 PGQX1403XA...
