Publicidad
Idiomas disponibles
Idiomas disponibles
Enlaces rápidos
Allen & Roth and logo design are
trademarks or registered trademarks
of LF, LLC. All rights reserved.
ATTACH YOUR RECEIPT HERE
Serial Number
Questions, problems, missing parts? Before returning to your retailer, call our customer service
department at 1-866-439-9800, 8 a.m. - 8 p.m., EST, Monday - Sunday. You could also contact us at
partsplus@lowes.com or visit www.lowespartsplus.com.
SM20575
welcoming
•
Purchase Date
sophisticated
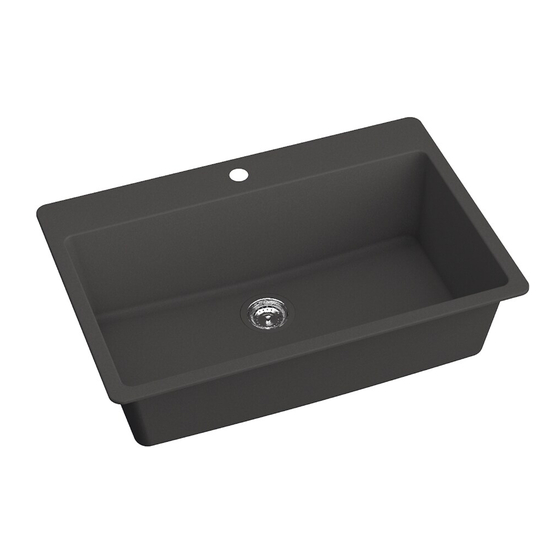
Granite Kitchen Sink
MODEL# JJ-LARGE SB GNT COMP Single Bowl
JJ-DB GNT COMP Double Bowl
lowes.com/allenandroth
1
•
inspiring
ITEM #2889548 Single Bowl
#2889547 Double Bowl
Español p. 9
Publicidad

Resumen de contenidos para Allen + Roth JJ-LARGE SB GNT COMP Single Bow
- Página 1 welcoming • sophisticated • inspiring ITEM #2889548 Single Bowl Allen & Roth and logo design are #2889547 Double Bowl trademarks or registered trademarks of LF, LLC. All rights reserved. Granite Kitchen Sink MODEL# JJ-LARGE SB GNT COMP Single Bowl JJ-DB GNT COMP Double Bowl ATTACH YOUR RECEIPT HERE Español p.
- Página 2 PACKAGE CONTENTS HARDWARE CONTENTS Single Bowl Topmount Cut-out 21.25" 21.25" 0.37" 32.25" 32.25" Top-mount Clip Top-mount Clip Mounting Bracket Mounting Screw Threaded nut with Screw with Screw Qty. 8 Qty. 8 Qty. 8 Single Bowl Undermount Cut-out Qty. 8 Qty. 8 0.16"...
- Página 3 INSTALLATION INSTRUCTIONS–TOPMOUNT INSTALLATION INSTRUCTIONS–TOPMOUNT 1. Preparing the installation location 3. Installing the mounting clips (AA) If necessary, disconnect the water supply lines Turn the sink over and press the mounting clips underneath the sink and remove the old sink. (AA) into the pre-drilled holes along the rim of the sink (A) until they are flush on the base of Place the 2-in-1 template (B) on sink installation the sink (A).
- Página 4 INSTALLATION INSTRUCTIONS–UNDERMOUNT INSTALLATION INSTRUCTIONS–UNDERMOUNT 1. Preparing the installation location 3. Mounting the sink If necessary, disconnect the water supply lines From underneath the countertop, apply silicone underneath the sink and remove the old sink. sealant around the perimeter of the installation location.
-
Página 5: Care And Maintenance
Fecha de compra Printed in Germany ¿Preguntas, problemas, piezas faltantes? Antes de volver a la tienda, llame a nuestro allen + roth ® is a registered trademark of Departamento de Servicio al Cliente al 1-866-439-9800 de lunes a domingo de 8 a.m. a 8 p.m., hora LF, LLC. -
Página 6: Preparación
CONTENIDO DEL PAQUETE ADITAMENTOS Abertura de instalación superior de un lavabo 53,97 cm 53,97 cm 9,39 mm 81,91 cm 81,91 cm Sujetador de Sujetador de Soporte de montaje Tornillo de Tuerca instalación superior instalación superior Cant. 8 montaje roscada Abertura de instalación inferior de un lavabo con tornillo con tornillo Cant. - Página 7 INSTRUCCIONES DE INSTALACIÓN–MONTAJE SUPERIOR INSTRUCCIONES DE INSTALACIÓN: MONTAJE SUPERIOR 1. Preparación del lugar de instalación 3. Instalación de los soportes de montaje Si es necesario, desconecte las líneas de entrada Dé la vuelta al fregadero y presione los de agua debajo del fregadero y retire el fregadero sujetadores de montaje (AA) en los orificios viejo.
- Página 8 INSTRUCCIONES DE INSTALACIÓN: MONTAJE INFERIOR INSTRUCCIONES DE INSTALACIÓN: MONTAJE INFERIOR 1. Preparación del lugar de instalación 3. Montaje del fregadero Si es necesario, desconecte las líneas de entrada Desde debajo de la cubierta prefabricada, de agua debajo del fregadero y retire el fregadero aplique sellador de silicona alrededor del viejo.
-
Página 9: Cuidado Y Mantenimiento
El fabricante rechaza cualquiera y todas las garantías implícitas. Impreso en Alemania allen + roth es una marca registrada de ®...
