Tabla de contenido
Publicidad
Idiomas disponibles
Idiomas disponibles
Enlaces rápidos
ATTACH YOUR RECEIPT HERE
Serial Number ____________________________ Purchase Date _________________________
Questions, problems, missing parts? Before returning to your retailer, call our
customer service department at 1-866-389-8827, 8 a.m. - 8 p.m., EST, Monday - Friday.
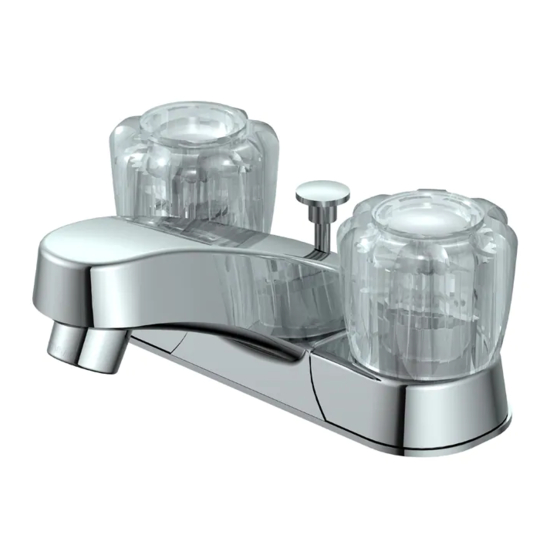
BATHROOM FAUCET
1
ITEM #0386625
TWO HANDLE
MODEL #F5120021CP
Français / Español p. 11
Publicidad
Tabla de contenido

Manuales relacionados para Project Source F5120021CP


Resumen de contenidos para Project Source F5120021CP
- Página 1 ITEM #0386625 TWO HANDLE BATHROOM FAUCET MODEL #F5120021CP Français / Español p. 11 ATTACH YOUR RECEIPT HERE Serial Number ____________________________ Purchase Date _________________________ Questions, problems, missing parts? Before returning to your retailer, call our customer service department at 1-866-389-8827, 8 a.m. - 8 p.m., EST, Monday - Friday.
-
Página 2: Package Contents
PACKAGE CONTENTS PART DESCRIPTION QUANTITY Faucet Aerator (preassembled) Main Plunger (preassembled) Lift Rod Drain Body (preassembled) Drain Flange (preassembled) Lift Rod Strap Thumbscrew (preassembled) Rubber Washer (preassembled) Lock Nut (preassembled) Friction Washer (preassembled) Spring Clip Ball Nut (preassembled) Ball Rod... -
Página 3: Safety Information
HARDWARE CONTENTS (shown actual size) Lock Nut Coupling Nut SAFETY INFORMATION Please read and understand this entire manual before attempting to assemble, operate or install the product. WARNING Do not fold it into a V or L shape, and do not use it if there are any cracks or damage. PREPARATION Before beginning assembly of product, make sure all parts are present. - Página 4 ASSEMBLY INSTRUCTIONS faucet if necessary. 2. Place a bead of clear silicone sealant (not included) around the base of the faucet (A). Install faucet (A) through top of sink (not included). 3. Install lock nuts (AA) onto threaded shanks of faucet (A) and hand tighten.
- Página 5 ASSEMBLY INSTRUCTIONS lines (not included). Screw coupling nuts faucet (A). drain assembly. Apply a bead of clear silicone sealant (not included) under the Note: From below, remove ball nut (M) from drain body (E). 6. From below, reattach drain assembly to lock nut (I).
- Página 6 ASSEMBLY INSTRUCTIONS 8. From below, insert ball rod (N) into drain body (E). Note: Plunger (C) can be installed either in a locked position, which prevents the plunger (C) from being removed, or unlocked position, which allows the plunger (C) to be removed for cleaning.
- Página 7 ASSEMBLY INSTRUCTIONS 10. Insert lift rod (D) into faucet (A) and, from below, attach to lift rod strap (G). Tighten thumbscrew (H) on lift rod strap (G). Attach ball rod (N) to lift rod strap (G) with spring clip (L). 12.
- Página 8 ASSEMBLY INSTRUCTIONS 13. Turn on water supply. OPERATION INSTRUCTIONS 1. Remove aerator (B) from faucet (A). 2. Flush out any debris and check for leaks around drain.
-
Página 9: Care And Maintenance
OPERATION INSTRUCTIONS 3. Replace aerator (B). CARE AND MAINTENANCE TROUBLESHOOTING PROBLEM POSSIBLE CAUSE CORRECTIVE ACTION Leak from under handle. Retainer nut has come loose. Tighten the retainer nut. Clean Ball seal damaged or dirty. or replace seal. Replace seats Seats damaged. and springs. -
Página 10: Replacement Parts List
WARRANTY The manufacturer warrants this faucet to be free from defects in workmanship and material present at time of shipment from the factory for a limited lifetime from the date of purchase. This warranty applies only to the original purchaser. The manufacturer agrees to correct such defects at no charge or, at our option, replace the faucet with a comparable or superior model. -
Página 11: Grifo Para Baño De Dos Manijas
ARTICLE #0286625 ROBINET DE SALLE DE BAINS À DEUX POIGNÉES MODÈLE #F5120021CP GRIFO PARA BAÑO DE DOS MANIJAS MODELO #F5120021CP JOIGNEZ VOTRE REÇU ICI / ADJUNTE SU RECIBO AQUÍ Numéro de série / Número de serie __________________________________________________ Date d’achat / Fecha de compra _____________________________________________________ Des questions, des problèmes, des pièces manquantes? - Página 12 CONTENU DE L’EMBALLAGE / CONTENIDO DEL PAQUETE PIÈCE DESCRIPTION / DESCRIPCIÓN QUANTITÉ PIEZA CANTIDAD Robinet / Grifo Aérateur (préassemblé) / Aireador (preensamblado) Bouchon principal (préassemblé) / Émbolo principal (preensamblado) Tige de levage / Varilla de levantamiento Corps du drain (préassemblé) / Cuerpo del desagüe (preensamblado) Bride de drain (préassemblée) / Brida del desagüe (preensamblada) Bande de tige de levage / Correa de la varilla de levantamiento Vis de serrage (préassemblée) / Tornillo de mariposa (preensamblado)
-
Página 13: Consignes De Sécurité / Información De Seguridad
QUINCAILLERIE INCLUSE (grandeur réelle) / ADITAMENTOS (se muestran en tamaño real) Écrou de blocage Écrou d’accouplement Contratuerca Tuerca de acoplamiento CONSIGNES DE SÉCURITÉ / INFORMACIÓN DE SEGURIDAD AVERTISSEMENT calfeutrant à base de silicone. Lea y comprenda completamente este manual antes de intentar ensamblar, usar o instalar el producto. - Página 14 PRÉPARATION / PREPARACIÓN Temps d’assemblage approximatif : 12 minutes Antes de comenzar a ensamblar el producto, asegúrese de tener todas las piezas. Compare las producto si falta alguna pieza o si estas están dañadas. Tiempo estimado de ensamblaje: 12 minutos grifo antiguo para liberar la presión acumulada.
- Página 15 INSTRUCTIONS POUR L’ASSEMBLAGE / INSTRUCCIONES DE ENSAMBLAJE Interrumpa el suministro de agua. Si es silicone clair (non inclus) autour de la base du robinet (A). Posez le robinet (A) dans les transparente (no se incluye) alrededor de la base del grifo (A). Instale el grifo (A) a través de la parte superior del lavabo (no se incluye).
- Página 16 INSTRUCTIONS POUR L’ASSEMBLAGE / INSTRUCCIONES DE ENSAMBLAJE Instale las tuercas de acoplamiento (BB) incluyen). Atornille las tuercas de à base de silicone clair (non inclus) sous la bride (F) et placez-la dans le lavabo. Remarque : Retire la brida (F) del ensamble de de sellador de silicona transparente (no se en el lavabo.
- Página 17 INSTRUCTIONS POUR L’ASSEMBLAGE / INSTRUCCIONES DE ENSAMBLAJE 7. Insérez le bouchon (C) dans la bride de drain (F). Inserte el émbolo (C) en el brida del desagüe (F). 8. Sous le lavabo, insérez le levier à rotule (N) dans le corps du drain (E). Remarque : Vous pouvez régler le bouchon (C) en pour le nettoyage).
- Página 18 INSTRUCTIONS POUR L’ASSEMBLAGE / INSTRUCCIONES DE ENSAMBLAJE 10. Insérez la tige de levage (D) dans le robinet de tige de levage (G). Serrez la vis de serrage (H) à la bande de tige de levage (G). Inserte la varilla de levantamiento (D) en la varilla de levantamiento (G).
- Página 19 INSTRUCTIONS POUR L’ASSEMBLAGE / INSTRUCCIONES DE ENSAMBLAJE Restablezca el suministro de agua.
- Página 20 MODE D’EMPLOI / INSTRUCCIONES DE FUNCIONAMIENTO Retire el aireador (B) del grifo (A). alrededor del desagüe. Vuelva a colocar el aireador (B).
-
Página 21: Entretien / Cuidado Y Mantenimiento
ENTRETIEN / CUIDADO Y MANTENIMIENTO votre garantie. DÉPANNAGE / SOLUCIÓN DE PROBLEMAS PROBLÈME CAUSE POSSIBLE MESURE CORRECTIVE PROBLEMA CAUSA POSIBLE ACCIÓN CORRECTIVA La poignée fuit. endommagé ou sale. Les Remplacez les sièges et les sièges sont endommagés. ressorts. La tuerca de retención está El aireador está... - Página 22 GARANTIE / GARANTÍA fabricante acepta reparar dichos defectos sin cargo o, según nuestro criterio, reemplazar el grifo a nuestro Departamento de Servicio al Cliente al 1-866-389-8827 para enviarle una autorización del fabricante, será responsabilidad del comprador. El fabricante no asume ningún tipo de...
- Página 23 LISTE DES PIÈCES DE RECHANGE / LISTA DE PIEZAS DE REPUESTO Pour obtenir des pièces de rechange, veuillez 1 866 389-8827, entre 8 h et 20 h (HNE), du lundi au vendredi. Para obtener piezas de repuesto, llame a nuestro Departamento de Servicio al Cliente al 1-866-389-8827, de lunes a viernes de 8 a.m.