Capítulos
Tabla de contenido
Solución de problemas

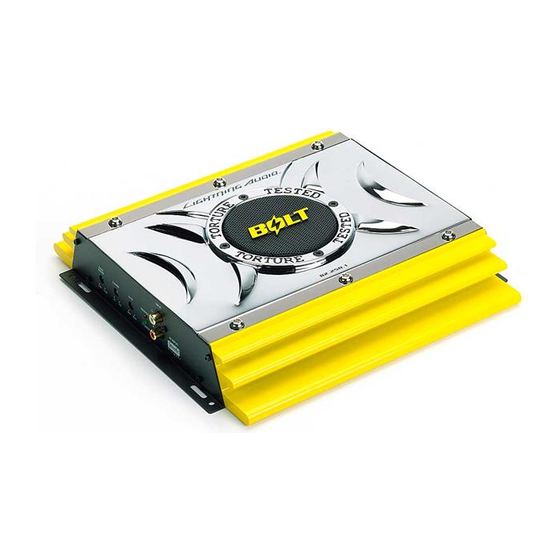
Resumen de contenidos para Lighting Audio BOLT B2.350.1
- Página 1 A m p l i f i e r B2.250.1 B2.350.1 B2.150.2 B2.200.2 B2.300.2 Installation et fonctionnement B2.300.4 Instalación y operación Einbau und Betrieb B2.400.4 Installazione e funzionamento...
-
Página 2: Tabla De Contenido
Introduction INNOVATE OR DISINTIGRATE Thank you for purchasing the Lightning Audio Bolt Amplifier. Our customers have come to expect that Lightning Audio pushes the edge in audio. Now we will push the edge in the amplifier and woofer business with high value and high performance models. -
Página 3: Practice Safe Sound
PRACTICE SAFE SOUND™ Continuous exposure to sound pressure levels over 100dB may cause permanent hearing loss. High powered auto sound systems may produce sound pressure levels well over 130dB. Use common sense and practice safe sound. Safety Instructions This symbol with “WARNING” is intended to alert the user to the presence of important instructions. -
Página 4: Installation
Design Features B2.300.4 B2.400.4 HI INPUT OUTPUT INPUT HI INPUT HI INPUT OUTPUT INPUT HI INPUT PROTECT PROTECT LF.RF LR.RR LF.RF LR.RR X-OVER GAIN GAIN X-OVER X-OVER GAIN GAIN X-OVER POWER POWER JUICE JUICE JUICE JUICE BOOST BOOST BOOST BOOST FILTER FILTER FILTER... -
Página 5: Mounting Locations
Installation This section focuses on some of the vehicle considerations for installing your new Amplifier. Pre-planning your system layout and best wiring routes will save installation time. When deciding on the layout of your new system, be sure that each component will be easily accessible for making adjustments. -
Página 6: Battery And Charging
Installation BATTERY AND CHARGING Amplifiers will put an increased load on the vehicle's battery and charging system. We recommend checking your alternator and battery condition to ensure that the electrical system has enough capacity to handle the increased load of your stereo system. Stock electrical systems which are in good condition should be able to handle the extra load of any Lightning Audio amplifier without problems, although battery and alternator life can be reduced slightly. - Página 7 Installation 9. Connect the speakers. Strip the speaker wires 1/2" and insert into the speaker terminal and tighten the set screw to secure into place. Be sure to maintain proper speaker polarity. DO NOT chassis ground any of the speaker leads as unstable operation may result. 10.
-
Página 8: Remote Juice Control (B2.350.1 Only)
Installation REMOTE JUICE CONTROL (B2.350.1 Only) Mounting and installation 1. Find a location, either under the dash or near the center console, that gives easy access to the remote. 2. Using the screws supplied, install the remote. 3. Route the cable for the remote and connect to both the remote and amplifier. -
Página 9: Operation
Operation ADJUSTING GAIN To adjust the gain setting, turn the amplifier gains all the way down. Turn the source unit volume up until distortion is audible and then turn it down a bit until the distortion is inaudible. Next, turn the amplifier gain setting until once again distortion is audible and then back it down until the distortion is inaudible. -
Página 10: Specifications
Specifications B2.250.1 B2.350.1 • Maximum Power: 750 watts • Maximum Power: 1050 watts • Power Rating: • Power Rating: 250w x 1 @ 2ohms 350w x 1 @ 2ohms 150w x 1 @ 4ohms 250w x 1 @ 4ohms • Input Sensitivity: 150mV - 4V •... -
Página 11: Limited Warranty Information
Limited Warranty Information Lightning Audio offers a limited warranty on products on the following terms: • Length of Warranty Speakers One year parts and labor warranty. Requires proof of purchase. Amplifiers Bolt: One year parts and labor warranty. Requires proof of purchase. Strike and Storm: One year parts and labor warranty. -
Página 12: International Instructions
Introduction L’innovation ou la mort ! Nous vous remercions d'avoir acheté cet ampli Lightning Audio Bolt. Notre clientèle s’attend à ce que Lightning Audio pousse toujours plus loin les limites du son. C’est ce à quoi nous nous consacrons à présent dans les domaines des amplis et des haut- parleurs graves grâce à... -
Página 13: Consignes De Sécurité
PRATIQUEZ UNE ÉCOUTE SANS RISQUES Une exposition continue à des niveaux de pression acoustique supérieurs à 100 dB peut causer une perte d'acuité auditive permanente. Les systèmes audio de forte puissance pour auto peuvent produire des niveaux de pression acoustique bien au-delà de 130 dB. Faites preuve de bon sens et pratiquez une écoute sans risque Consignes de sécurité... -
Página 14: Installation
Particularités Techniques B2.300.4 B2.400.4 OUTPUT INPUT OUTPUT INPUT HI INPUT HI INPUT HI INPUT HI INPUT PROTECT PROTECT LF.RF LR.RR LF.RF LR.RR X-OVER GAIN GAIN X-OVER X-OVER GAIN GAIN X-OVER POWER POWER JUICE JUICE JUICE JUICE BOOST BOOST BOOST BOOST FILTER FILTER FILTER... -
Página 15: Emplacements De Montage
Installation Cette section traite de points concernant le véhicule dont il faut tenir compte pour l’installation de votre nouvel ampli. Vous sauverez du temps en planifiant à l’avance la disposition du système et du câblage. Assurez-vous, entre autres, que chaque composant du système est facilement accessible pour les réglages. -
Página 16: Batterie Et Chargement
Installation BATTERIE ET CHARGE Les amplificateurs exercent une charge accrue sur la batterie et le système de charge du véhicule. Nous vous conseillons de vérifier l’état de l’alternateur et de la batterie pour vous assurer que le système électrique puisse supporter la charge accrue de votre système stéréo. Les systèmes électriques ordinaires en bon état sont normalement capables de fournir sans problème la charge supplémentaire requise par les amplis Lightning Audio. - Página 17 Installation 9. Connectez les haut-parleurs : dénudez les fils des haut-parleurs de 1/2" et insérez la partie dénudée dans la borne du haut-parleur, puis serrez la vis sans tête pour fixer le tout. Veillez à respecter la polarité des haut-parleurs. NE mettez 10.
-
Página 18: Contrôle De Puissance À Distance
Installation CONTRÔLE DE PUISSANCE À DISTANCE (modèle B2.350.1 seulement) Montage et installation 1. Trouvez un bon emplacement, sous le tableau de bord ou près de la console centrale, offrant un accès facile à l’appareil de télécommande. 2. Installez la commande à distance à l’aide des vis fournies. -
Página 19: Fonctionnement
Fonctionnement RÉGLAGE DU GAIN Pour régler le gain, tournez le bouton de gain de l’ampli vers son niveau le plus bas. Augmentez le volume de la source audio jusqu’à produire une distorsion audible, puis baissez-le jusqu’à ce que la distorsion devienne inaudible. Augmentez ensuite le gain de l’ampli jusqu’à produire de nouveau une distorsion audible, puis baissez-le jusqu’à... -
Página 20: Caractéristiques
Caractéristiques B2.250.1 B2.350.1 • Puissance Maximum: 750 watts • Puissance Maximum: 1050 watts • Puissance nominale : • Puissance nominale : 100 w x 2 @ 4 ohms 250 w x 1 @ 2 ohms 150 w x 2 @ 2 ohms 150 w x 1 @ 4 ohms 300 w x 1 @ 4 ohms •... -
Página 21: Garantie Limitée
Garantie limitée Lightning Audio offre une garantie limitée sur ses produits selon les termes suivants : • Durée de la garantie Haut-parleurs Un an, pièces et main-d’œuvre. Preuve d'achat exigée. Amplis Bolt : Un an, pièces et main-d’œuvre. Preuve d'achat exigée. Strike et Storm : Un an, pièces et main-d’œuvre. -
Página 22: Introducción
Introducción Innove o desintegrese! Gracias por comprar el Amplificador Lightning Audio Bolt. Nuestros clientes pueden contar con que Lightning Audio traspase los límites del audio. Ahora, traspasaremos lo límites en el negocio de amplificadores y woofers con modelos de gran valor y alto rendimiento. -
Página 23: Practique El Sonido Seguro
PRACTIQUE EL SONIDO SEGURO El contacto continuo con niveles de presión de sonido superiores a 100 dB puede causar la pérdida permanente de la audición. Los sistemas de sonido para automóviles de alta potencia pueden producir niveles de presión de sonido superiores a los 130 dB. Use su sentido común y practique el sonido seguro. -
Página 24: Instalación
Características de Diseéo B2.300.4 B2.400.4 OUTPUT INPUT OUTPUT INPUT HI INPUT HI INPUT HI INPUT HI INPUT PROTECT PROTECT LF.RF LR.RR LF.RF LR.RR X-OVER GAIN GAIN X-OVER X-OVER GAIN GAIN X-OVER POWER POWER JUICE JUICE JUICE JUICE BOOST BOOST BOOST BOOST FILTER FILTER... -
Página 25: Lugares Para El Montaje
Instalación Esta sección se concentra en algunas de las consideraciones de su vehículo para instalar el nuevo amplificador. La planificación previa del diagrama de su sistema y las mejores rutas del cableado ayudarán a ahorrar tiempo en la instalación. Cuando se decide sobre el diagrama de su nuevo sistema, asegúrese de que cada componente esté... -
Página 26: Batería Y Carga
Instalación BATERÍA Y CARGA Los amplificadores incrementarán la demanda sobre la batería del vehículo y el sistema de carga. Recomendamos verificar el estado del alternador y de la batería para asegurar que el sistema eléctrico tenga suficiente capacidad para procesar la demanda extra en su sistema de estéreo. Sistemas eléctricos de fábrica que están en buenas condiciones deben tener capacidad suficiente para la demanda extra de cualquier amplificador de Lightning Audio sin problemas, aunque la vida útil de la batería y del alternador pueden reducirse levemente. - Página 27 Instalación 9. Conecte los altavoces. Pele 1/2 pulgada (1,3 cm) de los cables de los altavoces, insértelos en los terminales de los altavoces y ajuste el tornillo de fijación en su lugar. Asegúrese de mantener la polaridad correcta en los altavoces. NO conecte ninguno de los conductores de los altavoces a tierra, ya que esto puede resultar en un funcionamiento inestable.
-
Página 28: Control De Juice Remoto (B2.350.1 Solamente)
Instalación CONTROL DE JUICE REMOTO (B2.350.1 solamente) Montaje e instalación 1. Encuentre un lugar debajo del tablero o cerca del centro de la consola, el cual permita acceder fácilmente al remoto. 2. Instale el remoto con los tornillos provistos. 3. Pase el cable para el remoto y conéctelo al remoto y al amplificador. -
Página 29: Operación
Operación AJUSTE DE LA GANANCIA Para ajustar el valor de la ganancia, baje la ganancia del amplificador completamente. Suba el volumen de la unidad fuente hasta que la distorsión sea audible y luego bájelo un poco hasta que la distorsión no pueda escucharse. -
Página 30: Especificaciones
Specifications B2.250.1 B2.350.1 • Potencia Máxima: 750 watts • Potencia Máxima: 1050 watts • Especificación de potencia: • Especificación de potencia: 250w x 1 @ 2ohms 350w x 1 @ 2ohms 150w x 1 @ 4ohms 250w x 1 @ 4ohms •... -
Página 31: Información Sobre La Garantía Limitada
Información sobre la garantía limitada Lightning Audio ofrece una garantía limitada para los productos según los siguientes términos: • Duración de la garantía Altavoces Un año de garantía sobre partes y mano de obra. Se requiere prueba de compra. Amplificadores Bolt: Un año de garantía sobre partes y mano de obra. -
Página 32: Einleitung
Einleitung Innovieren oder desintegrieren! Vielen Dank für Ihren Kauf des Lightning Audio Bolt Verstärkers. Unsere Kunden sind es gewöhnt, von Lightning Audio die modernste Technologie zu erwarten. Mit unseren modernen Verstärkern und Woofern bieten wir jetzt wertvolle Hochleistungsmodelle. Zum ersten Mal können Verstärker vom Kunden mit Zubehör wie der CT-1 Kühlungsturbine persönlicher gestaltet werden. -
Página 33: Sicherheitshinweise
PRAKTIZIEREN SIE SAFE SOUND Fortgesetzte Geräuschdruckpegel von über 100 dB können beim Menschen zu permanentem Hörverlust führen. Leistungsstarke Autosoundsysteme können Geräuschdruckpegel erzeugen, die weit über 130 dB liegen. Bitte wenden Sie gesunden Menschenverstand an und praktizieren Sie SAFE SOUND. Sicherheitshinweise Dieses Symbol mit dem Wort „WARNUNG“... -
Página 34: Einbau
Designcharakteristiken B2.300.4 B2.400.4 OUTPUT INPUT OUTPUT INPUT HI INPUT HI INPUT HI INPUT HI INPUT PROTECT PROTECT LF.RF LR.RR LF.RF LR.RR X-OVER GAIN GAIN X-OVER X-OVER GAIN GAIN X-OVER POWER POWER JUICE JUICE JUICE JUICE BOOST BOOST BOOST BOOST FILTER FILTER FILTER FILTER... -
Página 35: Befestigungsstellen
Einbau Dieser Abschnitt konzentriert sich auf Erwägungen hinsichtlich des Einbaus Ihres neuen Verstärkers im Fahrzeug. Vorausplanung Ihres Systemlayouts und der besten Verkabelungsrouten spart Zeit beim Einbau. Prüfen Sie bei der Wahl eines Layouts für Ihr neues System, ob alle Komponenten leicht erreichbar sind, um Einstellungen vorzunehmen. -
Página 36: Batterie Und Aufladung
Einbau BATTERIE UND AUFLADUNG Verstärker belasten Batterie- und Aufladungssystem Ihres Fahrzeugs zusätzlich. Wir empfehlen eine Überprüfung des Zustands Ihrer Lichtmaschine und Batterie, um zu gewährleisten, dass das elektrische System ausreichende Kapazitäten hat, um die zusätzliche Belastung durch Ihre Stereoanlage zu verkraften. Gewöhnliche elektrische Systeme in gutem Zustand sollten in der Lage sein, die zusätzliche Belastung aller Verstärker von Lightning Audio problemlos zu verkraften. - Página 37 Einbau 9. Die Lautsprecher anschließen. Von den Enden der Lautsprecherkabel 13 mm Isolation abziehen, dann die Kabel in das Lautsprecheranschlussstück einführen und die Befestigungsschraube fest anziehen. Die Lautsprecherkabel NICHT über das Fahrgestell erden, da dies zu unstabilem Betrieb führen kann. 10.
-
Página 38: Juice-Fernbedienung (Nur B2.350.1)
Einbau JUICE-FERNBEDIENUNG (nur B2.350.1) Einbau und Installation 1. Eine Stelle unter dem Armaturenbrett oder nahe der Mittelkonsole wählen, die leichten Zugriff auf die Fernbedienung erlaubt. 2. Die beiliegenden Schrauben zum Einbau der Fernbedienung verwenden. 3. Das Fernbedienungskabel verlegen und sowohl an der Fernbedienung als auch am Verstärker anschließen. -
Página 39: Betrieb
Betrieb LAUTSTÄRKE (GAIN) EINSTELLEN Zur Anpassung der Lautstärkereinstellung den Verstärker abdrehen. Die Lautstärke des Source- Geräts aufdrehen, bis eine Verzerrung hörbar wird, und sie dann etwas abdrehen, bis die Verzerrung nicht mehr hörbar ist. Als nächstes den Verstärker aufdrehen, bis eine Verzerrung erneut hörbar wird, und ihn dann abdrehen, bis die Verzerrung nicht mehr hörbar ist. -
Página 40: Technische Daten
Technische Daten B2.250.1 B2.350.1 • Maximale Energie: 750 watts • Maximale Energie: 1050 watts • Nennleistung: • Nennleistung: 250 W x 1 @ 2 Ohm 350 W x 1 @ 2 Ohm 150 W x 1 @ 4 Ohm 250 W x 1 @ 4 Ohm •... -
Página 41: Informationen Zur Beschränkten Garantie
Informationen zur beschränkten Garantie Lightning Audio bietet eine beschränkte Produktgarantie zu folgenden Bedingungen: • Laufzeit der Garantie Lautsprecher Ein Jahr auf Teile und Fertigung. Kaufnachweis erforderlich. Verstärker Bolt: Ein Jahr auf Teile und Fertigung. Kaufnachweis erforderlich. Streik und Sturm: Ein Jahr auf Teile und Fertigung. Kaufnachweis erforderlich. Oder zwei Jahre auf Teile und Fertigung, wenn von einem Vertragshändler eingebaut. -
Página 42: Introduzione
Introduzione Introdurre novità o disintegrare! Vi ringraziamo per aver acquistato l’amplificatore Bolt (Fulmine) della Lightning Audio. Ormai, i nostri clienti si aspettano che la Lightning Audio oltrepassi il traguardo nel campo audio. Adesso oltrepasseremo il traguardo anche nel campo degli amplificatori e dei woofer—con modelli ad alto valore e ad altre prestazioni. -
Página 43: Istruzioni Di Sicurezza
OSSERVATE LE REGOLE DEL “SUONO SENZA PERICOLI” La costante esposizione a livelli di pressione acustica al di sopra dei 100dB possono causare la perdita permanente dell’udito. I sistemi audio ad alta potenza possono produrre livelli di pressione acustica ben superiori ai 130dB. Si consiglia il buon senso e l’osservanza delle regole del “suono senza pericoli.”... -
Página 44: Installazione
Caratteristiche del Design B2.300.4 B2.400.4 OUTPUT INPUT OUTPUT INPUT HI INPUT HI INPUT HI INPUT HI INPUT PROTECT PROTECT LF.RF LR.RR LF.RF LR.RR X-OVER GAIN GAIN X-OVER X-OVER GAIN GAIN X-OVER POWER POWER JUICE JUICE JUICE JUICE BOOST BOOST BOOST BOOST FILTER FILTER... -
Página 45: Posizionamento
Installazione Questa sezione si concentra su alcune considerazioni a livello di veicolo inerenti all’installazione del vostro nuovo amplificatore.Programmando a priori la configurazione del vostro sistema audio nonché i migliori cablaggi, risparmierete tempo durante l’installazione. Quando avrete deciso la miglior configurazione per il vostro nuovo sistema audio, assicuratevi di poter accedere facilmente a ciascuna componente per effettuare le regolazioni necessarie. -
Página 46: Batteria E Caricamento
Installazione BATTERIA E CARICAMENTO Gli amplificatori rappresentano un ulteriore carico sulla batteria e sul sistema di caricamento del veicolo. Vi raccommandiamo pertanto di controllare la condizione del vostro alternatore e della vostra batteria per assicurarvi che il sistema elettrico sia in grado di far fronte all’ulteriore carico che inciderà sul vostro sistema stereofonico. - Página 47 Installazione 9. Collegate gli altoparlanti. Spelate i fili degli altoparlanti di 1,27 cm e inseriteli nel terminale degli altoparlanti, stringendo la vite di arresto per fissarli. Assicuratevi di mantenere la corretta polarità per gli altoparlanti. NON collegate a massa nessudei cavi dell’amplificatore in quanto ciò potrebbe dar luogo ad un funzionamento instabile.
-
Página 48: (Solamente B2.350.1)
Installazione TELECOMANDO DI CORRENTE (Solamente B2.350.1) Montage et installation 1. Trouvez un bon emplacement, sous le tableau de bord ou près de la console centrale, offrant un accès facile à l’appareil de télécommande. 2. Usando le viti fornite, installate il telecomando. 3. -
Página 49: Funzionamento
Funzionamento REGOLAZIONE DI GUADAGNO Per regolare la sintonizzazione del guadagno, abbassate completamente i guadagni dell’amplificatore. Alzate il volume dell’unità di fonte finché la distorsione non diventi udibile, e poi abbassatelo finché la distorsione non sia più udibile. In seguito, girate dinuovo la sintonizzazione di guadagno dell’amplificatore finché... -
Página 50: Specifiche
Specifications B2.250.1 B2.350.1 • Alimentazione Massima: 750 watts • Alimentazione Massima: 1050 watts • Potenza a regime: 250w x 1 @ 2ohm • Potenza a regime: 150w x 1 @ 4ohm 350w x 1 @ 2ohm • Sensibilità d’ingresso: 150mV – 4V 250w x 1 @ 4ohm •... -
Página 51: Informazioni Inerenti Alla Garanzia Limitata
Informazioni Inerenti alla Garanzia Limitata La Lightning Audio offre una garanzia limitata sui prodotti alle seguenti condizioni: • Durata della garanzia Altoparlanti Garanzia di un anno sui pezzi di ricambio e sulla manodopera. È necessaria laricevuta. Amplificatori Bolt (Fulmine): Garanzia di un anno sui pezzi di ricambio e sulla manodopera. Ènecessaria la ricevuta. - Página 52 Lightning Audio 955 N. Fiesta Blvd, Suite 4 Gilbert, Arizona 85233 U.S.A. In U.S.A., (480) 966-8278 In Europe, Fax (49) 850-3934-014 In Japan, Fax (81) 559-79-1265 11/02 B.M. Printed in China MAN-4569-A...