Publicidad
Enlaces rápidos
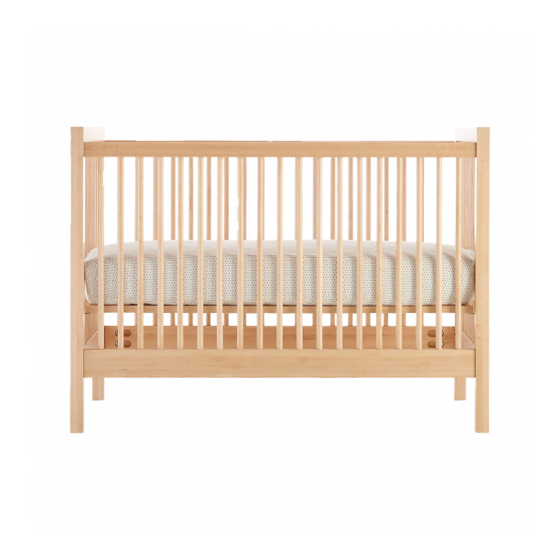
Andersen II
Crib / Lit d'enfant / Cuna
WARNING:
!
• Failure to follow these warnings and assembly instructions could result in serious injury or death.
• Read all instructions before assembling crib. Keep instructions for future use.
• Do not use this crib if you cannot exactly follow the instructions that come with it.
WARNING:
!
• For toddler bed use, the minimum age shall be no less than 15 months, and the maximum weight shall not be greater
than 50 lb (22.7 kg).
• Infants can suffocate on soft bedding. Never add a pillow or comforter. Never place additional padding or mattress
under an infant.
• To reduce the risk of SIDS, pediatricians recommend healthy infants be placed on their backs to sleep, unless
otherwise advised by your physician.
STRANGULATION HAZARD:
• Strings can cause strangulation! DO NOT place items with a string, cord or ribbon around a child's neck, such as hood
strings or pacifier cords. DO NOT suspend strings over crib or toddler bed, or attach strings to toys for any reason.
• To help prevent strangulation, tighten all fasteners. A child can trap parts of the body or clothing on loose fasteners.
• DO NOT place crib or toddler bed near window or patio door where cords from blinds or drapes may strangle a child.
FALL HAZARD:
• When child is able to pull to standing position, set mattress to lowest position and remove bumper pads, large toys
and other objects that could serve as steps for climbing out.
• When child is able to climb out or reaches the height of 35 inches (89 cm), the crib shall no longer be used and the child
should be placed in a youth or regular bed.
CAUTION: ANY MATTRESS USED IN
!
THIS CRIB SHALL BE AT LEAST 27 1⁄4 BY 51
5⁄8 IN. (69 CM BY 131 CM) WITH A
THICKNESS NOT EXCEEDING 6 IN. (15 CM),
AND WHEN IT IS PUSHED FIRMLY AGAINST
ANY SIDE OF THIS CRIB, IT DOES NOT
LEAVE A GAP OF MORE THAN 1 IN. (3 CM)
BETWEEN THE MATTRESS AND ANY PART
OF ANY OTHER SIDE OF THE CRIB.
• Check this product for damaged hardware, loose joints, loose bolts or other fasteners, missing parts, or sharp edges
before and after assembly and frequently during use. Securely tighten loose bolts and other fasteners. DO NOT use crib
if any parts are missing, damaged or broken. Contact Crate and Barrel for replacement parts and instructional literature if
needed. DO NOT substitute parts.
• If refinishing, use a non-toxic finish specified for children's products.
• Never use plastic shipping bags or other plastic film as mattress covers because they can cause suffocation.
• Infants can suffocate in gaps between crib sides and a mattress that is too small.
• To clean crib: Wipe with clean soft cloth dampened with a mild cleanser and water. Rinse with clean water using a soft
cloth, and dry thoroughly.
• Follow warnings on all products in a crib.
• When a vaporizer is in use, always aim vapor steam away from the crib as well as away from other wood furniture.
v.04 - 07/2018
800.967.6696 | crateandbarrel.com
1/13
Publicidad

Manuales relacionados para Crate&Barrel Andersen II


Resumen de contenidos para Crate&Barrel Andersen II
- Página 1 Andersen II Crib / Lit d’enfant / Cuna WARNING: • Failure to follow these warnings and assembly instructions could result in serious injury or death. • Read all instructions before assembling crib. Keep instructions for future use. • Do not use this crib if you cannot exactly follow the instructions that come with it.
- Página 2 Andersen II Crib / Lit d’enfant / Cuna MISE EN GARDE: • Il y a risque de blessure sévère ou d’accident mortel si les mises en garde et les instructions de montage ne sont pas rigoureusement respectées. • Lire attentivement toutes les instructions avant de procéder au montage du lit d’enfant. Conserver ces instructions pour s’y référer à...
- Página 3 Andersen II Crib / Lit d’enfant / Cuna ADVERTENCIA: Al no seguirse estas advertencias y las instrucciones de ensamblaje pueden producirse lesiones graves o hasta la muerte. •Lea todas las instrucciones antes de armar la cuna. Guarde las instrucciones para uso futuro.
- Página 4 Andersen II Crib / Lit d’enfant/ Cuna English This page lists the contents included in the box. Please take time to identify the hardware as well as the individual components of the product. As you unpack and prepare for assembly, place the contents on a carpeted or padded area to protect them from damage.
- Página 5 Andersen II Crib / Lit d’enfant / Cuna 10 - End panel bolts 8 - Large bolts 4 - Bolt Caps 4 - Wood Dowels 10 - Boulons pour panneau 8 - Grands boulons 4 - Capuchons pour boulons 4 - Chevilles en bois...
- Página 6 Andersen II Crib / Lit d’enfant / Cuna 2 - End panels 2 - Panneaux pour tête/pied de lit 2 - Paneles extremos 2 - Side panels 2 - Panneaux latéraux 2 - Paneles laterales 1 - Mattress support panel 1 - Panneau de support du matelas 1 - Panel de soporte del colchón...
- Página 7 Andersen II Crib / Lit d’enfant / Cuna exposed hole for toddler rail assembly Trou à nu pour monter le garde-corps Orificio expuesto para el montaje de la barandilla para niños pequeños Insert 2 wooden dowels into left end panel as shown. Attach 2 brackets to left end panel with 1 end panel bolt per bracket.
- Página 8 Andersen II Crib / Lit d’enfant / Cuna Left end panel Panneau de lit côté gauche Panel extremo izquierdo Fit brackets and dowels of left end panel into corresponding holes of 2 side panels. Using a small Allen wrench, secure top of each side panel with 1 end panel bolt as shown. Using a small Allen wrench, secure bottom of each side panel with 2 large bolts, 2 spring washers, and 2 half-moon brackets.
- Página 9 Andersen II Crib / Lit d’enfant / Cuna Fit brackets and dowels of right end panel into corresponding holes of 2 side panels. Using a small Allen wrench, secure top of each side panel with 1 end panel bolt as shown. Using a small Allen wrench, secure bottom of each side panel with 2 large bolts, 2 spring washers, and 2 half-moon brackets.
- Página 10 Andersen II Crib / Lit d’enfant / Cuna High Haute Alta Middle Médiane Media Basse Baja Determine the desired height (low, middle, high) for the crib mattress. Fit each support pin into corresponding corner as shown. Make sure support pin is securely engaged with assembly.
- Página 11 Andersen II Crib / Lit d’enfant / Cuna NOTE: Make sure metal plate of mattress panel is at the bottom during assembly. ATTN : S’assurer d’avoir orientée la plaque métallique du panneau de support de matelas vers le bas pendant le montage.
- Página 12 Andersen II Crib / Lit d’enfant / Cuna Carefully position crib upright as shown. Adjust levelers as necessary. Assembly is now complete. Avec précaution, mettre le lit d’enfant en position verticale, selon le schéma. Régler les ajusteurs de niveau si besoin. Le montage est présentement achevé.
- Página 13 Andersen II Crib / Lit d’enfant / Cuna CLEANING AND CARE Clean surfaces with a dry or damp soft cloth. Do not use abrasive cleaners. Once the crib is in use, periodically check to make sure all bolts are tight, and tighten as necessary. For future use, keep these instructions in the envelope attached to the mattress support.