Tabla de contenido
Publicidad
Idiomas disponibles
Idiomas disponibles
Enlaces rápidos
Publicidad
Tabla de contenido

Resumen de contenidos para Dörr 170 XTra 1200 Lux
- Página 1 LED 170 XTra 1200 Lux Gebrauchsanweisung Instruction Manual Руководство пользователя Notice d´utilisation Manuale di istruzione 10-11 Manual de Istrucciones 12-13 Bruksanvisning 14-15 www.doerrfoto.de...
-
Página 2: Bezeichnung Der Bauteile
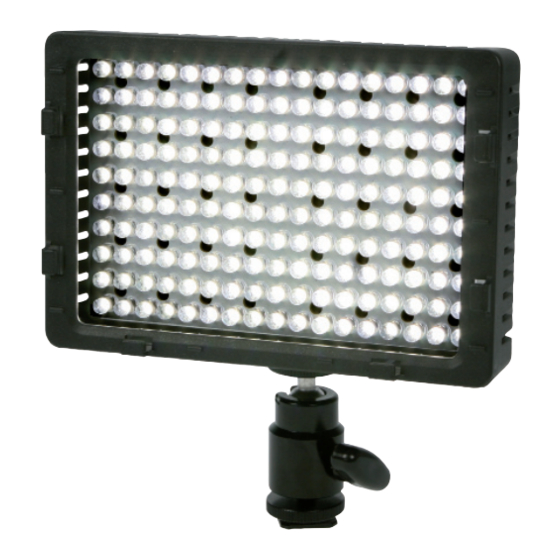
1. Bezeichnung der Bauteile ➅ ➀ ➃ ➆ ➇ ➁ ➄ ➂ ➈ 1. Leuchtpanel mit LEDs 6. Diffusor- Halter 2. Kugelkopf 7. Drehrad zum Dimmen der LED Leistung 3. Fuß zum Aufstecken auf Kamera-Blitzschuh 8. Testknopf & LEDs zur Batterie-/ 4. -
Página 3: Technische Daten
Sie können nun die Ultra 170 LED Leuchte mit dem Ein-/Ausschalter einschalten und und das Dimmrad auf die gewünschte Leistungseinstellung drehen. Bitte beachten Sie, dass die LEDs nach dem Einschalten einige Sekunden benötigen, bis sie die volle Lichtleistung erbringen. Hinweise: •... -
Página 4: Accessories Included
1. Nomenclature ➅ ➀ ➃ ➆ ➇ ➁ ➄ ➂ ➈ 1. Light Panel with LEDs 6. Diffuser Holder 2. Ball Head 7. Knob to turn for dimming the LED power 3. Light Panel Foot to slide on Camera’s Hot Shoe 8. - Página 5 Now you switch on the Ultra 170 LED Video light using the on/off switch. The dim knob allows dimming of LED power as desired. When you switch the light on, please note that the LEDs will take a few seconds to get to their full performance.
- Página 6 Наименования составных частей ➅ ➀ ➃ ➆ ➇ ➁ ➄ ➂ ➈ 1. Световая панель со светодиодами 6. Держатель рассеивателя 2. Шаровая головка 7. Кнопка для приглушения мощности свето 3. Пятка световой панели для установки на горячий башмак камеры 8. Кнопка теста и светодиоды для контроля 4.
-
Página 7: Технические Характеристики
Т еперь включите светодиодную вспышку для видеосъемки LED 170 Video light с помощью переключателя вкл./ выкл. Кнопка для приглушения мощности позволяет приглушить мощность светодиодов до желаемого уровня. При включении вспышки, пожалуйста, учтите, что светодиодам потребуется несколько секунд, чтобы достичь своей полной мощности. Примечания: • Пожалуйста, всегда используйте батареи питания одного типа, бренда и мощности. -
Página 8: Accessoires Fournis
1. Descriptif des composants ➅ ➀ ➃ ➆ ➇ ➁ ➄ ➂ ➈ 1. Panneau d’éclairage aux LEDs 6. Fixation du diffuseur 2. Rotule ball 7. Commutateur pour la régulation graduelle de la 3. Pied d’insertion sur l’embase de l’appareil photo puissance des LED 4. -
Página 9: Données Techniques
Vous pouvez maintenant mettre en marche le système d’éclairage Ultra 170 LED par le biais de l`interrupteur Marche/ Arrêt et régler graduellement le niveau de puissance souhaitée par le biais du commutateur. Prennez en considération que les LEDS ont besoin de quelques sécondes jusqu’à ce que la puissance maximale de lumière soit atteinte. Informations: •... -
Página 10: Accessori Inclusi
1. Nomenclatura ➅ ➀ ➃ ➆ ➇ ➁ ➄ ➂ ➈ 1. Pannello Luminoso a LED 6. Porta Diffusore 2. Testa a sfera 7. Manopola per diminuire la Potenza del LED 3. Pannello luminoso con innesto al contatto caldo della 8. -
Página 11: Montaggio Del 170 Led Sulla Fotocamera O Videocamera
Posizionate la leva (ON/OFF) dell’ 170 Led Video Light su ON. Se le batterie sono state inserite nella maniera corretta si accenderà il LED, la manopola vi permette di diminuire la potenza del LED. Nota bene che ci vuole qualche secondo per ottenere la potenza piena del LED. -
Página 12: Accesorios Suministrados
1. Nomenclatura ➅ ➀ ➃ ➆ ➇ ➁ ➄ ➂ ➈ 1. Panel luminoso de LEDs 6. Sujeción del difusor 2. Rótula de bola 7. conmutador rotativo de regulación gradual de la 3. Pie enchufable en la toma de flash de la cámara potencia de los LEDs 4. -
Página 13: Duración Y Nivel De Carga De Las Pilas
Ahora puede Ude encender el cabezal de flash LED 170 actuando el interruptor de encendido/apagado y puede también regular gradualmente la potencia deseada por medio del conmutador rotativo. Tenga en cuenta que los LEDS necesitan algunos segundos hasta que la potencia de luz máxima sea alcanzada. Notas: •... -
Página 14: Medföljande Tillbehör
1. Benämningar ➅ ➀ ➃ ➆ ➇ ➁ ➄ ➂ ➈ 1. Ljuspanel med LED-lampor 6. Sujeción del difusor 2. Kulled 7. Vridreglage för justering av ljusstyrkan Diffuserhållare 3. Ljuspanelens fot att fästa I kamerans blixtsko 8. Testknapp och LED-visning av batteristatus 4. - Página 15 Slå på belysningen med av/på-knappen. Med vridreglaget kan du ställa in belysningens styrka till lämplig nivå. När du startar belysningen tänk på att det tar några sekunder innan LED-lamporna når full effekt. Observera: • Använda alltid batterier av samma typ, märke och kapacitet •...
- Página 16 LED 170 XTra 1200 Lux DÖRR GmbH Postfach 1280 89202 Neu-Ulm/Germany • • Fon +49 731 97037-0 Fax +49 731 97037-37 • info@doerrfoto.de www.doerrfoto.de • www.doerrfoto.de...

