Publicidad
Enlaces rápidos
Publicidad

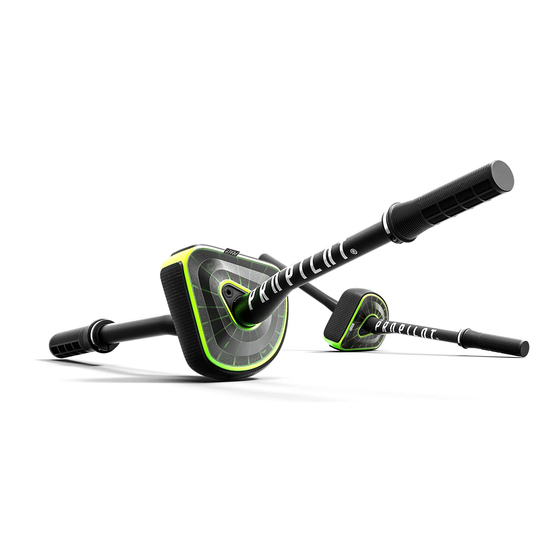
Resumen de contenidos para PRAEP PROPILOT
- Página 1 OWNRS MANUAL...
- Página 2 IT IS ALL ABOUT ARATION TH A N K YO U FO R TA KI N G CA R E O F YO U R M OTO M U S CLES! PLEASE R EA D TH E I N STR U CTI O N S CA R EFU LLY A N D ENJ OY YO U R PR O PI LOT EXPER I EN CE AS M U CH AS N I N A D O ES .
- Página 3 SHORTCUT ASSEMBLY VIDEO CONTENT ProPilot App (download) 5mm Hex Key Level Ring Phonepatch PR AEP ProPilot ® ® Shims 31.8mm https://youtu.be/E1S5 V6bnBaM Clamping Brackets w. Screws Stamp 35mm NOTE Please star t at p. 11 for 35mm handlebars...
- Página 4 INSERT THE INSTALLING A 31.8MM SHIMS HANDLEBAR ⅔ Die 31.8 mm Shims zu ca. ⅔ einschieben Lenker mit 180° Drehung einschieben Inser t the 31.8 mm shims by approx. ⅔ Inser t the bar with a 180° t wist Insérer les cales de 31,8 mm d‘environ ⅔ Insérez le guidon avec un tour de 180 °...
- Página 5 ADJUST THE SHIM ALIGNMENT DE - Die Shims sollten bündig und mittig sitzen. Korrigiere ihre Position durch drehen des Lenkers, oder drücke sie vorsichtig an einer Tischkante in Position EN - The shims should sit flush on both sides. Correct the position by turning the bars or press them carefully into position on a edge FR - Les cales doivent reposer au milieu.
- Página 6 Installiere die Klemmung and install the clamp with the 35 stamp Inser t the brackets FR - Faites glisser le guidon sans cales dans le ProPilot Installez la pince et installez la pince avec le timbre 35 Installare il morsetto...
- Página 7 SLIDE ON THE LEVEL RING DE - Stelle in der Grundposition Deine gewünschte Lenkerdrehung ein, schiebe den Level Ring von rechts auf und richte ihn anhand der Markierungen aus EN - Set your preferred handlebar t wist in the basic BACK FRONT position, slide the level ring from the right and align it...
- Página 8 CLAMPING THE DE - LENKERKLEMMUNG HANDLEBAR DIE KLEMMUNG BEIDSEITIG GLEICHMÄSSIG ANZIEHEN. ACHTUNG: NICHT BIS ZUM ANSCHLAG FESTZIEHEN! MIN. DREHMOMENT 7NM EN - HANDLEBAR CLAMP TIGHTEN THE CLAMP EVENLY ON BOTH SIDES. CAUTION: DO NOT TIGHTEN TO THE STOP! MIN. TORQUE 7NM FR - COLLIER DE GUIDON SERREZ LA PINCE UNIFORMÉMENT DES DEUX CÔTÉS.
- Página 9 THE DIFFERENT LEVELS DE - Die drei verschiedenen Level star ten von stabil (BEGINNER) über seitlich instabil ( A DVA NCED) bis zur Punktbalance (PRO) EN - The three dif ferent level s star t from stable Position Marks (BEGINNER), laterally unstable ( A DVA NCED) up to point balance (PRO) FR - Les trois niveaux dif férents par tent de stable (BEGINNER), instable latéralement ( A DVA NCED jusqu‘à...
- Página 10 CONNECTING THE SMARTPHONE DE - Appliziere den Phonepatch auf der Rückseite Deines Smar tphones und lege es auf die flache Seite der ProPosition BACK EN - Apply the Phonepatch on the back of your smar t- phone and place it on the flat side of the Pro Position FR - Appliquez le Phonepatch à...
- Página 11 INSTALL OUR APP AND GET TRAILREADY...
- Página 12 READY FOR SOME RIDELIKE TRAINING.
- Página 13 ESTE PRODUCTO ESTÁ DISEÑADO PARA SU USO EN SUPERFICIES LIMPIAS Y PLANAS. EL USO Y MONTAJE INCORRECTOS PUEDEN PROVOCAR FALLAS AVVERTENZE PREMATURAS DEL MATERIAL Y / O LESIONES. NON RECOMENDADO: - MANILLAR DE CARBONO - Manillar con zona de sujeción pulida PRAEP.COM/PAGES/FAQs...
- Página 14 GET SOME TRAINING INSPIRATION PRAEP.COM/PAGES/TRAINING...
- Página 15 C O P Y R I G H T © 2 0 2 1 K A I K A I G M B H P R A E P ® A N D P R O P I L O T ® A R E R E G I S T E R E D T R A D E M A R K S I N T H E E U , T H E U S A , C H I N A A N D S W I T Z E R L A N D D E S I G N E D A N D M A N U F A C T U R E D...

