Publicidad
Idiomas disponibles
Idiomas disponibles
ESTE PRODUCTO ESTÁ INDICADO
ÚNICAMENTE EN LUGARES
ABRIGADOS O PARA UNA
UTILIZACIÓN PUNTUAL.
THIS PRODUCT IS SUITABLE
ONLY FOR PROPERLY-INSULATED
ENVIRONMENTS OR FOR
OCCASIONAL USE.
MANUAL DE USUARIO /
USER MANUAL
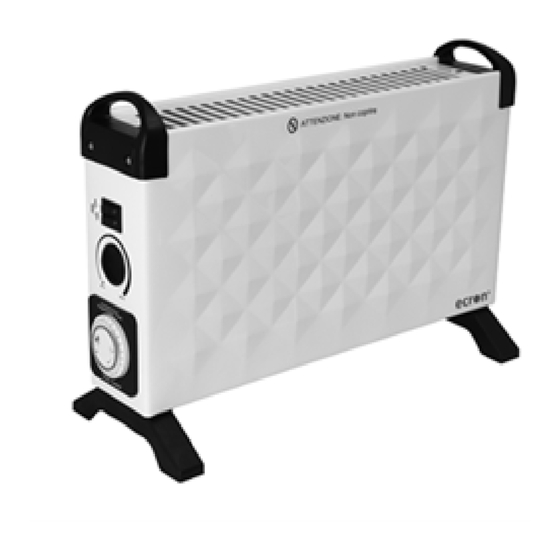
DL06-1 TIMER
CONVECTOR
POTENCIA MÁXIMA 2000 W / TEMPORIZADOR 24 HORAS
CONVECTOR
MAX. POWER 2000 W / 24 HOURS TIMER
Publicidad
Tabla de contenido

Manuales relacionados para ECRON DL06-1 TIMER


Resumen de contenidos para ECRON DL06-1 TIMER
- Página 1 UTILIZACIÓN PUNTUAL. THIS PRODUCT IS SUITABLE ONLY FOR PROPERLY-INSULATED ENVIRONMENTS OR FOR OCCASIONAL USE. MANUAL DE USUARIO / USER MANUAL DL06-1 TIMER CONVECTOR POTENCIA MÁXIMA 2000 W / TEMPORIZADOR 24 HORAS CONVECTOR MAX. POWER 2000 W / 24 HOURS TIMER...
- Página 3 Lea detenidamente todas las instrucciones de seguridad incluidas en este manual antes de utilizar el aparato. En él encontrará consejos importantes relativos al uso, mantenimiento y limpieza del aparato. Guarde este manual en un lugar seguro y consérvelo para posteriores consultas. Before using the appliance, please read all the safety instructions included in this manual carefully.
-
Página 4: Importantes Medidas De Seguridad
IMPORTANTES MEDIDAS DE SEGURIDAD - ADVERTENCIA: Para evitar sobrecalentamientos, NO CUBRIR el aparato de calefacción. Al usar un aparato eléctrico, se deben cumplir unas medidas de seguridad básicas, entre las que se incluyen: 1. Para fijar las ruedas a las patas del radiador ver el apartado “Instrucciones de montaje”... - Página 5 suministro eléctrico es compatible con el voltaje y el tipo de corriente especificado en la carcasa (placa de especificaciones). 3. Procure que el cable no toque el aparato cuando esté caliente. No usar este aparato de calefacción en el entorno inmediato de una bañera, ducha o piscina.
- Página 6 7. Este aparato es sólo para uso doméstico 8. No coloque el calentador sobre alfombras. 9. Asegúrese de colocar el calefactor sobre una superficie plana y estable. 10. Para evitar riesgo de incendio o electrocución, no coloque el aparato cerca de cortinas o muebles. 11.
- Página 7 podría causar un choque eléctrico, fuego o estropear el aparato. 14. No utilizar este aparato en habitaciones con gases explosivos o mientras se estén usando disolventes inflamables, barnices o colas. 15. Desenchufe siempre el calentador para moverlo de un lugar a otro. 16.
- Página 8 sensoriales o mentales reducidas o falta de experiencia y conocimiento, si se les ha dado la supervisión o formación apropiadas respecto al uso del aparato de una manera segura y comprenden los peligros que implica. 18. Los niños no deben jugar con el aparato.
- Página 9 de 8 años deben sólo encender/ apagar el aparato siempre que éste haya sido colocado o instalado en su posición de funcionamiento normal prevista y que sean supervisados o hayan recibido instrucciones relativas al uso del aparato de una forma segura y entiendan los riesgos que el aparato tiene.
- Página 10 ponerse atención particular cuando los niños y las personas vulnerables estén presentes. 22. ADVERTENCIA: Este aparato de calefacción no está equipado con un dispositivo de control de temperatura de la habitación. No utilice este aparato de calefacción en habitaciones pequeñas que estén ocupadas por personas que no pueden abandonar por si mismas la habitación, a menos que se...
- Página 11 su cuenta, ya que podrían poner al usuario en grave riesgo. Las reparaciones sólo deben ser realizadas por personal cualificado. 25. Precaución. No utilice robots de limpieza en la misma habitación sin supervisión. 26. Desconectar y desenchufar siempre el aparato de la red cuando no esté en uso o cuando quiere revisarlo o limpiarlo.
-
Página 12: Partes Del Aparato
29. El aparato debe colocarse a una distancia de al menos 1,5 metros de los baños, duchas, lavanderías, etc. PARTES DEL APARATO 1 x Calefactor 2 x PATAS Tornillos de fijación para las patas (12 mm) - Página 13 INSTRUCCIONES DE MONTAJE Colocación de las patas IMPORTANTE: Antes de usar el calefactor, se deben montar las patas. Coloque el aparato boca abajo (en un lugar donde no pueda rayar, asegúrese de que está firme y de que no se caerá). Utilice los tornillos (C ) para fijar las patas (B) al aparato (A).
- Página 14 ADVERTENCIA: Coloque el calefactor con cuidado. No debe estar delante o debajo de una toma de corriente. No debe estar debajo de una estantería, cortinas o cualquier otro obstáculo. Coloque solo 2 tornillos en cada pata (diagonalmente) en las posiciones mostradas por los círculos negros, tal como se ve en la foto.
- Página 15 INSTRUCCIONES DE FUNCIONAMIENTO Antes de conectar el aparato coloque todos los mandos en posición de apagado. NOTA: Es normal que cuando el convector se enciende por primera vez o cuando se enciende después de no haberlo utilizado durante un largo período de tiempo, puede emitir cierto olor.
-
Página 16: Uso Del Temporizador
Si no se usa el temporizador, asegúrese que el interruptor deslizante está colocado en la posición “I” Encienda el aparato con los interruptores de potencia situados en el panel lateral. Se iluminarán la luz de los interruptores cuando estén encendidos (Ver Figura 6) Por su seguridad, el calefactor tiene un dispositivo antivuelco en la base que desconecta el aparato en el caso de que se caiga. - Página 17 Coloque el interruptor deslizante en a posición del reloj Para seleccionar el tiempo de funcionamiento del calefactor debe sacar las pestañas rojas hacia fuera. Cada pestaña representa 15 minutos. Para cancelar el tiempo seleccionado, mueva las pestañas a la posición central. Si desea que funciona de forma continua, coloque el interruptor deslizante en la posición “I”.
-
Página 18: Impieza Y Mantenimiento
Si los botones de potencia tienen el piloto luminoso apagado, el calefactor no calentará aunque el temporizador esté en la posición “I” de encendido. IMPIEZA Y MANTENIMIENTO Espere a que el calefactor se enfríe y desenchúfelo, luego límpielo. Límpielo con un paño ligeramente humedecido. Nunca lave directamente con agua, no deje caer agua en el calefactor. - Página 19 Identificador(es) del modelo: DL06-1 TIMER Partida Símbolo Valor Unidad Partida Unidad Potencia calorífica Tipo de aportación de calor, únicamente para los aparatos de calefacción local eléctricos de acumulación (seleccione uno) Potencia Control manual de la carga de calorífica Pnom 1,8-2,0...
- Página 20 Con control de temperatura interior mediante termostato mecánico Con control electrónico de temperatura interior Control electrónico de temperatura interior y temporizador diario Control electrónico de temperatura interior y temporizador semanal Otras opciones de control (pueden seleccionarse varias) Control de temperatura interior con detección de presencia Control de temperatura interior con detección de ventanas...
-
Página 21: Especificaciones Técnicas
ESPECIFICACIONES TÉCNICAS Modelo: DL06-1 TIMER Alimentación: 220-240V ~ 50-60 Hz Potencia Máx: 1800 – 2000 W Potencias de calor: 750-1250-2000 W... - Página 23 Important Safty Instruction “Read all instruction before use” and save for future reference. WARNING:- In order to avoid overheating, do not cover the heater. 1. Do not use the heater unless the feet are correctly attached (for portable status). 2. Ensure that the outlet socket voltage into which the heater is plugged is in accordance with the indicated voltage on the product rating label of the...
- Página 24 heater and the socket is earthed. 3. Keep the power cord away from the hot body of the heater. 4. WARNING: Do not use this heater in the immediate surroundings of a bath, a shower or a swimming pool. 5. WARNING: In order to avoid overheating, do not cover the heater.
- Página 25 curtains or furniture in order to avoid a fire Hazard. 11. WARNING: heater must not be located immediately below a socket- outlet. 12. The Heater can’t be mounted on the wall. 13. Do not insert any object through the heat outlet or air grilles of the heater. 14.
- Página 26 damaged, it must be replaced by the manufacturer, its service agent or a similar qualified person in order to avoid a Hazard. 17. This appliance can be used by children aged from 8 years and above and persons with reduced physical, sensory or mental capabilities or lack of experience and knowledge ONLY IF they have been given supervision...
- Página 27 children without supervision. 19. Children of less than 3 years should be kept away unless continuously supervised. 20. Children aged from 3 years and less than 8 years shall only switch on/ off the appliance provided that it has been placed or installed in its intended normal operating position and they have been given supervision and instruction concerning use...
- Página 28 perform user maintenance. 21. CAUTION: some parts of this product can become very hot and cause burns. Particular attention has to be given where children and vulnerable people are present. 22. WARNING: This heater is not equipped with a device to control the room temperature.
- Página 29 24. Never attempt repairs yourself. Repairs to electrical appliances should only be performed by a qualified electrician. Improper repairs may place the user at serious risk and Will invalidate the guarantee. Take the appliance to a qualified repair agent. 25. CAUTION: Do not allow cleaning robots to operate in the same room without supervision.
-
Página 30: Know Your Machine
plug with wet hands. 28. Never pull on the cord when disconnecting the plug from the mains 29. The convector should be placed at least a 1.5 meters distance from baths, showers, laundries, etc. KNOW YOUR MACHINE 1 x Heater 2 x Foot FITTINGS 4 x Screw for feet (12 mm) -
Página 31: Assembly Instruction
ASSEMBLY INSTRUCTION Fitting the Feet NOTE: Before using the heater, the feet must be fitted to the unit. Carefully turn the unit upside down. Use the Screws “C” to fix the feet “B” onto the Heater “A”. Take care to ensure that they are located correctly in the bottom ends of the heater side moldings. - Página 32 WARNING: Position the Heater carefully. It must not be in front of or below a power socket. It must not be below a shelf, curtains or any other obstruction. Only Fit 2 screws to each foot (diagonally) in the positions shown by the black circles as shown here.
- Página 33 OPERATION NOTE: It is normal when the heater is turned on for the first time or when turned on after having not been used for a long period of time it may emit some odour. This will disappear when the heater has been ON for a short while.
- Página 34 If not using the Timer, make sure the Timer slide switch is set to the ”I” position Turn On the heating elements by means of the rocker switches on the side panel. When the heating elements are ON the switches will illuminate.
-
Página 35: Using The Timer
USING THE TIMER Set the timer by turning the disc so that the pointer on the timer is the same as the local time. For example at 10:00AM (10 o’clock) set the disc to the number 10. Position the slide switch to the clock position Set the periods of time that you want the heater to work each day by pulling the red teeth outward. - Página 36 position. If the heater is required to run continuously, set the slide switch on the timer to the position indicated by (I). To override the timer action slide the switch to either (0) for heat off or (1) for heat on. The clock timer will continue to run but will no longer control the heater.
- Página 37 When the heater is not used for long periods of time it should be protected from dust and stored in a clean dry place. SPECIFICATIONS Model: DL06-1 TIMER Voltage: 220-240V ~ 50-60 Hz Max. Power: 1800 - 2000W Power Range:...
- Página 38 WASTE ELECTRICAL PRODUCTS SHOULD NOT BE DISPOSED OF WITH HOUSEHOLD WASTE. PLEASE RECYCLE WHERE FACILITIES EXIT. CHECK WITH YOUR LOCAL AUTHORITY FOR RECYCLING ADVICE. The CE mark signifies that this product has been assessed to meet the high safety, health, and environmental protection requirements of the harmonization legislation of the EU.
- Página 39 Model identifier(s): DL06-1 TIMER Item Symbol Value Unit Item Unit Heat output Type of heat input, for electric storage local space heaters only (select one) Nominal heat Pnom 1.8- manual heat charge control, output with integrated thermostat Minimum heat Pmin 0.75...
- Página 40 electronic room temperature control plus week timer Other control options (multiple selections possible) room temperature control, with presence detection room temperature control, with open window detection with distance control option with adaptive start control with working time limitation with black bulb sensor Contact details EROSKI, S,COOP.
- Página 44 TELEFON O DE ATENCION AL CONSUMIDOR : 944 943 444 / www.eroski.e s...