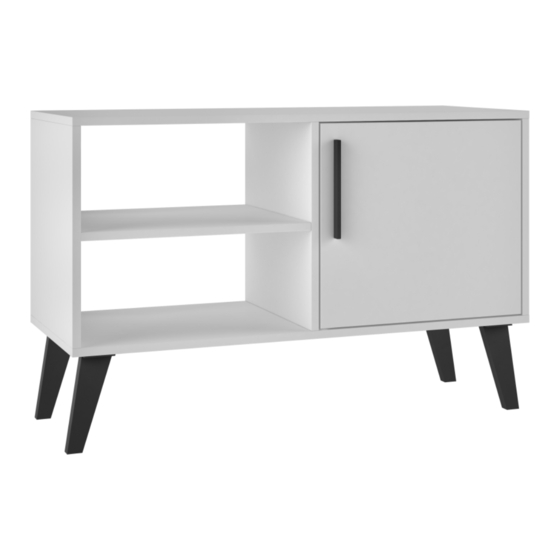
Resumen de contenidos para Manhattan Comfort BPP 24-205
- Página 1 MANUAL DE MONTAGEM ASSEMBLY INSTRUCTIONS INSTRUCCIONES DE MONTAJE COD BR: BPP 24-205, BPP 24-208 COD US: 145AMC183, 145AMC205, 145AMC208...
- Página 3 Sumário Summary Resumen Acessórios incluídos na caixa Hardware included in box Accesorios incluidos en la caja Leia atentamente este manual e siga os passos indicados para que o produto não perca a garantia e também para uma perfeita montagem. Read this manual and follow the steps in order to keep the guarantee and also for the perfect fit.
-
Página 4: Antes De Começar Before Starting Antes De Comenzar
Antes de começar Before starting Antes de comenzar Antes de começar a montagem prepare o ambiente, deixando-o completamente limpo e com bom espaço para iniciar o trabalho. Prepare the room before starting the assembly, leaving it completely clean and the area in good condition to start the work. -
Página 5: Dimensões E Ferramentas Dimensions And Tools Dimensiones Y Herramientas
Dimensões e ferramentas Dimensions and tools Dimensiones y herramientas Dimensões: L: 900 A: 585 P: 350 mm Dimensions: W: 35.43 H: 23.03 D: 13.78 inches Dimensiones: L: 900 A: 585 P: 350 mm Limpeza Cleanig Limpieza Pano levemente umedecido com água, seguido de pano seco, não utilizar produtos químico ou abrasivos. Slightly dampened cloth and after a dry cloth, do not use chemicals or abrasives. - Página 6 COD BR: BPP 24-205, BPP 24-208 COD US: 145AMC183, 145AMC205, 145AMC208 PEÇA DESCRIÇÃO QUANT. PART DESCRIPTION PIEZA DESCRIPCIóN CANTIDAD BASE BASE BASE TAMPO TAPA LATERAL ESQUERDA LEFT SIDE LATERAL IZQUIERDA LATERAL DIREITA RIGHT SIDE LATERAL DERECHA PARTITION DIVISÓRIA PARTICIÓN PRATELEIRA...
- Página 7 ACESSóRIOS INCLUÍDOS NA CAIXA 01 - HARDWARE INCLUDED IN BOX 01 - ACCESORIOS INCLUÍDOS EN LA CAJA 01 EF 000216 X 10 EF 000033 x 16 EF 000557 x 16 TAPA FUROS x 10 8x30 STICKER x 10 TAPAS PLÁSTICAS x 10 GIZ x 01 EF 000132 x 6 EF 000168 X 20...
- Página 8 = 11 KG - 24.25LB = 5 KG - 11LB PASSO 1 / STEP 1 / PASO 1 Insira a ferragem EF 000094 nas peças 02, 03 e 05. Insert hardware EF 000094 into pieces 02, 03 and 05. Añade el herraje EF 000094 en las piezas 02, 03 y 05. EF 000094...
- Página 9 PASSO 2 / STEP 2 / PASO 2 Insira o suporte plástico a ferragem EF 000033 nas peças 03, 05 e 06. Insert the plastic support and hardware EF 000033 into pieces 03, 05 and 06. Añade el soporte plastico y el herraje EF 000033 en las piezas 03, 05 y 06. SUPORTE PLÁSTICO PLASTIC SUPPORT SOPORTE PLASTICO...
- Página 10 PASSO 5 / STEP 5 / PASO 5 Conecte as peças 03, 05 e 06, insira a ferragem EF 000216 e gire para apertar. Connect pieces 03, 05 and 06, insert hardware EF 000216 and turn to tighten. Junte las piezas 03, 05 y 06, añade el herraje EF 000216 y gire para apretar. PASSO 6 / STEP 6 / PASO 6 Fixe os pés (peças 09) na peça 01 usando a ferragem EF 000557.
- Página 11 Conecte a peça 01 utilizando ferragem EF 000132. Connect piece 01 using hardware EF 000132. Junte la pieza 01 utilizando el herraje EF 000132. EF 000025 Por favor, observe a posição da ferragem EF 000025 Please, note hardware EF 000025 position. Por favor, observe la posición del herraje EF000025.


