South Shore 4219 Instrucciones De Ensamblaje
Ocultar thumbs
Ver también para 4219:
- Instrucciones de ensamblaje (15 páginas) ,
- Instrucciones de ensamblaje (19 páginas)
Publicidad
Enlaces rápidos
ASSEMBLY INSTRUCTIONS
INSTRUCTIONS D'ASSEMBLAGE
INSTRUCCIONES DE ENSAMBLAJE
Modèle
Model/
/ Modelo
-
4219
-
4257-
4270-
Item
Article/
/ Articulo
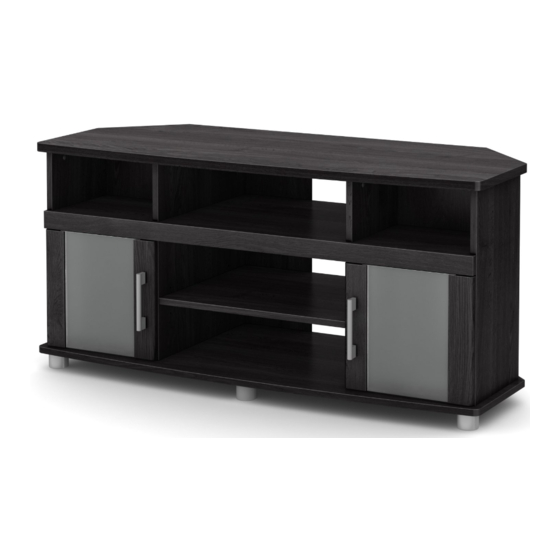
Corner TV Stand
Meuble
TV
en coin
-
690
-
Rinconera para TV
ADULT ASSEMBLY REQUIRED
DOIT ÊTRE ASSEMBLÉ PAR UN ADULTE
DEBE SER ENSAMBLADO POR UN ADULTA
10127-
N.B.: It is important to carefully read the instructions
before beginning the assembly.
Identify all the parts and hardware.
We recommend that you assemble the unit on a carpeted floor
to avoid scratches. To facilitate assembly
Keep the assembly instructions
for warranty purposes. It contains all pertinent
information regarding replacement parts and maintenance.
N.B. Il est important de bien lire les instructions
avant de commencer l'assemblage.
Bien identifier les pièces et la quincaillerie.
Il est recommand d'assembl
é
éviter les égratignures. Pour un assemblage facile et agréable
;
2 personnes sont requises
Gardez les instructions d'assemblage pour
la garantie. Elles contiennent toutes les informations pour un
remplacement de pièce ou pour l'entretien périodique.
N.B. Lea con detenimiento las instrucciones
antes de comenzar a ensamblar su mueble.
Identifique las piezas y los articulos de ferretería.
Se recomienda ensamblar la unidad sobre una alfombra
para evitar los rasguños. Para un ensamblaje mas facil
se necesitan dos personas.
para
un futuro
Este instructivo contiene todas las informaciones necesarias
para un sustitución de pieza o un mantenimiento periodico.
1-800-290-0465
10014993
Rev.:Di6
2 people are required
for future use
and
er
l'unité sur un tapis pour
.
utilisation future
et pour
Guarde
el instructivo de ensamble
uso
y para usos
de garantía.
09/09/2015
.
Publicidad

Manuales relacionados para South Shore 4219


Resumen de contenidos para South Shore 4219
- Página 1 It contains all pertinent INSTRUCCIONES DE ENSAMBLAJE information regarding replacement parts and maintenance. Modèle Model/ / Modelo N.B. Il est important de bien lire les instructions 4219 4257- 4270- 10127- avant de commencer l’assemblage. Item Bien identifier les pièces et la quincaillerie.
- Página 2 AVERTISSEMENT ADVERTENCIA WARNING Serious or fatal crushing injuries Des blessures graves ou fatales El vuelco del mueble puede ser can occur from furniture tip-over. peuvent résulter de basculement causa de lesiones graves o de un To help prevent tip-over : du meuble.
- Página 3 HOW TO USE THE DOWEL(-14 -) AND THE ECCENTRIC NUT(-158-) EXEMPLE D'UTILISATION (GOUJON(-14 -) ET ECROU(-158-)) EJEMPLO DE UTILIZACIÓN (CLAVIJA(-14 -) Y TUERCA EXCÉNTRICA(-158-) -14 - 0 -158- FRANÇAIS ENGLISH ESPAÑOL nsérer jusqu’au fond le «goujon à ntroduzca el “clavija -14 -” 0 hasta el fondo Fully insert the “quick fit dowel -14 -”...
- Página 4 -EXPLODED VIEW (Piece numbers for reference)FACING THE UNIT -VUE EXPLOSÉE (Numéros des pièces pour références)FACE AU MEUBLE -VISIÓN DE CONJUNTO (Número de las piezas para referencia)FRENTE AL MUEBLE RIGHT SIDE CÔTÉ DROIT LADO DERECHO LEFT SIDE CÔTÉ GAUCHE LADO IZQUIERDO - All parts are marked out or labelled on one side.
- Página 5 CODE HARDWARE DESCRIPTION CODE HARDWARE DESCRIPTION CODE DESCRIPTION DE LA QUINCAILLERIE CODE DESCRIPTION DE LA QUINCAILLERIE CODIGO CANTIDAD DESCRIPCION DE LA FERRETERÍA CODIGO CANTIDAD DESCRIPCION DE LA FERRETERÍA HANDLE 2 1/2" ROUND HEAD SCREW POIGNÉE VIS 2 1/2" TÊTE RONDE MANIJA ORNILLO 2 1/2"...
- Página 6 Required/Requis/Requerido * TOOLS REQUIRED/ OUTILS REQUIS/ HERRAMIENTAS REQUERIDOS: - 2 PEOPLES/ 2 PERSONNES /2 PERSONAS - HAMMER /MARTEAU /MARTILLO - STANDARD /PLAT /PLANO - PHILLIPS /ÉTOILE/ ESTRELLA /OU/ J(2) - ROBERTSON/ CARRÉ /CUADRADO - With the hammer, insert -251-(4) to J(2). - Screw -69-(2) with -121-(4).
- Página 7 Required/Requis/Requerido Required/Requis/Requerido - Raw face -231- Face brute - Lado bruto G3 (2) Insert -231-( ) into G2 and G3(2). Insert -14 -( 4 24 ) with into A , G, C, C1, H and H1. Insérer -231-( ) dans G2 et G3(2) Insérer -14 -( 4 24...
- Página 8 Required/Requis/Requerido Required/Requis/Requerido - Raw face Face brute - Lado bruto -158- -POSITION #1 -POSITION #2 -POSITION #1 OU #3 -POSICIÒN #2 -POSICIÒN #1 F1 (2) - With thumb, insert -158-( ) into , C 1, F1(2), H and H1 (Make sure the little arrow is towards the insertion hole.) - Screw 704(1) through 703(1) and 701(1) in A (Check position) - Avec le pouce, insérer -158-( ) dans , C...
- Página 9 -158- correct/ incorrect/ - Raw face correcto incorrecto Face brute - Lado bruto correct/ incorrect/ - Raw face correcto incorrecto Face brute - Lado bruto - Insert -F1(2) into H and H1. - Insert C, C1 and G3(2) into F1(2), H and H1. Tighten right -158-( ) 4 little more than a half turn Tighten right -158-( )
- Página 10 Required/Requis/Requerido -158- -171- - Insert A into C, C1, H and H1. Tighten right -158-( ) little more than a half turn on C , C1, H and H1 to lock them together. - Cover -158-(8) with -171-(8) on C, C1, H and H1. - Insert A dans C, C1, H et H1.
- Página 11 Required/Requis/Requerido -99- -1 1- - Raw face - Partie brute - Lado bruto -99- -99- -1 1- -99- -1 1- -99- -1 1- -1 1- - Switch to continue the next step. - Retourner afin de poursuivre l`étape suivante - Retorno Continuar con el siguiente paso - Screw -181-(4) on P1 with -99-(4).
- Página 12 Required/Requis/Requerido Required/Requis/Requerido - Raw face Face brute - Lado bruto -99- -158- -171- - Raw face - Partie brute - Lado bruto -99- -99- -99- -99- correct/ incorrect/ - Insert G into C, C1, H and H1. correcto incorrecto Tighten right -158-( ) a half turn on C , C1, H and H1...
- Página 13 Required/Requis/Requerido - Insert -357-(5) into - Insérer -357-(5) dans - Insertar -357-(5)
- Página 14 Required/Requis/Requerido Required/Requis/Requerido - Make sure the unit is level (squared). - Insert -180-( ) on and H . - In beginning by the corners, nail F to A, G, H and H1 with -90-(16). Slide on -180-( ). - Assurez vous que l'unité soit au niveau (à l'équerre). - Insérer -180-( ) sur H et 1 - En commençant par les coins, clouer F à...
- Página 15 Required/Requis/Requerido * Doors adjustement (Hinges) * Ajustement des portes (Charnières) * Ajuste de las puertas (Bisagras) -374- -LEFT/ RIGHT -GAUCHE/ DROITE -IZQUIERDA/ DERECHA -DEPTH -PROFONDEUR -251- -374- -PROFUNDIDAD -374- -251- -251- -251- -HEIGHT -374- -HAUTEUR -ALTURA -374- - To install J(2), screw -251-(4) into C and C1. * Make sure the unit is level.
- Página 16 ' o p é r a t i o n . -Para las mudanzas, recomendamos vaciar el contenido del sistema de sonido antes de moverlo y siempre realizar esta operación entre dos personas. -This South Shore Industries product is designed to withstand the weight indicated on the plan. We lbs-...
- Página 17 •TO PREVENT THE UNIT FALLING ON CHILDREN Locate a stud in the wall behind the unit. Screw -116- through -703- and the safety strap in the stud of the wall -Safety strap installation -Installation de la sangle de sécurité •If the safety strap is not in the box, please contact the -Instalacion del correa de seguridad...
- Página 18 AINTENANCE TIPS ONSEILS D NTRETIEN ONSEJOS DE MANUTENIMIENTO CUSTOMERS SERVICE/ SERVICE À LA CLIENTÈLE / SERVICIO A LA CLIENTELA If you have any difficulty assembling this unit, or to order replacement parts, do not hesitate to contact us. - Never let liquids or damp cloths sit on this furniture. Do not return any parts to the store, find the number(s) - Ne jamais laisser de liquide ou linge humide of the part(s) in the “Exploded view”...
-
Página 19: Service À La Clientèle
5 YEAR LIMITED WARRANTY GARANTIE LIMITÉE DE 5 ANS GARANTIA LIMITADA DE 5 AÑOS 1. South ShoreTM Furniture provides the original buyer with a 1.Meubles South ShoreMC garantit à l'acheteur original, pour 1.South ShoreMR garantizan al comprador original, por un warranty covering “defects”...