Publicidad
Idiomas disponibles
Idiomas disponibles
Enlaces rápidos
7546886COM
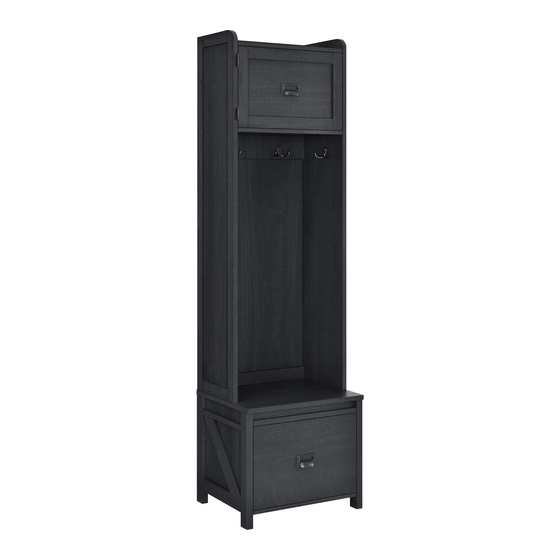
Entryway Storage
Date of Purchase ___ / ___ / ___
Lot Number:
THIS INSTRUCTION BOOKLET CONTAINS IMPORTANT SAFETY INFORMATION. PLEASE READ AND KEEP FOR FUTURE REFERENCE.
Do Not Return This Product!
Contact our customer service team for help first.
Call: 1-800-489-3351 (toll free)
Monday-Friday 9am - 5pm CST
Visit: www.ameriwoodhome.com
WARNING
- Unit can tip over causing severe injury or death.
- Anchor unit to stud in wall (if instructed to).
- Do Not allow children to climb on unit.
- Put heavy items on lower shelves or drawers.
B347546886COM03GO
Easy
Assembly Difficulty Meter
Follow Ameriwood Home
Tough
You
Tube
Publicidad

Manuales relacionados para Ameriwood HOME systembuild EVOLUTION 7546886COM


Resumen de contenidos para Ameriwood HOME systembuild EVOLUTION 7546886COM
- Página 1 Tough Visit: www.ameriwoodhome.com Assembly Difficulty Meter WARNING Follow Ameriwood Home - Unit can tip over causing severe injury or death. - Anchor unit to stud in wall (if instructed to). - Do Not allow children to climb on unit. - Put heavy items on lower shelves or drawers.
-
Página 2: Helpful Hints
Do NOT return this product! Contact our friendly customer service team first for help. Assembly Tips Call us! 1-800-489-3351 Monday-Friday 9am - 5pm CST Tube Visit ameriwoodhome.com Helpful Hints PEOPLE NEEDED FOR ASSEMBLY: 2 ESTIMATED ASSEMBLY TIME: 1 HOUR - Open your item in the area you plan to keep it to avoid excessive heavy lifting. - Identify, sort and count the parts before attempting assembly. -
Página 3: Before You Start
Before You Start Read through each step carefully and follow the proper order Separate and count all your parts and hardware Give yourself enough room for the assembly process Have the following tools: Flat Head Screwdriver, #2 Phillips Head Screwdriver and Hammer Caution: If using a power drill or power screwdriver for screwing, please be aware to slow down and stop when screw is tight. - Página 4 Board Identification Not actual size FIXED SHELF SEAT PANEL T7546886010GO T7546886020GO T7546886030GO QTY: 1 PC QTY: 1 PC QTY: 1 PC BOTTOM UPPER LEFT SIDE PANEL UPPER RIGHT SIDE PANEL T7546886040GO T7546886050GO T7546886060GO QTY: 1 PC QTY: 1 PC QTY: 1 PC LOWER LEFT SIDE PANEL LOWER RIGHT SIDE PANEL DOOR...
- Página 5 Board Identification Not actual size MIDDLE BACK PANEL DRAWER FRONT LOWER BACK PANEL T7546886130GO T7546886151GO T7546886140GO QTY: 1 PC QTY: 1 PC QTY: 1 PC LEFT DRAWER SIDE RIGHT DRAWER SIDE DRAWER BACK T7546886171GO T7546886161GO T7546886180GO QTY: 1 PC QTY: 1 PC QTY: 1 PC DRAWER BOTTOM T7546886190GO...
- Página 6 Board Identification Not actual size systembuild.com Tube...
-
Página 7: Part List
Hardware Bag Reference number: 27546886COM2GO Part List Actual Size Ø15 x 10mm Ø8 x 20mm Ø6 x 30mm Ø8 x 30mm ×30 ×30 ×8 ×27 CAM LOCK CAM BOLT WOOD DOWEL WOOD DOWEL TGO2100 TGO2000 TGO2903 TGO2900 Ø4.2 x 45mm Ø3 x 12mm Ø4.2 x 40mm Ø3 x 12mm... - Página 8 Hardware Bag Reference number: 27546886COM2GO Part List No Actual Size Ø6 x 30mm ×4 METAL HOOK WALL ANCHOR MAGNETIC CATCH HINGE TGO3537 TGO6501 TGO6512 TGO4310 ×2 ×2 DRAWER BRACKET HANDLE TGO6513 TGO5513 right drawer right cabinet left cabinet left drawer member member member...
- Página 9 STEP 1 ×14 ×4 ×4 1.1 Screw (1) into (E) & (F) as illustrated. 1.2 Insert (3) into (E) & (F) as illustrated. 1.3 Insert (4) into (L) as illustrated. ×8 ×4 1.4 Attach (16) to (E), (F) & (L) with (5) as illustrated. systembuild.com Tube...
- Página 10 STEP 2 ×16 ×4 ×8 2.1 Screw (1) into (C), (G) & (H) as illustrated. 2.2 Insert (3) into (G) & (H) as illustrated. 2.3 Attach (22-2) to (G) with (10) as illustrated. 2.3 Attach (23-2) to (H) with (10) as illustrated. ×1 ×1 22-2...
- Página 11 STEP 3 ×2 ×1 ×23 3.1 Insert (4) into (A), (B), (D), (N), (J) & (K) as illustrated. 3.2 Attach (18) to (A) with (13) as illustrated. systembuild.com Tube...
- Página 12 STEP 4 Quick Assembly LOCK ×7 ×4 Proper orientation of CAM LOCK 4.1 Attach (A), (B) & (J) to (E) with (2) as illustrated. 4.2 Attach (L) to (E) with (2) as illustrated. 4.3 Use (11) to cover cam lock hole on (A), (B) as illustrated. FINISHED EDGE Note: 3 small holes on this side...
- Página 13 STEP 5 Quick Assembly LOCK ×7 ×4 Proper orientation of CAM LOCK 5.1 Attach (F) to (A), (B), (J) & (L) with (2) as illustrated. 5.2 Use (11) to cover cam lock hole on (A), (B) as illustrated. systembuild.com Tube...
- Página 14 STEP 6 ×6 6.1 Attach (C) to (E), (F) & (J) with (6) as illustrated. systembuild.com Tube...
- Página 15 STEP 7 Quick Assembly LOCK ×10 Proper orientation of CAM LOCK 7.1 Insert (N) into (D) as illustrated. 7.2 Attach (G) & (H) to (D), (K) & (N) with (2) as illustrated. systembuild.com Tube...
- Página 16 STEP 8 Quick Assembly LOCK ×6 Proper orientation of CAM LOCK 8.1 Attach sub-assembly D/G/H from previous step to (C) with (2) as illustrated. systembuild.com Tube...
- Página 17 STEP 9 IMPORTANT! THE BACK PANEL IS A STRUCTURAL PART OF THIS UNIT AND MUST BE INSTALLED PROPERLY. ×16 9.1 Attach (M) to sub-assembly C/E/F/L from previous step with (7) as illustrated. * Assure that the unit is square. Distance from corner to corner must be equal as shown. systembuild.com Tube...
- Página 18 STEP 10 ×4 ×8 ×1 ×1 10.1 Attach (9) to (I) with (5) as illustrated. 10.2 Attach (19) to (I) with (14) & (10) as illustrated. 10.3 Attach (21) to (I) with (12) as illustrated. ×2 ×2 10.4 Attach (I) to (E) with (14) as illustrated. systembuild.com Tube...
- Página 19 STEP 11 To adjust side ways. Loosen screw "B" and adjust door. Tighten screw "B". systembuild.com Tube...
- Página 20 STEP 12 ×4 ×2 ×4 12.1 Insert (20) into (P) & (Q) as illustrated. 12.2 Attach (P) & (Q) to (O) with (14) as illustrated. 12.3 Insert (S) into (P), (Q) & (O) as illustrated. 12.4 Attach (R) to (P) & (Q) with (15) as illustrated. systembuild.com Tube...
- Página 21 STEP 13 ×6 ×1 ×1 ×1 ×2 22-1 23-1 13.1 Attach (22-1) to (P) with (10) as illustrated. 13.2 Attach (23-1) to (Q) with (10) as illustrated. 13.3 Attach (21) to (O) with (12) as illustrated. 22-1 22-1 23-1 23-1 systembuild.com Tube...
- Página 22 STEP 14 ×1 ×1 Wall Hole Cabinet Slide 14.1 Drill a 3/16" (5mm) diameter hole in the wall. Tap the wall anchor (17) into the hole until it is flush. 14.2 Fasten screw (8) through the hole to wall anchor (17) as illustrated. For Masonry, Concrete, or other wall materials: Consult your local hardware store for appropriate anchors to securely attach the safety bracket...
- Página 23 Maximum Loads This unit has been designed to support the maximum loads shown. Exceeding these load limits could cause sagging, instability, product collapse, and/or serious injury. Peg hook 5 lbs./ 2.3 kg 15 lbs./6.8 kg Warning: Risk of injury to persons - do not place a television on this furniture. This furniture is not approved for use with a television.
- Página 24 Visit your local retailer's website, rate your purchased product and leave us some feedback! We would like to extend a big "Thank You" to all of our customers for taking the time to assemble this Ameriwood Home product, and to give us your valuable feedback. systembuild.com Tube...
- Página 25 Español Cubierta Delantera Este libro de instrucciones contiene información IMPORTANTE de seguridad. Por favor lea y manténgalo para referencia en el futuro. No Regrese este producto! Comuniquese con nuestro amistoso equipo de servicio al cliente para obtener ayuda. Llamenos al: 1-800-489-3351 (Gratis) Lunes - Viernes 9am - 5pm CST Visitar: www.ameriwoodhome.com PRECAUCION Este mueble puede volcarse y causar graves heridas y/o muerte.
- Página 26 Español Tamaño real Este no es el tamaño real (1) Perno de leva ARRIBA (2) Bloqueo de leva (16) Gancho de metal (3) Taco de madera (17) Ancla de pared (4) Pasador de madera (18) Pestillo magnético (5) Tornillo (19) Bisagra (20) Soporte para cajones (6) Tornillo (21) Manija...
- Página 27 Español Página 13 5.1 Conecte (F) a (A), (B), (J) y (L) con (2) como se ilustra. 5.2 Utilice (11) para cubrir el orificio de bloqueo de la leva en (A), (B) como se ilustra. Página 14 6.1 Conecte (C) a (E), (F) y (J) con (6) como se ilustra. Página 15 7.1 Inserte (N) en (D) como se ilustra.
- Página 28 Visite el sitio web de su distribuidor local, califique el producto que compró y déjenos sus comentarios. Nos gustaría enviar un gran "Agradecimiento" a todos nuestros clientes por tomarse el tiempo de ensamblar este producto de Ameriwood Home, y por darnos sus valiosos comentarios. Gracias systembuild.com...
- Página 29 systembuild.com Tube...
- Página 30 Taille actuelle Pas de taille réelle HAUT (1) Boulon de came (16) Crochet en métal (2) Verrouillage à came (17) Ancrage mural (3) Cheville en bois (18) Prise magnétique (4) Cheville en bois (19) Charnière (5) Vis (20) Support de tiroir GAUCHE (6) Vis (21) Poignée...
- Página 31 systembuild.com Tube...
- Página 32 Merci systembuild.com Tube...