Tabla de contenido
Publicidad
Enlaces rápidos
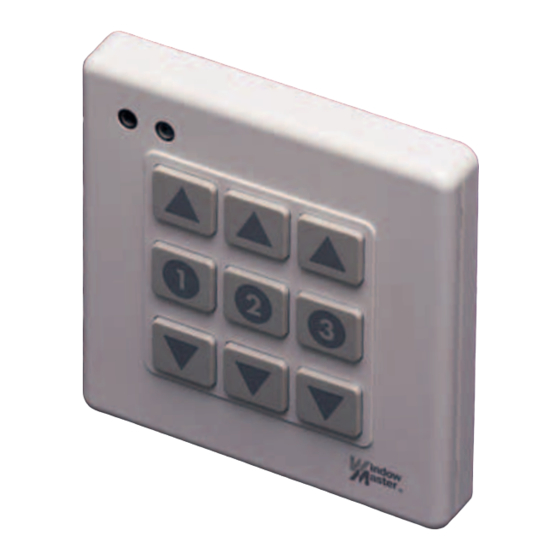
WLI 130
®
English:
Installation instructions for keypad WLI 130
Read installation instructions carefully before proceeding and
keep for future reference.
Deutsch:
Anleitung für Bedienungstastatur WLI 130
Vor Montagebeginn bitte sorgfältig die gesamte Einbauanlei-
tung
lesen; die Einbauanleitung für spätere Verwendung aufbewa-
hren.
Français :
Notice d'installation de clavier WLI 130
Lire attentivement la totalité de la notice avant l'installation, et
la conserver pour une utilisation ultérieure.
Dansk:
Monteringsvejledning for tastatur WLI 130
Læs hele vejledningen grundigt igennem før montering.
Vejledningen bør opbevares til senere brug.
WindowMaster, DK-2950 Vedbæk
www.WindowMaster.com
942427
Publicidad
Capítulos
Tabla de contenido

Resumen de contenidos para Window Master WLI 130
- Página 1 WLI 130 ® English: Installation instructions for keypad WLI 130 Read installation instructions carefully before proceeding and keep for future reference. Deutsch: Anleitung für Bedienungstastatur WLI 130 Vor Montagebeginn bitte sorgfältig die gesamte Einbauanlei- tung lesen; die Einbauanleitung für spätere Verwendung aufbewa- hren.
-
Página 2: Tabla De Contenido
English: Contents Deutsch: Inhalt Français : Sommaire Dansk: Indhold Important information......3 Wichtige Informationen....... 3 Information importante......3 Vigtig information....... Fitting of keypad........ 4 Montage der Bedienungstastatur..4 Installation du clavier......4 Montering af tastatur......4 Connection of motors and keypad..5-6 Anschluß... -
Página 3: Important Information
WindowMaster products. The connection to other products may cause damage or malfunction. • The WLI 130 keypad requires a minimal amount of mainten- ance. The surface may be cleaned with a soft damp cloth using a small amount of household cleaner diluted in water. -
Página 4: Fitting Of Keypad
Français : Installation du clavier Dansk: Montering af tastatur English: Fit keypad WLI 130 on wall. Hidden wiring (A): Run cable through hole in backplate. Visible wiring (B): Decide where to lead the cable through. Make hole in side of backplate by removing knock-out. -
Página 5: Connection Of Motors And Keypad
English: Connection of motors and keypad Deutsch: Anschluß der Motoren und der Bedien Français : Connexion des moteurs et du clavier Dansk: Motor- og tastaturtilslutning... - Página 6 nungstastatur English: Three motors can be operated individually from one keypad. The keypad has three rows of buttons; each row oper- ates one motor. Deutsch: Drei Motoren können von einer einzigen Bedie- nungs-tastatur individuell bedient werden. Die Bedienungsta- statur hat drei Tastenreihen; jede Reihe bedient einen Motor. Français : Trois moteurs peuvent être commandés individu- ellement de ce seul clavier.
-
Página 7: Setting Of Operation Mode
English: Setting of operation mode Deutsch: Einstellung der Bedienungsart Français : Réglage de mode opératoire Dansk: Indstilling af betjeningsmåde AUTO = MAN = AUTO = AUTO = AUTO = MAN = AUTO = AUTO = AUTO = MAN... - Página 8 English: If a switch (1, 2 or 3) is set in position "AUTO" (auto- matic), the corresponding motor will travel to the end-stop after one press of the button. If a switch is set in position "MAN" (manual), the motor will run only as long as the button is pressed (recommended for electrically operated Venetian blind).
- Página 9 ® WindowMaster AG WindowMaster A/S ☎ ☎ 062/289 22 22 45 67 03 00 WindowMaster WindowMaster Control Systems Limited Fenstertechnik GmbH ☎ ☎ 01 536 510 990 (0 40) 54 73 85-85 www.WindowMaster.com WMa 942427-0403 ©1993, 2003 WindowMaster A/S ®WindowMaster is a registered trademark used under licence by WindowMaster Group...
- Página 10 Lees de instructies aandachtig door voordat u verder gaat en houdt deze bij de hand. Italiano: Istruzioni di montaggio per la pulsantiera WLI 130 Leggere attentamente le istruzioni prima di iniziare l’instal- lazione e conservarle per un eventuale successivo utilizzo.
- Página 11 Nederlands: Inhoud Italiano: Contenuto Español: Contenido Belangrijke informatie......3 Informazione importante...... 3 Información importante......3 Bevestiging van het bedieningspaneel.. 4 Fissaggio della pulsantiera....4 Colocación del pulsador..... 4 Aansluiten van motoren en bedieningspaneel......5-6 Collegamento dei motori e della pulsantiera........5-6 Conexión del motor y del pulsador..
-
Página 12: Belangrijke Informatie
• Este producto ha sido diseñado para ser usado con las pro- ducts WindowMaster. Su conexión a otras products puede causar averías ó funcionamiento incorrecto. • El pulsador WLI 130 tiene un mantenimiento mínimo. La superficie puede limpiarse con un paño húmedo y blando, con algún limpiador doméstico diluido en agua. -
Página 13: Bevestiging Van Het Bedieningspaneel
Als de kabel aan de bovenzijde binnen komt dient u de onderplaat 180° te draaien. Italiano: Fissare la pulsantiera WLI 130 al muro. Cavo nascosto (A): Far passare il cavo attraverso il foro nella parte posteriore della scatola. Cavo visibile (B): Decidere dove far passare il cavo. -
Página 14: Conexión Del Motor Y Del Pulsador
Nederlands: Aansluiten van motoren en bedien Italiano: Collegamento dei motori e della pulsan Español: Conexión del motor y del pulsador 14 5... - Página 15 ingspaneel ntiera Nederlands: Drie motoren kunnen afzonderlijk bediend worden vanaf hetzelfde bedieningspaneel. Het paneel heeft drie rijen met knoppen; elke rij stelt een andere motor in werking. Italiano: Tre motori possono essere azionati individualmente da una sola pulsantiera. La pulsantiera ha tre file di pulsanti; ogni fila opera un motore.
-
Página 16: Impostazione Della Modalità Operativa
Nederlands: Instellen van de manier van bedien Italiano: Impostazione della modalità operativa Español: Selección del modo de operación AUTO = MAN = AUTO = AUTO = AUTO = MAN = AUTO = AUTO = AUTO = MAN 16 7... - Página 17 Nederlands: Als een schakelaar (1, 2 of 3) in de stand "AUTO" (automatisch) wordt gezet, zal de motor na een druk op de knop de opdracht geheel uitvoeren. Als de schakelaar in de stand "MAN" wordt gezet (handbediening), zal de motor alleen lopen zolang de knop wordt ingedrukt (dit wordt aanbevolen voor een electrisch bediende jaloezie).
- Página 18 ®...

