Tabla de contenido
Publicidad
Idiomas disponibles
Idiomas disponibles
Enlaces rápidos
Publicidad
Tabla de contenido

Manuales relacionados para Oster OS-AWMC7LW

Resumen de contenidos para Oster OS-AWMC7LW
- Página 1 MODELO OS-AWMC7LW MODEL Manual de Instrucciones ENFRIADOR DE AIRE LEA TODAS LAS INSTRUCCIONES ANTES DE USAR ESTE APARATO Instruction Manual AIR COOLER PLEASE READ ALL INSTRUCTIONS BEFORE USING THIS APPLIANCE...
- Página 2 G UÍ A RÁPID A Llene primero el tanque y luego conecte a la fuente de energía de acuerdo al voltaje indicado en la etiqueta de energía. Coloque su enfriador de aire cerca de una ventana abierta. Encienda y disfrute de una brisa fresca. Asegúrese de desconectarlo previo a su limpieza.
-
Página 3: Tabla De Contenido
ÍN DI CE GUÍA DE USO..............................P1 SEGURIDAD..............................P3 DESCRIPCIÓN..............................P4 FUNCIONAMIENTO..............….................P5 LIMPIEZA Y MANTENIMIENTO........................P6... -
Página 4: Guía De Uso
GU Í A DE USO Agua ¿Cómo funcionan los enfriadores evaporativos? Aire caliente Filtro de polvo Aire frío Tanque de agua Cojín de enfriamiento Bomba de agua Energía eficiente sin compresor El aire del ambiente es atraído hacia el enfriador y pasa a través de un filtro reductor de polvo y olores, entrando al sistema enfriador en forma de panel de abeja. -
Página 5: Otros Usos
G UÍA D E USO Otros usos El enfriador de aire se puede utilizar como humidificador. Para ser utilizado en esta función las ventanas y puertas deben estar cerradas para permitir que el aire humidificado se acumule. NOTA IMPORTANTE Cuando el producto es utilizado por primera vez, el sistema de enfriamiento desprenderá... -
Página 6: Seguridad
SE GU RIDA D • Si el cable proporcionado se daña, deberá remplazarlo por uno del fabricante, su agente de servicio o personas calificadas similares para evitar riesgos. • Este dispositivo puede ser utilizado por niños desde los 8 años y por personas con capacidad física, sensorial o mental disminuida, o por personas sin experiencia o conocimiento, sólo si son supervisados o si se les entregan instrucciones relacionadas con el uso del mismo de forma segura y... -
Página 7: Descripción
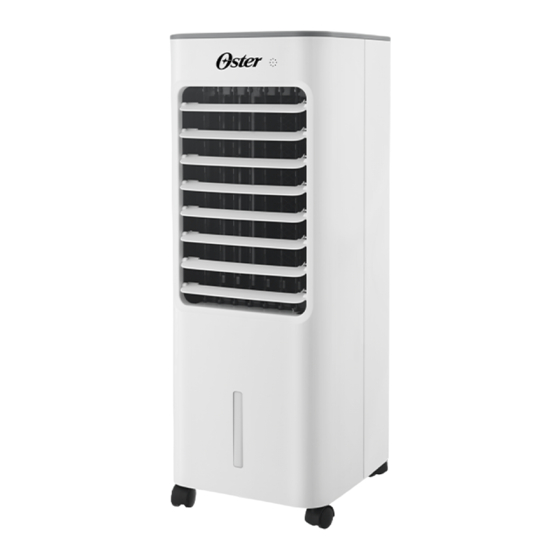
DESCR IPC IÓN Nombre de los componentes 1. Panel de control 5. Caja de hielo 2. Filtro de panal 6. Ruedas universales 3. Cubierta del tanque de agua 7. Ruedas delanteras 4. Tanque de agua 8. Ruedras traseras E s p a ñol- 4... -
Página 8: Funcionamiento
F UNC IO NA MI EN TO Panel de control Presione un botón de la unidad para activar su función. • Presione el botón [SPEED] (Velocidad} para seleccionar una de las 3 velocidades de flujo de aire. • Presione el botón [STYLE] (Estilo) para seleccionar entre las funciones Natural y Sleep (Reposo). - Página 9 F UNC IO NA MI EN TO Control remoto Botón Botón de Encencido / Apagado VELOCIDAD Botón de HUMIDIFICADOR / Botón de AIRE FRÍO OSCILACIÓN Botón de TEMPORIZADOR Botón de tipo de ráfaga Instalacón de las baterías Tirar de la ranura Cierre de seguridad Consejos:...
-
Página 10: Llenado Del Tanque
F UNC IO NA MI EN TO Llenado del tanque Uso de la caja de hielo Agua + Hielo Nivel de agua SUGERENCIA Cuando utilice la función de Humidificación, el nivel de agua en el tanque debe permanecer bajo el indicador de máximo (MAX). Deberá rellenar con agua si el nivel disminuye bajo la indicación de mínimo (MIN). -
Página 11: Limpieza Y Mantenimiento
L IM PI EZ A Y M AN TEN IMI EN TO IMPORTANTE Este dispositivo requiere de pocos cuidados. Sin embargo, no intente repararlo por sus propios medios. Siempre consulte con personal calificado de servicio técnico si es necesario. PRECAUCIONES 1. -
Página 12: Drenaje Y Limpieza Del Tanque De Agua
Drenaje y limpieza del tanque de agua • Apague la alimentación y desconecte el enfriador de aire de la fuente de alimentación. • Lleve la unidad a un lugar donde se pueda drenar. • Quite la tapa del tapón de drenaje de agua y deje que el tanque se vacíe. -
Página 13: Limpieza Del Filtro
Limpieza del filtro • Apague la unidad y desenchufe el cable de alimentación de la toma de corriente de la pared. • Gire la unidad hacia el panel posterior, localice el tornillo de desmontaje de la rejilla trasera y retírelo con la ayuda de un destornillador. - Página 14 Q U I C K ST A RT G U I DE Fill the tank with water and connect the device to an energy source that matches the product specifications. Place your air cooler near an open window. Turn it on and enjoy a cooling breeze. Make sure to disconnect the device before cleaning.
- Página 15 IN DEX USER GUIDE..............................P1 SAFETY................................P3 DESCRIPTION..............................P4 OPERATION................….................P5 MAINTENANCE AND CLEANING........................P6...
-
Página 16: User Guide
U SER GUI DE Water ¿How do evaporative cooler work? Hot air Dust filter Cool air Water tank Cooling pad Water bomb Energy efficient, no compressor Ambient air is drawn to the air cooler and goes through an odor and dust filter, after that it enters the cooling system which has a honeycomb shape. - Página 17 USER GUI DE Other Uses This Air Cooler can also be used as humidifier. In order to use this device as a humidifier, both windows and doors must be closed to allow the buildup of humidified air. IMPORTANT NOTE When using this product for the first time, the cooling system will give off an odor which will dissipate within a few hours.
-
Página 18: Safety
SA F ETY • If the power cord gets damaged, it must be replaced by the manufacturer or its service agent or a similarly qualified person in order to avoid hazard. • This appliance can be used by children aged from 8 years and above and persons with reduced physical, sensory or mental capabilities or lack of experience and knowledge if they have been given supervision or instruction concerning use of the... -
Página 19: Description
DE SC R IP TION Name of the components 1. Control panel 5. Ice box 2. Honeycomb filter 6. Universal wheels 3. Water tank cover 7. Front wheel 4. Water tank 8. Rear wheel E ng li sh - 4... -
Página 20: Operation
OPE RA TI ON Control Panel Press one of these buttons to activate their function. • Press the [SPEED] button to select one of the three airflow speeds. • Press the [STYLE] button to select between Natural and Sleep functions. •... -
Página 21: Remote Control
OPE RA TI ON Remote control ON / OFF button SPEED button HUMIDIFIER / COLD AIR button SWING button TIMER button Type of air-blow button Battery installation Pull out the slot Safety lock Advice: 1. Make sure the positive side of the battery faces up. 2. - Página 22 OPE RA TI ON Filling of the water tank Use of the ice box Water + Ice Water level When using the humidification function, the water level in the tank must be below the MAX indicator. You must refill the tank is the water level drops below the MIN indicator.
-
Página 23: Maintenance And Cleaning
MAI N TENA NCE A N D C L EA N IN G IMPORTANT This device requires minimal maintenance. However, do not attempt to repair it on your own. Always consult with certified service staff if necessary. WARNINGS 1. Disconnect the device from the power supply before cleaning or assembling. 2. - Página 24 Draining and cleaning the water tank • Turn off the Air Cooler and disconnect it from the power supply. • Move the unit to a place where it can be drained. • Remove the drain plug and allow the tank to empty. •...
- Página 25 Cleaning of the filter • Turn off the unit and unplug the power cord from the wall outlet. • Rotate the unit facing the back panel, locate the Rear Grill Removal Screw and remove with the help of a screw driver. •...
- Página 26 © 202 Sunbeam Products, Inc. doing business as Jarden Consumer Solutions. All rights reserved. The Oster™ logo is a trademark of Sunbeam Products, Inc., used under license. Manufactured, distributed or sold by Household Solutions. S.A., Vanterpool Plaza, 2nd Fl., Road Town, Tortola, British Virgin Islands, official licensee for this product.