Publicidad
Idiomas disponibles
Idiomas disponibles
Enlaces rápidos
Publicidad

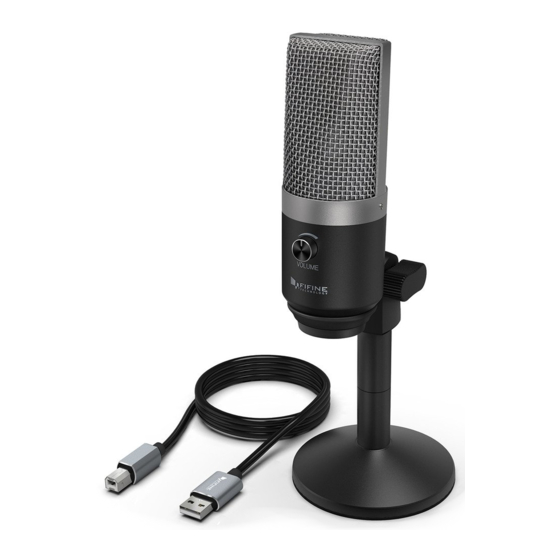
Resumen de contenidos para Fifine K670
- Página 1 K670 CONTACT US If there is any problem, please contact us by email or phone. We will reply within 24 hours (Mon. to Fri. ). E-Mail: info@salcar.de Tel: 0341 25257850 Company: Salcar GmbH Address: An der Hebemärchte 6 04316 Leipzig, Germany...
-
Página 2: What'S In The Box
CONTENTS WHAT'S IN THE BOX 1 X Microphone with the pivot mount USER'S MANUEL ---------------------- 2 1 X Adjustable Desk Stand(Included 3 detachable stand tube heighten from 1.97” to 4.65”) 1 X 6.56' length USB cable A-male to B male BEDIENUNGSANLEITUNG ---------------------- 15 1 X 5/8"... - Página 3 2.Screw the pivot mount onto the top of the 3. If necessary, adjust the microphone’s angle mental desk stand. with the pivot mount’s thumbscrew.(turn left for tighten ,turn right for loosen) SETTING UP MICROPHONE WITH ADJUSTABLE DESK MICROPHONE STAND 1.97" 3.19"...
-
Página 4: Headphone Output
HEADPHONE OUTPUT 670 includes a standard 1/8”(3.5mm) headphone jack for monitoring and playback. When your preliminary setup is completed (Choose “MIC_TEST” as input), and your USB microphone is connected to your Computer’s USB port (the microphone’s blue LED is illuminated),Use 670 Headphone output to monitor your microphone recording in real-time or tracks recordings from your computer. -
Página 5: Computer Setup
Output Impedance: 2200 Equivalent Noise Level: 66dB-A Max.SPL: 120dB(at 1kHz≤1% T.H.D S/N Ratio: 66dB Operating Current: 13mA ± 2mA Typical Frequency Response Curve Frequency Response (0dB=1V/pa) 4. Click the Input tab and select the “MIC_TEST” as the device for sound input. Frequency Hz COMPUTER SETUP Apple MAC OS... - Página 6 Windows Please wait for a few seconds when rst time operation ,since driver of microphone takes time to automatically install.(If plugging receiver in a di erent USB port, driver installs again).After installation, if mic picks up no sound, please follow procedures below. 1.
- Página 7 If you need output your voice from 3.5mm jack of computer, pls choose the output from “Realtek High De nition Audio” option. Click into “Playback”-choose “MIC_TEST”- right click Note:(Applicable for MAC and Windows) and choose “Disable”. Meanwhile Enable the “Realtek High De nition Audio”. 1.
-
Página 8: Important Notice
microphone gain either from the control panel (or system preferences) settings or through your recording program. Selecting software You have many choices in recording software. Audacity, available for free online at http://au- dacity.sourceforge.net/, is a widely used software program that provides basic recording Output:Pls choose correct output software. -
Página 9: Was Ist In Der Verpackung
WAS IST IN DER VERPACKUNG 1 X Mikrofon mit Schwenkhalterung 1 x verstellbarer Tischständer (3 abnehmbare Standrohrerhöhungen von 1,97"auf 4,65") 1 x 6,56'' langes USB-Kabel A-Stecker an B-Stecker 1 x 5/8"männlich auf 3/8" weiblich Adapter 1 X Benutzerhandbuch GARANTIE Bei Online-Registrierung erhalten Sie innerhalb von 90 Tagen nach dem Kauf eine erweiter- te Garantie von 2 Jahren. - Página 10 6. Stecken Sie das mitgelieferte USB-Kabel im rechten Winkel in den USB-Ausgang an der Unterseite des Mikrofons. 2.Schrauben Sie die Schwenkhalterung oben 3.Passen Sie bei Bedarf den Winkel des auf den Tischständer. Mikrofons mit der Rändelschraube der Schwenkhalterung an (zum Drehen nach links drehen, zum Lösen nach rechts drehen).
- Página 11 KOPFHÖRERAUSGANG SPEZIFIKATION Stromversorgung: 5V Das 670er Modell verfügt über eine standardmäßige 3,5-mm-Kopfhörerbuchse für Überwa- Polarmuster: Unidirektional chung und Wiedergabe. Frequenz: 50Hz-15KHz Wenn Ihre vorbereitenden Einstellungen abgeschlossen sind (wählen Sie „MIC_TEST“ als Emp ndlichkeit: -46 ± 3 dB (bei 1 kHz) Eingang) und Ihr USB-Mikrofon an den USB-Port Ihres Computers angeschlossen ist (die Ausgangsimpedanz: 2200 blaue LED des Mikrofons leuchtet), verwenden Sie den 670-Kopfhörerausgang, um die...
- Página 12 Windows 3. Klicken Sie als nächstes auf "Sound", um das Fenster mit den Soundeinstellungen anzuzei- gen. Warten Sie beim ersten Betrieb einige Sekunden, da der Treiber des Mikrofons eine automa- tische Installation benötigt. (Falls Sie den Empfänger an einen anderen USB-Anschluss anschließen, wird der Treiber erneut installiert.) 1.
- Página 13 HINWEIS: Ihre Stimme aus der Kopfhörerbuchse an der Rückseite des Mikrofons kann nicht stummgeschaltet werden. Wählen Sie die 3,5-mm-Buchse des Computers, wenn Sie eine Chatsoftware (Skype) verwenden. Wenn Sie Ihre Stimme über die 3,5-mm-Buchse des Computers ausgeben möchten, wählen Sie die Ausgabe mit der Option „Realtek High De nition Audio“. Klicken Sie auf "Wieder- gabe"...
- Página 14 Ausgabe: Bitte wählen Sie die korrekte Ausgabe Hinweis: Wenn Sie feststellen, dass das USB-Mikrofon nicht verfügbar ist, melden Sie sich bei AUDACITY (oder einer anderen Aufzeichnungssoftware) ab. Danach das Mikrofon einstecken und die Software erneut starten. 2. Stellen Sie sicher, dass Sie in Ihrem Computersystem nicht auf Gerät hören klicken, wenn Sie eine Aufnahmesoftware verwenden.
-
Página 15: Presentation
Mikrofonlautstärke (oder den Pegel) entweder über die Einstellungen Ihres Bedienfelds MANUEL FRANÇAIS (oder der Systemeinstellungen) oder über Ihre Aufnahmesoftware. Wenn Ihr Aufnahmeprogramm einen unzureichenden Pegel anzeigt, können Sie die PRESENTATION Mikrofonverstärkung entweder über die Einstellungen des Bedienfelds (oder der 1 X Microphone avec montage à pivot Systemeinstellungen) oder über Ihr Aufnahmeprogramm erhöhen. -
Página 16: Guida Rapida
« Périphériques d'enregistrement ». MANUALE ITALIANO 2. Sélectionnez l'onglet Enregistrement et choisissez « Périphérique audio USB PnP » comme périphérique par défaut. Lorsque vous parlez au micro, l'icône de type barre devient verte et INTRODUZIONE rebondit. Si elle reste inchangée, réinitialisez l'ordinateur et rebranchez le micro sur le port 1X Microfono con Pivot mount USB. -
Página 17: Introducción
2. Seleziona la scheda Registrazione e scegli il "Dispositivo Audio USB PnP" come dispositivo MANUALE ITALIANO prede nito. Quando parli al microfono,l'icona a barra diventerà verde e lampeggerà. Se non si veri ca lcun cambiamento, resetta il computer e ricollega alla porta USB. e ancora non INTRODUCCIÓN visualizzi il "Dispositivo Audio USB PnP", la reghiamo di contattare il servizio assistenza. - Página 18 2. Seleccionar la pestaña de Grabación, y elegir “Dispositivo de Audio USB PnP” como dispositivo predeterminado. Cuano le hable al micrófono, el icono tipo barra se vuelve verde y rebota. Si permanece sin cambiar, por favor reinicie el ordenador y vuelva a insertar en el puerto USB.
