Tabla de contenido
Publicidad
Enlaces rápidos
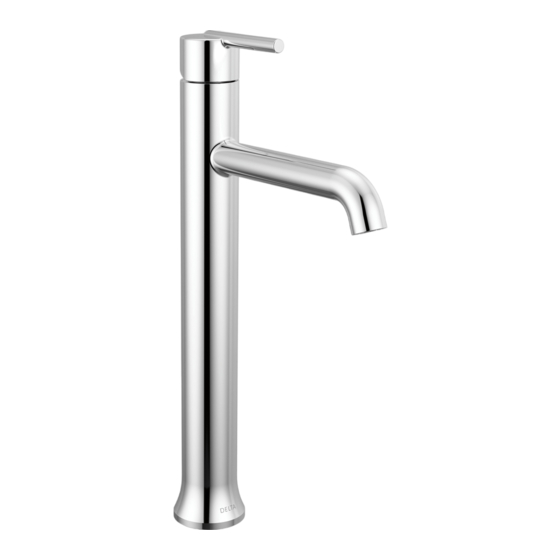
Models/Modelos/Modèles
759-DST
Series/Series/Seria
Trinsic
®
Write purchased model number here.
Escriba aquí el número del modelo comprado.
Inscrivez le numéro de modèle ici.
For easy installation of your Delta
faucet you will need:
• To READ ALL the instructions completely
before beginning.
• To READ ALL warnings, care, and
maintenance information.
Para instalación fácil de su llave Delta
usted necesitará:
• LEER TODAS las instrucciones completamente
antes de empezar.
• LEER TODOS los avisos, cuidados, e
información de mantenimiento.
Pour installer votre robinet Delta
facilement, vous devez:
• LIRE TOUTES les instructions avant de débuter;
• LIRE TOUS les avertissements ainsi que toutes
les instructions de nettoyage et d'entretien;
www.deltafaucet.com
79041
You may need/Usted puede necesitar/
Articles dont vous pouvez avoir besoin:
79041
1
SINGLE HANDLE LAVATORY
CENTERSET AND VESSEL FAUCETS
LLAVES MONOCONTROL DE MONTURA
DE RECIPIENTE PARA LAVAMANOS
ROBINETS À UNE MANETTE POUR
BASSIN DE COMPTOIR
1/8"
1/8 po
1/8"
1/8 po
10/30/14
Rev. A
Publicidad
Tabla de contenido

Resumen de contenidos para Delta Trinsic 759-DST
- Página 1 • To READ ALL warnings, care, and maintenance information. 1/8" 1/8 po 1/8" Para instalación fácil de su llave Delta 1/8 po usted necesitará: • LEER TODAS las instrucciones completamente antes de empezar. • LEER TODOS los avisos, cuidados, e información de mantenimiento.
- Página 2 Slide gasket (1) up over tubes and mounting stud. Install gasket onto Place metal bracket (3) over mounting stud (4) under sink. the bottom of the faucet (2), and position faucet on sink. Option: If Secure with mounting nut / wrench (5). sink is uneven, use silicone under the gaskets.
-
Página 3: Water Line Connections
Los accesorios (1) son de compresión de no cortar el tubo demasiado corto. Delta no se responsabiliza por las tuberías que se han de 3/8”, con los extremos de color rojo para el agua caliente y azul l La tubería está... -
Página 4: Correct Method Método Correcto Bonne Méthode
Incorrect Installation Correct method Instalación Incorrecta Método Correcto Installation Incorrecte Bonne méthode Do not install sleeve Ensure cut is straight. upside down. No instale la manga Asegúrese que el Custom Fit Connections - Plastic Sleeve Installation Instructions boca abajo. corte esté recto. 1. - Página 5 Side View / Vista lateral / Vue latérale Place a bucket below the outlet fitting and move the valve Connect outlet tube (1) to spout handle (1) to the open mixed position.Then, while holding tube (2) with supplied clip (3). the outlet tube (2) with o-rings over the bucket, slowly open Pull on tube (1) to ensure it is and close the supply stops (3).
-
Página 6: Instructions De Nettoyage
Cleaning and Care Care should be given to the cleaning of this product. Although its finish is extremely dura- ble, it can be damaged by harsh abrasives or polish. To clean, simply wipe gently with a damp cloth and blot dry with a soft towel. Limpieza y Cuidado de su Llave Tenga cuidado al ir a limpiar este producto. - Página 7 RP72997s RP72996s Button Handle, Button & Screw Botón Manija, Botón y Tornillo Bouton Manette, Bouton et Vis RP72998 RP72993s Screw Tornillo Casquillo Embase RP7449 O-Ring RP72994 Anillo “O” Bonnet Nut Joint Torique Tuerca del Bonete Chapeaux Fileté RP73000 Valve Assembly Ensamble de la válvula Soupape sSpecify Finish...
-
Página 8: Garantía Limitada De Las Llaves De Agua (Grifos) Delta
1 de enero 1995 e instaladas en los Estados Unidos de América, Canadá y México. uso y servicio normal. Si la reparación o su reemplazo no es práctico, Delta Faucet Company tiene DELTA FAUCET COMPANY NO SE HACE RESPONSABLE POR CUALQUIER DAÑO ESPECIAL, la opción de reembolsarle su dinero por la cantidad del precio de compra a cambio de la devolución...


