Tabla de contenido
Publicidad
Idiomas disponibles
Idiomas disponibles
Enlaces rápidos
Publicidad
Tabla de contenido

Resumen de contenidos para Steren GAM-100
- Página 3 Microscopio digital USB. Por favor revise el manual completamente para estar seguro de instalar y poder operar apropiadamente este producto. Para apoyo, compras y todo lo nuevo que tiene Steren, visite nuestro sitio Web en: www.steren.com...
- Página 4 PRECAUCIÓN Evite tocar el lente con los dedos u objetos puntiagudos, pueden dañarlo. Utilice un paño suave y limpio para su limpieza. Evite dejar caer el microscopio. Golpes fuertes constantes pueden causar daños al lente del microscopio o a los componentes electrónicos.
-
Página 5: Características
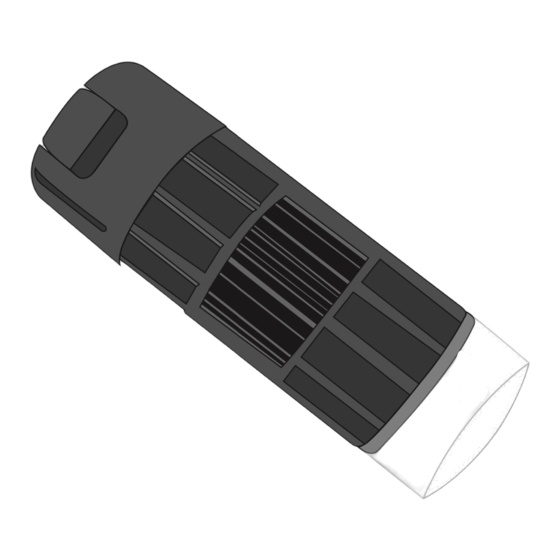
Características microscopio digital conecta puerto USB para que las imágenes puedan ser visualizadas en cualquier computadora de escritorio o laptop. Es compatible con cualquier software de edición ya que se reconoce como si fuera una cámara web, permitiendo grabar video o tomar una imagen estática (foto) con casi cualquier software. - Página 6 Controles...
- Página 7 1.- Lente Coloque sobre el objeto que desee visualizar. 2.- Iluminación Encienden en caso de que requiera luz adicional. 3.- Enfoque Mueva hacia la derecha o izquierda para ajustar el enfoque del objeto visualizado. 4.- Imagen fija Presione para obtener una imagen fija del objeto visualizado.
-
Página 8: Instalación De Software
Instalación de software El microscopio cuenta con un visualizador integrado, sin embargo es posible utilizar cualquier software que tenga la posibilidad de visualizar cámaras web. Para instalar el software, sólo copie el archivo amcap2a a su escritorio. -
Página 9: Instalación Del Microscopio
Instalación del microscopio El microscopio no requiere de drivers adicionales ya que cuenta con tecnología Plug & Play, sólo conéctelo a un puerto USB disponible en la computadora. La computadora detectará el dispositivo y realizará los cambios necesarios en el sistema, cuando aparezca el mensaje de que ya están instalados los controladores, podrá... -
Página 10: Uso Del Microscopio
Uso del microscopio 1.- Después de que conectó el microscopio a un puerto USB y se actualizó el sistema, ejecute el programa amcap2a. 2.- En pantalla se mostrará una imagen previa del microscopio. 3.- Coloque el microscopio en el área que desee observar. - Página 11 4.- Ajuste el enfoque.
- Página 12 5.- En caso de que requiera luz adicional, utilice el control de iluminación para encender los LEDs correspondientes. 6.- Cuando ya no requiera utilizar el microscopio, cierre programa amcap2a caso esté utilizando adicional, apáguela.
-
Página 13: El Microscopio Puede Quedarse
7.- El microscopio puede quedarse conectado para su uso posterior o puede desconectarse hasta que lo vuelva a utilizar. Si la imagen no se muestra o tiene otro dispositivo como una cámara web, debe seleccionar la opción Devices y cambiar el dispositivo a USB 2.0 camera. - Página 14 Filtros de imagen El programa amcap2a le permite utilizar ciertos filtros de imagen a fin de obtener diferentes características de las imágenes capturadas.
- Página 15 Imagen original Imágenes con filtro...
- Página 16 Seleccionando la resolución de las imágenes Utilice Options >> Video capture pin para seleccionar un tamaño de imagen.
- Página 17 Ubique la opción Output size para cambiar el tamaño de acuerdo a sus requerimientos.
- Página 18 Toma de fotografías fijas El microscopio permite tomar fotografías fijas de las imágenes visualizadas. Para obtener imágenes fijas, siga siguientes instrucciones: Ejecute programa favorito para cámara web. 2.- En pantalla se mostrará una imagen previa del microscopio. 3.- Coloque el microscopio en el área que desee observar.
- Página 19 4.- Ajuste el enfoque. 5.- En caso de que requiera luz adicional, utilice el control de iluminación para encender los LEDs correspondientes. 6.- Presione el botón de imagen fija para obtener una imagen de la visualización actual. Es posible que el botón de imagen fija no funcione correctamente en todos los programas de visualización de cámara web.
-
Página 20: Problemas Y Soluciones
Problemas y soluciones Problema Solución -Compruebe que el dispositivo esté correctamente conectado a un puerto USB. -Cambie a otro puerto USB. La imagen -Compruebe que lo está colocando no se ve sobre una superficie que no requiere luz adicional, en caso contrario retire la iluminación. -
Página 21: Especificaciones
Especificaciones Alimentación: 5V - - - (x USB) diseño producto especificaciones pueden cambiar sin previo aviso. - Página 22 Electrónica Steren S.A. de C.V. 2.- Electrónica Steren S.A de C.V. se compromete a reparar el producto en caso de estar defectuoso sin ningún cargo al consumidor. Los gastos de transportación serán cubiertos por el proveedor.
- Página 23 DATOS DEL DISTRIBUIDOR Nombre del Distribuidor__________________ Número de serie____________________ Fecha de entrega_________________ ELECTRONICA STEREN S.A. DE C.V. En caso de que Camarones 112, Obrero Popular, 02840, su producto pre- México, D.F. RFC: EST850628-K51 sente alguna falla, STEREN PRODUCTO EMPACADO S.A.
- Página 26 Digital USB microscope GAM-100 Thank You on purchasing your new Steren product. This manual includes all the feature operations and troubleshooting necessary to install and operate your new Digital USB microscope. Please review this manual thoroughly to ensure proper installation and operation of this product.
- Página 27 CAUTION Avoid touching the lens with fingers or sharp objects which could damage the lens. Use a soft, clean cloth for cleaning. Avoid dropping the microscope. Severe shock to the microscope can cause damage to the lens or electronics.
- Página 28 Highlights The digital microscope can be connected to an USB port in the computer and watch images. It is compatible with any editing software, the computer will detected it as webcam, allowing to record video or take some snapshots. Perfect for science homework, professional research or just for fun.
- Página 29 Controls...
- Página 30 1.- Lens Place over the desired object to watch. 2.- Light Turns on when you need it. 3.- Focus Move left or right to set the focus. 4.- Snapshot Press to get a snapshot of the current image. 5.- Light control Move left or right to activate or deactivate background light.
- Página 31 How to install the microscope The microscope does not require additional software to work. Just plug into an available USB port. The computer will detect the device and automatically will update some files in the system, when the message appears in the screen about the hardware is ready, you will be able to start to use the microscope.
-
Página 32: Software Installation
Software installation The microscope has a viewer, however you can use another software with webcam function. To install the software, only copy amcap2a file to your desktop. - Página 33 How to use the microscope 1.- After connecting the microscope to PC, run amcap2a. 2.- A new window will display, showing microscope image. 3.- Place the microscope over the desired area to watch.
- Página 34 4.- Set the focus.
- Página 35 5.- In case you need additional light, use the light control to turn the LEDs on. 6.- If you don’t require to use the microscope, close amcap2a and turn the lights off.
- Página 36 7.- The microscope may be connected always to be used later, or you may unplug it to use it later. If the image is not displayed and you have another device such as a webcam, you may need to select the “Devices” menu and change the input to USB 2.0 camera.
- Página 37 Filtering images The amcap2a allow you to use some filters to get different features of captured images.
- Página 38 Original image Image filter...
-
Página 39: Image Resolution
Image resolution Use Options >> Video capture pin to select an image size. - Página 40 Locate Output size option to change it according your needs.
- Página 41 Snapshots The microscope allows you to get snapshots from the previews. To get them, follow these instructions: 1.- Run your favourite web cam software. 2.- You will see the image. 3.- Place the microscope in the desired area.
- Página 42 4.- Set the focus. 5.- In case you need additional light, use the light control to turn the LEDs on. 6.- Press Snapshot button to capture images. It is possible that snapshot button does not work smoothly with all web cam software.
-
Página 43: Troubleshooting
Troubleshooting Problem Solución -Make sure the device is correctly installed in the USB port. -Switch to other USB port. Cannot see the image -Make sure that viewed surface does not require more light, otherwise turn the lights on. Blur image Set the focus Cannot take It is possible that your software is... - Página 44 Specifications Input: 5V - - - (x USB) Product design and specifications are subject to change, without notice.
- Página 45 Part number: GAM-100 Brand: Steren WARRANTY This Steren product is warranted under normal usage against defects in workmanship and materials to the original purchaser for one year from the date of purchase. CONDITIONS 1.- This warranty card with all the required information, invoice, product box or package, and product, must be presented when warranty service is required.
- Página 48 Este instructivo puede mejorar con tu ayuda, escríbenos a: Help us to improve this instruction manual, send an email to: 01800 500 9000 Centro de Servicio a Clientes Customer Service Center...