Hitachi DH 40MR Instrucciones De Seguridad Y Manual De Instrucciones
Ocultar thumbs
Ver también para DH 40MR:
- Instrucciones de manejo (27 páginas) ,
- Instrucciones de manejo (63 páginas) ,
- Instrucciones de manejo (61 páginas)
Tabla de contenido
Publicidad
Idiomas disponibles
Idiomas disponibles
Enlaces rápidos
Model
Modèle
Modelo
SAFETY INSTRUCTIONS AND INSTRUCTION MANUAL
IMPROPER OR UNSAFE use of this power tool can result in death or serious bodily
injury!
This manual contains important information about product safety. Please read and
understand this manual BEFORE operating the power tool. Please keep this manual
available for other users and owners before they use the power tool. This manual should
be stored in safe place.
INSTRUCTIONS DE SECURITE ET MODE D'EMPLOI
Une utilisation INCORRECTE OU DANGEREUSE de cet outil motorisé peut entraîner la
mort ou de sérieuses blessures corporelles!
Ce mode d'emploi contient d'importantes informations à propos de la sécurité de ce
produit. Prière de lire et de comprendre ce mode d'emploi AVANT d'utiliser l'outil
motorisé. Garder ce mode d'emploi à la disponibilité des autres utilisateurs et propriétaires
avant qu'ils utilisent l'outil motorisé. Ce mode d'emploi doit être conservé dans un
endroit sûr.
INSTRUCCIONES DE SEGURIDAD Y MANUAL DE INSTRUCCIONES
¡La utilización INAPROPIADA O PELIGROSA de esta herramienta eléctrica puede
resultar en lesiones de gravedad o la muerte!
Este manual contiene información importante sobre la seguridad del producto. Lea y
comprenda este manual ANTES de utilizar la herramienta eléctrica. Guarde este manual
para que puedan leerlo otras personas antes de utilizar la herramienta eléctrica. Este
manual debe ser guardado en un lugar seguro.
DOUBLE INSULATION
DOUBLE ISOLATION
AISLAMIENTO DOBLE
DH 40MR
WARNING
AVERTISSEMENT
ADVERTENCIA
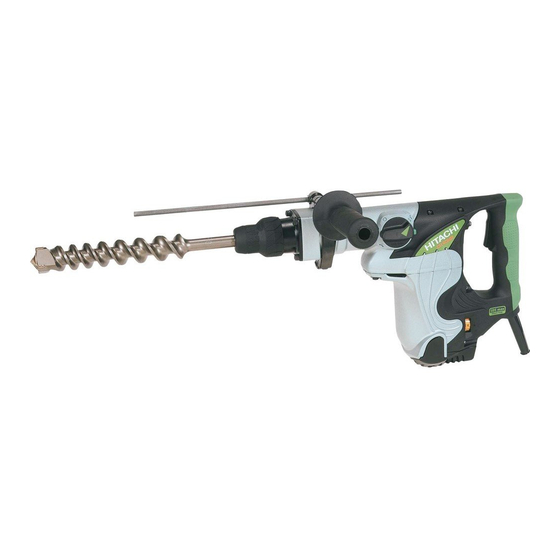
Rotary Hammer
Marteau rotatif
Martillo perforador
Publicidad
Tabla de contenido

Manuales relacionados para Hitachi DH 40MR


Resumen de contenidos para Hitachi DH 40MR
- Página 1 Rotary Hammer Model DH 40MR Marteau rotatif Modèle Martillo perforador Modelo SAFETY INSTRUCTIONS AND INSTRUCTION MANUAL WARNING IMPROPER OR UNSAFE use of this power tool can result in death or serious bodily injury! This manual contains important information about product safety. Please read and understand this manual BEFORE operating the power tool.
-
Página 2: Tabla De Contenido
CONTENTS English Page Page IMPORTANT SAFETY INFORMATION ....3 ASSEMBLY AND OPERATION ........10 MEANINGS OF SIGNAL WORDS ......3 APPLICATIONS ............10 PRIOR TO OPERATION .......... 10 SAFETY ................. 4 HOW TO USE ............11 GENERAL SAFETY RULES ........4 USING DRILL CHUCK, CHUCK ADAPTOR ... -
Página 3: Important Safety Information
WARNINGS on the power tool and in this Instruction Manual. NEVER use this power tool in a manner that has not been specifically recommended by HITACHI. MEANINGS OF SIGNAL WORDS WARNING indicates a potentially hazardous situations which, if ignored, could result in death or serious injury. -
Página 4: Safety
English SAFETY GENERAL SAFETY RULES WARNING: Read and understand all instructions. Failure to follow all instructions listed below, may result in electric shock, fire and/or serious personal injury. SAVE THESE INSTRUCTIONS 1. Work Area (1) Keep your work area clean and well lit. Cluttered benches and dark areas invite accidents. - Página 5 5. Service (1) Tool service must be performed only by a HITACHI authorized service center. Service or maintenance performed by unqualified personnel could result in a risk of injury. (2) When servicing a tool, use only identical replacement parts. Follow instructions in the Maintenance section of this manual.
-
Página 6: Specific Safety Rules And Symbols
English SPECIFIC SAFETY RULES AND SYMBOLS 1. Hold tools by insulated gripping surfaces when performing an operation where the cutting tool may contact hidden wiring or its own cord. Contact with a “live” wire will make exposed metal parts of the tool “live” and shock the operator. 2. - Página 7 16. NEVER use a tool which is defective or operating abnormally. If the tool appears to be operating unusually, making strange noises, or otherwise appears defective, stop using it immediately and arrange for repairs by a Hitachi authorized service center.
-
Página 8: Double Insulation For Safer Operation
English DOUBLE INSULATION FOR SAFER OPERATION To ensure safer operation of this power tool, HITACHI has adopted a double insulation design. “Double insulation” means that two physically separated insulation systems have been used to insulate the electrically conductive materials connected to the power supply from the outer frame handled by the operator. -
Página 9: Functional Description
English FUNCTIONAL DESCRIPTION NOTE: The information contained in this Instruction Manual is designed to assist you in the safe operation and maintenance of the power tool. NEVER operate, or attempt any maintenance on the tool unless you have first read and understood all safey instructions contained in this manual. -
Página 10: Assembly And Operation
5. Confirming condition of the environment: Confirm that the work site is placed under appropriate conditions conforming to prescribed precautions. 6. How to install tool CAUTION: For tools such as a drill bit and a bull point, use only Hitachi genuine parts. -
Página 11: How To Use
English (1) Clean, then smear the tool shank with the grease provided in the green tube. (2) To attach the tool (SDS max shank), insert it into the hole until it contacts the innermost end of the hole as illustrated in Fig. 2. If you continue to turn the tool with slight pressure, you can feel a spot where there is a hitch. - Página 12 English CAUTION: Although this machine is equipped with a safety clutch, if the drill bit becomes bound in concrete or other material, the resultant stoppage of the drill bit could cause the machine body to turn in reaction. Ensure that the main handle and side handle are gripped firmly during operation.
- Página 13 English Selector Lever Lever Holder (1) Switching to “hammering” (a) Push the button, release lock and turn the selector lever counterclockwise. (b) Align L of the selector lever and of the lever holder as illustrated in Fig. 7. (c) Release the button to lock the selector lever. NOTE: Turn the selector lever (do not push the button) to check if it is completely locked and make sure...
- Página 14 English 6. Warming up (Fig. 11) The grease lubrication system in this unit may require warming up in cold regions. Position the end of the bit so makes contact with the concrete, turn on the switch and perform the warming up operation. Make sure that a hitting sound is produced and then use the unit.
-
Página 15: Using Drill Chuck, Chuck Adaptor
English USING DRILL CHUCK, CHUCK ADAPTOR Note that this machine can be used at “rotation only” if separately sold parts such as drill chuck and chuck adaptor are attached. Use it with the selector lever positioned at “rotation + hammering”. WARNING: During operation, be sure to grip the handle and the side handle firmly to prevent your body from swaying. - Página 16 English (2) Mount the core bit shank to the Rotary Hammer. (Fig. 16) (3) Insert the center pin into the guide plate until it stops. (4) Engage the guide plate with the core bit, and turn the guide plate to left or right so that it does not fall even if it faces downward.
-
Página 17: Maintenance And Inspection
0.28" (7 mm) 0.67" (17 mm) Fig. 20 NOTE: Use HITACHI carbon brush No.73 indicated in Fig. 20 Replacing carbon brushes: (For parts name, refer to Fig. 1) Loosen the two set screws and remove the tail cover. Remove the brush caps and carbon brushes. - Página 18 All quality power tools will eventually require servicing or replacement of parts because of wear from normal use. To assure that only authorized replacement parts will be used, all service and repairs must be performed by a HITACHI AUTHORIZED SERVICE CENTER, ONLY.
-
Página 19: Accessories
ALWAYS use Only authorized HITACHI replacement parts and accessories. NEVER use replacement parts or accessories which are not intended for use with this tool. Contact HITACHI if you are not sure whether it is safe to use a particular replacement part or accessory with your tool. - Página 20 English External dia. Overall lenght Code No. 13-3/8" (340 mm) 313448 5/8" (16 mm) 21-1/4" (540 mm) 313456 13-3/8" (340 mm) 313449 3/4" (19 mm) 21-1/4" (540 mm) 313457 12-5/8" (320 mm) 313450 7/8" (22 mm) 20-15/32" (520 mm) 313458 12-5/8"...
- Página 21 English 5. Bolt plaching operation with Chemical Anchor (Rotation + Hammering) (Standard socket (1) Chemical Anchor Adaptor on the market) (SDS max shank) Square dimensions of the side Code No. of the socket installation 1/2" (12.7 mm) 313469 3/4" (19.0 mm) 313470 6.
- Página 22 13. Hammer grease A 1.1 lbs (500 g) (in a can) Code No. 980927 0.15 lbs (70 g) (in a green tube) Code No. 308471 NOTE: Specifications are subject to change without any obligation on the part of the HITACHI.
-
Página 23: Informations Importantes De Sécurité
AVERTISSEMENTS sur l’outil motorisé et dans ce mode d’emploi. NE JAMAIS utiliser cet outil motorisé d’une manière qui n’est pas spécifiquement recommandée par HITACHI. SIGNIFICATION DES MOTS D’AVERTISSEMENT AVERTISSEMENT indique des situations potentiellement dangereuses qui, si elles sont ignorées, pourraient entraîner la mort ou de sérieuses blessures. -
Página 24: Securite
Français SECURITE REGLES GENERALE DE SECURITE AVERTISSEMENT: Lire et coxmprendre toutes les instructions. Un non respect de toutes les instructions ci-dessous peut entraîner une électrocution, un incendie et/ou de sérieuses blessures personnelles. CONSERVER CES INSTRUCTIONS 1. Zone de travail (1) Garder la zone de travail propre et bien éclairée. Les établis mal rangés et les zones sombres invitent aux accidents. - Página 25 5. Réparation (1) La réparation de l’outil ne doit être réalisée que par un centre de service HITACHI autorisé. Une réparation ou un entretien réalisé par un personnel non qualifié peut entraîner des risques de blessures.
-
Página 26: Regles De Securite Specifiques Et Symboles
Français (2) Lors de la réparation d’un outil, utiliser uniquement des pièces de rechange identiques. Suivre les instructions de la section d’entretien de ce mode d’emploi. L’utilisation de pièces non autorisées ou un non respect des instructions d’entretien peut créer un risque d’électrocution ou de blessures. REGLES DE SECURITE SPECIFIQUES ET SYMBOLES 1. - Página 27 Si l’outil n’a pas l’air de fonctionner normalement, fait des bruits étranges ou sans cela paraît défectueux, arrêter de l’utiliser immédiatement et le faire réparer par un centre de service Hitachi autorisé. 17. NE JAMAIS laisser fonctionner l’outil sans surveillance. Le mettre hors tension.
-
Página 28: Double Isolation Pour Un Fonctionnement Plus Sur
..Courant alternatif DOUBLE ISOLATION POUR UN FONCTIONNEMENT PLUS SUR Pour assurer un fonctionnement plus sûr de cet outil motorisé, HITACHI a adopté une conception à double insolation. “Double isolation” signifie que deux systèmes d’isolation physiquement séparés ont été utilisés pour isoler les matériaux conducteurs d’électricité... -
Página 29: Description Fonctionnelle
Français DESCRIPTION FONCTIONNELLE REMARQUE: Les informations contenues dans ce mode d’emploi sont conçues pour assister l’utilisateur dans une utilisation sans danger et un entretien de l’outil motorisé. NE JAMAIS utiliser ni entreprendre une révision de l’outil sans avoir d’abord lu et compris toutes les instructions de sécurité... -
Página 30: Assemblage Et Fonctionnement
5. Vérification des conditions d’environnement Vérifier que l’état de l’aire de travail est conforme aux précautions. 6. Comment installer l’outil PRECAUTION: Pour les outils tels que foret et pointe de broyage n’utiliser que les pièces HITACHI authentiques. -
Página 31: Utilisation
Français (1) Nettoyer, puis graisser la queue de l’outil avec la graisse fournie à cet effet en tube vert. (2) Pour fixer l’outil (tige SDS max), l’insérer dans l’orifice jusqu’à ce qu’il touche l’extrémité intérieure de l’orifice comme indiqué sur la Fig. 2. Si l’on continue à... - Página 32 Français PRECAUTION: Bien que cette machine soit équipée d’un cran de sécurité, si la mèche est prise dans le béton ou autre matériel l’arrêt de son fonctionnement pourrait faire tourner le corps de la machine. Tenir fermement la poignée principale et la poignée latérale pendant le fonctionnement.
- Página 33 Français Sélecteur Cache inférieur (1) Commutation sur “percussion” (a) Appuyer sur le bouton, libérer le verrou et tourner le levier de sélection dans le sens inverse des aiguilles d’une montre. (b) Aligner L du levier de sélection sur support de levier comme indiqué sur la Fig (c) Relâcher le bouton pour verrouiller le levier de sélection.
-
Página 34: Utilisation Du Mandrin Porte-Foret Et Du Raccord De Mandrin
Français 6. Préchauffage (Fig. 11) Le système de graissage de l’outil risque de devoir être préchauffé dans les régions froides. Placer l’extrémité de la mèche de façon qu’elle entre en contact avec le béton, enclencher l’interrupteur et effectuer une opération de préchauffage. -
Página 35: Comment Utiliser La Couronne
Français (1) Commutation sur “rotation + percussion” Pour commuter sur “rotation + percussion”, procéder comme indiqué au point [3. Perçage en “rotation + percussion”]. (2) Fixation du raccord de mandrin sur le mandrin Mandrin Tige SDS max porte-foret (Fig. 14) porte- Attache Raccord de... - Página 36 Français (4) Engager la plaque de guidage dans la couronne et tourner la plaque de guidage à gauche ou à droite de manière à ce qu’elle à ce qu’elle ne Goujon central Plaque de puisse pas tomber, même si elle orientée vers guidage le bas.
-
Página 37: Entretien Et Inspection
PRECAUTION: Utiliser la polisseuse avec un balai en carbone qui est usé au-delà de la limite d’usure endommagera le moterur. Limite d’usure No. du balai en carbone 0.28" (7 mm) 0.67" (17 mm) Fig. 20 REMARQUE: Utiliser le balai en carbone HITACHI No. 73 indiqué sur la Fig. 20. - Página 38 Période de remplacement Remplacer la graisse après chaque période de 6 moins d’utilisation. Se procurer la graisse chez l’Agence de Service Autorisée HITACHI la plus proche. Procéder au remplacement. Plein de graisse PRECAUTION: Avant de faire le plein de la graisse, fermer l’interrupteur et débrancher l’outil de la prise de courant.
-
Página 39: Accessoires
être dangereux et peut causer des blessures ou des dommages mécaniques. REMARQUE: Les accessoires sont sujets à changement sans obligation de la part de HITACHI. ACCESSOIRES STANDARD (1) Valise (Plastique) (No. de code 321325) ................1 (2) Poignée latérale (No. de code 313078) ................1 (3) Quenouille (No. - Página 40 Français Diamètre extérieur Longueur totale No. de code 13-3/8" (340 mm) 313448 5/8" (16 mm) 21-1/4" (540 mm) 313456 13-3/8" (340 mm) 313449 3/4" (19 mm) 21-1/4" (540 mm) 313457 12-5/8" (320 mm) 313450 7/8" (22 mm) 20-15/32" (520 mm) 313458 12-5/8"...
- Página 41 Français 5. Mise en place du boulon pour d’ancre chimique (Rotation + Percussion) (Support standard (1) Raccord d’ancre chimique disponible dans le (Tige SDS max) commerce) Dimensions du carré du côté No. de code de l’installation du support 1/2" (12,7 mm) 313469 3/4"...
- Página 42 13. Graisse A pour marteau 1,1 lbs (500 g) (en boîte) No. de code 980927 0,15 lbs (70 g) (en tube vert) No. de code 308471 REMARQUE: Les spécifications sont sujettes à modification sans aucune obligation de la part de HITACHI.
-
Página 43: Información Importante Sobre Seguridad
ADVERTENCIAS en dicha herramienta y en este Manual de instrucciones. No utilice NUNCA esta herramienta eléctrica de ninguna forma que no esté específicamente recomendada por HITACHI. SIGNIFICADO DE LAS PALABRAS DE SEÑALIZACIÓN ADVERTENCIA indica situaciones potencialmente peligrosas que, si se ignoran, pueden resultar en la muerte o en lesiones de gravedad. -
Página 44: Seguridad
Español SEGURIDAD NORMAS GENERALES DE SEGURIDAD ADVERTENCIA: Lea y entienda todas las instrucciones. Si no sigue las instrucciones indicadas a continuación, pueden producirse descargas eléctricas, incendios, y/o lesiones serias. GUARDE ESTAS INSTRUCCIONES. 1. Área de trabajo (1) Mantenga el área de trabajo limpia y bien iluminada. Los bancos de trabajo desordenados y las áreas obscuras pueden conducir a accidentes. - Página 45 En caso de que una herramienta esté averiada, hágala reparar en un centro de servicio autorizado HITACHI antes de utilizarla. Muchos de los accidentes se deben a herramientas mal cuidadas.
-
Página 46: Normas Y Símbolos Específicos De Seguridad
Español (2) Para el servicio de mantenimiento o reparación de una herramienta, utilice solamente piezas de repuesto idénticas. Siga las instrucciones de la sección de mantenimiento de este manual. La utilización de piezas no autorizadas, o el no seguir las indicaciones del Manual de instrucciones puede crear el riesgo de descargas eléctricas u otras lesiones. - Página 47 16. NO utilice NUNCA una herramienta defectuosa o que funcione anormalmente. Si la herramienta parece que funciona anormalmente, produciendo ruidos extraños, etc., deje inmediatamente de utilizarla y solicite su arreglo a un centro de reparaciones autorizado por Hitachi. 17. NO deje NUNCA la herramienta en funcionamiento desatendida. Desconecte su alimentación.
-
Página 48: Aislamiento Doble Para Ofrecer Una Operación Más Segura
..Corriente alterna AISLAMIENTO DOBLE PARA OFRECER UNA OPERACIÓN MÁS SEGURA Para garantizar una operación más segura de esta herramienta eléctrica, HITACHI ha adoptado un diseño de aislamiento doble. “Aislamiento doble” significa que se han utilizado dos sistemas de aislamiento físicamente separados para aislar los materiales eléctricamente conductores conectados a la fuente de alimentación del bastidor exterior manejado por el... -
Página 49: Descripción Funcional
Español DESCRIPCIÓN FUNCIONAL NOTA: La información contenida en este Manual de instrucciones ha sido diseñada para ayudarle a utilizar con seguridad y mantener esta herramienta eléctrica. NUNCA haga funcionar ni efectúe el mantenimiento de la herramienta antes de leer y comprender todas las instrucciones de seguridad contenidas en este manual. -
Página 50: Montaje Y Operación
Español MONTAJE Y OPERACIÓN APLICACIONES Función de rotación y golpeteo Perforación de orificios de anclaje Perforación de orificios en hormigón Función de martilleo solamente Trituración de hormigón, cincelado, excavación y escuadreo (utilizando accesorios opcionales) ANTES DE LA OPERACIÓN 1. Fuente de alimentación Cerciórese de que la fuente de alimentación que vaya a utilizar cumpla los requisitos indicados en la placa de características del producto. -
Página 51: Modo De Utilización
6. Montaje de la herramienta PRECAUCIÓN: Para usar herramientas tales como el puntero y, usar siempre piezas genuinas Hitachi. (1) Limpiar y engrasar la espiga con la grasa provista. (2) Para fijar la herramienta (espiga SDS max), insértela en el orificio hasta que entre en contacto con el extremo interior del mismo, como se muestra en la Fig. - Página 52 Español (2) No es necesario presionar el cuerpo principal del martillo perforador. Es suficiente con empujar ligeramente el martillo perforador teniendo en cuenta que los materiales saltan libremente, al taladrar. PRECAUCIÓN: Aunque este aparato se equipa con un embrague de seguridad, si se atasca la barrena de taladrar en el hormigón u otro material semejante, puede pasar que, al atascarse la barrena, el cuerpo del martillo gire en dirección opuesta.
- Página 53 Español Palanaca selectora Cubierta inferior (1) Cambio a “martilleo” (a) Apriete el botón, desbloquee la palanca selectora y gírela en el sentido contrario a las agujas del reloj. (b) Alinee la marca L de la palanca selectora y del sujetador de palanca, tal como se muestra en la Fig.
-
Página 54: Utilización Del Portabarrenas Y Del Adaptador Para Portabarrenas
Español 6. Calentamiento (Fig. 11) El sistema de lubricación de esta unidad puede requerir calentamiento en ciertas regiones. Coloque el extremo de la broca de forma que entre en contacto con el hormigón, ponga en ON el interruptor de alimentación principal de la unidad, y realice la operación de calentamiento. -
Página 55: Modo De Usar La Barrena Tubular
Español (1) Cambio a “rotación + martilleo” Para cambiar a “rotación + martilleo”, realice los mismos procedimientos que los mencionados en [3. Cuando taladre con “rotación + martilleo”]. (2) Fijación del adaptador para portabarrenas al portabarrenas (Fig. 14) (a) Fije el adaptador para portabarrenas al portabarrenas. - Página 56 Español (4) Unir la placa guía con la barrena tubular y girar la placa guía hacia la izquierda o hacia la derecha de forma que no se caiga a pesar de Pasador Place guía estar indicando hacia abajo. (Fig. 17) central 2.
-
Página 57: Mantenimiento E Inspección
PRECAUCIÓN: La utilización de esa pulidora con escobillas desgastadas más allá del límite dañará el motor. Límite de desgaste Núm. de escobilla 0.28" (7 mm) 0.67" (17 mm) Fig. 20 NOTA: Utilice las escobillas HITACHI Núm. 73 indicadas en la Fig. 20. - Página 58 Período de cambio de grasa: Luego de adquirir la herramienta, cambiarle la grasa cada 6 meses de uso. Consultar para ello al centro de servicio HITACHI autorizado. Procedimiento de cambio de grasa. Rellenado de grasa PRECAUCIÓN: Antes de rellenar de grasa, desconectar el aparato y desenchufarlo del tomacorriente.
-
Página 59: Accesorios
La utilización de otros accesorios puede resultar peligrosa y causar lesiones o daños mecánicos. NOTA: Los accesorios están sujetos a cambio sin ninguna obligación por parte de HITACHI. ACCESORIOS ESTÁNDAR (1) Caja (Plástica) (Núm. de código 321325) ................1 (2) Mango lateral (Núm. de código 313078) ................1 (3) Tope (Núm. - Página 60 Español Diámetro externo Longitud total Núm. de código 13-3/8" (340 mm) 313448 5/8" (16 mm) 21-1/4" (540 mm) 313456 13-3/8" (340 mm) 313449 3/4" (19 mm) 21-1/4" (540 mm) 313457 12-5/8" (320 mm) 313450 7/8" (22 mm) 20-15/32" (520 mm) 313458 12-5/8"...
- Página 61 Español 5. Trabajo de colocación de pernos para anclaje químico (Rotación + Martilleo) (Receptáculo (1) Adaptador de anclage estándar en venta químico (Espiga SDS max) en el mercado) Dimensión cuadrangular del lado Núm. de código de instalación del receptáculo 1/2" (12,7 mm) 313469 3/4"...
- Página 62 13. Grasa A para martillo 1,1 libras 500 g (en una lata) Núm. de código 980927 0,15 libras 70 g (en un tubo naranja) Núm. de código 308471 NOTA: Las especificaciones están sujetas a cambio sin ninguna obligación por parte de HITACHI.
- Página 64 Issued by Shinagawa Intercity Tower A, 15-1, Konan 2-chome, Minato-ku, Tokyo 108-6020, Japan Distributed by 3950 Steve Reynolds Blvd. Norcross, GA 30093 Hitachi Koki Canada Co. 6395 Kestrel Road Mississauga ON L5T 1Z5 Code No. C99118362 N Printed in Japan...