Singer 1408 Manual De Instrucciones
Ocultar thumbs
Ver también para 1408:
- Manual de instrucciones (62 páginas) ,
- Manual de instrucciones (62 páginas) ,
- Manual de instrucciones (62 páginas)
Tabla de contenido
Publicidad
Enlaces rápidos
Publicidad
Tabla de contenido
Solución de problemas

Manuales relacionados para Singer 1408


Resumen de contenidos para Singer 1408
- Página 1 Instruction Manual 1408 / 1409 Manual de Instrucciones Manuel d'Instruction...
-
Página 2: Important Safety Instructions
IMPORTANT SAFETY INSTRUCTIONS When using an electrical appliance, basic safety should always be needle causing it to break. followed, including the following: 9. Switch the sewing machine off ("O") when making any adjustments Read all instructions before using this sewing machine. in the needle area, such as threading needle, changing needle, threading bobbin, or changing presser foot, and the like. -
Página 3: Importante Instrucciones De Seguridad
IMPORTANTE INSTRUCCIONES DE SEGURIDAD Cuando se utiliza un dispositivo eléctrico, debe seguirse siempre 9. Desconectar la máquina de coser (posición "O") cuando se precauciones de seguridad básica, incluyendo las siguientes: realice cualquier ajuste en la zona de la aguja, tal como enhebrado de la aguja, cambio de aguja, enhebrado de la Leer todas... -
Página 4: Instructions Importantes De Sécurité
INSTRUCTIONS IMPORTANTES DE SÉCURITÉ Lors de l'utilisation d'un appareil électrique, il est important de toujours 7. Ne pas utiliser d'aiguilles tordues. suivre certaines précautions de sécurité dont certaines sont les suivantes : 8. Ne pas tirer sur le tissu ou le pousser lors de la couture. Ceci pourrait Lire toutes les instructions avant d'utiliser votre machine à... -
Página 5: Felicitaciones
Congratulations Felicitaciones Félicitations As the owner of a new Singer sewing Como propietario/ a de una nueva Vous voici à présent propriétaire d'une machine, you are about to begin an máquina de coser Singer, usted acaba machine à coudre Singer et en cette exciting adventure in creativity. -
Página 6: Tabla De Contenido
Reverse Sewing/ Removing the Work/ Cutting the Thread ....................27 Blind Hem....................................29 Sew 4-step Buttonholes ................................31 Sewing on Buttons (Model 1408 only) ...........................33 Sewing on Buttons (Model 1409 only)...........................35 Free Motion Darning, Stippling..............................37 General Information Installing the Removable Extension Table ..........................39 Attaching the Presser Foot Shank............................41... - Página 7 Remate/ Cómo sacar la tela/ Cómo cortar el hilo ........................28 Dobladillo invisible / Puntada de lencería ..........................30 Cómo coser ojales en 4 pasos ..............................32 Pegado de botones (Sólo Modelo 1408) ..........................34 Pegado de botones (Sólo Modelo 1409)..........................36 Zurcido y bordado libre................................38 Información General nstalación de la cubierta removible ............................40...
- Página 8 Couture en marche arrière/ Pour retirer votre ouvrage en cours/ Pour couper le fil .............28 Ourlet invisible et point de lingerie ............................30 Comment faire des boutonnières (Boutonnières 4 étapes)....................32 Couture de boutons (Modèle 1408 seulement) ........................34 Couture de boutons (Modèle 1409 seulement) ........................36 Reprisage et matelassage pointillé ............................38 Informations générales...
-
Página 9: Principle Parts Of The Machine
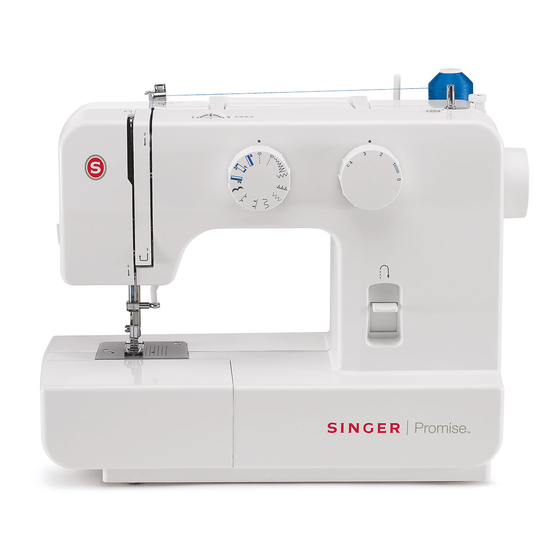
Principal Parts of the Machine 1. Thread tension dial 2. Thread take-up lever 3. Thread cutter Face plate Presser foot 6. Needle plate 7. Removable extension table/ accessory storage 8. Pattern selector dial 9. Bobbin stopper 10. Stitch length dial (Model 1409) 11. -
Página 10: Partes De La Máquina
Partes de la máquina Les composantes principales de la machine à coudre Disco de tensión 1. Réglage de la tension Tirahilos 2. Releveur du fil Cortahilos 3. Coupe fil Palanca para coser hacia átras 4. Plaque frontale Prensatelas 5. Pied presseur Placa de la aguja 6. - Página 11 Principal Parts of the Machine 12. Handle 13. Bobbin winding spindle 14. Spool pins 15. Handwheel 16. Power and light switch 17. Main plug socket 18. Bobbin thread guide 19. Presser foot lifter 20. Foot speed control 21. Power cord...
- Página 12 Partes de la máquina Les composantes principales de la machine à coudre 12. Asa de transporte 13. Devanador 12. Poignée de transport 13. Axe pour disposer la canette 14. Portabobinas 15. Volante 14. Tige de la bobine 16. Interruptor de encendido y apagado 15.
-
Página 13: Connecting Machine To Power Source
Connecting Machine to Power Source Connect the machine to a power source as illustrated. (1) This appliance is equipped with a polarized plug which must be used with the appropriate polarized outlet. (2) Attention: Unplug power cord when machine is not in use. Foot control The foot control pedal regulates the sewing speed. -
Página 14: Conexión De La Máquina A La Fuente De Alimentación Eléctrica
Conexión de la máquina a la fuente de Branchement de la machine à une source alimentación eléctrica d'alimentation Conecte la máquina a una fuente de alimentación según se ilustra. Brancher la machine comme indiqué ci-contre. (1) La fiche de la (1) Esta máquina está... -
Página 15: Two Step Presser Foot Lifter
Two Step Presser Foot Lifter When sewing several layers or thick fabrics, the presser foot can be raised to a higher position for easy positioning of the work (A). Elevador del prensatelas de dos tiempos Cuando se cose varias capas de tela gruesa, el prensatelas puede elevarse a una posición alta para facilitar la colocación la tela (A). -
Página 16: Accessories
Accessories Standard accessories (1) a. All purpose foot b. Zipper foot c. Buttonhole foot d. Button sewing foot e. L-screwdriver f. Seam ripper/ brush g. Spool pin felt (2x) h. Pack of needles (3x) i. Edge/ quilting guide j. Bobbin (3x) k. -
Página 17: Accesorios
(Estos 6 accesorios no se suministran con esta máquina; sin embargo, están disponibles como accesorios especiales a ® cependant, ils sont disponibles dans votre magasin SINGER ) través de su distribuidor local.) l. Pied pour matelassage l. Prensatelas de acolchado m. -
Página 18: Winding The Bobbin
Winding the Bobbin - Place the thread and Spool pin felt (a) onto the spool pin. (1) - Wind thread clockwise around bobbin winder tension discs. - Thread bobbin as illustrated and place on spindle. (3) - Push bobbin spindle to right. (4) - Hold thread end. -
Página 19: Devanado De La Bobina
Devanado de la bobina Remplissage de la canette - Coloque el hilo y el fieltro del Porta-carrete (a) en el porta- - Installer la bobine de fil et le feutre (a) sur la tige de la carrete. (1) bobine. (1) - Devane el hilo en sentido de las manecillas del reloj - Enroulez le fil, dans le sens horaire, entre les disques du alrededor de los discos de tensión del devanador de la... -
Página 20: Inserting The Bobbin
Inserting the Bobbin When inserting or removing the bobbin, the needle must be fully raised. 1. Open the hinged cover. 2. Pull the bobbin case tab (a) and remove the bobbin case. 3. Hold the bobbin case with one hand. Insert the bobbin so that the thread runs in a clockwise direction (arrow). -
Página 21: Colocación De La Bobina
Colocación de la bobina Insertion de la canette La aguja tiene que estar siempre en la posición más alta Lors de la mise en place et du retrait de la canette, veillez al colocar y quitar la bobina. à ce que l'aiguille se trouve en position haute maximale. 1. -
Página 22: Threading The Upper Thread
Threading the Upper Thread This is a simple operation but it is important to carry out correctly as by not doing so several sewing problems could result. - Start by raising the needle to its highest point (1), and continue turning the handwheel counterclockwise until the needle just slightly begins to descend. -
Página 23: Enhebrado Del Hilo Superior
Enhebrado del hilo superior Enfilage supérieur trata de una operación sencilla pero es importante Cette opération est simple. Il est important de l'exécuter realizarla correctamente pues de no hacerlo podría surgir correctement sous peine de faire éventuellement face à varios problemas en la costura. plusieurs problèmes de couture. -
Página 24: Raising The Bobbin Thread
Raising the Bobbin Thread Hold the upper thread with the left hand. Turn the handwheel (1) towards you (counterclockwise) lowering, then raising needle. Note: If it is difficult to raise the bobbin thread, check to make sure the thread is not trapped by the hinged cover or the Removable Extension Table. -
Página 25: Elevación Del Hilo De La Bobina
Elevación del hilo de la bobina Pour remonter le fil de canette Sujete el hilo superior con la mano izquierda. Gire el volante Tenir le fil supérieur avec la main gauche. Tourner le volant (1) (1) hacia usted hasta que baje totalmente la aguja, siga vers vous (sens anti-horaire) pour abaisser et lever l'aiguille. -
Página 26: Thread Tension
Thread Tension Upper thread tension Basic thread tension setting: "4". (1) To increase the tension, turn the dial to the next number up. To reduce the tension, turn the dial to the next number down. A. Normal thread tension for straight stitch sewing. B. -
Página 27: Tensión Del Hilo
Tensión del hilo Tension du fil Tensión del hilo superior Tension du fil supérieur Réglage de base pour la tension du fil: "4". Adjuste de la tensión del hilo básica: "4". (1) Pour augmenter la tension, tourner la sélecteur sur une valeur Para aumentar la tensión, girar el disco al siguiente número plus élevée. -
Página 28: How To Choose Your Pattern
How to Choose Your Pattern To select a stitch, simply turn the pattern selector dial (a). The pattern selector dial may be turned in either direction. The following page shows the recommended range of stitch lengths. Adjust the stitch length with the stitch length dial (b) according to the fabric being used. -
Página 29: Cómo Seleccionar Su Puntada
¿Cómo seleccionar su puntada? Comment choisir votre motif Para seleccionar una puntada, simplemente gire el selector Tournez le bouton sélecteur (a) pour sélectionner un point. de puntadas (a). El selector de puntada puede girar en Le bouton sélecteur de point peut être tourné dans toutes les cualquier dirección. -
Página 30: Stitch Length Dial (Model 1409 Only)
Stitch Length Dial (Model 1409 only) Function of stitch length dial for when straight stitching For straight stitch sewing, turn the Pattern Selector Dial to the straight stitch setting. (1) Turn the Stitch Length Dial, and the length of the individual stitches will decrease as the dial approaches "0". -
Página 31: Selector De Largo De Puntadas (Sólo Modelo 1409)
Selector de largo de puntadas Cadran de longueur de point (Sólo Modelo 1409) (Modèle 1409 seulement) Función de selección de largo de puntada para costura recta Fonction du cadran de longueur de point lors de la couture de points droits Para la puntada recta, dé... -
Página 32: Sewing Straight Stitch
Sewing Straight Stitch To begin sewing, set the machine for straight stitch. (1) Place the fabric under the presser foot with the fabric edge lined up with the desired seam guide line on the needle plate. Lower the presser foot lifter, and then step on the foot controller to start sewing. -
Página 33: Puntada Recta
Puntada recta Couture de points droits Para comenzar a coser, gire el selector de puntadas en la Pour commencer à coudre, régler la machine sur le point puntada recta, puede seleccionar la posición de la aguja en droit. (1) centro o a la derecha. (1) Placer le tissu sous le pied presseur avec le bord du tissu Coloque la tela bajo prensatelas con el borde de la tela aligné... -
Página 34: Reverse Sewing/Removing The Work/ Cutting The Thread
Reverse Sewing To secure the beginning and the end of a seam, press down the reverse sewing lever (A). Sew a few reverse stitches. Release the lever and the machine will sew forward again. (1) Removing the Work Turn the handwheel toward you (counterclockwise) to bring the thread take up lever to its highest position and the needle begins to descend, raise the presser foot and remove work behind... -
Página 35: Remate/ Cómo Sacar La Tela/ Cómo Cortar El Hilo
Remate Couture en marche arrière Para fijar el comienzo y el final de la costura, presione la Afin de renforcer le début et la fin d'une couture, abaisser le palanca de retroceso.Haga unas pocas puntadas hacia atrás. bouton marche arrière en le poussant ver le bas. Faire Suelte la palanca y la máquina coserá... -
Página 36: Blind Hem
Blind Hem For hems, curtains, trousers, skirts, etc. Blind hem for stretch fabrics. Blind hem/ lingerie for firm fabrics. Note: It takes practice to sew blind hems. Always make a Model 1409 only sewing test first. Blind Hem: Turn up the hem to the desired width and press. Fold back (as shown in Fig. -
Página 37: Dobladillo Invisible / Puntada De Lencería
Dobladillo invisible / Puntada de lencería Ourlet invisible et point de lingerie Para dobladillos, cortinas, pantalones, faldas, etc. Pour ourlet, rideaux, pantalons, jupes, etc. Ourlets invisible pour tissu élastique. Para realizar un dobladillo invisible en telas elásticas, seleccione esta puntada. Ourlets invisible / lingerie pour tissu ferme. -
Página 38: Sew 4-Step Buttonholes
Sew 4-step Buttonholes Prepare 1. Take off the all purpose foot and attach the buttonhole foot. 2. Measure diameter and thickness of button and add 0.3cm (1/8") for bartacks to obtain correct buttonhole length; mark buttonhole size on fabric (a). 3. -
Página 39: Cómo Coser Ojales En 4 Pasos
Cómo coser ojales en 4 pasos Comment faire des boutonnières (Boutonnières 4 étapes) Preparación 1. Quite el prensatelas de usos múltiples y coloque el Préparation prensatelas para hacer ojales (a). 1. Enlevez le pied universel et installez le pied boutonnière. 2. -
Página 40: Sewing On Buttons (Model 1408 Only)
Sewing on Buttons (Model 1408 only) Install the darning plate. (1) Change the all purpose foot to button sewing foot. (2) Position the work under the foot. Place the button in the desired position and lower the foot. Set the Pattern Selector Dial for the second zig-zag pattern (as shown), which should correspond to the distance between the two holes of the button. -
Página 41: Pegado De Botones (Sólo Modelo 1408)
Pegado de botones (Sólo Modelo 1408) Couture de boutons (Modèle 1408 seulement) Instalar la placa cubre impelentes. (1) Cambie el prensatelas al especial para coser botones. (2) Placez la plaque de reprisage sur la plaque à aiguille. (1) Installez le pied pose de boutons. (2) Coloque el trabajo abajo del prensatelas. -
Página 42: Sewing On Buttons (Model 1409 Only)
Sewing on Buttons (Model 1409 only) Install the darning plate. (1) Change the all purpose foot to button sewing foot. (2) Position the work under the foot. Place the button in the desired position and lower the foot. Set the Pattern Selector Dial on " " and sew a few securing stitches. -
Página 43: Pegado De Botones (Sólo Modelo 1409)
Pegado de botones ( Sólo Modelo 1409 Couture de boutons (Modèle 1409 seulement) Instalar la placa cubre impelentes. (1) Cambie el prensatelas al especial para coser botones. (2) Placez la plaque de reprisage sur la plaque à aiguille. (1) Installez le pied pose de boutons. (2) Coloque el trabajo abajo del prensatelas. -
Página 44: Free Motion Darning, Stippling
Remove the presser foot shank. (3) Attach the darning/ embroidery foot to the presser foot bar. The lever (a) should be behind the needle clamp screw (b). Model 1408 Model 1409 Press the darning/ embroidery foot on firmly from behind with your index finger and tighten the screw (c). -
Página 45: Zurcido Y Bordado Libre
Zurcido y bordado libre Reprisage et matelassage pointillé * El prensatelas de bordado libre es un accesorio opcional * Le pied de raccommodage est un accessoire d'option dont no suministrado con su máquina. (1) votre machine n'est pas équipée. (1) Instale la placa cubre impelentes. -
Página 46: Installing The Removable Extension Table
Installing the Removable Extension Table Hold the removable extension table horizontally, and push it in the direction of the arrow. (1) To remove the extension table, pull it toward the left. The inside of the removable extension table can be utilized as an accessory box. -
Página 47: Información General I Nstalación De La Cubierta Removible
Instalación de la cubierta removible Installation du bras amovible Coloque la máquina en una superficie estable, empuje la Maintenir le bras amovible en position horizontal et le cubierta removible como indica la flecha, y luego jale hacia pousser comme indiqué ci-contre. (1) afuera. -
Página 48: Attaching The Presser Foot Shank
Attaching the Presser Foot Shank Raise the presser foot bar (a) with the presser foot lifter. Attach the presser foot shank (b) as illustrated. (1) Attaching the presser foot Lower the presser foot shank (b) using the presser foot lifter, until the cut-out (c) is directly above the pin (d). -
Página 49: Colocación Del Portaprensatelas
Colocación del portaprensatelas Poser le support du pied presseur Eleve la barra del prensatelas (a). Coloque el portaprensatelas Relever la barre du pied (a) avec le releveur de pied (b) según se ilustra. (1) presseur. Attacher le support du pied presseur (b) comme illustré. -
Página 50: Needle/Fabric/Thread Chart
Leather, vinyl, upholstery. (Leaves smaller hole than standard SINGER large needle.) Note : ® 1. For best sewing results always use genuine SINGER needles. 2. Replace needle often (approximately every other garment ) and/ or at first thread breakage or skipped stitches. -
Página 51: Guía De Selección De Agujas/ Telas/ Hilos
Cuero, vinilo, tapicería (deja un agujero más pequeño que la aguja grande estándar. Nota: 1.Para mejores resultados de la costura, utilice solamente agujas SINGER originales. ® 2.Cambie la aguja con frecuencia (aproximadamente cada dos prendas) y/ o a los primeros hilos rotos o fallas en las puntadas. -
Página 52: Table De Correspondance De L'aIguille, Du Tissu Et Du Fil
(Fait de plus petits trous que les grandes aiguilles standard). NOTE: ® 1.Pour de meilleurs résultats, n'utilisez que des aiguilles authentiques SINGER . 2.Remplacez régulièrement l'aiguille (chaque fois que vous commencez un nouveau vêtement) et/ ou quand le fil casse ou les points sautent. -
Página 53: Darning Plate
Install the darning plate as illustrated. For normal sewing, remove the darning plate. For free-motion sewing it is recommended to use a darning/embroidery foot, available as an optional accessory from authorized SINGER retailers. (See page 6 for part ® number of darning/embroidery foot) -
Página 54: Placa Cubre Impelentes
Para el bordado libre se recomienda usar un prensatelas pied à reprisage / broderie, disponible comme accessoire para zurcir/bordar, el cual es un accesorio opcional con los optionnel chez votre agent autoriser SINGER . (Voir page 6 ® Distribuidores Autorizados SINGER ®... -
Página 55: Inserting & Changing Needle
Inserting & Changing Needles Change the needle regularly, especially if it is showing signs of wear and causing problems. For best sewing results always use SINGER Brand Needles. ® Insert the needle as illustrated as follows: A. Loosen the needle clamp screw and tighten again after inserting the new needle. -
Página 56: Mantenimiento Y Solución De Problemas Colocación Y Cambio De Agujas
Pour obtenir les meilleurs résultats, toujours utiliser des SINGER . ® aiguilles fabriquées par SINGER . ® Inserta la aguja como se ilustra: Insérer l'aiguille tel qu'indiqué ci-contre: A. Afloje el tornillo de abrazadera de la aguja y vuélvalo... -
Página 57: Changing The Bulb
- Loosen screw (A) as illustrated. (1) - Remove the face plate (B). (2) - Unscrew the bulb and install a new one (C). (3) - Replace the face plate and tighten screw. ® Should there be any problem, consult your authorized SINGER retailer. -
Página 58: Cambio De La Bombilla
- Reposer la plaque frontale et visser la vis. - Volver a colocar la placa frontal y apretar el tornillo. ® Pour tout problème, consulter votre agent autoriser SINGER . En caso de cualquier duda, consulte a su Distribuidor ®... -
Página 59: Troubleshooting Guide
Troubleshooting Guide Problem Cause Correction Upper thread 1. The machine is not threaded correctly. 1. Rethread the machine. breaks 2. The thread tension is too tight. 2. Reduce the thread tension. (lower number) 3. The thread is too thick for the needle. 3. -
Página 60: Problemas Y Soluciones
Problemas y soluciones Problema Causa Solución El hilo superior se 1. La máquina está mal enhebrada. 1. Enhebrar la máquina correctamente. rompe 2. La tensión del hilo es demasiado fuerte. Disminuir la tensión del hilo superior. (número menor) 3. El hilo es demasiado grueso para la aguja. 3. -
Página 61: Guide De Dépannage
Guide de dépannage Problème Cause Solution Le fil supérieur 1. La machine n'est pas correctement enfilée. 1. Réenfiler la machine. casse 2. La tension du fil est trop élevée. 2. Réduire la tension. (valeur inférieure) 3. Le fil est trop gros pour l'aiguille. 3. - Página 62 021M1A0104 ) Apr/10 SINGER 1408/1409(M10A /M20A...