Registrarse
Cargar
Manuales
Marcas
Olympus Manuales
Accesorios para Camaras
PT-042
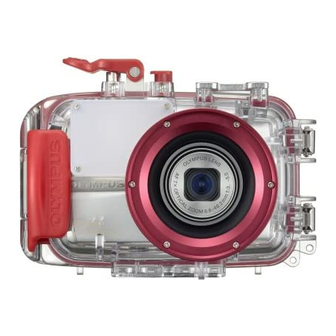
Olympus PT-042 Manuales
Manuales y guรญas de usuario para Olympus PT-042. Tenemos
1
Olympus PT-042 manual disponible para descarga gratuita en PDF: Manual De Instrucciones
Olympus PT-042 Manual De Instrucciones (268 pรกginas)
Marca:
Olympus
| Categorรญa:
Accesorios para Camaras
| Tamaรฑo: 15 MB
Tabla de contenido
ๆฅๆฌ่ช
8
ใฏใใใซ
2
ใไฝฟ็จใฎๅใซๅฟ ใใ่ชญใฟใใ ใใ
2
ๅฎๅ จใซใไฝฟใใใใ ใใใใซ
3
้ปๆฑ ใซใคใใฆ
4
ใซใกใฉใขใผใใฎ่จญๅฎใซใคใใฆ
5
ใๅใๆฑใใซใคใใฆ
6
Tabla de Contenido
8
1 ๆบๅใใใพใใใ
10
็ฎฑใฎไธญใ็ขบ่ชใใพใ
10
ๅ้จๅ็งฐ
11
ในใใฉใใใๅใไปใใพใ
12
ๅบๆฌๆไฝใใในใฟใผใใพใ
12
ใใญใใฏใฟใผใฎๆงใๆน
12
ใทใฃใใฟใผใฌใใผใฎๆผใๆน
13
ๆฎๅฝฑใขใผใใฎๅใๆใๆน
13
ใบใผใ ใใฟใณใฎไฝฟใๆน
13
2 ใใญใใฏใฟใผใฎไบๅใใงใใฏใใใพใใใ
15
ไฝฟ็จๅใฎไบๅใในใ
15
ไบๅใในใ
15
3 ใใธใฟใซใซใกใฉใ่ฃ ๅกซใใพใใใ
16
ใใธใฟใซใซใกใฉใใใงใใฏใใพใ
16
้ปๆฑ ใฎ็ขบ่ช
16
ๆฎๅฝฑๅฏ่ฝๆๆฐใฎ็ขบ่ช
16
ใใธใฟใซใซใกใฉใฎในใใฉใใใใฏใใใพใใใ
16
ใซใกใฉใๆบๅใใพใ
16
่ฃ ๅกซใงใใใใธใฟใซใซใกใฉใฏ
16
ใซใกใฉใฎ้ปๆบใๅ ฅใใพใ
16
ใซใกใฉใฎๅไฝใใงใใฏใใใพใ
17
ใใญใใฏใฟใผใ้ใใพใ
17
ใใธใฟใซใซใกใฉใ่ฃ ๅกซใใพใ
17
ใทใชใซใฒใซใ่ฃ ๅกซใใพใ
18
่ฃ ๅกซ็ถๆ ใฎใใงใใฏใใใพใ
18
ใใญใใฏใฟใผใๅฏ้ใใพใ
19
่ฃ ๅกซๅพใฎๅไฝใใงใใฏ
19
ๆฎๅฝฑใทใผใณ๏ผๆฎๅฝฑใขใผใใฎ็ขบ่ช
20
ใฌใณใบใญใฃใใใฎๅใไปใๆนใๅใใฏใใๆน
20
ๆถฒๆถใใผใใฎๅใไปใๆนใๅใใฏใใๆน
21
็ฎ่ฆๆคๆป
21
4 ๆฐดไธญใงใฎๆฎๅฝฑๆนๆณ
23
ในใใฉใใใฎไฝฟใๆน
23
ๆฎๅฝฑใใพใใใ
23
ๆถฒๆถใขใใฟใงๆฎๅฝฑ็ป้ขใ็ขบ่ชใใพใ
23
ใทใฃใใฟใผใฌใใผใ้ใใซๆผใใพใ
23
ใใฉใใทใฅๆฎๅฝฑๆใฎใๆณจๆ
23
5 ๆฐดไธญๆฎๅฝฑใทใผใณใซๅใใใๆฎๅฝฑ
24
ๆฐดไธญๆฎๅฝฑใทใผใณใฎ็จฎ้ก
24
Kๆฐดไธญใฏใคใ1
24
Lๆฐดไธญใฏใคใ2
24
Hๆฐดไธญใใฏใญ
24
ๆฎๅฝฑใทใผใณใฎ้ธๆๆนๆณ
25
ๆฐดไธญๆฎๅฝฑใทใผใณๆใฎAfใญใใฏใซใคใใฆ
25
6 ๆฎๅฝฑ็ตไบๅพใฎๅใๆฑใๆนๆณ
26
ๆฐดๆปดใๆญใๅใใพใใใ
26
ใใธใฟใซใซใกใฉใๅใๅบใใพใ
27
ใใญใใฏใฟใผใ็ๆฐดใงๆดใใพใ
28
ใใญใใฏใฟใผใไนพ็ฅใใใพใใใ
28
7 ้ฒๆฐดๆฉ่ฝใฎใกใณใใใณในใใใพใใใ
29
๏ผฏใชใณใฐใๅใใฏใใใพใ
29
๏ผฏใชใณใฐใฎๅใใฏใใใใ
29
๏ผฏใชใณใฐใๅใไปใใพใ
31
๏ผฏใชใณใฐใธใฎใฐใชในๅกๅธๆนๆณ
31
ๆถ่ๅใฏๅใๆฟใใพใใใ
32
English
46
Introduction
40
Please Read the Following Items before Use
40
For Safe Use
41
Batteries
42
Setting the Underwater Shooting Scene Mode
43
For Prevention of Water Leakage Accidents
43
Handling the Product
44
1 Preparations
48
Check the Contents of the Package
48
Names of the Parts
49
Install the Strap
50
Master the Basic Operation
50
Holding the Case
50
How to Press the Shutter Lever
51
How to Switch the Shooting Mode
51
How to Use the Zoom Buttons
51
How to Use the POWER Button
52
2 Advance Check of the Case
53
Advance Test before Use
53
Advance Test
53
3 Install the Digital Camera
54
Check the Digital Camera
54
Battery Confirmation
54
Confirmation of the Remaining Number of Pictures to be Taken
54
Remove the Hand Strap from the Digital Camera
54
Prepare the Camera
54
Applicable Digital Cameras
54
Turn on the Digital Camera
54
Check the Camera's Operation
55
Open the Case
55
Load the Digital Camera
55
Insertion of Silica Gel
56
Make Sure the Camera Is Loaded Properly
56
Seal the Case
57
Check the Operation of the Loaded Camera
57
Confirm the Shooting Scene and Shooting Mode
58
Mounting and Removing the Lens Cap
58
Installation and Removal of the LCD Hood
59
Installation
59
Removal
59
Perform the Final Checks
59
Visual Inspection
59
Final Test (Water Leakage Test)
60
4 Taking Pictures under Water
61
How to Use the Hand Strap
61
Taking Pictures
61
Confirm the Picture on the LCD Monitor
61
Press the Shutter Lever Gently
61
Cautions When Using the Flash
61
5 Underwater Shooting According to the Scene Type
62
Underwater Shooting Modes
62
Kunderwater Wide-Angle 1
62
Hunderwater Macro
62
How to Select the Shooting Scene
63
Locking AF During Underwater Shooting
63
6 Handling after Shooting
64
Wipe off any Waterdrop
64
Take out the Digital Camera
65
Wash the Case with Pure Water
66
Dry the Case
66
7 Maintaining the Waterproof Function
67
Remove the O-Ring
67
Removal of the O-Ring
67
Remove any Sand, Dirt, Etc
68
Install the O-Ring
69
How to Apply Grease to the O-Ring
69
Replace Consumable Parts
70
8 Appendix
71
Q & a on the Use of the PT-042
71
Specifications
76
Limitation de Garantie
78
Veuillez Lire Cette Section Avant D'utiliser le Produit
78
Pour une Utilisation Sรปre
79
Franรงais
84
1 Prรฉparatifs
86
Contrรดle du Contenu de L'emballage
86
Nomenclature des Piรจces
87
Mise en Place de la Courroie
88
Maรฎtriser le Fonctionnement de Base
88
Tenue du Caisson
88
Comment Appuyer Sur le Levier du Dรฉclencheur
89
Comment Changer le Mode de Prise de Vue
89
Comment Utiliser les Touches de Zoom
89
Utilisation de la Touche POWER
90
2 Contrรดle Prรฉliminaire du Caisson
91
Test Prรฉliminaire Avant Utilisation
91
Test Prรฉliminaire
91
3 Mise en Place de L'appareil Photo Numรฉrique
92
Contrรดle de L'appareil Photo Numรฉrique
92
Contrรดle de Batterie
92
Confirmation du Nombre de Vues Restant ร Prendre
92
Retirer la Courroie de L'appareil Photo Numรฉrique
92
Prรฉparer L'appareil Photo
92
Appareils Photo Numรฉriques Applicables
92
Mettre en Marche L'appareil Numรฉrique
92
Vรฉrifier le Fonctionnement de L'appareil Photo
93
Ouvrir le Caisson
93
Insรฉrer L'appareil Photo Numรฉrique
93
Introduction du Gel de Silice
94
Vรฉrifier aprรจs Insertion
94
Sceller le Caisson
95
Vรฉrifier le Fonctionnement de L'appareil Photo Installรฉ
95
Vรฉrifier le Mode de Prise de Vue et de Scรจne de Prise de Vue
96
Montage et Retrait du Bouchon D'objectif
96
Mise en Place et Retrait de la Coiffe de L'รฉcran ACL
97
Mise en Place
97
Retrait
97
Effectuer les Contrรดles Finaux
97
Inspection Visuelle
97
Test Final (Test de Fuite D'eau)
98
4 Prise de Vues Sous L'eau
99
Utilisation de la Dragonne
99
Prise de Vues
99
Confirmer la Vue Sur L'รฉcran ACL
99
Appuyer Doucement Sur le Dรฉclencheur
99
Prรฉcaution en Utilisant le Flash
99
5 Prise de Vue Sous-Marine Selon le Type de Scรจne
100
Types de Scรจnes Sous-Marines
100
Kgrand Angle Sous-Marin 1
100
Hgros Plan Sous-Marin
100
Comment Sรฉlectionner le Mode de Scรจne de Prise de Vue
101
Mรฉmorisation AF pendant la Prise de Vue Sous-Marine
101
6 Manipulation aprรจs la Prise de Vue
102
Essuyer Toute Goutte D'eau
102
Sortir L'appareil Photo Numรฉrique
103
Laver le Caisson Avec de L'eau Pure
104
Sรฉcher le Caisson
104
7 Maintien de la Fonction D'รฉtanchรฉitรฉ
105
Retirer le Joint
105
Retrait du Joint
105
Retirer Tout Grain de Sable, Poussiรจre, Etc
106
Installer le Joint
107
Comment Appliquer la Graisse Sur le Joint
107
Remplacer les Piรจces Consommables
108
8 Annexe
109
Q & R Sur L'utilisation du PT-042
109
Fiche Technique
114
Vorsichtsmaรnahmen bei der Bedienung
117
Einstellen der Unterwasser-Aufnahmeprogramme
119
Gewรคhrleistung der Wasserdichtigkeit
119
Deutsch
122
Vorbereitende Schritte
124
Packungsinhalt auf Vollstรคndigkeit Prรผfen
124
Bezeichnung der Teile
125
Anbringen der Handgelenkschlaufe
126
Grundsรคtzliche Bedienungsschritte
126
Richtiges Halten des Gehรคuses
126
Richtiges Betรคtigen des Auslรถserhebels
127
So Wรคhlen Sie ein Neues Aufnahmeprogramm
127
Verwendung der Zoomtasten
127
So Verwenden Sie die POWER-Taste
128
2 Systemcheck vor Benutzung des Gehรคuses
129
Erster Systemcheck vor dem Gebrauch
129
Erster Dichtigkeitstest
129
3 Einsetzen der Digitalkamera
130
รberprรผfen der Digitalkamera
130
Batterieleistung
130
รberprรผfen der noch Verfรผgbaren Restaufnahmen
130
Entfernen Sie den Trageriemen von der Digitalkamera
130
Bereiten Sie die Kamera vor
130
Geeignete Digitalkameras
130
Schalten Sie die Digitalkamera ein (ON)
130
รberprรผfen Sie die Kamera auf Einwandfreie Funktionsweise
131
รffnen des Gehรคuses
131
Setzen Sie die Digitalkamera ein
131
Einlegen des Silicagel-Beutels
132
รberprรผfen Sie die Kamera auf Einwandfreie Installation
132
Verschlieรen Sie das Gehรคuse
133
รberprรผfen Sie die Eingesetzte Kamera auf Einwandfreie Funktionsweise
133
รberprรผfen Sie das Aufnahmeprogramm/Motivprogramm
134
Anbringen und Abnehmen des Objektivschutzes
134
Anbringen und Entfernen der LCD-Monitor-Blendschutzhaube
135
Anbringen
135
Entfernen
135
Abschlieรende รberprรผfung des Gehรคuses
135
Visuelle Inspektion
135
4 Unterwasseraufnahmen
137
Verwendung der Handgelenkschlaufe
137
Aufnahmen machen
137
Bildรผberwachung auf dem LCD-Monitor
137
Drรผcken Sie den Auslรถserhebel Behutsam
137
Bitte Beim Fotografieren mit Blitz Beachten
137
5 Unterwasseraufnahme bei Verwendung eines Aufnahmeprogramms
138
Die Verfรผgbaren Unterwasser-Aufnahmeprogramme
138
Unterwasser-Weitwinkel 1
138
Unterwasser-Weitwinkel 2
138
H Unterwasser-Nahaufnahme
138
So Wรคhlen Sie ein Aufnahmeprogramm/Motivprogramm
139
Verwendung des Schรคrfespeichers bei Unterwasseraufnahmen
139
6 Behandlung nach dem Gebrauch
140
Entfernen von Wassertropfen
140
Entnehmen Sie die Digitalkamera
141
Reinigen des Gehรคuses mit Klarem Wasser
142
Abtrocknen des Gehรคuses
142
7 Wartung der Wasserdichtigkeit
143
Entfernen des O-Rings
143
Gehen Sie Hierzu wie Folgt vor
143
Reinigen des O-Rings
144
Anbringen des O-Rings
145
Einfetten des O-Rings
145
Austausch von Verschleiรteilen
146
8 Anhang
147
Technische Daten
152
Espaรฑol
160
Introducciรณn
154
Lea Atentamente las Siguientes Indicaciones Antes de Utilizar el Producto
154
Para un Uso Seguro
155
Para la Prevenciรณn de Accidentes por Filtraciรณn de Agua
157
Manipulaciรณn del Producto
158
1 Preparaciones
162
Compruebe el Contenido del Paquete
162
Nombres de las Piezas
163
Coloque la Correa
164
Conozca la Operaciรณn Bรกsica
164
Sostener la Caja
164
Cรณmo Presionar la Palanca del Disparador
165
Cรณmo Seleccionar el Modo de Toma Fotogrรกfica
165
Cรณmo Usar Los Botones de Zoom
165
Cรณmo Utilizar el Botรณn POWER
166
2 Verificaciรณn Anticipada de la Caja
167
Prueba Anticipada Antes de Su Uso
167
Prueba Anticipada
167
3 Instale la Cรกmara Digital
168
Compruebe la Cรกmara Digital
168
Confirmaciรณn de Pila
168
Confirmaciรณn del Nรบmero de Fotos que Se Pueden Hacer
168
Retire la Correa de Mano de la Cรกmara Digital
168
Prepare la Cรกmara
168
Cรกmaras Digitales Compatibles
168
Encender la Cรกmara Digital
168
Compruebe el Funcionamiento de la Cรกmara
169
Abra la Caja
169
Colocaciรณn de la Cรกmara Digital
169
Inserciรณn de Silicagel
170
Compruebe la Condiciรณn de Colocaciรณn de la Cรกmara
170
Selle la Caja
171
Compruebe la Operaciรณn de la Cรกmara Colocada
171
Confirme el Modo de Escena de Toma Fotogrรกfica y Toma
172
Fotogrรกfica
172
Colocar y Retirar la Tapa del Objetivo
172
Instalaciรณn y Retiro del Visera de LCD
173
Instalaciรณn
173
Extracciรณn
173
Realice las Verificaciones Finales
173
Inspecciรณn Visual
173
Prueba Final (Prueba de Filtraciรณn de Agua)
174
4 Tomando Fotos Debajo del Agua
175
Cรณmo Usar la Correa de Mano
175
Hacer Fotos
175
Confirme la Foto en el Monitor LCD
175
Pulse Suavemente la Palanca del Disparador
175
Precauciรณn al Usar el Flash
175
5 Toma Fotogrรกfica Debajo del Agua de Acuerdo al Tipo de Escena
176
Tipos de Escenas de Toma Fotogrรกficas Submarinas
176
Kgran Angular Submarino 1
176
Hmacro Submarino
176
Cรณmo Seleccionar el Modo de Toma Fotogrรกfica
177
Bloqueando el Enfoque Automรกtico (AF) Durante la Toma Fotogrรกfica Debajo del Agua
177
6 Manipulaciรณn Despuรฉs de la Toma Fotogrรกfica
178
Limpie Secando todo Vestigio de Agua
178
Retire la Cรกmara Digital
179
Lave la Caja con Agua Pura
180
Seque la Caja
180
7 Manteniendo la Funciรณn de Hermeticidad al Agua
181
Retire la Junta Tรณrica
181
Quite toda Arena, Suciedad, Etc
182
Coloque la Junta Tรณrica
183
Cรณmo Aplicar Grasa a la Junta Tรณrica
183
Reemplace las Piezas Consumibles
184
8 Apรฉndice
185
Preguntas y Repuestas sobre el Uso de la PT
185
Especificaciones
190
ๆฑ่ฏญ
198
ๆฃๆฅๅ ่ฃ ็ไธญ็ๅ ๅฎน
200
้จไปถๅ็งฐ
201
ๅฎ่ฃ ๆๅธฆ
202
ๆๆ้ฒๆฐดๆบๅฃณ็ๅงฟๅฟ
202
ๆๆ ทๆๅฟซ้จๆ
203
ๆๆ ท่ฝฌๆขๆๆๆจกๅผ
203
ๆๆ ทไฝฟ็จ่ฐ็ฆๆ้ฎ
203
ๆๆ ทไฝฟ็จPowerๆ้ฎ
204
2 ้ฒๆฐดๆบๅฃณ็้ขๅ ๆฃๆฅ
205
ไฝฟ็จๅ็้ขๅ ๆฃๆฅ
205
้ขๅ ๆฃๆฅ
205
3 ่ฃ ๅ ฅๆฐ็ ็ ง็ธๆบ
206
ๆฃๆฅๆฐ็ ็ ง็ธๆบ
206
็กฎ่ฎค็ตๆฑ
206
็กฎ่ฎคๅฏๆๆๅพๅๆฐ้
206
ๅไธๆฐ็ ็ ง็ธๆบไธ็ๆๅธฆ
206
็ ง็ธๆบ็ๅๅคๅทฅไฝ
206
ๅฏ่ฃ ๅ ฅๅชไบๅๅท็ๆฐ็ ็ ง็ธๆบ
206
ๆๅผๆฐ็ ็ธๆบ็็ตๆบ
206
ๆฃๆฅ็ ง็ธๆบ็ๆไฝๆ ๅต
206
ๆๅผ้ฒๆฐดๆบๅฃณ
207
่ฃ ๅ ฅๆฐ็ ็ ง็ธๆบ
207
ๆๅ ฅ็ก ่ถ
208
ๆฃๆฅ่ฃ ๅ ฅ็ถๅต
208
ๅฏๅฐ้ฒๆฐดๆบๅฃณ
209
่ฃ ๅ ฅๅ็ๆไฝๆฃๆต
209
ๆๆๅบๆฏ๏ผๆๆๆจกๅผ็็กฎ่ฎค
210
้ๅคด็็ๅฎ่ฃ ๅๅไธๆนๆณ
210
ๆ็ปๆฃๆฅ ๏ผๆผๆฐดๅฎ้ช
212
็จๆถฒๆถๆพ็คบๅฑ็กฎ่ฎคๆๆ็ป้ข
213
่ฝป่ฝปๆๅฟซ้จๆ
213
ไฝฟ็จ้ชๅ ็ฏๆๆๆถ็ๆณจๆไบ้กน
213
5 ไธๆฐดไธญๆๆๅบๆฏ็ธๅปๅ็ๆๆ
214
ๆฐดไธญๆๆๅบๆฏ็็ง็ฑป
214
Kๆฐดไธญๅนฟ่ง1
214
Lๆฐดไธญๅนฟ่ง2
214
Hๆฐดไธญ่ฟๆ
214
ๆๆๅบๆฏ็้ๆฉๆนๆณ
215
6 ๆๆๅ็ๅค็ๆนๆณ
216
ๆฆๅนฒๆฐดๆปด
216
ๅๅบๆฐ็ ็ ง็ธๆบ
217
็จๆธ ๆฐดๆธ ๆด้ฒๆฐดๆบๅฃณ
218
ๆพๅนฒ้ฒๆฐดๆบๅฃณ
218
7 ้ฒๆฐดๅ่ฝ็็ปดๆค
219
ๅไธO-็ฏ
219
ๅไธO-็ฏ็ๆนๆณ
219
ๅฎ่ฃ O-็ฏ
221
ๅฆไฝไฝฟ็จO-็ฏ่ฝฏ่
221
ๆดๆขๆถ่ๆง้ถไปถ
222
์กฐ์ ๋ง/ํ๊ตญ์ด
236
1 ์์ํ๊ธฐ
238
๊ตฌ์ฑํ ํ์ธ
238
๋ถํ ๋ช ์นญ
239
์คํธ๋ฉ ์ฐ๊ฒฐํ๊ธฐ
240
๊ธฐ๋ณธ ์กฐ์ ์ตํ๊ธฐ
240
์ผ์ด์ค ์ก๊ธฐ
240
์ ํฐ ๋ ๋ฒ ๋๋ฅด๋ ๋ฒ
241
์ดฌ์ ๋ชจ๋์ ์ ํ ๋ฐฉ๋ฒ
241
์ค ๋ฒํผ ์ฌ์ฉ๋ฒ
241
Power ๋ฒํผ ์ฌ์ฉ๋ฒ
242
2 ์ผ์ด์ค ์ฌ์ ์ ๊ฒ
243
์ฌ์ฉ ์ ์ฌ์ ๊ฒ์ฌ
243
์ฌ์ ๊ฒ์ฌ
243
3 ๋์งํธ ์นด๋ฉ๋ผ ์ฅ์ฐฉ
244
๋์งํธ ์นด๋ฉ๋ผ ํ์ธ
244
๋ฐฐํฐ๋ฆฌ ํ์ธ
244
๋จ์ ์ดฌ์ ๊ฐ๋ฅํ์ ํ์ธ
244
๋์งํธ ์นด๋ฉ๋ผ์์ ํธ๋ ์คํธ๋ฉ ์ ๊ฑฐ
244
์นด๋ฉ๋ผ๋ฅผ ์ค๋นํฉ๋๋ค
244
์ฅ์ฐฉ ๊ฐ๋ฅํ ๋์งํธ ์นด๋ฉ๋ผ
244
์นด๋ฉ๋ผ์ ์ ์์ ์ผญ๋๋ค
244
์นด๋ฉ๋ผ์ ์กฐ์์ํ ์ ๊ฒ
245
์ผ์ด์ค ์ด๊ธฐ
245
๋์งํธ ์นด๋ฉ๋ผ ์ฅ์ฐฉ
245
์ค๋ฆฌ์นด๊ฒ ์ฝ์
246
์ฅ์ฐฉ ์ํ ์ ๊ฒ
246
์ผ์ด์ค ๋ฐ๋ด
247
์ดฌ์ ์ /์ดฌ์ ๋ชจ๋์ ํ์ธ
247
๋ ์ฆ ๋๊ป์ ์ฅ์ฐฉ, ๋ถ๋ฆฌ
248
Lcd ํ๋์ ์ฅ์ฐฉ๊ณผ ๋ถ๋ฆฌ
249
์ต์ข ์ ๊ฒ ์ํ
249
์ก์ ๊ฒ์ฌ
249
์ต์ข ์ ๊ฒ
250
4 ์์ค ์ดฌ์
251
ํธ๋ ์คํธ๋ฉ ์ฌ์ฉ๋ฒ
251
์ฌ์ง ์ดฌ์
251
Lcd ๋ชจ๋ํฐ์์ ์ฌ์ง์ ํ์ธํฉ๋๋ค
251
์ ํฐ ๋ ๋ฒ๋ฅผ ๋ถ๋๋ฝ๊ฒ ๋๋ฃน๋๋ค
251
ํ๋์ ์ฌ์ฉ์ ์ฃผ์ ์ฌํญ
251
5 ์์ค ์ดฌ์ ์ ์ ๋ง์ถ์ด ์ดฌ์
252
์์ค ์ดฌ์ ์ ์ ์ข ๋ฅ
252
H ์์ค ์ ์ฌ
252
์ดฌ์ ์ ์ ์ ํ ๋ฐฉ๋ฒ
253
์์ค ์ดฌ์ ์ ์ผ๋ Af ์ ๊ธ์ ๊ดํด์
253
6 ์ดฌ์ ํ ์ทจ๊ธ ๋ฐฉ๋ฒ
254
๋ฌผ๊ธฐ ์ ๊ฑฐ
254
๋์งํธ ์นด๋ฉ๋ผ๋ฅผ ๊บผ๋ ๋๋ค
255
์ผ์ด์ค๋ ๋ฌผ์ ์ด์ฉํด ์ถฉ๋ถํ ์ธ์ฒํ ์ ์์ต๋๋ค
256
์ผ์ด์ค ๊ฑด์กฐ
256
7 ๋ฐฉ์๊ธฐ๋ฅ ์ ์ง๊ด๋ฆฌ
257
O-๋ง ์ ๊ฑฐ
257
O-๋ง ์ ๊ฑฐ ๋ฐฉ๋ฒ
257
์ด๋ฌผ์ง ์ ๊ฑฐ
258
O-๋ง ์ค์นํ๊ธฐ
259
O-๋ง์ ์คํ์ ๋ฐ๋ฅด๊ธฐ
259
์๋ชจํ ๊ต์ฒด
260
์ฌ์ฉ ๊ด๋ จ ์ง์ ๋ฐ ๋ต๋ณ
261
์ ํ ๊ท๊ฒฉ
266
Publicidad
Publicidad
Productos relacionados
Olympus PT-047
Olympus PT-046
Olympus PT-045
Olympus PT-041
Olympus PT-043
Olympus PT-030
Olympus PT-032
Olympus PT-034
Olympus PT-059
Olympus PT-058
Olympus Categorias
Cรกmaras Digitales
Objetivos Fotogrรกficos
Camaras
Grabadoras de Voz
Accesorios para Camaras
Mรกs Olympus manuales
Login
Entrar
O
Iniciar sesiรณn con Facebook
Iniciar sesiรณn con Google
Cargar el manual
Cargar desde el disco
Cargar desde la URL