Tabla de contenido
Publicidad
Enlaces rápidos
1
15402
P E R S O N A L
R O B O T
CAUTION - ELECTRIC TOY
– Not recommended for children under 10 years of age. As with
all electric products, precautions should be observed during the
handling and use to prevent electric shock.
MISE EN GARDE : JOUET ÉLECTRIQUE
– Non recommandé pour les enfants de moins de 10 ans. Comme
avec tous les autres produits électriques, des précautions
s'imposent durant la manipulation et l'utilisation afin d'éviter les
chocs électriques.
10 +
Instructions
Notice de montage
Instrucciones de construcción
Bauanleitung
Bouwinstructie
XL
TM
2.0
1
x
1800
Ni-MH
mAh
BATTERY INCLUDED / BATTERIE
FOURNIE / BATERÍA INCLUIDA /
AKKU ENTHALTEN / BATTERIJ
INBEGREPEN
WARNING:
Adapter cord could be a strangulation hazard.
Not for use by children under 3 years of age.
ATTENTION !
Le cordon de l'adaptateur présente un risque de strangulation.
Ne pas laisser à la portée des enfants de moins de 3 ans.
Publicidad
Tabla de contenido

Manuales relacionados para Meccano Meccanoid XL 2.0


Resumen de contenidos para Meccano Meccanoid XL 2.0
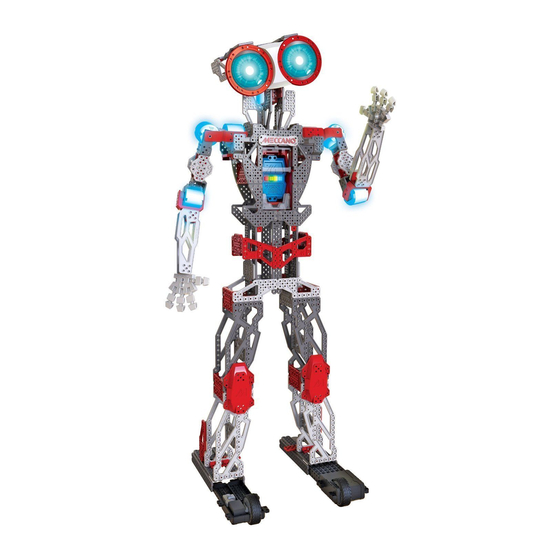
- Página 1 15402 P E R S O N A L R O B O T CAUTION - ELECTRIC TOY – Not recommended for children under 10 years of age. As with all electric products, precautions should be observed during the handling and use to prevent electric shock. 1800 Ni-MH MISE EN GARDE : JOUET ÉLECTRIQUE...
- Página 2 EN. Content: 1020 Parts, 1 AC/DC wall mount charger (10.4W), 1 Rechargeable Ni-MH battery 1800 mAh, 1 MeccaBrain™, 1 LED module, 3 hand EN. Building instructions for model#2 are available at www.meccano.com. FR. La notice de montage du modèle 2 est disponible sur www.meccano.com tools, 8 servos, 2 rear wheel assembly, 2 motor gear box assembly, 1 USB cable.
- Página 3 Before first-time use, charge the 6.0V NiMH rechargeable battery pack for 2 hours. Rechargeable battery should only be charged under adult supervision. Do not recharge a battery pack that shows leakage or corrosion. Immediately remove the battery charger from power supply after charging is finished (Charger light turned green). The product may have unexpected movement.
-
Página 4: Tabla De Contenido
TABLE OF CONTENTS • SOMMAIRE • Í NDICE • INHALTSVERZEICHNIS • INHOUD 1. ASSEMBLY ........................5-50 1. ASSEMBLAGE ........................5-50 1.1 PLUG IN AND DOWNLOAD YOUR LANGUAGE..............7 1.1 BRANCHEMENTS ET TÉLÉCHARGEMENT DE LA LANGUE............7 1.2 BUILD YOUR ROBOT ....................8-50 1.2 MONTAGE DU ROBOT .....................8-50 2. -
Página 5: Assembly
ASSEMBLY • ASSEMBLAGE • MONTAJE • ZUSAMMENBAU • MONTAGE M904 M104 B696 M216 C935 M008 M901 M027 A911 (0111) M008 M027 M929 A247 (0147D) M017 M928 M002 x322 A411 (0111A) M019 M016 A511 M046 (0111C) M119 M256 M217 M006 M222 M255 M003 M925... - Página 6 CONSTRUCTION TIPS / ASTUCES DE CONSTRUCTION TIPS DE CONSTRUCCIÓN / TIPPS ZUM BAUEN / MONTAGETIPS...
-
Página 7: Plug In And Download Your Language
For instructions in other languages, visit www.meccano.com • Connect USB cable to computer. Pour télécharger les instructions dans une autre langue, rends-toi sur www.meccano.com • Insert micro USB end into the port on the Para consultar las instrucciones en otros idiomas, visita www.meccano.com MeccaBrain •... -
Página 8: Build Your Robot
1.2 BUILD YOUR ROBOT • MONTAGE DU ROBOT • MONTA TU ROBOT • DEINEN ROBOTER ZUSAMMENBAUEN • BOUW JE EIGEN ROBOT NOTE: HOW TO CHARGE MECCANOID XL2.0 • Disconnect and remove battery from Meccanoid™. • Connect battery charger connector into battery pack. •... - Página 50 HOW TO INSTALL BATTERIES EINLEGEN DES AKKUS 1. Open the battery door with a Meccano tool. 1. Batteriefachabdeckung mit einem Meccano-Werkzeug 2. DO NOT remove or install batteries using sharp or öffnen. 2. Akkus NICHT mit scharfen metal tools. 3. Install battery pack as shown. 4. Replace oder metallenen Gegenständen entfernen...
-
Página 51: Connect The Electronics
2.1 CONNECT THE ELECTRONICS Plug in Plug in servos and left foot motor LED module into ports 1, 2 and 3. and right foot motor. Right Arm Servo Neck Servo Left Arm Servo Left Foot Motor Right Foot Motor Plug in speaker. Plug in battery cable. - Página 52 2.1 CONNECT THE ELECTRONICS Speaker To MeccaBrain port 2 To MeccaBrain port 1 To MeccaBrain port 3 To left shoulder servo To right shoulder servo...
-
Página 53: Play
PLAY 3.1 LET’S PLAY MeccaBrain 1 Meccanoid will start speaking and do a systems check to verify connections. Microphone GREEN 2 If connections are correct, the robot will restart, and then introduce himself. L.I.M. Library Note: If connections are not correct, the robot will let you know. Return to step 146 and review connections. 3 Meccanoid will ask you to test its voice commands. -
Página 54: Command Card
3.2 COMMAND CARD VOICE CONTROL TIPS 1 Say “Main Menu”, “Play a Game”, “Teach Me Something” to navigate between the voice command sections, shown below. 2 Then you can say a voice command from the section that you have selected. 3 Speak clearly when giving a voice command. -
Página 55: Voice Commands
3.3 VOICE COMMANDS Say: Record L.I.M.™ Say: Forward/ Backward Say: Charades Say: Introduce yourself Meccanoid will: Tell you how to Meccanoid will: Guide you through the basic Meccanoid will: Roll forwards or program using Learned Intelligent Meccanoid will: Introduce himself. instructions of the Game. -
Página 56: Program With App
Spin Master is not responsible for any damage caused to electronic devices through improper use. *COMPATIBLE WITH SELECT IOS AND SELECT ANDROID DEVICES (SOLD SEPARATELY). CHECK WWW. MECCANO.COM FOR A LIST OF COMPATIBLE DEVICES AND SYSTEM REQUIREMENTS, TO DETERMINE IF YOUR DEVICE IS COMPATIBLE. SPIN MASTER RESERVES THE RIGHT TO WITHDRAW THE APPLICATION AT ANY GIVEN TIME AND WITHOUT NOTICE. -
Página 57: Réalisation Des Branchements
2.1 RÉALISATION DES BRANCHEMENTS Branche les servomoteurs Branche le et le module LED dans moteur du pied gauche... les ports 1, 2 et 3. et celui du pied droit. Servomoteur du bras droit Servomoteur du cou Servomoteur du bras gauche Moteur du pied gauche Moteur du pied droit Branche le haut-parleur. -
Página 58: Haut-Parleur
2.1 RÉALISATION DES BRANCHEMENTS Haut-parleur VERS port MeccaBrain VERS port MeccaBrain VERS port MeccaBrain VERS servomoteur épaule gauche VERS servomoteur épaule droite... -
Página 59: Jeu
3.1 JOUONS ! MeccaBrain 1 Meccanoid commence à parler et vérifie ses systèmes afin de détecter d’éventuels problèmes de branchements. Micro VERT 2 Si aucun problème n’est détecté, il redémarre, te demande ton nom, puis se présente à son tour. Bibliothèque L.I.M. -
Página 60: Liste Des Commandes
CONSEILS POUR L’UTILISATION DES COMMANDES VOCALES 3.2 LISTE DES COMMANDES 1 Dis « Menu principal », « Jouons à un jeu », « Apprends-moi quelque chose » ou pour parcourir les commandes vocales, indiquées ci-dessous. 2 Prononce alors l’une des commandes vocales de la catégorie que tu as choisie. 3 Parle clairement lorsque tu prononces une commande vocale ;... -
Página 61: Commandes Vocales
3.3 COMMANDES VOCALES Dis : Dis : Enregistre un mouvement L.I.M.™ Dis : Imitations Marche avant/Marche arrière Dis : Présente-toi Meccanoid va : T’expliquer comment le Meccanoid va : Te présenter les règles de base du Meccanoid va : Avancer ou reculer. Meccanoid va : Se présenter. -
Página 62: Programmation Via L'APplication
2 & 3 nécessitent un appareil mobile non fourni.) Application gratuite disponible sur : www.meccano.com IMPORTANT ! RENDS-TOI SUR WWW.MECCANO.COM POUR VÉRIFIER SI TON APPAREIL EST COMPATIBLE. (PEUT NE PAS FONCTIONNER AVEC TOUS LES APPAREILS*) Meccanoid communique avec les appareils mobiles en Bluetooth®... -
Página 63: Conecta Los Componentes Electrónicos
2.1 CONECTA LOS COMPONENTES ELECTRÓNICOS Conecta los servos y Conecta el motor del pie el módulo LED en los izquierdo puertos 1, 2 y 3. y el motor del pie derecho Servo del brazo derecho Servo del cuello Motor del pie Motor del pie Servo del brazo izquierdo izquierdo... - Página 64 2.1 CONECTA LOS COMPONENTES ELECTRÓNICOS Altavoz MeccaBrain™ puerto 2 MeccaBrain™ puerto 1 MeccaBrain™ puerto 3 Servo del hombro izquierdo Servo del hombro derecho...
-
Página 65: Cómo Jugar
CÓMO JUGAR 3.1 VAMOS A JUGAR MeccaBrain 1 Meccanoid comenzará a hablar y comprobará las conexiones mediante un sistema de verificación. Micrófono VERDE 2 Si las conexiones son correctas, el robot se reinicia y luego se presentará. Biblioteca M.I.A. Nota: Si las conexiones no son correctas, el robot te lo hará saber. Volver al paso 146 y revisar las conexiones. 3 Meccanoid te pedirá... -
Página 66: Guía De Botones
3.2 TARJETA DE COMANDOS CONSEJOS DE CONTROL DE VOZ 1 Dí “Menú principal”, “Juega a un juego” o “Enséñame algo” para navegar entre las secciones de comandos de voz que se muestran a continuación. 2 A continuación, se puede decir un comando de voz de la sección que has seleccionado. 3 Habla con claridad cuando des un comando de voz. -
Página 67: Comandos De Voz
3.3 COMANDOS DE VOZ Dí: Graba un movimiento M.I.A. Dí: Mímica* Dí: Andar hacia adelante/hacia atrás Dí: Preséntate* Meccanoid: te dirá cómo grabar Meccanoid: te guiará a través de las instrucciones del Meccanoid: andará hacia adelante o usando el Movimiento Inteligente Meccanoid: se presentará. -
Página 68: Programar Con Aplicación
(se necesita un dispositivo inteligente no incluido para el punto 2 y 3). App gratuita disponible en www.meccano.com ¡IMPORTANTE! CONSULTA EN LA WEB WWW.MECCANO.COM PARA COMPROBAR SI TU DISPOSITIVO ES COMPATIBLE (ES POSIBLE QUE NO FUNCIONE CON TODOS LOS DISPOSITIVOS*) Meccanoid se comunica con tu smartphone o tablet a través de Bluetooth... - Página 69 2.1 ELEKTRONISCHE TEILE VERBINDEN Servos und LED-Modul mit Anschlüssen 1, 2 und Motor für linken Fuß und 3 verbinden. Motor für rechten Fuß anschließen Servo für rechten Arm Servo für Hals Servo für linken Arm Motor für linken Fuß Motor für rechten Fuß Lautsprecher anschließen.
- Página 70 2.1 ELEKTRONISCHE TEILE VERBINDEN Lautsprecher In MeccaBrain™-Anschluss 2 In MeccaBrain™-Anschluss 1 In MeccaBrain™-Anschluss 3 An Servo für linke Schulter An Servo für rechte Schulter...
- Página 71 SPIELEN 3.1 SO WIRD GESPIELT MeccaBrain™ 1 Meccanoid spricht und nimmt eine Systemprüfung vor, um die Verbindungen zu bestätigen. Mikrofon GRÜN 2 Wenn alles stimmt, führt der Roboter einen Neustart durch und stellt sich dann vor. L-I-M- Bibliothek Hinweis: Wenn die Verbindungen nicht stimmen, teilt dir der Roboter das mit. Kehre zu Schritt 146 zurück und überprüfe die Verbindungen.
- Página 72 3.2 BEFEHLSKARTE TIPPS ZUR SPRACHSTEUERUNG 1 Mit dem Sprachbefehl „Hauptmenü“, „Spiel ein Spiel“ oder „Bring mir etwas bei“ kann zwischen den unten stehenden Sprachbefehlsabschnitten gewechselt werden. 2 Einen Sprachbefehl aus dem ausgewählten Abschnitt sagen. 3 Beim Geben eines Sprachbefehls immer deutlich sprechen. Nicht zu schnell und nicht zu langsam sprechen. BEFEHLSKARTE SPIEL EIN SPIEL HAUPTMENÜ...
- Página 73 3.3 SPRACHBEFEHLE Sag „L-I-M™ aufnehmen“. Sag: „Pantomime“* Sag: „Vorwärts“/„Rückwärts“ Sag: „Stell dich vor“* Meccanoid: erklärt dir das Meccanoid: erklärt dir die Spielregeln. Er setzt all Meccanoid: rollt vorwärts oder Programmieren einer L.I.M.™-Bewegung. Meccanoid: stellt sich vor. rückwärts. seine Schauspielkünste ein, um eine Person, einen Ort oder ein Ding darzustellen, und du musst erraten, was L.I.M.™...
- Página 74 (2 und 3 erfordern ein Smart-Gerät [nicht enthalten]) Die kostenlose App findest du auf www.meccano.com WICHTIG! AUF WWW.MECCANO.COM KANNST DU ÜBERPRÜFEN, OB DEIN GERÄT KOMPATIBEL IST. (U. U. NICHT FÜR ALLE GERÄTE GEEIGNET*) *MIT AUSGEWÄHLTEN IOS- UND ANDROID-GERÄTEN KOMPATIBEL (SEPARAT ERHÄLTLICH). AUF WWW.
-
Página 75: De Elektronica Aansluiten
2.1 DE ELEKTRONICA AANSLUITEN Sluit de motor voor de Sluit de servo’s en de LED-module aan op linkervoet en poorten 1, 2 en 3. de motor voor de rechtervoet aan. Servo rechterarm Servo hals Servo linkerarm Motor linkervoet Motor rechtervoet Sluit de luidspreker aan. - Página 76 2.1 DE ELEKTRONICA AANSLUITEN Luidspreker Naar MeccaBrain™-poort 2 Naar MeccaBrain™-poort 1 Naar MeccaBrain™-poort 3 Naar servo linkerschouder Naar servo rechterschouder...
- Página 77 SPELEN 3.1 LATEN WE SPELEN MeccaBrain 1 Meccanoid begint te praten en voert een systeemcontrole uit om de aansluitingen te controleren Microfoon GROEN 2 Als de verbindingen correct zijn, zal de robot opnieuw opstarten en zichzelf voorstellen. G.I.B. Bibliotheek Opmerking: als de aansluitingen niet kloppen, laat de robot je dat weten. Ga terug naar stap 146 en controleer de aansluitingen.
-
Página 78: Commando-Kaart
3.2 COMMANDO-KAART TIPS VOOR SPRAAKBESTURING 1 Zeg “hoofdmenu”, “speel een spel” of “leer me iets” om te navigeren tussen de spraakbesturingssecties die hieronder staan. 2 Je kunt een spraakcommando geven uit het gedeelte dat je hebt geselecteerd. 3 Spreek duidelijk als je een spraakcommando geeft. Niet te snel, niet te langzaam. COMMANDO-KAART SPEEL EEN SPEL HOOFDMENU... - Página 79 3.3 SPRAAKOPDRACHTEN Zeg: neem G.I.B.™ op. Zeg: imitatiespel* Zeg: voorwaarts/achterwaarts Zeg: Stel jezelf voor* Meccanoid: vertelt je hoe je kunt Meccanoid: legt de basisregels van het spel uit. Hij Meccanoid: rolt voor- of achteruit. programmeren met geleerde intelligente Meccanoid: stelt zichzelf voor doet zijn beste imitatie van een persoon, plaats of ding bewegingen, oftewel G.I.B.™...
- Página 80 Meccanoid communiceert met je smartphone via Bluetooth ® BELANGRIJK! GA NAAR WWW.MECCANO.COM OM ERACHTER TE KOMEN OF JE APPARAAT COMPATIBEL IS. (WERKT MOGELIJK NIET OP ALLE APPARATEN*) Spin Master is niet verantwoordelijk voor enige schade aan elektronische apparatuur die is veroorzaakt door onjuist gebruik.
-
Página 81: Consumer Information
• Promptly remove dead batteries from the toy. tipo equivalente. wipe with a scratchless cloth. Do not put any foreign contenu peut différer des images. Meccano se réserve le • Dispose of used batteries properly. objects in the USB port or sensors. Do not pull hard droit de supprimer le site Internet www.meccano.com à... - Página 82 Maak de sensoren schoon met een zachte pueden arañar el acabado y bloquear los sensores. No kann von den Bildern abweichen. Meccano behält sich • NOOIT door elkaar. doek. Plaats geen vreemde objecten in de USB-poort of de sumerjas el juguete en agua.
- Página 83 Requires 1 x Ni-MH 1800 mAh battery muss das Netzteil gemäß den örtlichen Recyclingbestimmungen für pas être remplacé ; s’il est endommagé, il est à mettre au tiene sobre el medio ambiente y la salud humana, Elektrogeräte entsorgt werden. pack (included). Batteries or battery packs rebut conformément aux réglementations locales concernant le se reducirán los recursos necesarios para fabricar Netzteile und Stromquellen für Spielzeuge dürfen nicht als...
- Página 84 AC/DC wall mount charger (10.4W) • Chargeur mural CA/CC (10,4 W) • Cargador con toma de pared ca/cc (10,4W) • WS/GS-Wand-Ladegerät (10,4 W) • AC/DC-oplader (10,4 W) EN. Spin Master International SARL, hereby declares that this Meccanoid XL 2.0 is in compliance with the essential 100-240V~50/60Hz 7.5V -- 1000mA requirements and other relevant provisions of Directive 1999/5/EC.