Tabla de contenido
Publicidad
Idiomas disponibles
Idiomas disponibles
Enlaces rápidos
MULTIWINE
PLUS
INSTRUCTIONS POUR
L'UTILISATEUR
LIRE AVEC ATTENTION CE MANUEL ET LE
CONSERVERPRÈS DU MEUBLE AVEC SOIN
ISTRUZIONI PER L'USO
LEGGERE ATTENTAMENTE E CONSERVARE CON CURA
ASSIEME AL MOBILE
USER INSTRUCTIONS
READ CAREFULLY AND KEEP WITH THE CABINET
BETRIEBSANLEITUNGFÜR
BETREIBER
SORGFÄLTING LESEN UND MIT DEM MÖBEL
AUFBEWAHREN
INSTRUCCIONES DE USO PARA
EL USUARIO
LEER ATENTAMENTE Y CONSERVARCON ESMERO
JUNTO AL MUEBLE
INSTRUÇOES PARA O USO
LER COM ATENÇAO E GUARDAR COM CUIDADO JUNTO
AO MÓVEL
N° DOC. UM0000294
REV. "B" - 10-07.19
Publicidad
Tabla de contenido

Resumen de contenidos para Bonnet Neve MULTIWINE PLUS Serie
- Página 1 MULTIWINE PLUS INSTRUCTIONS POUR L’UTILISATEUR LIRE AVEC ATTENTION CE MANUEL ET LE CONSERVERPRÈS DU MEUBLE AVEC SOIN ISTRUZIONI PER L’USO LEGGERE ATTENTAMENTE E CONSERVARE CON CURA ASSIEME AL MOBILE USER INSTRUCTIONS READ CAREFULLY AND KEEP WITH THE CABINET BETRIEBSANLEITUNGFÜR BETREIBER SORGFÄLTING LESEN UND MIT DEM MÖBEL AUFBEWAHREN INSTRUCCIONES DE USO PARA...
-
Página 2: Simbologia Del Manuale
SIMBOLOGIA DEL MANUALE SYMBOLS IN THE MANUAL SYMBOLES DU MANUEL SYMBOLE IN DER ANLEITUNG SÍMBOLOS DEL MANUAL Nel manuale sono utilizzati alcuni simboli per richiamare l’attenzione del lettore e mettere in evidenza alcuni aspetti particolarmente importanti della trattazione. Qui di seguito il significato dei diversi simboli utilizzati. The manual uses some symbols to draw the reader’s attention and highlight certain aspects which are particularly important to cover. -
Página 3: Description Générale Allgemeine Beschreibung Descripción General
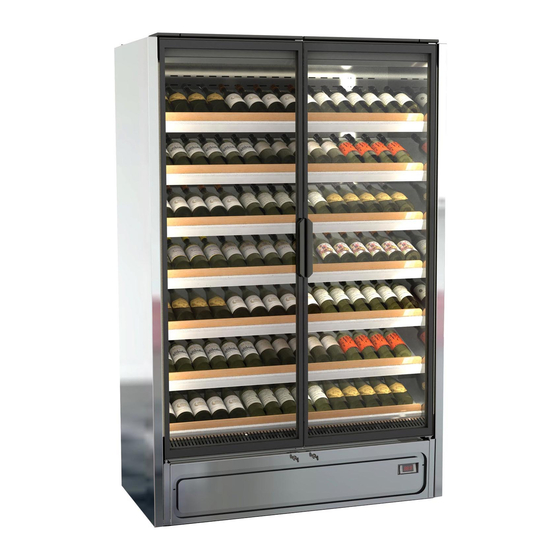
DESCRIZIONE GENERALE OVERALL DESCRIPTION DESCRIPTION GÉNÉRALE ALLGEMEINE BESCHREIBUNG DESCRIPCIÓN GENERAL MANIGLIE VETRO FRONTALE PIEDINI REGOLABILI HANDLES FRONT GLASS ADJUSTABLE FEET POIGNÉES VITRE FRONTALE PIEDS RÉGLABLES GRIFFE FRONTSCHEIBE VERSTELLBARE FÜSSE MANILLAS VIDRIO FRONTAL SISTEMA DI CHIUSURA CLOSURE SYSTEM GRIGLIA POSTERIORE SYSTÈME DE FERMETURE REAR GRID TÜRSCHLIESSSYSTEM GRILLE ARRIÈRE... - Página 4 SPECIFICHE TECNICHE TECHNICAL SPECIFICATION DÉTAILS TECHNIQUES TECHNISCHE SPEZIFIKATIONEN ESPECIFICACIONES TÉCNICAS SPECIFICHE TECNICHE MULTIWINE PLUS 125 MULTIWINE PLUS 125 TECHNICAL SPECIFICATION DÉTAILS TECHNIQUES MULTIWINE PLUS 125 TECHNISCHE SPEZIFIKATIONEN MULTIWINE PLUS 125 ESPECIFICACIONES TÉCNICAS MULTIWINE PLUS 125...
- Página 5 SPECIFICHE TECNICHE MULTIWINE PLUS 188 MULTIWINE PLUS 188 TECHNICAL SPECIFICATION DÉTAILS TECHNIQUES MULTIWINE PLUS 188 TECHNISCHE SPEZIFIKATIONEN MULTIWINE PLUS 188 ESPECIFICACIONES TÉCNICAS MULTIWINE PLUS 188...
- Página 6 SPECIFICHE TECNICHE MULTIWINE PLUS 250 MULTIWINE PLUS 250 TECHNICAL SPECIFICATION DÉTAILS TECHNIQUES MULTIWINE PLUS 250 TECHNISCHE SPEZIFIKATIONEN MULTIWINE PLUS 250 ESPECIFICACIONES TÉCNICAS MULTIWINE PLUS 250...
- Página 7 Dimensioni esterne (lunghezza x profondità x Altezza) (mm) External dimensions (Width x depth x High) (mm) Dimensions externes (largeur x profondeur x hauteur) (mm) 1330 x 721 x 2055 1954 x 721 x 2055 2578 x 721 x 2055 Aussenabmessungen (Breite x Tiefe x Höhe) (mm) Dimensiones exteriores (ancho x profundidad x altura) (mm) Volume Lordo (litri) / Gross volume (Liters) /...
-
Página 8: Schema Elettrico
SCHEMA ELETTRICO WIRING DIAGRAM SCHÉMA ÉLECTRIQUE SCHALTPLAN ESQUEMA ELÉCTRICO SCHEMA ELETTRICO MULTIWINE PLUS 125 MULTIWINE PLUS 125 WIRING DIAGRAM SCHÉMA ÉLECTRIQUE MULTIWINE PLUS 125 SCHALTPLAN MULTIWINE PLUS 125 ESQUEMA ELÉCTRICO MULTIWINE PLUS 125... - Página 9 SCHEMA ELETTRICO MULTIWINE PLUS 188 MULTIWINE PLUS 188 WIRING DIAGRAM SCHÉMA ÉLECTRIQUE MULTIWINE PLUS 188 SCHALTPLAN MULTIWINE PLUS 188 ESQUEMA ELÉCTRICO MULTIWINE PLUS 188 SCHEMA ELETTRICO MULTIWINE PLUS 250 MULTIWINE PLUS 250 WIRING DIAGRAM SCHÉMA ÉLECTRIQUE MULTIWINE PLUS 250 SCHALTPLAN MULTIWINE PLUS 250 ESQUEMA ELÉCTRICO MULTIWINE PLUS 250...
- Página 10 DISPOSITIVO DEVICE DISPOSITIF GERÄT DISPOSITIVO Centralina elettronica Electronic control Central électronique Elektronisches Aggregat Centralita electrónica Compressore Compressor Compresseur Kompressor Compresor Cavo spina Plug cable Câble fiche Steckerkabel Cable de clavija Lampada led interno vasca Tank inner led light Lampe à LED à l’intérieur de la cuve Led-Lampe im Innern der Wanne Lámpara led e interior recipiente Alimentatore switching...
-
Página 11: Identificazione Apparecchiatura
Il presente manuale è stato realizzato in modo semplice e razionale affinchè leggendolo conosciate a fondo il vostro mobile. Si raccomanda di leggere attentamente il contenuto e di conservarlo unitamente al mobile. Il costruttore declina ogni responsabilità per danni causati a persone o cose dovuti alla mancata osservanza delle avvertenze contenute in questo manuale. - Página 12 SICUREZZA AVVERTENZA APPARECCHI UTILIZZANO REFRIGERANTE R290 (PROPANO) Il refrigerante R290 è un gas naturale senza effetti sull’ambiente, ma infiammabile. È quindi indispensabile accertarsi che tutti i tubi del circuito refrigerante non siano danneggiati, prima di collegare l’apparecchio alla rete di alimentazione. Ogni 8 gr.
-
Página 13: Indicazioni Di Sicurezza
INDICAZIONI DI SICUREZZA • Leggete attentamente il manuale e rispettate i contenuti prima di installare ed utilizzare l’apparecchio. • Conservate sempre il libretto d’istruzione e in caso di vendita dell’apparecchio consegnatelo al nuovo proprietario. • Questo apparecchio è molto pericoloso se lasciato esposto alla pioggia, ai temporali ed alle intemperie con il cavo di alimentazione inserito alla presa di corrente. - Página 14 INSTALLAZIONE STOCCAGGIO E DISIMBALLO ATTENZIONE! Utilizzare guanti protettivi durante le operazioni di disimballaggio e installazione. L’unità viene spedita ancorata su base in legno e protetta da montanti angolari e da involucro in nylon. Tenere gli imballaggi lontano dai bambini. Per ogni movimentazione successiva della vetrina è consigliato l’utilizzo della pedana in legno.
- Página 15 L’ apparecchiatura, corredata o meno del proprio imballo, deve essere stoccata con cura all’interno dei magazzini o locali al riparo da interperie, agenti atmosferici e dall’esposizione diretta dei raggi del sole ad una temperatura compresa tra 0 e +40 °C. -15-...
- Página 16 SCELTA DEL LUOGO DI POSIZIONAMENTO Per garantire un esercizio senza guasti del banco frigorifero, osservare assolutamente i seguenti punti: • Non posizionare il banco refrigerato all’aperto. • Non posizionare il banco refrigerato in prossimità di sorgenti termiche ad es. termosifoni. •...
- Página 17 GRIGLIA ANTERIORE Dopo aver posizionato il banco, avvitare la griglia anteriore con le viti che trovate in dotazione all’interno del banco. CARICAMENTO È fondamentale non superare i limiti di carico indicati al fine di non alterare la circolazione corretta di aria ed evitare così una temperatura del prodotto più elevata. EVITARE: •...
-
Página 18: Carico Max Su Ripiani
CARICO MAX SU RIPIANI 150 Kg / SQM 150 Kg / SQM 150 Kg / SQM 150 Kg / SQM 150 Kg / SQM 150 Kg / SQM Attenzione! È assolutamente necessario rispettare i carichi max indicati (Kg) per ciascun ripiano onde evitare la deformazione o rottura. ILLUMINAZIONE Attenzione! Durante le fasi di caricamento del prodotto, manutenzione e pulizia vasca;... -
Página 19: Ulteriori Informazioni
ULTERIORI INFORMAZIONI Dopo aver tolto l’imballo procedere ad una pulizia accurata di tutto il banco, utilizzando acqua tiepida e sapone neutro al 5% ed asciugandolo poi con un panno morbido; per le parti in vetro usare unicamente prodotti specifici evitando l’uso di acqua che può... -
Página 20: Messa In Servizio
MESSA IN SERVIZIO Se il banco refrigerato è stato fortemente inclinato a causa del posizionamento o dei montaggio accessori, attendere minimo 3 ore prima della messa in funzione in modo da permettere all’olio lubrificante di raccogliersi nel compressore. Se questa prescrizione non viene osservata, la macchina frigorifera a compressione può essere danneggiata irreparabilmente. -
Página 21: Pulizia Esterna
PULIZIA PULIZIA ESTERNA Per una buona conservazione delle superfici dell'apparecchio operare come segue: MOBILE ESTERNO: Quando è necessario pulire delicatamente il mobile esterno usare un panno morbido imbevuto di soluzione di acqua e detersivo neutro. SUPERFICI IN ACCIAIO INOSSIDABILE: Lavare con acqua tiepida e saponi neutri ed asciugare con panno morbido;... - Página 22 REGOLAZIONE TEMPERATURA E COMANDI Questo apparecchio frigorifero è equipaggiato di una centralina elettronica per il mantenimento automatico della temperatura all’interno della vasca. La centralina è tarata in fabbrica e non deve essere toccata dall’utilizzatore. Soltanto nel caso in cui la temperatura media interna risulti non soddisfacente, si può agire come segue: La centralina è...
-
Página 23: Inconvenienti E Soluzioni
INCONVENIENTI E SOLUZIONI Gli inconvenienti di funzionamento che si riscontrano negli apparecchi frigoriferi sono dovuti, nella maggioranza dei casi ad installazione elettrica difettosa. Si tratta quindi di cause che possono essere facilmente eliminate sul posto. L’APPARECCHIO NON FUNZIONA CAUSA SOLUZIONE PERSONALE AUTORIZZATO Controllare che non manchi corrente Inserire la spina... - Página 24 INSERIMENTO SONDA PT1000 (OPZIONAL) Il banco può aver in dotazione la sonda PT1000. Per accedere a tale sonda, seguire le seguenti indicazioni: 1. Rimuovere la copertura posteriore (A). 2. Far passare la sonda PT1000 (B) nel foro della coprtura (A). 3.
-
Página 25: Equipment Identification
This manual was drafted in a simple and rational manner to allow you to fully understand your equipment. You are advised to read the content carefully and keep it with the equipment. The manufacturer cannot be held in any way liable for damage caused to people or property due to non-compliance with warnings contained in this manual. - Página 26 SAFETY SAFETY WARNINGS FOR THE APPLIANCES USING R290 COOLING FLUID (PROPANE) Propane is a natural gas that doesn’t affect the environment but is inflammable. It is therefore essential to ensure that all refrigerant pipes are not damaged before connecting the appliance to the mains supply. Every 8 gr. Of refrigerant, the installation room must have a 1 m³...
-
Página 27: Safety Information
SAFETY INFORMATION • Read the manual carefully and adhere to the contents before installing and using the appliance. • Always keep the instructions manual safe and if the appliance is sold, hand it over to the new owner. • This equipment is very dangerous if left exposed to rain, thunderstorms or bad weather with the power cable plugged into the power socket. - Página 28 INSTALLATION STORAGE AND DISMANTLING WARNING! Use protective gloves during unpacking and installation operations. The unit is shipped anchored onto a wooden base and protected by corner posts, cardboard top and nylon wrapping. Keep all packaging away from children. For each subsequent handling of the cabinet, the use of the wooden platform is recommended.
- Página 29 The appliance, equipped or not with its packaging, must be carefully stored inside warehouses or premises protected from bad weather, atmospheric agents and direct exposure to sunlight at a temperature between 0 and +40 °C. -29-...
- Página 30 SELECTING THE PLACE OF INSTALLATION In selecting the place of installation, ensure that the following instructions are observed, this being vital for proper and troublefree working of the cabinet: • Do not install the cabinet outdoors. • Do not install the cabinet in the vicinity of heating radiators or other heat sources. •...
- Página 31 FRONT GRID Having positioned the counter, screw in the front grid with the screws found supplied inside the counter. LOADING It is fundamental not to exceed the load limits indicated to avoid altering correct air circulation and thereby avoid a higher product temperature. WARNING: •...
- Página 32 MAX LOAD ON SHELVES 150 Kg / SQM 150 Kg / SQM 150 Kg / SQM 150 Kg / SQM 150 Kg / SQM 150 Kg / SQM Attention! It is strictly necessary to comply with the max loads indicated (Kg) for each shelf to avoid deformation or breakage.
-
Página 33: Further Information
FURTHER INFORMATION Take out packaging and clean all the cabinet using warm water together with 5% of neutral soap then dry it with a soft cloth; for the glass parts only use specific products, avoiding the use of water which can leave on the glasses limestone residues. It is fundamental to comply with the distances indicated (cm) for correct installation of the equipment. -
Página 34: Putting Into Operation
PUTTING INTO OPERATION If the cabinet has been sharply tilted while being sited or for mounting of accessories, it must be left to stand for at least three hours before being started to allow the lubricating oil to settle in the compressor. Failure to do so can cause total destruction of the compressor refrigerating system. -
Página 35: Outer Cleaning
CLEANING OUTER CLEANING For a good preservation of the cabinet’s body a periodical cleaning is necessary. EXTERNAL BODY: When necessary, the external body should be cleaned with a cloth and a neutral soap and water solution. STAINLESS STEEL SURFACES: Wash with warm water and mild detergent, rinse well and dry with soft cloth. Avoid scouring pads etc. - Página 36 TEMPERATURE SETTING AND CONTROLS Each refrigerating appliance is provided with an electronic control for automatic maintenance of the appropriate pre-established temperature inside the tank. This temperature adjuster is gauged by the factory and should not be touched by the user. Only if the average internal temperature is too cold or not cold you can increment or decrement the temperature: •...
- Página 37 MALFUNCTION AND REMEDIES Most of the functioning inconveniences are generally due to simple causes or to defective electrical connections. These problems can usually be solved on site. THE UNIT DOES NOT START CAUSE SOLUTION AUTHORISED STAFF Check that the unit is properly plugged Insert the plug User Check that the unit is properly plugged...
- Página 38 INSERTION OF PROBE PT1000 (OPTIONAL) The counter can have probe PT1000 supplied. To access this probe, follow the instructions below: 1. Remove the rear covering (A). 2. Pass the probe PT1000 (B) in the hole of cover (A). 3. Insert and screw in the cover again (A). -38-...
-
Página 39: Identification De L'APpareil
Ce manuel a été réalisé de façon simple et rationnelle afin qu’en le lisant, vous connaissiez votre meuble à fond. On conseille de lire attentivement le contenu et de le conserver avec le meuble. Le fabricant décline toute responsabilité pour des dommages causés sur des personnes ou objets dus à... - Página 40 SÉCURITÉ INDICATIONS DE SECURITE POUR LES APPAREILS QUI UTILISENT LE REFRIGERANT R290 (PROPANE) Le propane est un gaz naturel sans effet sur l’environnement, mais inflammable. Il est donc indispensable de s’assurer que tous les tuyaux du circuit réfrigérant ne sont pas endommagés, avant de brancher l’appareil au réseau d’alimentation.
-
Página 41: Indications De Sécurité
INDICATIONS DE SÉCURITÉ • Lisez attentivement la notice et respectez les contenus avant d’installer et d’utiliser l’appareil. Conservez toujours la notice d’utilisation et en cas de vente de l’appareil, remettez-le au nouveau propriétaire. • Cet appareil est très dangereux s’il est laissé exposé à la pluie, aux orages et aux intempéries avec le câble d’alimentation branchée à... - Página 42 INSTALLATION STOCKAGE ET DÉBALLAGE ATTENTION! Utiliser des gants de protection durant les opérations de déballage et installation. L’unité est expédiée ancrée sur une base en bois et protégée par des montants angulaires, une chape en carton et par une enveloppe en nylon. Tenir les emballages hors de portées des enfants. Si une autre manutention a lieu par la suite, nous recommandons l’utilisation d’un marchepied en bois.
- Página 43 L’appareil, avec ou sans emballage, doit être stocké avec soin dans les entrepôts ou les locaux à l’abri des intempéries, des agents atmosphériques et non exposé directement aux rayons du soleil, à une température de 0 à 40 °C. -43-...
- Página 44 CHOIX DU LIEU D’IMPLANTATION Pour un fonctionnement sans défaut de le banc les points suivants doivent absolument être observés lors du choix du lieu d’implantation: • Ne pas installer le banc à ciel ouvert. • Ne pas installer le banc à proximité de sources de chaleur, comme p. ex. chauffafges.
- Página 45 GRILLE ANTÉRIEURE Après avoir positionné le comptoir, visser la grille antérieure avec les vis qui se trouvent à l’intérieur du comptoir. CHARGEMENT Il est essentiel de ne pas dépasser les limites de charge indiquées afin de ne pas altérer la circulation correcte d’air et d’éviter ainsi une température plus élevée du produit.
- Página 46 CHARGE MAX. SUR TABLETTES 150 Kg / SQM 150 Kg / SQM 150 Kg / SQM 150 Kg / SQM 150 Kg / SQM 150 Kg / SQM Attention ! Il est impératif de respecter les charges max. indiquées (kg) pour chaque tablette afin d’éviter leur déformation ou bris.
-
Página 47: Informations Supplémentaires
INFORMATIONS SUPPLÉMENTAIRES Après avoir enlevé l’emballage, nettoyer soigneusement le banc entier avec de l’eau tiède et du savon neutre à 5%. Ensuite essuyer avec un chiffon souple. Pour le parties en verre utiliser uniquement produits pour le nettoyage des vitres; eviter d’utiliser l’... -
Página 48: Mise En Marche
MISE EN MARCHE Si le comptoir réfrigéré a été fortement incliné en raison du positionnement des accessoires ou de montage, attendez au moins 3 heures avant la mise en service de manière à permettre à l’huile de recueillir dans le lubrifiant du compresseur. -
Página 49: Nettoyage Externe
NETTOYAGE NETTOYAGE EXTERNE Pour une bonne conservation des surfaces de l’appareil, recourir au nettoyage périodique. MEUBLE EXTERNE: Nettoyer délicatement le meuble externe avec un chiffon souple imbibé d’eau et détergent neutre; rincer et sécher avec soin. SURFACES EN ACIER INOXYDABLE: Laver avec de l’eau tiède au savon neutre et essuyer avec un chiffon souple; pour ne pas détériorer les surfaces, éviter de la paille de fer ou des feuilles avec des fibres métalliques. - Página 50 REGLAGE DE LA TEMPERATURE ET COMMANDES Chaque appareil frigorifique est pourvu d’une central électronique pour le maintien automatique de la température, préfixée et appropriée, à l’intérieur de la cuve. Ce dispositif pour régler la température st gradué à l’usine et ne devrait pas être touché par l’utilisateur. Seulement si la température moyenne interne est trop froide ou trop élevée, il faut agir comme suit: •...
-
Página 51: Problèmes Et Solutions
PROBLÈMES ET SOLUTIONS Les fautes de fonctionnement qui se produisent sur les appareils frigorifiques sont dûs, dans la pluspart des cas, à l’installation électrique défectueuse. Il s’agit donc de causes pouvant être facilement éliminées sur place. L’APPAREIL NE FONCTIONNE PAS CAUSE SOLUTION PERSONNEL AUTORISÉ... - Página 52 INSERTION SONDE PT1000 (OPTION) Le comptoir peut être fourni avec la sonde PT1000. Pour accéder à cette sonde, suivre les instructions ci-après: 1. Retirer la protection arrière (A). 2. Faire passer la sonde PT1000 (B) dans l’orifice de la protection (A). 3.
- Página 53 Diese Anleitung ist einfach und zweckmäßig geschrieben worden, damit Sie Ihr Kühlmöbel nach dem Durchlesen genau kennen. Bitte lesen Sie den Inhalt aufmerksam durch und bewahren Sie die Anleitung zusammen mit dem Kühlmöbel auf. Der Hersteller haftet nicht für Personen- und Sachschäden, die durch die Nichtbeachtung der Warnhinweise in dieser Anleitung verursacht worden sind.
- Página 54 SICHERHEIT SICHERHEITSHINWEISE FÜR GERÄTE DIE KÜHLMITTEL R290 (PROPAN) VERWENDEN Propan sind natürliche Gase ohne Umweltauswirkungen, allerdings entzündbar. Unbedingt kontrollieren, ob alle Rohre des Kreislaufs unversehrt sind, bevor das Gerät an das Stromnetz angeschlossen wird. Pro 8 g Kühlmittel muss der Installationsraum ein Mindestvolumen von 1 m³...
-
Página 55: Sicherheitshinweise
SICHERHEITSHINWEISE • Lesen Sie vor der Installation und Benutzung des Geräts sorgfältig das Handbuch und beachten die Sie darin. • Heben Sie das Anleitungsbuch immer auf und übergeben sie es bei einem Verkauf des Geräts an den neuen Besitzer. • Dieses Gerät kann erhebliche Gefahren verursachen, wenn es Regen, Gewitter und anderen Witterungsbedingungen mit eingestecktem Netzkabel ausgesetzt wird. - Página 56 INSTALLATION LAGERUNG UND AUSPACKEN ACHTUNG! Tragen Sie stets Schutzhandschuhe beim Auspacken und bei der Installation. Die Einheit wird auf einer Holzbasis verankert versandt, mit Kantenschutz, Kartonabdeckung und Nylonumhüllung. Das Verpackungsmaterial von Kindern fernhalten. Für jede weitere Bewegung der Vitrine wird die Verwendung der Holzplattform empfohlen.
- Página 57 Das Gerät, mit oder ohne eigene Verpackung, muss vorsichtig in den Warenlagern oder Lagerräumen, geschützt Unwetter, Witterungseinflüssen direkter Sonneneinstrahlung einer Temperatur zwischen 0 und +40 °C gelagert werden. -57-...
-
Página 58: Wahl Des Aufstellungsortes
WAHL DES AUFSTELLUNGSORTES Für einen störungsfreien Betrieb des Kühlregals sind bei der Wahl des Aufstellungsortes unbedingt nachstehende Punkte zu beachten: • Kühlregal nicht im Freien aufstellen. • Kühlregal nicht in der Nähe von Wärmequellen, wie z. B. Heizungen aufstellen. • Direkte Sonnenbestrahlung (z.B. - Página 59 VORDERES GITTER Nach Aufstellung des Kühlmöbels das vordere Gitter mit den mitgelieferten Schrauben in dem Arbeitstisch anschrauben. LADEN Die angegebene Ladekapazität darf nicht überschritten werden, damit die korrekte Luftzirkulation unverändert bleibt und die Temperatur des Produkts sich nicht erhöht. VERMEIDEN: •...
- Página 60 MAX LAST AUF REGALEN 150 Kg / SQM 150 Kg / SQM 150 Kg / SQM 150 Kg / SQM 150 Kg / SQM 150 Kg / SQM Achtung! ES ist unbedingt notwendig die angegebenen max. Lasten (Kg) für jedes Regal zu beachten, um Verformung oder Bruch zu vermeiden. BELEUCHTUNG Achtung! Während der Phasen der Füllung, Wartung und Reinigung des Produkts soll man absolut das...
-
Página 61: Weitere Informationen
WEITERE INFORMATIONEN Nachdem die Verpackung abgenommen wurde ist eine sorgfältige Reinigung des ganzen Gerätes vorzunehmen, indem lauwarmes Wasser und 5%haltige Neutro-Seife anzuwenden ist; schließlichmit einem weichen Tuch abtrocknen. Für die Teile aus Glas sind ausschließlich spezifische Produkte anzuwenden sowie Wasser zu vermeiden, welches Kalkablage hinterläßt. Die angegebenen Abstände (cm) für die korrekte Installation des Geräts müssen unbedingt eingehalten werden. - Página 62 INBETRIEBNAHME Wurde das Kühlregal zum Zweck der Einbringung oder nder Montage von Zubehör stark geneigt, so muβ das Kühlregal vor der Inbetriebnahme mindestens drei Stunden ruhen. Hierdurch kann sich das Schmieröl im Verdichter sammeln. Wird dies nicht beachtet, kannn es zu einem Totalschaden der Verdichter-Kältemaschine kommen. Vergewissern Sie sich, dass die auf der Datenplakette angegebene Spmuannung mit der Netzspannung übereinstimmt.
- Página 63 8. REINIGUNG 8.1 REINIGUNG AUSSEN Damit die Oberflächen des Gerätes gut erhalten bleiben ist eine periodische reinigung durchzuführen. EXTERNES GEHÄUSE: Wenn erforderlich vorsichtig mit einem, in einer Lösung von Wasser und neutralem Waschmittel getränkten weichen Tuch reinigen. OBERFLÄCHEN AUS ROSTFREIEM STAHL: Mittels lauwarmen Wasser und Neutro-Seifen reinigen, sowie mit weichem Tuch abtrocknen, Risper oder Stahlwolle vermeiden, welche die Oberflächen beschädigen.
- Página 64 TEMPERATUREINSTELLUNG UND STEUERUNGEN Jeder Gerät ist mit einem Elektronik-Aggregat zur Aufrechterhaltung der Temperatur im Behälter ausgestattet. Dieser Temperaturregler wird in der Fabrik geeicht und Dürfte von dem Benutzer nicht berührt werden. Nur wenn die Durchschnittstemperatur zu kalt oder nicht kalt genug sein sollte ist wie folgt vorzugehen: •...
-
Página 65: Probleme Und Lösungen
PROBLEME UND LÖSUNGEN Die Funktionsstörungen die bei Kühlgeräten auftreten sindzum größten Teil auf mangelhafte Elektro-Installation zurückzuführen. Es handelt sich somit um Ursachen die vor Ort einfach zu beseitigen sind. DAS GERÄT FUNKTIONIERT NICHT URSACHE URSACHE BEFUGTES PERSONAL Kontrollieren, daß der Strom regulär in der Steckdose ankommt Den Stecker einstecken Benutzer Kontrollieren, daß... - Página 66 EINSETZEN DER SONDE PT1000 (OPTIONAL) Das Kühlmöbel kann mit der Sonde PT1000 geliefert werden. Um zu dieser Sonde zu gelangen, die folgenden Anweisungen befolgen: 1. Die hinterer Abdeckung (A) entfernen. 2. Die Sonde PT1000 (B) in das Loch der Abdeckung (A) führen. 3.
-
Página 67: Identificación Del Equipo
El presente manual ha sido redactado de manera simple y racional para que, al leerlo, usted conozca a fondo su mueble. Se recomienda leer atentamente el contenido del manual y conservarlo junto con el mueble. El fabricante declina toda responsabilidad por daños causados a personas o a objetos por incumplimiento de las advertencias incluidas en el presente manual. - Página 68 SEGURIDAD INDICACIONES DE SEGURIDAD PARA APARATOS QUE UTILIZAN REFRIGERANTE R290 (PROPANO) El propano es un gas natural sin repercusiones para el medio ambiente, pero inflamable. Es, por tanto, indispensable asegurarse de que todos los tubos del circuito no están dañados antes de conectar el aparato a la red de alimentación.
-
Página 69: Indicaciones De Seguridad
INDICACIONES DE SEGURIDAD • Lea atentamente el manual y respete su contenido antes de instalar y utilizar el equipo. • Conserve siempre el manual de instrucciones y en caso de venta del equipo entrégueselo al nuevo propietario. • Este equipo es muy peligroso si se expone a la lluvia, a las tormentas y a la intemperie con el cable de alimentación enchufado. -
Página 70: Instalación
INSTALACIÓN ALMACENAMIENTO Y DESEMBALAJE ¡ATENCIÓN! Utilizar guantes de protección durante las operaciones de desembalaje e instalación. La unidad se envía anclada en una base de madera y protegida por montantes angulares, tapa de cartón y envoltura de nylon. Conserve lo embalajes lejos del alcance de los niños. Para toda manipulación sucesiva de la vitrina se aconseja el uso de la tarima de madera. - Página 71 El equipo, con o sin embalaje, se debe guardar cuidadosamente en un almacén o local reparado de la intemperie, de los fenómenos atmosféricos y de la exposición directa a los rayos solares, a una temperatura entre 0 y +40 °C. -71-...
-
Página 72: Eligir Donde Colocar El Mueble
ELIGIR DONDE COLOCAR EL MUEBLE Para garantizar un rendimiento sin fallos del medio de frío, observar absolutamente los siguientes puntos: • No colocar el medio de frío al aire libre. • No colocar el medio de frío en la proximidad de fuentes termicas, por ejemplo, termosifones. •... - Página 73 REJILLA ANTERIOR Una vez colocado el banco, la rejilla anterior con los tornillos que se suministran en el interior del banco. CARGA Es fundamental no superar los límites de carga indicados para no alterar la correcta circulación de aire y, así, evitar una temperatura del producto más elevada. EVITAR: •...
-
Página 74: Iluminación
CARGA MÁX. EN INSTANTES 150 Kg / SQM 150 Kg / SQM 150 Kg / SQM 150 Kg / SQM 150 Kg / SQM 150 Kg / SQM ¡Atención! Es absolutamente necesario respetar las cargas máx indicadas (kg) para cada estante para evitar que se deformen o se rompan. ILUMINACIÓN ¡Atención! Durante las fases de carga del producto, mantenimiento y limpieza del baño de la bancada;... -
Página 75: Información Adicional
INFORMACIÓN ADICIONAL Después de quitado el embalaje, limpiar esmeradamente el banco completo con agua tibia y jabón neutro al 5% y luego enjugar con un pañuelo sople. Para la limpieza de los vidrios utilizar sólo productos específicos. Evitar el empleo de agua que puede dejar sobre el vidrío residuos de sarro. Es fundamental respetar las distancias indicadas (cm) para instalar correctamente el equipo. -
Página 76: Puesta En Funcionamiento
PUESTA EN FUNCIONAMIENTO Si el medio de frío ha sido energicamente inclinado a causa deinstalacion o montaje de accesorios, esperar como minimo 3 oras antes de ponerlo en marcha para que el aceite lubricante se recoja en el compresor. Asegúrese de que la tensión indicada en la placa de datos técnicos corresponde a la de la red. LA LÍNEA DE ALIMENTACIÓN ELÉCTRICA A LA QUE ESTARÁ... -
Página 77: Limpieza Exterior
LIMPIEZA LIMPIEZA EXTERIOR Para una buena conservación de las superficies del equipo, recurrir a la limpieza periódica: MUEBLE EXTERNO: Cuando sea necesario limpiar delicatamente el mueble externo utilizar un trapo mórbido empapado en agua y detergente neutro; enjugar y secar con cuidado. SUPERFICIES DE ACERO INOXIDABLE: Lavar con agua caliente y jabones neutros y enjugar con un chiffon sople;... -
Página 78: Ajuste De Temperatura Y Comandos
AJUSTE DE TEMPERATURA Y COMANDOS Todo aparato frigorìfico está equipado con una centralita electrónica para el mantenimiento automático de la temperatura para el interior del tanque. Este regulador de la temperatura es tarado en la fábrica y no debe ser tocado por el usuario. -
Página 79: Busqueda Y Reparación De Faltas
BUSQUEDA Y REPARACIÓN DE FALTAS Las faltas de funcionamiento que se encuentran en los equipos frigoríficos son debidas, en la mayoridad de los casos, a la instalación eléctrica defectuosa. Se trata entonces de causas que pueden ser fácilmente eliminadas en el sitio. CONTROLAR QUE NO HAYA UNA EXCESIVA ACUMULACIÓN DE HIELO SOBRE EL EVAPORADOR CAUSA SOLUCIÓN... -
Página 80: Introducción Sonda Pt1000 (Opcional)
INTRODUCCIÓN SONDA PT1000 (OPCIONAL) Para acceder a dicha sonda siga estas instrucciones: 1. Quite la tapadera posterior (A). 2. Pase la sonda PT1000 (B) por el agujero de la tapadera (A). 3. Introduzca y enrosque de nuevo la tapadera (A). -80-...